2008 AUDI A4 brake light
[x] Cancel search: brake lightPage 247 of 342
Care of vehicle and cleaning245
Controls
Safety
Driving tips
General maintenance
Self-help
Technical data
WARNING
•
Do not wash the vehicle with the ignition switched on – risk of
accident.
•
Do not clean the underside of the car or inside the wheel arches
without protecting your hands and arms. You may cut yourself on
sharp metal parts.
•
Take care when washing the car during the winter: moisture
and ice on the brakes may affect braking efficiency – this could
cause an accident.Caution
•
Do not wash the vehicle in direct sunlight – otherwise the paint
can be damaged.
•
Do not use insect sponges or abrasive household sponges, etc.
– they can damage the surfaces.
•
The headlights should only be washed with water – do not wipe
them with a dry cloth or sponge. It is best to use soapy water.
•
Never wash tyres with a jet that sprays the water out in a direct
stream. This could damage the tyres – even if the spray is kept at a
distance and only used for a very short time.For the sake of the environment
The car should only be washed in special wash bays. This prevents
oily water from getting into the public drains. In some districts,
washing vehicles anywhere else may be prohibited.Waxing and polishingWaxing
Waxing protects the paintwork. It is time to apply a good coat of wax
when water no longer forms droplets and rolls off the clean paint-
work.Even if a wax solution is used regularly in the car wash, it is advis-
able to protect the paint with a coat of wax at least twice a year.
In the summer, you will find it is much easier to remove dead insects
(which accumulate on the bumper and the front of the bonnet) if the
car has been waxed recently.
Polishing
Polishing is only necessary if the paint has lost its shine, and the
gloss cannot be brought back by putting on wax.
The car must be waxed after polishing if the polish used does not
contain wax compounds to seal the paint.
Caution
Matt painted and plastic parts must not be treated with wax or
polish.Ornamental trim and mouldingsThe metal brightwork on the body is made of aluminium rather than
chrome (for environmental reasons).
Dirt or marks on the trim mouldings should be removed with an
acid-free cleaning agent (do not use a chrome cleaner). Body polish
is also unsuitable for use on trim mouldings. The intensive cleaning
fluids often used before the car goes into a car wash may contain
alkaline substances, which can cause dull or milky patches when
they dry out.
Audi dealers carry stocks of cleaning products which have been
tested for use on your vehicle and are not harmful to the
environment.
document_0900452a81b1b9de.book Seite 245 Donnerstag, 26. Juli 2007 9:16 09
Page 248 of 342
Care of vehicle and cleaning 246Plastic partsPlastic parts will come clean with regular washing. If this is not suffi-
cient, plastic parts should only be treated with a special solvent-free
plastic cleaning agent. Do not use paint cleaners, polishes or wax on
plastic parts.Paint damageMinor damage to the paint, such as scratches or stone chips, should
be touched up without delay before the metal starts to corrode. Suit-
able touch-up brushes or sprays for your car can be obtained from
an Audi dealer.
The number of the original paint finish on the vehicle is given on the
data sticker ⇒page 321.
If corrosion is already visible it must be thoroughly removed by a
qualified workshop.Windows
Clear vision is an essential safety factor.The windscreen must not be cleaned with insect remover or wax,
otherwise the windscreen wipers will not function properly
(juddering).
Traces of rubber, oil, grease or silicone can be removed with a
window cleaning solution or a silicone remover. Wax residue can
only be removed with a special cleaner. Your Audi dealer will be able
to provide you with more detailed information.
The windows should also be cleaned on the inside at regular inter-
vals.
Use a separate cloth or chamois to dry the windows. Cloths used for
waxing and polishing contain residues that will cause smears on the
glass.
WARNING
Do not use water-repellent coatings on the windscreen. In bad visi-
bility conditions such as light rain, low sun or when driving at
night these coatings can cause increased dazzle, which is a
serious safety hazard. Such coatings can also cause the wiper
blades to judder.
Caution
•
Remove snow and ice from windows and mirrors with a plastic
scraper only. To avoid scratches caused by dirt on the glass, the
scraper should only be pushed in one direction and not moved to
and fro.
•
The heating element for the rear window is located on the inner
side of the window. To avoid damaging the heating element, do not
put stickers on the inner side of the window.
•
Never use warm or hot water to remove snow and ice from
windows and mirrors. This could cause the glass to crack!
Rubber seals (weatherstrips)The weatherstrips will remain pliable and last longer if they are
occasionally treated with a suitable care product (for example sili-
cone spray). This will also prevent premature ageing and leaks. The
doors will be easier to open as well. If they are kept pliable, the door
seals will be less likely to freeze up in the winter.WheelsThe wheels require regular attention to preserve their appearance.
It is important to remove road salt and brake dust by washing the
wheels at regular intervals, otherwise the finish will be impaired.
document_0900452a81b1b9de.book Seite 246 Donnerstag, 26. Juli 2007 9:16 09
Page 249 of 342
Care of vehicle and cleaning247
Controls
Safety
Driving tips
General maintenance
Self-help
Technical data After washing, the wheels should only be cleaned with an "acid-
free" cleaning agent for alloy wheels. This is available from Audi
dealers and specialist retailers. Never leave the cleaning agent on
the rims for any longer than specified in the instructions before
rinsing it off. If the wheel cleaner fluid contains acid it can attack the
surfaces of the wheel bolts.
Car polish or other abrasive agents should not be used. If the
protective paint coating is damaged by stone chips etc., the
damaged area should be touched up immediately.
WARNING
Please note when cleaning the wheels that water, ice and road salt
can impair the effectiveness of the brakes – this can cause an
accident.Care of interiorSound system / MMI* display screen and MMI control console*The display screen can be cleaned with a soft cloth and a special
“LCD cleaner” (available from retailers of electrical goods). Moisten
the cloth with a small amount of the cleaning fluid.
Clean the MMI control console with a fine brush first to prevent any
dirt from getting in between the control buttons and the housing.
We then recommend wiping the MMI control console using a cloth
moistened with washing-up liquid and water.
Caution
To avoid scratching the screen, do not wipe the display with a dry
cloth.
•
To avoid any possibility of damage, do not let any liquid get
inside the control console.
Plastic parts and leatherettePlastic parts and leatherette can be cleaned with a damp cloth. If
this is not sufficient, plastic parts and leatherette should only be
treated with a special solvent-free plastic cleaner.Textile covers and trim partsTextile covers and trim parts (e.g. seats, door trim) should be
cleaned regularly with a vacuum cleaner. This will remove surface
dirt which could otherwise be rubbed into the textile material
during use. Do not use steam cleaners, as the steam could carry the
dirt deeper into the textile material.
Normal cleaning
We recommend that you use a soft sponge or lint-free, micro-fibre
cloth for normal cleaning. Only use brushes on floor coverings and
mats, as other textile surfaces could become damaged.
In the case of normal surface dirt you can use a foam cleaner. Use a
sponge to spread the foam on the textile surface and to work it into
the material lightly. However, make sure that the textile material
does not become soaking wet. Then dab off the foam with a dry and
absorbent cloth (e.g. a micro-fibre cloth) and vacuum off any
residue once the surface is completely dry.
Removal of stains
To treat stains caused by spilled drinks (coffee, fruit juice or similar)
make up a solution with a mild detergent for sensitive fabrics and
apply it with a sponge. If the stains are difficult to remove, a
washing paste can be applied directly onto the stain and worked
into the fabric. The surface will then have to be wiped with clear
document_0900452a81b1b9de.book Seite 247 Donnerstag, 26. Juli 2007 9:16 09
Page 264 of 342
Checking and topping up fluids 262
WARNING
•
The cooling system is under pressure. Do not unscrew the cap
on the expansion tank when the engine is hot: you could be
scalded by escaping steam
•
The coolant and coolant additive can be a health hazard. Store
the coolant additive in the original container in a safe place out of
reach of children – risk of poisoning.For the sake of the environment
Drained off coolant should not be used again. Drain off the used
coolant into a suitable container and dispose of it in the proper
manner (observe environmental regulations).Radiator fan
The radiator fan can start running spontaneously.The radiator fan is driven by the engine via a poly V-belt. The speed
of the fan is varied by a viscous clutch according to the temperature.
There is also an auxiliary electric fan, which cuts in automatically
whenever the temperature of the coolant and the engine compart-
ment rises above a certain level.
The auxiliary fan can continue to run for as long as 10 minutes after
stopping the engine – even after the ignition is switched off. It may
also start running suddenly ⇒ after a while if•
residual heat raises the coolant temperature, or
•
the hot engine compartment is additionally heated up by the
sun.
WARNING
When working in the engine compartment be aware that the radi-
ator fan may start running suddenly – risk of injury.
Brake fluidChecking brake fluid level
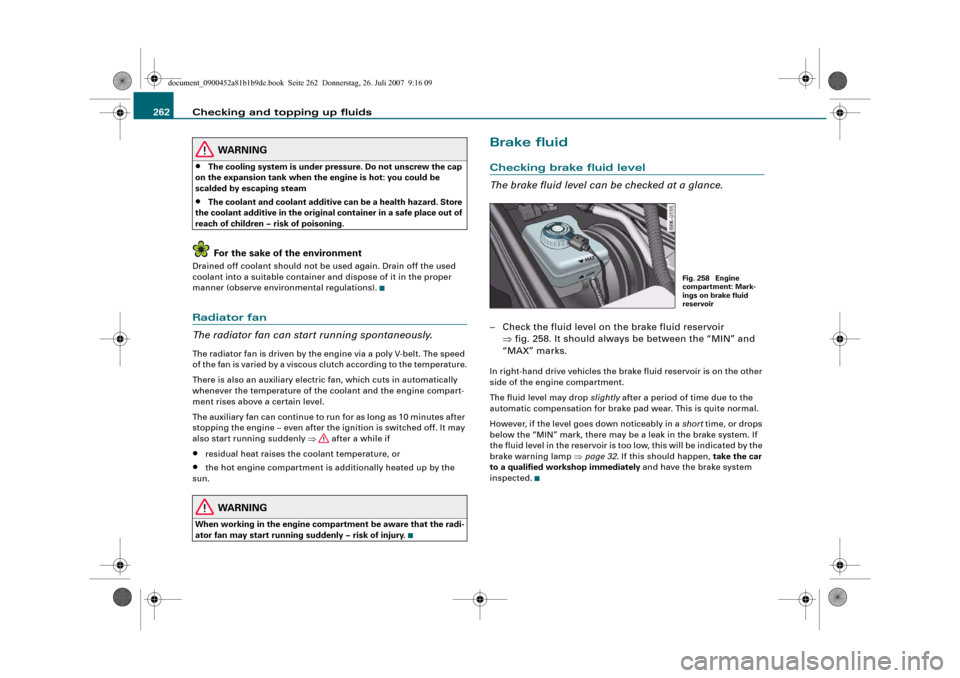
The brake fluid level can be checked at a glance.– Check the fluid level on the brake fluid reservoir
⇒fig. 258. It should always be between the “MIN” and
“MAX” marks.In right-hand drive vehicles the brake fluid reservoir is on the other
side of the engine compartment.
The fluid level may drop slightly after a period of time due to the
automatic compensation for brake pad wear. This is quite normal.
However, if the level goes down noticeably in a short time, or drops
below the “MIN” mark, there may be a leak in the brake system. If
the fluid level in the reservoir is too low, this will be indicated by the
brake warning lamp ⇒page 32. If this should happen, take the car
to a qualified workshop immediately and have the brake system
inspected.
Fig. 258 Engine
compartment: Mark-
ings on brake fluid
reservoir
document_0900452a81b1b9de.book Seite 262 Donnerstag, 26. Juli 2007 9:16 09
Page 290 of 342
Self-help 288•
Seek professional assistance if the repair of a tyre puncture is
not possible with the sealing compound.
•
If tyre pressure is less than 1.3 bar after driving about 10
minutes, the tyre is too badly damaged. Do not drive on. You
should obtain professional assistance.Caution
Take special care if you have to repair a tyre on a gradient.
Note
•
Do not use the compressor for longer than 6 minutes at a time,
as it could overheat. When the compressor has cooled down, you
can use it again.
•
If tyre sealant should leak out, leave it to dry and then pull it off
like foil.
•
After carrying out a tyre repair remember to buy a new tyre
sealant can at a qualified workshop. This will ensure that the Tyre
Mobility System is operative again.
•
Please observe the relevant regulations.
Changing a wheelPreparations
Some preparations are necessary before changing a
wheel.– If you have a flat tyre, stop the car well away from moving
traffic. Choose a location that is as level as possible.– All passengers should leave the car. They should wait in
a safe place (for instance behind the roadside crash
barrier).
– Apply the parking brake to stop the vehicle moving acci-
dentally.
–Engage first gear (manual gearbox) or move selector
lever to position P (automatic gearbox).
– When towing a trailer: unhitch the trailer from your
vehicle.
– Take the tools ⇒page 283 and the spare wheel*
⇒page 284 out of the luggage compartment.
WARNING
If you have a puncture in moving traffic, switch on the hazard
warning lights and place the warning triangle in a visible location.
This is for your own safety and also warns other road users.
Caution
If you have to change the tyre on a gradient, block the wheel oppo-
site the wheel being changed by placing a stone or similar object
under it to prevent the vehicle from rolling away.
Note
Please observe the relevant regulations.How to change a wheel
Change the wheel as described below.–Pull off the hub cap. Also refer to ⇒page 289, “Hub
caps”.
WARNING (continued)
document_0900452a81b1b9de.book Seite 288 Donnerstag, 26. Juli 2007 9:16 09
Page 297 of 342
Self-help295
Controls
Safety
Driving tips
General maintenance
Self-help
Technical data terminal must not touch metal parts of the vehicle: this can cause
short circuiting.
•
Do not bend over the batteries – risk of acid burns.
•
The screw plugs on the battery cells must be screwed in firmly.
•
Keep sparks, flame and lighted cigarettes away from batteries:
the gases given off can cause an explosion.
•
If jump-starting another vehicle, position the jump leads in
such a way that they cannot come into contact with any moving
parts in the engine compartment of the other vehicle.Caution
Please note that the above method of connecting the leads is meant
for jump-starting your vehicle. If jump-starting another vehicle, you
should not connect the negative lead (–) to the negative terminal of
the discharged battery, but directly to the engine block or a solid
metal part bolted to the engine block. If the battery of the other
vehicle does not have a gas vent, there is a risk that a mixture of
oxygen and hydrogen gas can accumulate and cause an
explosion.Tow-starting and towing awayGeneral notes
Points to observe when tow-starting or towing awayIf you use a towrope:
Notes for the driver of the towing vehicle
– The towrope must be taut before driving off.– Engage the clutch very gently when starting to move; on
vehicles with automatic gearbox press the accelerator
slowly.
Notes for the driver of the towed vehicle
– The ignition should be switched on so that the turn
signals, horn, windscreen wipers and washers can be
used. Please ensure that the steering wheel is unlocked
when you switch on the ignition, and that it moves freely.
–Put gear lever in neutral (manual gearbox) or move
selector lever to position N (automatic gearbox).
– The brake servo and power steering only work when the
engine is running. Considerably more effort is required
on the brake pedal and steering wheel when the engine
is switched off.
– Ensure that the towrope remains taut at all times when
towing.
Towrope or towbar
It is easier and safer to tow a vehicle with a towbar. You should only
use a towrope if you do not have a towbar.
A towrope should be slightly elastic to reduce the loading on both
vehicles. It is advisable to use a towrope made of synthetic fibre or
similar material.
Attach the tow-rope or tow-bar only to the towing anchorages
intended for this purpose ⇒page 296 or ⇒page 297.
Driving technique
Towing requires some experience – especially when using a
towrope. Both drivers should be familiar with the technique required
for towing. Inexperienced drivers should not attempt to tow-start or
tow away another vehicle.
WARNING (continued)
document_0900452a81b1b9de.book Seite 295 Donnerstag, 26. Juli 2007 9:16 09
Page 306 of 342
Fuses and bulbs 304BulbsChanging bulbs
Changing bulbs requires a certain degree of practical
skill.You can change the following bulbs for exterior lights yourself:•
Halogen headlights: Bulb for dipped headlights
•
Halogen headlights: Bulb for main beam headlights
•
Bulb for fog light
•
Bulbs for rear lights in boot lid
•
Bulbs for rear lights in side panel
•
Bulbs for number plate light
The following bulbs should only be changed by a qualified work-
shop:
•
Halogen headlights: Bulb for turn signals
•
Halogen headlights: Bulb for side lights
•
Xenon headlights*: Bulb for turn signals
•
Xenon headlights*: Light source for daytime running
lights/parking lights
•
Bulb for headlights: Bi-xenon lights ⇒
•
Light source for turn signal in exterior mirror housing
•
Light source for high-level brake light
As a rule, you require a certain degree of practical skill to change
defective bulbs. This applies in particular to those bulbs which are
only accessible from the engine compartment.
If in doubt, we recommend that you have defective bulbs changed
by a qualified workshop or qualified mechanic.
If you do decide to change bulbs in the engine compartment your-
self, be aware of the safety risks involved ⇒page 255 ⇒.
Types of bulbs
You must only replace a bulb with a bulb of the same type. Informa-
tion regarding e.g. the wattage can be found on the base of the
bulb.
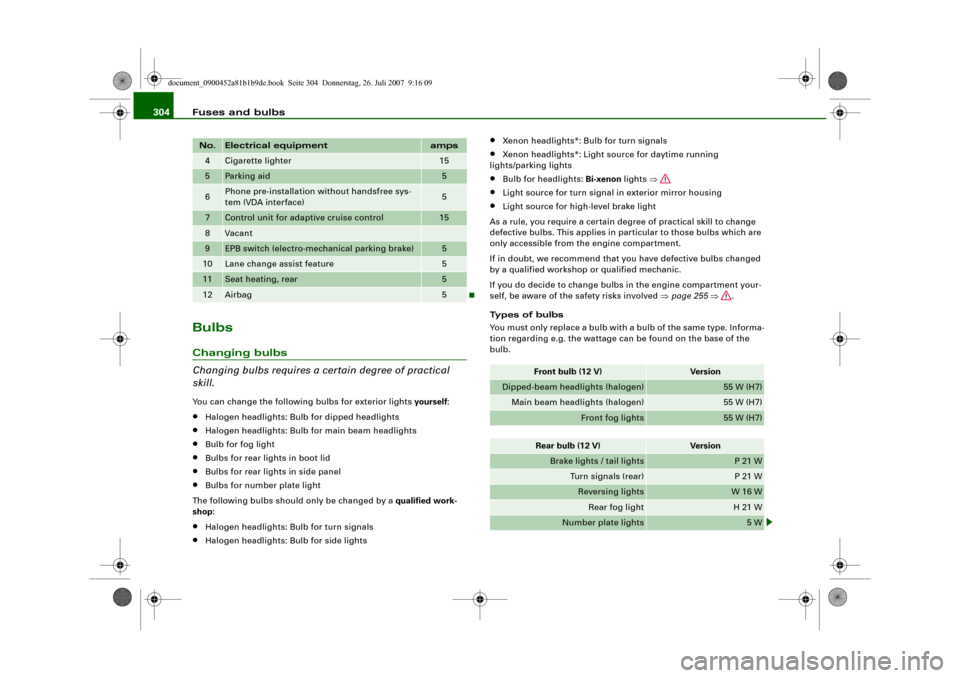
4
Cigarette lighter
15
5
Parking aid
5
6
Phone pre-installation without handsfree sys-
tem (VDA interface)
5
7
Control unit for adaptive cruise control
15
8
Vacant
9
EPB switch (electro-mechanical parking brake)
5
10
Lane change assist feature
5
11
Seat heating, rear
5
12
Airbag
5
No.
Electrical equipment
amps
Front bulb (12 V)
Vers io n
Dipped-beam headlights (halogen)
55 W (H7)
Main beam headlights (halogen)
55 W (H7)
Front fog lights
55 W (H7)
Rear bulb (12 V)
Vers io n
Brake lights / tail lights
P 21 W
Turn signals (rear)
P 21 W
Reversing lights
W 16 W
Rear fog light
H 21 W
Number plate lights
5 W
document_0900452a81b1b9de.book Seite 304 Donnerstag, 26. Juli 2007 9:16 09
Page 313 of 342
Fuses and bulbs311
Controls
Safety
Driving tips
General maintenance
Self-help
Technical data
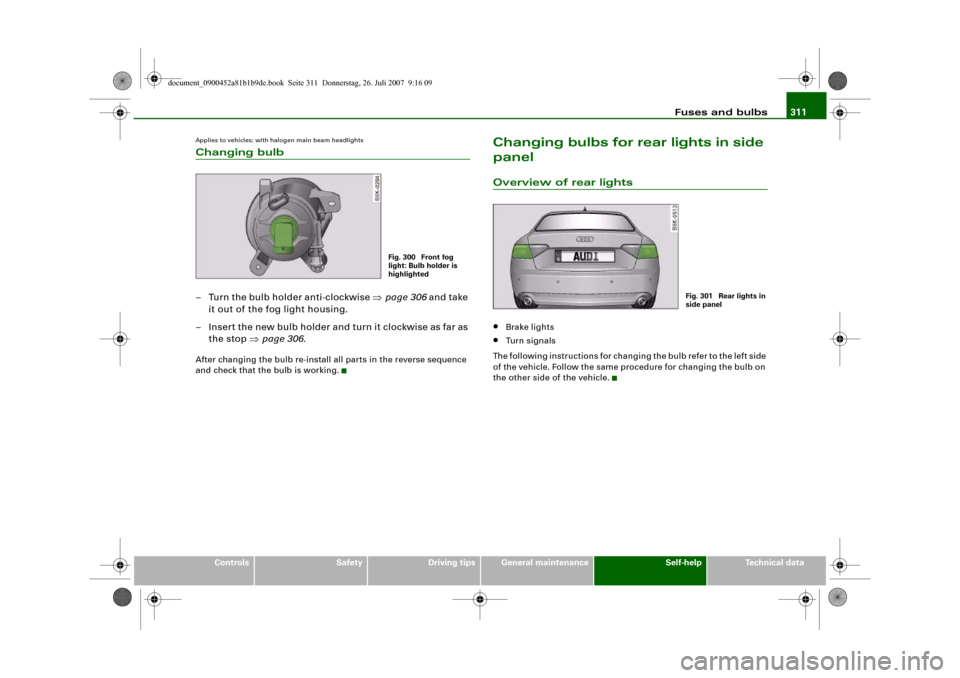
Applies to vehicles: with halogen main beam headlightsChanging bulb– Turn the bulb holder anti-clockwise ⇒page 306 and take
it out of the fog light housing.
– Insert the new bulb holder and turn it clockwise as far as
the stop ⇒page 306.After changing the bulb re-install all parts in the reverse sequence
and check that the bulb is working.
Changing bulbs for rear lights in side
panelOverview of rear lights•
Brake lights
•
Turn signals
The following instructions for changing the bulb refer to the left side
of the vehicle. Follow the same procedure for changing the bulb on
the other side of the vehicle.
Fig. 300 Front fog
light: Bulb holder is
highlighted
Fig. 301 Rear lights in
side panel
document_0900452a81b1b9de.book Seite 311 Donnerstag, 26. Juli 2007 9:16 09