2008 AUDI A4 catalytic converter
[x] Cancel search: catalytic converterPage 17 of 342
Instruments and warning/indicator lamps15
Controls
Safety
Driving tips
General maintenance
Self-help
Technical data
Caution
Never run the tank completely dry. The irregular supply of fuel can
cause misfiring, which would allow unburnt fuel to enter the
exhaust system. This can lead to overheating and damage to the
catalytic converter.Warning and indicator lampsOverview
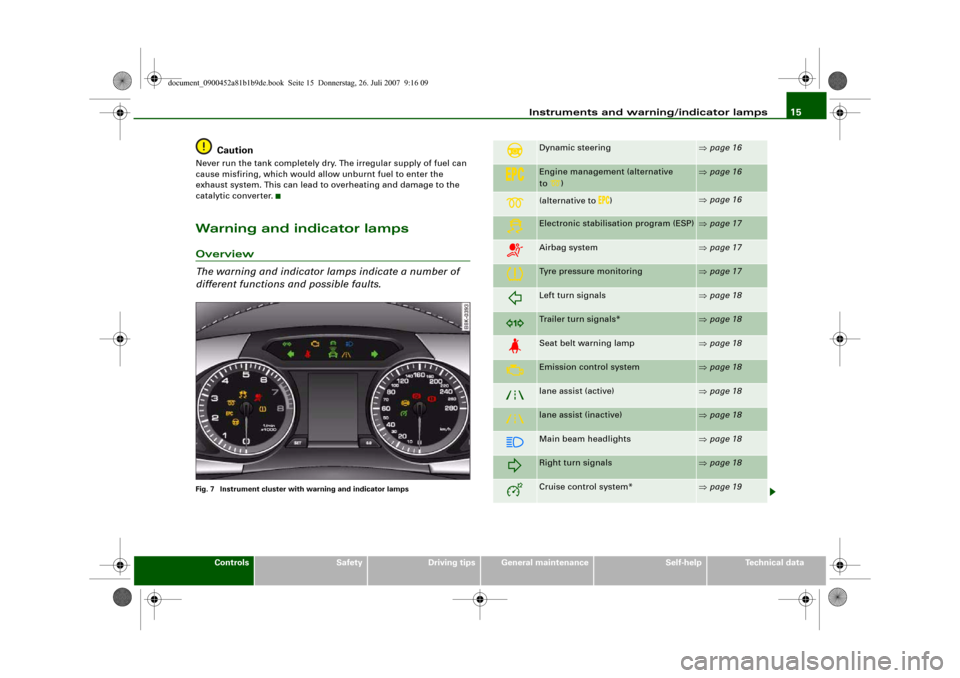
The warning and indicator lamps indicate a number of
different functions and possible faults.Fig. 7 Instrument cluster with warning and indicator lamps
Dynamic steering
⇒page 16
Engine management (alternative
to)
⇒page 16
(alternative to
)
⇒page 16
Electronic stabilisation program (ESP)
⇒page 17
Airbag system
⇒page 17
Tyre pressure monitoring
⇒page 17
Left turn signals
⇒page 18
Trailer turn signals*
⇒page 18
Seat belt warning lamp
⇒page 18
Emission control system
⇒page 18
lane assist (active)
⇒page 18
lane assist (inactive)
⇒page 18
Main beam headlights
⇒page 18
Right turn signals
⇒page 18
Cruise control system*
⇒page 19
document_0900452a81b1b9de.book Seite 15 Donnerstag, 26. Juli 2007 9:16 09
Page 20 of 342
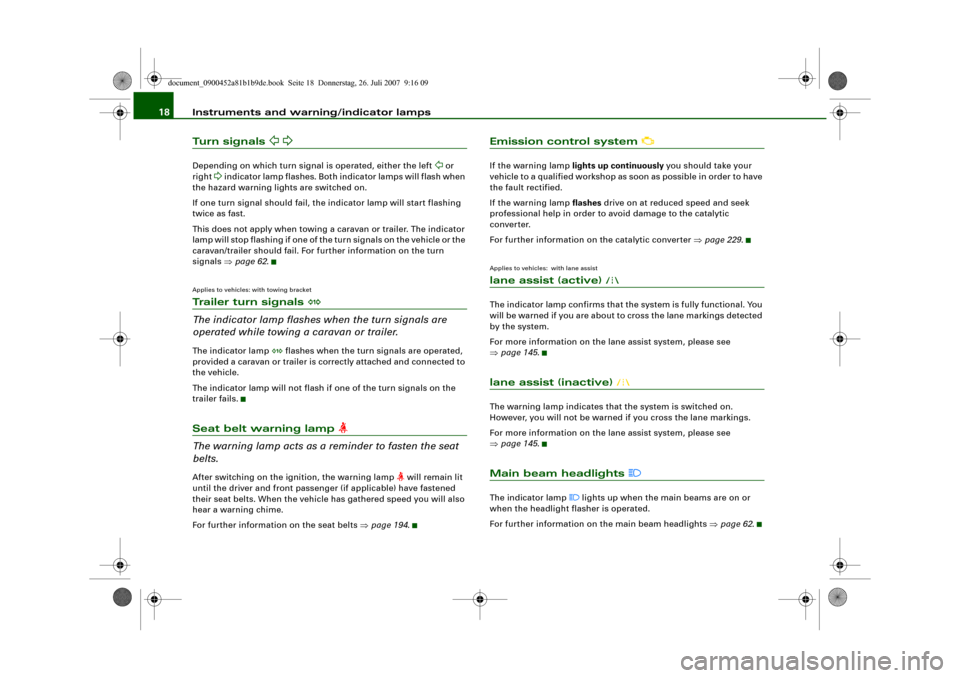
Instruments and warning/indicator lamps 18Turn signals
Depending on which turn signal is operated, either the left
or
right
indicator lamp flashes. Both indicator lamps will flash when
the hazard warning lights are switched on.
If one turn signal should fail, the indicator lamp will start flashing
twice as fast.
This does not apply when towing a caravan or trailer. The indicator
lamp will stop flashing if one of the turn signals on the vehicle or the
caravan/trailer should fail. For further information on the turn
signals ⇒page 62.
Applies to vehicles: with towing bracketTrailer turn signals
The indicator lamp flashes when the turn signals are
operated while towing a caravan or trailer.The indicator lamp
flashes when the turn signals are operated,
provided a caravan or trailer is correctly attached and connected to
the vehicle.
The indicator lamp will not flash if one of the turn signals on the
trailer fails.
Seat belt warning lamp
The warning lamp acts as a reminder to fasten the seat
belts.After switching on the ignition, the warning lamp
will remain lit
until the driver and front passenger (if applicable) have fastened
their seat belts. When the vehicle has gathered speed you will also
hear a warning chime.
For further information on the seat belts ⇒page 194.
Emission control system
If the warning lamp lights up continuously you should take your
vehicle to a qualified workshop as soon as possible in order to have
the fault rectified.
If the warning lamp flashes drive on at reduced speed and seek
professional help in order to avoid damage to the catalytic
converter.
For further information on the catalytic converter ⇒page 229.Applies to vehicles: with lane assistlane assist (active)
The indicator lamp confirms that the system is fully functional. You
will be warned if you are about to cross the lane markings detected
by the system.
For more information on the lane assist system, please see
⇒page 145.lane assist (inactive)
The warning lamp indicates that the system is switched on.
However, you will not be warned if you cross the lane markings.
For more information on the lane assist system, please see
⇒page 145.Main beam headlights
The indicator lamp
lights up when the main beams are on or
when the headlight flasher is operated.
For further information on the main beam headlights ⇒page 62.
document_0900452a81b1b9de.book Seite 18 Donnerstag, 26. Juli 2007 9:16 09
Page 231 of 342
Your vehicle and the environment229
Controls
Safety
Driving tips
General maintenance
Self-help
Technical data
Your vehicle and the environmentRunning inA new vehicle should be run in over a distance of 1,500 km. For the
first 1,000 km the engine speed should not exceed 2/3 of the
maximum permissible engine speed – do not use full throttle and do
not tow a trailer or caravan. From 1,000 to 1,500 km you can gradu-
ally increase the engine rpm and road speed.
During its first few hours of running, the internal friction in the
engine is greater than later on when all the moving parts have
bedded down.
How the vehicle is driven for the first 1,500 km also influences the
engine quality. After the first 1,500 km you should continue driving
at moderate engine speeds, in particular when the engine is cold.
This helps to reduce wear and tear on the engine and increases the
potential mileage which can be covered by the engine.
You should also avoid driving with the engine speed too low.
Change down to a lower gear when the engine no longer runs
“smoothly”. Excessively high engine speeds are prevented by an
automatic rev limiter.Emission control systemsCatalytic converter
Applies to vehicles with petrol engine: The vehicle must only be
used with unleaded petrol, otherwise the catalytic converter will be
destroyed.
Never run the tank completely dry. The irregular fuel supply can
cause misfiring, which would allow unburnt fuel to enter the
exhaust system, which could cause overheating and damage the
catalytic converter.Diesel particulate filter
Applies to vehicles with diesel engine: The diesel particulate filter
can filter out almost all soot particles contained in the exhaust gas.
In normal driving conditions the filter is self-cleaning. Should the
self-cleaning function of the filter not be able to operate, e.g. when
the vehicle is continuously used only for short trips, the filter
becomes obstructed with soot and the symbol
for the diesel
particulate filter lights up ⇒page 38.
WARNING
•
Because of the high temperatures which can occur in the emis-
sion control system (catalytic converter or diesel particulate
filter), do not park the vehicle where the exhaust can come into
contact with flammable materials under the car (e.g. on grass or
at the forest edge). - Fire hazard!
•
Do not apply any underseal agents in the area around the
exhaust system - fire hazard!
How to improve economy and minimise pollutionFuel economy, environmental impact and wear on the engine,
brakes and tyres depend largely on the way you drive the vehicle. By
adopting an economical driving style and anticipating the traffic
situation ahead, you can reduce fuel consumption by 10-15%. The
following section gives you some tips on lessening the impact on
the environment and reducing your operating costs at the same
time.
document_0900452a81b1b9de.book Seite 229 Donnerstag, 26. Juli 2007 9:16 09
Page 253 of 342
Fuel and filling the tank251
Controls
Safety
Driving tips
General maintenance
Self-help
Technical data
Fuel and filling the tankPetrolApplies to vehicles: with petrol enginePetrol grade
The correct grade of petrol is listed inside the fuel tank
flap.The vehicle is equipped with a catalytic converter and must only be
run on unleaded petrol. Unleaded petrol must comply with the
European EN 228 standard. The petrol grades have different octane
ratings (RON). If, in exceptional circumstances, the correct octane
rating is not available, please note the following:•
For engines which require Premium unleaded petrol (95 RON)
according to ⇒page 323, “Performance, weights and dimensions”:
Regular unleaded fuel with 91 RON can also be used. This will,
however, result in a slight loss of power.
•
For engines which require Super Plus unleaded petrol (98 RON)
according to ⇒page 323, “Performance, weights and dimensions”:
Premium unleaded fuel with 95 RON can also be used. This can,
however, result in a slight loss of power under certain driving condi-
tions. – If premium unleaded petrol is not available, the engine can
be run on regular unleaded petrol with 91 RON as an emergency
measure. In this case only use moderate engine speeds and a light
throttle. Fill up with premium or Super Plus petrol as soon as
possible.Caution
•
Petrol complying with the EN 228 standard can contain small
quantities of ethanol. However, “bioethanol fuels”, which are
retailed under various different names such as E50 and E85, and
which contain a large proportion of ethanol, must not be put into
the vehicle, as this would damage the fuel system.
•
Even one tankful of leaded fuel would permanently impair the
efficiency of the catalytic converter.
•
High engine speed and full throttle can damage the engine when
using petrol with an octane rating lower than the correct grade for
the engine.
DieselApplies to vehicles: with diesel engineDiesel fuel
Please note the information on the inside of the fuel tank
flap.Diesel fuel must comply with the European EN 590 standard. It must
have a cetane number (CN) of at least 51. The cetane number indi-
cates the ignition quality of the diesel fuel.
Winter-grade diesel
Diesel fuel can thicken in winter. For this reason petrol stations in
some countries also offer winter diesel.
Caution
•
The vehicle is not designed for the use of biodiesel (FAME fuel).
The fuel system would be damaged if you used biodiesel.
•
Do not mix fuel additives (“thinners”, petrol or similar additives)
with the diesel fuel.
•
If poor-quality diesel fuel is used, it may be necessary to drain
the water separator on the fuel filter more frequently than is speci-
fied in the Service Schedule. We recommend having this done by a
specialist workshop. If water is allowed to collect in the filter, this
can cause engine performance problems.
document_0900452a81b1b9de.book Seite 251 Donnerstag, 26. Juli 2007 9:16 09
Page 255 of 342
Fuel and filling the tank253
Controls
Safety
Driving tips
General maintenance
Self-help
Technical data −Insert the filler nozzle as far as possible into the spare fuel
canister.
−If the spare fuel canister is made of metal, the filler nozzle
must be in contact with the canister during filling. This helps
prevent an electrostatic charge building up.
−Make sure you never spill fuel in the vehicle or in the luggage
compartment. Fuel vapour is explosive. Risk of fatal accident!
Caution
•
If any fuel is spilt onto the vehicle, it should be removed immedi-
ately, as it could otherwise damage the paintwork.
•
Never run the tank completely dry. If there is an irregular fuel
supply, misfiring can occur. As a result unburnt fuel can enter the
exhaust system and cause damage to the catalytic converter(s).
•
When filling the fuel tank after having run it completely dry on a
vehicle with a diesel engine the ignition must be switched on for at
least 30 seconds without starting the engine. When you then start
the engine it may take longer than normal (up to one minute) for the
engine to start firing. This is because air needs to be bled from the
fuel system while starting.For the sake of the environment
Do not try to put in more fuel after the automatic filler nozzle has
switched off; this may cause the fuel to overflow if it becomes warm.
Note
The tank flap is not locked when you lock the vehicle from the
inside.
Releasing the tank flap manually
The tank flap can be released manually if the central
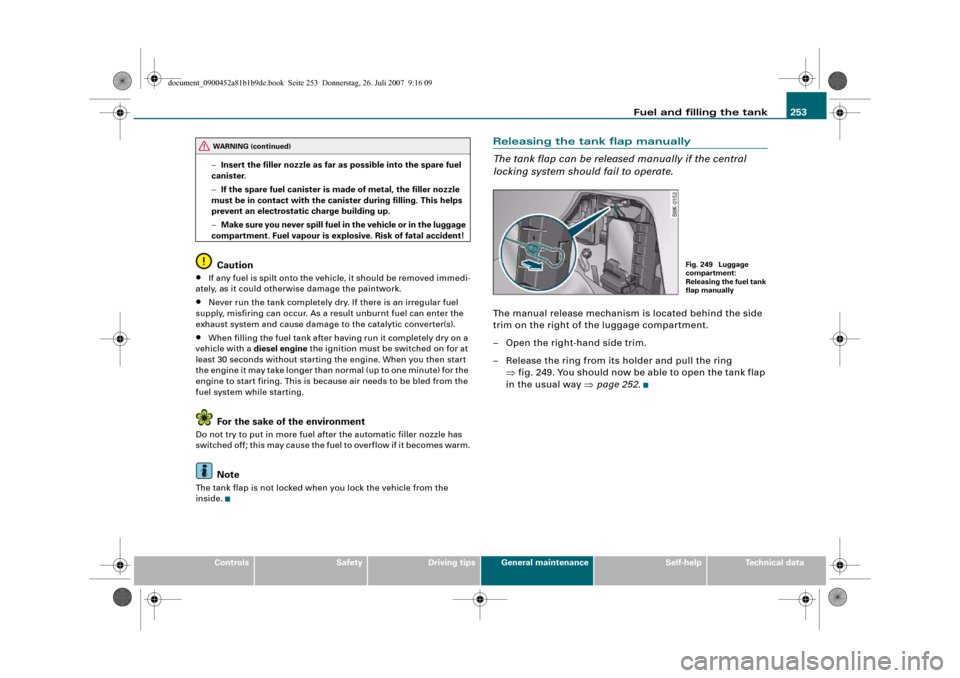
locking system should fail to operate.The manual release mechanism is located behind the side
trim on the right of the luggage compartment.
– Open the right-hand side trim.
– Release the ring from its holder and pull the ring
⇒fig. 249. You should now be able to open the tank flap
in the usual way ⇒page 252.
WARNING (continued)
Fig. 249 Luggage
compartment:
Releasing the fuel tank
flap manually
document_0900452a81b1b9de.book Seite 253 Donnerstag, 26. Juli 2007 9:16 09
Page 262 of 342
Checking and topping up fluids 260
Caution•
The oil level must never be above area ⇒page 258, fig. 254,
as this may result in damage to the catalytic converter or to the
engine. On vehicles without an oil dipstick, you can check the oil
level via the sound system or MMI*. Contact a qualified workshop to
extract the engine oil if necessary.
•
No additives should be used with engine oil. Any damage caused
by the use of such additives would not be covered by the factory
warranty.For the sake of the environment
•
Never pour oil down drains or into the ground.
•
Always observe statutory requirements when disposing of
empty oil canisters.
Cooling systemCoolant
The purpose of the coolant is to carry heat away from the
engine. The correct amount of anti-freeze is important to
prevent the cooling system from freezing in winter.The cooling system is filled for life at the factory, so the coolant does
not need to be changed. The coolant consists of a mixture of water
and anti-freeze additive G12++. This is a glycol-based anti-freeze
with anti-corrosion additives.
Anti-freeze additive
The amount of anti-freeze additive required depends on the temper-
atures to be expected in the winter season. If the anti-freeze concen-
tration is too low the coolant can freeze, resulting in failure of the
cooling system and heater.The cooling system is filled at the factory with the correct amount of
anti-freeze for the country concerned.
In most cases the mixture consists of 60% water and 40% additive.
This mixture gives the required anti-freeze protection at tempera-
tures down to -25 °C and protects the alloy parts of the cooling
system against corrosion. It also prevents scaling and raises the
boiling point of the coolant.
Countries with warm climate
The coolant concentration must not be reduced by adding plain
water, even in the summer or in warm climates. The concentration
of the anti-freeze additive must always be at least 40%.
Countries with cold climate
If greater anti-freeze protection is required in very cold climates, the
proportion of the anti-freeze additive G12++ can be increased. A
concentration of 60% offers protection down to about - 40 °C. The
concentration of the anti-freeze additive must not be more than
60%, otherwise this would reduce the anti-freeze protection. In addi-
tion, the cooling effect will be adversely affected.
Vehicles for export to countries with a cold climate (such as Sweden,
Norway and Finland) are supplied with antifreeze protection down
to about -35 °C. The concentration of the antifreeze additive for
these countries should always be at least 50%.
Caution
•
It is advisable to have the cooling system checked before the
winter season to make sure that the antifreeze concentration is
adequate for the conditions to be expected. This applies particularly
if you intend to take the car into a colder climate zone. If necessary,
have the anti-freeze concentration increased to 50 - 60% as required.
•
Use only anti-freeze additive G12++, an additive meeting the
specification “TL 774 G”. Other additives may give considerably
inferior corrosion protection. The resulting corrosion in the cooling
system can lead to a loss of coolant, causing serious damage to the
engine.
Aa
document_0900452a81b1b9de.book Seite 260 Donnerstag, 26. Juli 2007 9:16 09
Page 299 of 342
Self-help297
Controls
Safety
Driving tips
General maintenance
Self-help
Technical data
Rear towline anchorage
Vehicles which do not have a factory-fitted towing
bracket* have a towline anchorage on the right side of the
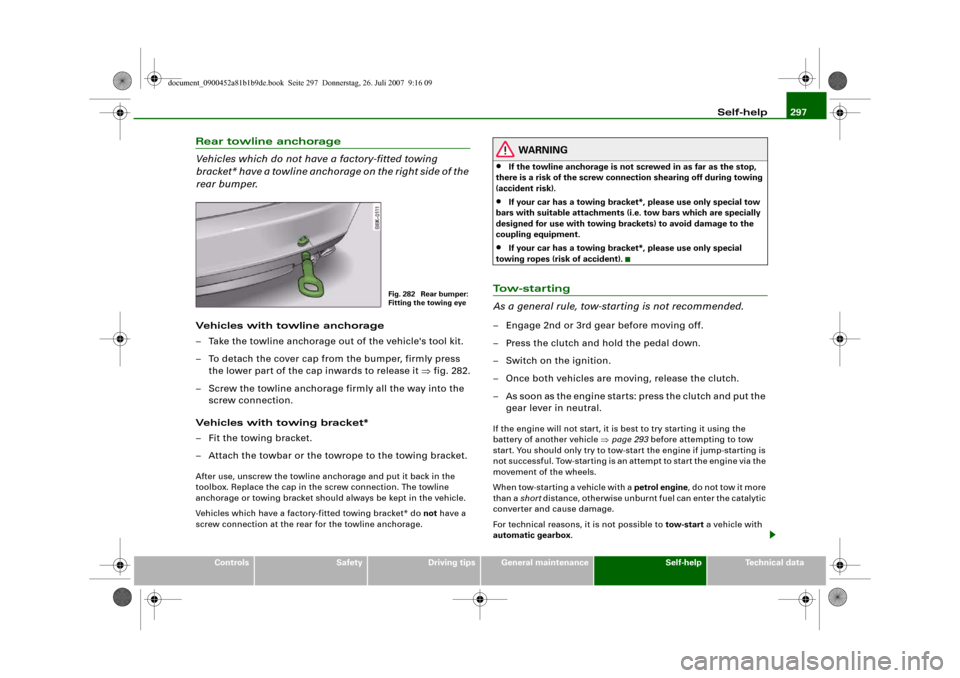
rear bumper.Vehicles with towline anchorage
– Take the towline anchorage out of the vehicle's tool kit.
– To detach the cover cap from the bumper, firmly press
the lower part of the cap inwards to release it ⇒fig. 282.
– Screw the towline anchorage firmly all the way into the
screw connection.
Vehicles with towing bracket*
– Fit the towing bracket.
– Attach the towbar or the towrope to the towing bracket.After use, unscrew the towline anchorage and put it back in the
toolbox. Replace the cap in the screw connection. The towline
anchorage or towing bracket should always be kept in the vehicle.
Vehicles which have a factory-fitted towing bracket* do not have a
screw connection at the rear for the towline anchorage.
WARNING
•
If the towline anchorage is not screwed in as far as the stop,
there is a risk of the screw connection shearing off during towing
(accident risk).
•
If your car has a towing bracket*, please use only special tow
bars with suitable attachments (i.e. tow bars which are specially
designed for use with towing brackets) to avoid damage to the
coupling equipment.
•
If your car has a towing bracket*, please use only special
towing ropes (risk of accident).
To w - s t a r t i n g
As a general rule, tow-starting is not recommended.– Engage 2nd or 3rd gear before moving off.
– Press the clutch and hold the pedal down.
– Switch on the ignition.
– Once both vehicles are moving, release the clutch.
– As soon as the engine starts: press the clutch and put the
gear lever in neutral.If the engine will not start, it is best to try starting it using the
battery of another vehicle ⇒page 293 before attempting to tow
start. You should only try to tow-start the engine if jump-starting is
not successful. Tow-starting is an attempt to start the engine via the
movement of the wheels.
When tow-starting a vehicle with a petrol engine, do not tow it more
than a short distance, otherwise unburnt fuel can enter the catalytic
converter and cause damage.
For technical reasons, it is not possible to tow-start a vehicle with
automatic gearbox.
Fig. 282 Rear bumper:
Fitting the towing eye
document_0900452a81b1b9de.book Seite 297 Donnerstag, 26. Juli 2007 9:16 09
Page 300 of 342
Self-help 298
WARNING
There is a high risk of accidents when tow-starting, as the towed
vehicle can easily be driven into the towing vehicle.
Caution
When tow-starting the vehicle, do not tow it further than 50 metres:
otherwise the catalytic converter could be damaged.Towing a vehicle with manual gearbox and front-wheel drive
Towing is relatively straightforward.Please observe the notes ⇒page 295.
The vehicle can be towed using a towbar or towrope in the normal
way, with all four wheels on the road; it can also be towed with
either the front or rear wheels lifted off the road. The vehicle must
not be towed faster than 50 km/h.Towing a vehicle with automatic gearbox and front-wheel drive
Certain restrictions must be observed when towing your
vehicle.Please observe the notes ⇒page 295.
The vehicle can be towed with a towbar or towrope in the normal
way, with all four wheels on the ground. When doing so, please note
the following points:•
Release the parking brake ⇒page 121.
•
Make sure the selector lever is in the N position.
•
The vehicle must not be towed faster than 50 km/h.
•
The vehicle must not be towed further than 50 km. The reason
for this is: when the engine is not running, the gearbox oil pump
does not work and the gearbox is not adequately lubricated for
higher speeds or longer distances.
If the vehicle has to be towed with a breakdown truck, it must only
be suspended at the front wheels. The reason for this is: the drive
shafts are located on the front wheels. If the car is towed with the
rear wheels lifted off the road (i.e. travelling backwards), the drive
shafts also turn backwards. The planetary gears in the automatic
gearbox then turn at such high speeds that the gearbox will be
severely damaged in a short time.Note
If it is not possible to tow the vehicle as described above, or if it has
to be towed further than 50 km, it must be transported on a special
car transporter or trailer.Towing a vehicle with manual gearbox and four-wheel drive
Certain restrictions must be observed when towing your
vehicle.Please observe the notes ⇒page 295.
The vehicle can be towed with a towbar or towrope in the normal
way, with all four wheels on the ground. It can also be towed by a
breakdown truck, with the wheels lifted at either the front or rear.
When doing so, please note the following points:•
The vehicle must not be towed faster than 50 km/h.
•
The vehicle must not be towed further than 50 km.
document_0900452a81b1b9de.book Seite 298 Donnerstag, 26. Juli 2007 9:16 09