Page 63 of 82

PERIODIC MAINTENANCE AND MINOR REPAIR
6-21
6
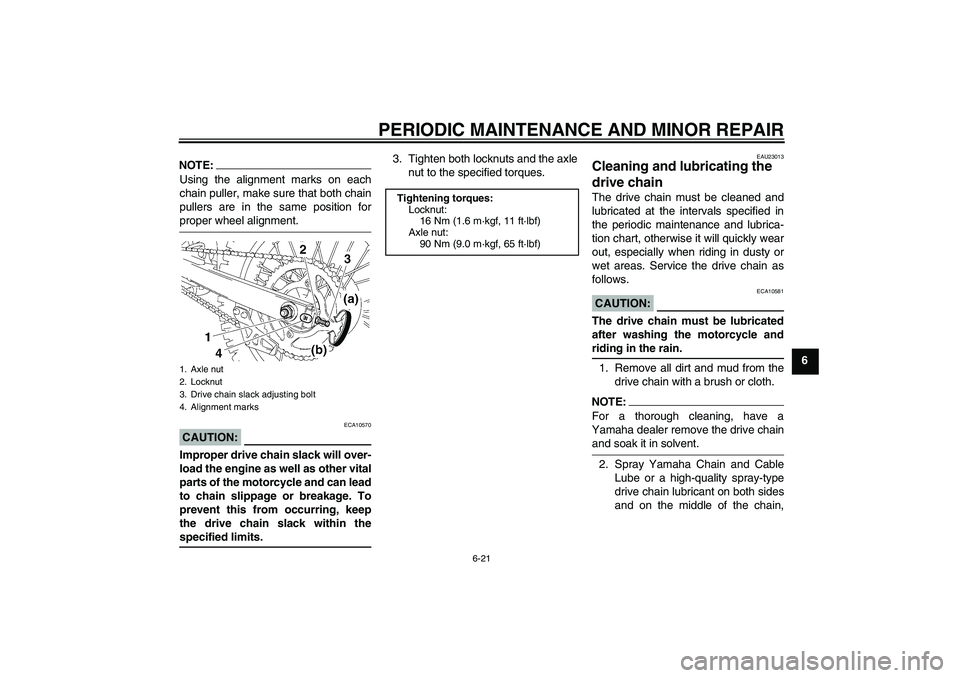
NOTE:Using the alignment marks on each
chain puller, make sure that both chain
pullers are in the same position forproper wheel alignment.CAUTION:
ECA10570
Improper drive chain slack will over-
load the engine as well as other vital
parts of the motorcycle and can lead
to chain slippage or breakage. To
prevent this from occurring, keep
the drive chain slack within thespecified limits.3. Tighten both locknuts and the axle
nut to the specified torques.
EAU23013
Cleaning and lubricating the
drive chain The drive chain must be cleaned and
lubricated at the intervals specified in
the periodic maintenance and lubrica-
tion chart, otherwise it will quickly wear
out, especially when riding in dusty or
wet areas. Service the drive chain as
follows.CAUTION:
ECA10581
The drive chain must be lubricated
after washing the motorcycle andriding in the rain.
1. Remove all dirt and mud from the
drive chain with a brush or cloth.NOTE:For a thorough cleaning, have a
Yamaha dealer remove the drive chainand soak it in solvent.
2. Spray Yamaha Chain and Cable
Lube or a high-quality spray-type
drive chain lubricant on both sides
and on the middle of the chain,
1. Axle nut
2. Locknut
3. Drive chain slack adjusting bolt
4. Alignment marks
Tightening torques:
Locknut:
16 Nm (1.6 m·kgf, 11 ft·lbf)
Axle nut:
90 Nm (9.0 m·kgf, 65 ft·lbf)
U5PA85E0.book Page 21 Thursday, April 13, 2006 3:06 PM
Page 69 of 82

PERIODIC MAINTENANCE AND MINOR REPAIR
6-27
6
EAU24360
Front wheel
EAU41340
To remove the front wheel
WARNING
EWA10820
�
It is advisable to have a Yamaha
dealer service the wheel.
�
Securely support the motor-
cycle so that there is no dangerof it falling over.
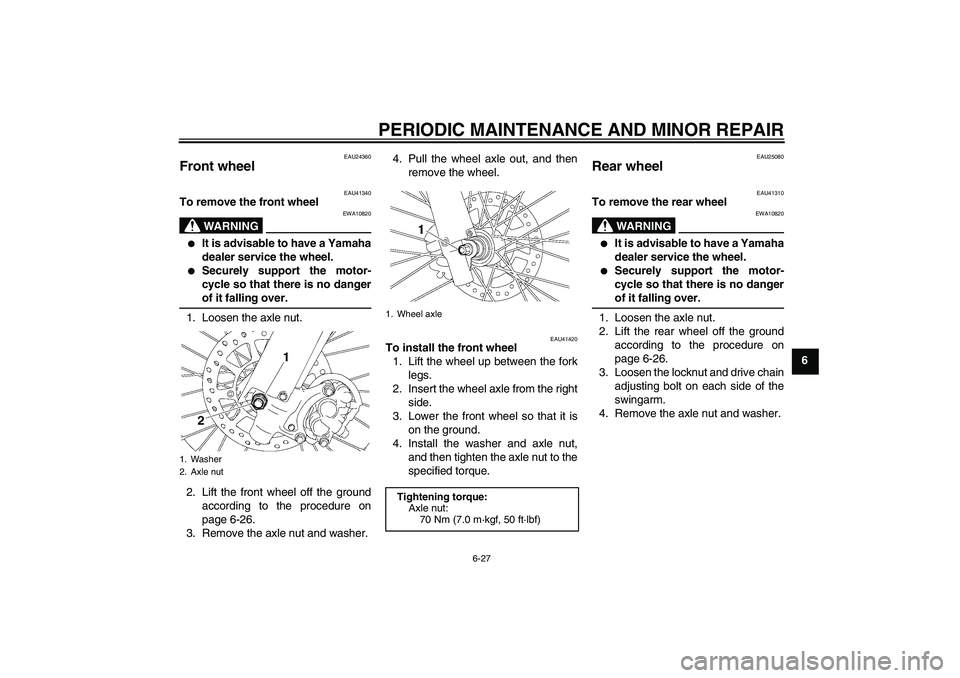
1. Loosen the axle nut.
2. Lift the front wheel off the ground
according to the procedure on
page 6-26.
3. Remove the axle nut and washer.4. Pull the wheel axle out, and then
remove the wheel.
EAU41420
To install the front wheel
1. Lift the wheel up between the fork
legs.
2. Insert the wheel axle from the right
side.
3. Lower the front wheel so that it is
on the ground.
4. Install the washer and axle nut,
and then tighten the axle nut to the
specified torque.
EAU25080
Rear wheel
EAU41310
To remove the rear wheel
WARNING
EWA10820
�
It is advisable to have a Yamaha
dealer service the wheel.
�
Securely support the motor-
cycle so that there is no dangerof it falling over.
1. Loosen the axle nut.
2. Lift the rear wheel off the ground
according to the procedure on
page 6-26.
3. Loosen the locknut and drive chain
adjusting bolt on each side of the
swingarm.
4. Remove the axle nut and washer.
1. Washer
2. Axle nut
1. Wheel axle
Tightening torque:
Axle nut:
70 Nm (7.0 m·kgf, 50 ft·lbf)
U5PA85E0.book Page 27 Thursday, April 13, 2006 3:06 PM
Page 70 of 82

PERIODIC MAINTENANCE AND MINOR REPAIR
6-28
65. Push the wheel forward, and then
remove the drive chain from the
rear sprocket.
NOTE:�
If the drive chain is difficult to re-
move, remove the wheel axle first,
and then lift the wheel upward
enough to remove the drive chain
from the rear sprocket.
�
The drive chain cannot be disas-sembled.
6. While supporting the brake caliper
and slightly lifting the wheel, pull
the wheel axle out.
NOTE:
A rubber mallet may be useful to tap thewheel axle out.
7. Remove the wheel.CAUTION:
ECA11070
Do not apply the brake after the
wheel has been removed together
with the brake disc, otherwise thebrake pads will be forced shut.
EAU41320
To install the rear wheel
1. Install the wheel and the brake cal-
iper bracket by inserting the wheel
axle from the right-hand side.
NOTE:�
Make sure that the retainer on the
swingarm is inserted into the slot in
the brake caliper bracket.
�
Make sure that there is enough
space between the brake pads be-fore installing the wheel.
2. Install the drive chain onto the rear
sprocket.
3. Install the washer and axle nut,
and then lower the rear wheel so
that it is on the ground.
4. Adjust the drive chain slack. (See
page 6-20.)
5. Tighten the axle nut to the speci-
fied torque.
1. Axle nut
2. Washer
3. Locknut
4. Drive chain slack adjusting bolt
1. Wheel axle
1. Retainer
2. Slot
U5PA85E0.book Page 28 Thursday, April 13, 2006 3:06 PM