Page 73 of 116
8-2
1
2
3
4
5
6
78
9
10
11
The service information included in this manual
and the tools provided in the owner’s tool kit are in-
tended to assist you in the performance of preven-
tive maintenance and minor repairs. However,
additional tools such as a torque wrench may be
necessary to perform certain maintenance work
correctly.
NOTE:
If you do not have the tools or experience required
for a particular job, have a Yamaha dealer perform
it for you.
WARNING
EWB01850
Never modify this ATV through improper in-
stallation or use of accessories, as it may
cause changes in handling, which in some sit-
uations could lead to an accident. All parts and
accessories added to this ATV should be gen-
uine Yamaha or equivalent components de-
signed for use on this ATV and should be
installed and used according to instructions. If
you have questions, consult an authorized
Yamaha ATV dealer.
Page 85 of 116
8-14
1
2
3
4
5
6
78
9
10
11
2. Remove the air filter case cover by unhooking
the holders.3. Unhook the holder holding the air filter ele-
ment, and then pull out the sponge material
from the air filter element.
4. Wash the sponge material gently but thor-
oughly in solvent.
WARNING
EWB01940
Always use parts cleaning solvent to clean the
sponge material. Never use low-flash-point
solvents or gasoline to clean the sponge mate-
rial because the engine could catch fire or ex-
1. Air filter case cover
2. Air filter case holder
2
2
1
1. Air filter element holder
2. Sponge material
1
2
Page 87 of 116
8-16
1
2
3
4
5
6
78
9
10
11
2. Remove the tailpipe by pulling it out of the
muffler.
3. Tap the tailpipe lightly, and then use a wire
brush to remove any carbon deposits from the
spark arrester portion of the tailpipe and inside
of the tailpipe housing.4. Insert the tailpipe into the muffler and align the
screw holes.
5. Install the screws and tighten them.
WARNING
EWB02340
Do not start the engine when cleaning the
spark arrester, otherwise it could cause injury
to the eyes, burns, carbon monoxide poison-
ing, possibly leading to death, and start a fire.
Always let the exhaust system cool prior to
touching exhaust components.
1. Screw
1
1. Tailpipe
2. Spark arrester
3. Screw
21
3
Page 92 of 116
8-21
1
2
3
4
5
6
78
9
10
11
4. Tighten the lower locknut.
5. While applying the front brake, turn out the up-
per adjusting bolt until the upper and lower ca-
ble lengths are equal. The cable joint will
become vertical.6. Tighten the upper locknut.
WARNING
EWB02080
Operating with improperly serviced or adjust-
ed brakes could cause loss of braking ability,
which could lead to an accident.
After servicing:
�
Make sure the brakes operate smoothly and
that the free play is correct.
�
Make sure the brakes do not drag.
Replacement of brake components requires
professional knowledge. These procedures
1. Upper locknut
2. Upper adjusting bolt
3. Lower locknut
4. Lower adjusting bolt
1
2
4
3(a)(b)(a)
(b)
1. Cable joint
1
Page 94 of 116

8-23
1
2
3
4
5
6
78
9
10
11
adjusting nut on the brake cable at the rear
wheel hub in direction (a), and to decrease it,
turn the nut in direction (b).
7. Tighten the locknut at the brake lever.
NOTE:
If the specified free play cannot be obtained as de-
scribed above or if the rear brake does not operate
correctly, have a Yamaha dealer check the internal
rear brake mechanism.WARNING
EWB02080
Operating with improperly serviced or adjust-
ed brakes could cause loss of braking ability,
which could lead to an accident.
After servicing:
�
Make sure the brakes operate smoothly and
that the free play is correct.
�
Make sure the brakes do not drag.
Replacement of brake components requires
professional knowledge. These procedures
should be performed by a Yamaha dealer.
EBU24900
Checking and lubricating the cables
The operation and the condition of all control ca-
bles should be checked before each ride, and the
cables and cable ends should be lubricated if nec-
essary. If a cable is damaged or does not move
smoothly, have a Yamaha dealer check or replace
it.
1. Brake lever free play adjusting nut
1
(a)(b)
Recommended lubricant:
Engine oil
Page 95 of 116

8-24
1
2
3
4
5
6
78
9
10
11
WARNING
EWB02130
Inspect cables frequently and replace if dam-
aged. Corrosion can result when the cable
sheaths become damaged, and cables can
also become frayed or kinked, which could re-
strict the operation of controls and lead to an
accident or injury.
EBU24911
Checking and lubricating the front and
rear brake levers
The operation of the front and rear brake levers
should be checked before each ride, and the lever
pivots should be lubricated if necessary.
EBU24961
Checking the wheel bearings
The front and rear wheel bearings must be
checked at the intervals specified in the periodic
maintenance and lubrication chart. If there is play
in a wheel hub or if a wheel does not turn smoothly,have a Yamaha dealer check the wheel bearings.
EBU25070
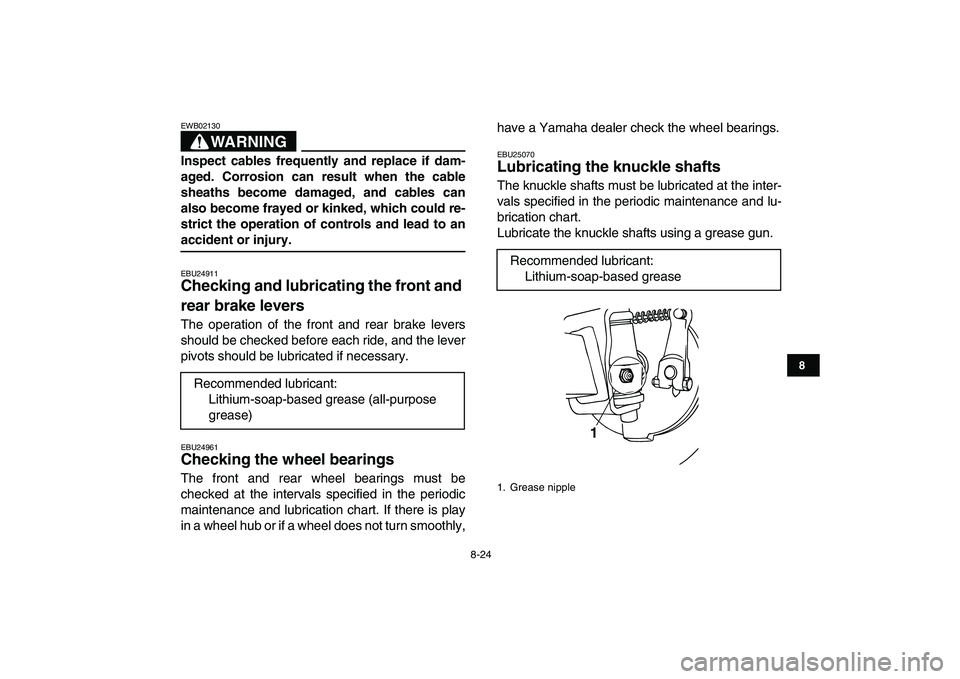
Lubricating the knuckle shafts
The knuckle shafts must be lubricated at the inter-
vals specified in the periodic maintenance and lu-
brication chart.
Lubricate the knuckle shafts using a grease gun.
Recommended lubricant:
Lithium-soap-based grease (all-purpose
grease)
Recommended lubricant:
Lithium-soap-based grease
1. Grease nipple
1
Page 97 of 116

8-26
1
2
3
4
5
6
78
9
10
11
CAUTION:
ECB00590
Use only distilled water, as tap water contains
minerals that are harmful to the battery.
WARNING
EWB02160
Battery electrolyte is poisonous and danger-
ous, as it contains sulfuric acid, which can
cause severe burns. Avoid contact with skin,
eyes or clothing. Always shield your eyes
when working near batteries.Antidote:
EXTERNAL: Flush with water.
INTERNAL: Drink large quantities of water or
milk. Follow with milk of magnesia, beaten egg
or vegetable oil. Call a physician immediately.
EYES: Flush with water for 15 minutes and get
prompt medical attention.
Batteries produce explosive gases. Keep
sparks, flame, cigarettes or other sources of ig-
nition away. Ventilate when charging or using
in an enclosed space.
KEEP OUT OF REACH OF CHILDREN.
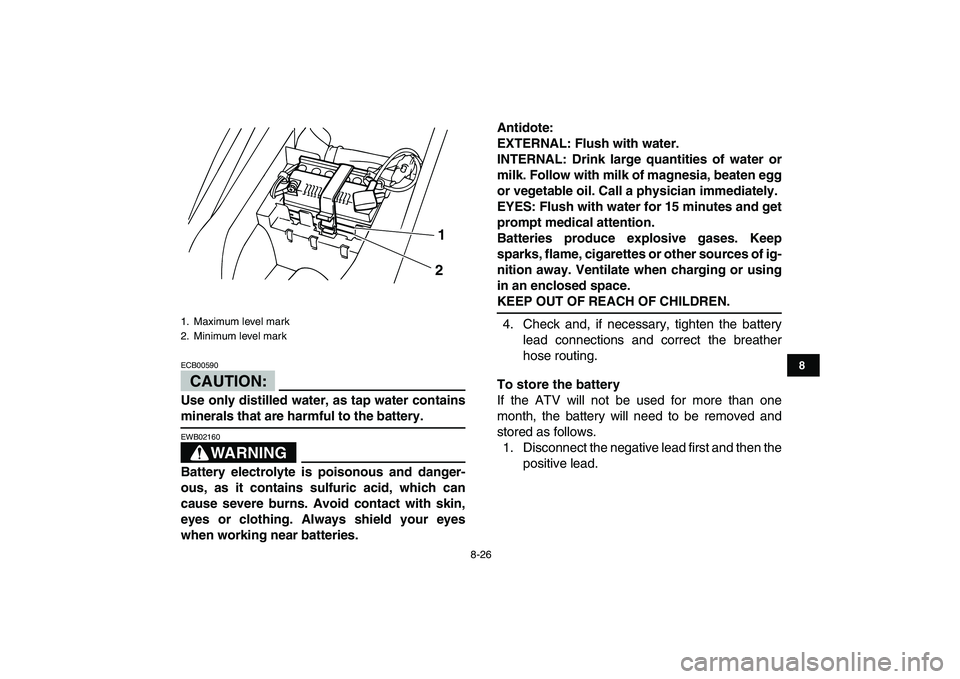
4. Check and, if necessary, tighten the battery
lead connections and correct the breather
hose routing.
To store the battery
If the ATV will not be used for more than one
month, the battery will need to be removed and
stored as follows.
1. Disconnect the negative lead first and then the
positive lead.
1. Maximum level mark
2. Minimum level mark
��
1
2
Page 99 of 116

8-28
1
2
3
4
5
6
78
9
10
11
that the frame is exposed to electrolyte or gas
expelled from the battery, the frame could suf-
fer structural and external damages.
EBU25242
Replacing the fuse
The fuse holder is located under the seat. (See
page 4-11.)
If the fuse is blown, replace it as follows.
1. Turn the key to “OFF” and turn off all electrical
circuits.
CAUTION:
ECB00640
To prevent accidental short-circuiting, turn off
the main switch when checking or replacing a
fuse.
2. Remove the blown fuse, and then install a
new fuse of the specified amperage.WARNING
EWB02171
Always use a fuse of the specified rating, and
never use a substitute object in place of the
proper fuse. An improper fuse or a substitute
object can cause damage to the electrical sys-
tem, which could lead to a fire.
3. Turn the key to “ON” and turn on the electrical
circuits to check if the devices operate.
4. If the fuse immediately blows again, have a
Yamaha dealer check the electrical system.
EBU25650
Removing a wheel
1. Loosen the wheel nuts.
1. Fuse
2. Spare fuse
1
2
Specified fuse:
5.0 A