Page 61 of 116

7-12
1
2
3
4
5
67
8
9
10
11
With the engine idling, shift the transmission into
the drive position and then release the parking
brake. Apply the throttle slowly and smoothly. The
centrifugal clutch will engage and you will start to
accelerate. If the throttle is applied too abruptly, the
front wheels may lift off the ground, resulting in a
loss of directional control. Avoid higher speeds un-
til you are thoroughly familiar with the operation of
your ATV.
When slowing down or stopping, release the throt-
tle and apply the brakes smoothly and evenly. Im-
proper use of the brakes can cause the tires to lose
traction, reducing control and increasing the possi-
bility of an accident.
TURNING YOUR ATV
To achieve maximum traction on unpaved surfac-
es, the two rear wheels are mounted solidly on one
axle and turn together at the same speed. There-
fore, unless the wheel on the inside of the turn is al-
lowed to slip or lose some traction, the ATV will
resist turning. A special turning technique must be
used to allow the ATV to make turns quickly and
easily. It is essential that this skill be learned first at
low speed.
WARNING
EWB01570
Always follow proper procedures for turning
as described in this Owner’s Manual. Practice
turning at low speeds before attempting to turn
at faster speeds. Do not turn at speeds too fast
for your skills or the conditions.
As you approach a curve, slow down and begin to
turn the handlebars in the desired direction. As you
do so, put your weight on the footboard to the out-
side of the turn (opposite your desired direction)
and lean your upper body into the turn. Use the
throttle to maintain an even speed through the
turn. This maneuver will let the wheel on the inside
of the turn slip slightly, allowing the ATV to make
the turn properly.
Page 64 of 116

7-15
1
2
3
4
5
67
8
9
10
11
if possible.
When crossing the side of a hill:
�
Always follow proper procedures as de-
scribed in the Owner’s Manual.
�
Avoid hills with excessively slippery or loose
surfaces.
�
Shift your weight to the uphill side of the
ATV.
If your ATV has stalled or stopped and you believe
you can continue up the hill, restart carefully to
make sure you do not lift the front wheels which
could cause you to lose control. If you are unableto continue up the hill, dismount the ATV on the up-
hill side. Physically turn the ATV around and then
descend the hill.
If you start to roll backwards, DO NOT apply the
rear brake to stop or try to put the ATV in gear. The
ATV could easily tip over backwards. Instead, ap-
ply the front brake gradually, or dismount the ATV
immediately on the uphill side.WARNING
EWB01761
Maintain a steady speed when climbing a hill.
If you lose all forward speed:
�
Keep weight uphill.
�
Apply the brakes.
�
Lock the parking brake after you are
stopped.
If you begin rolling backwards:
�
Keep weight uphill.
�
Never apply the rear brake while rolling
backwards. Apply the front brake.
�
When fully stopped, apply the rear brake as
well, and then lock the parking brake.
Dismount on uphill side or to a side if pointed
straight uphill. Turn the ATV around and re-
mount, following the procedure described in
the Owner’s Manual.
OK
Page 67 of 116
7-18
1
2
3
4
5
67
8
9
10
11
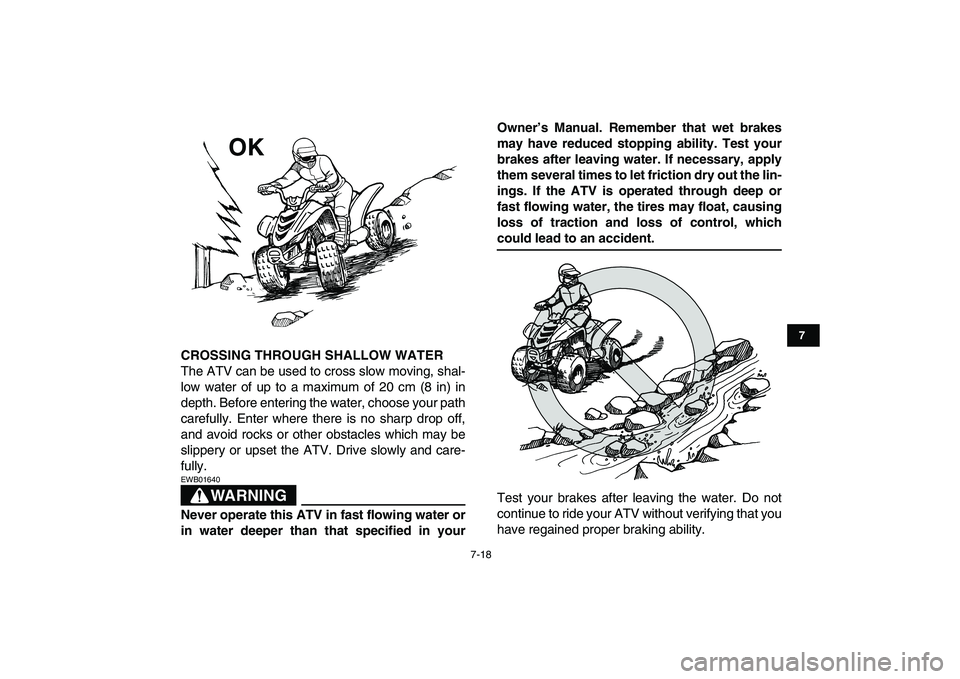
CROSSING THROUGH SHALLOW WATER
The ATV can be used to cross slow moving, shal-
low water of up to a maximum of 20 cm (8 in) in
depth. Before entering the water, choose your path
carefully. Enter where there is no sharp drop off,
and avoid rocks or other obstacles which may be
slippery or upset the ATV. Drive slowly and care-
fully.
WARNING
EWB01640
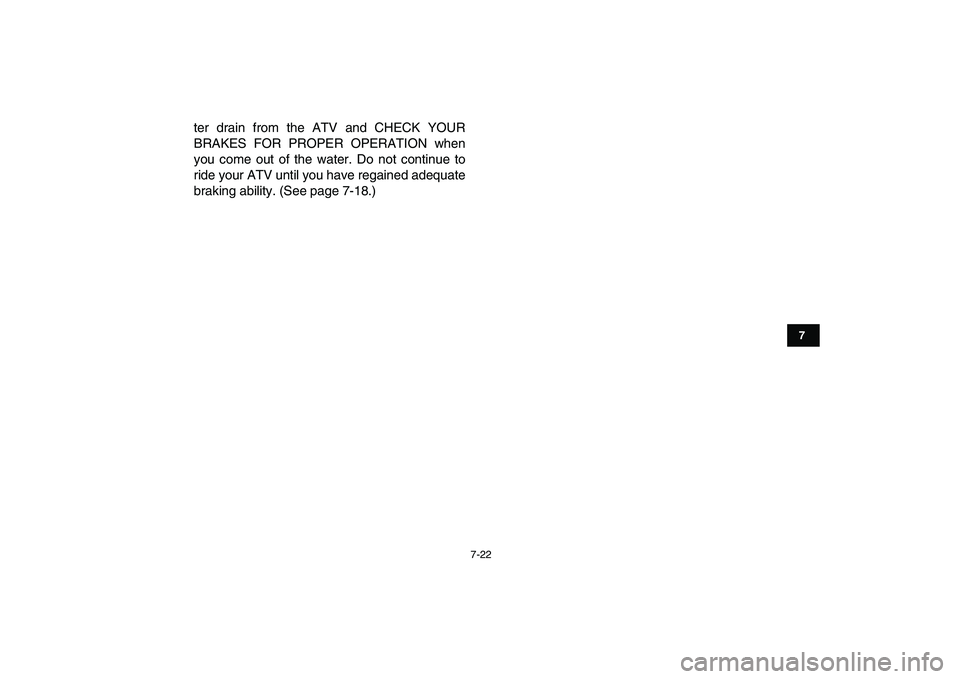
Never operate this ATV in fast flowing water or
in water deeper than that specified in yourOwner’s Manual. Remember that wet brakes
may have reduced stopping ability. Test your
brakes after leaving water. If necessary, apply
them several times to let friction dry out the lin-
ings. If the ATV is operated through deep or
fast flowing water, the tires may float, causing
loss of traction and loss of control, which
could lead to an accident.
Test your brakes after leaving the water. Do not
continue to ride your ATV without verifying that you
have regained proper braking ability.
OK
Page 69 of 116
7-20
1
2
3
4
5
67
8
9
10
11
you go over obstacles, always follow proper
procedures as described in the Owner’s Manu-
al.
SLIDING AND SKIDDING
Care should be used when riding on loose or slip-
pery surfaces since the ATV may slide. If unex-
pected and uncorrected, sliding could lead to an
accident.
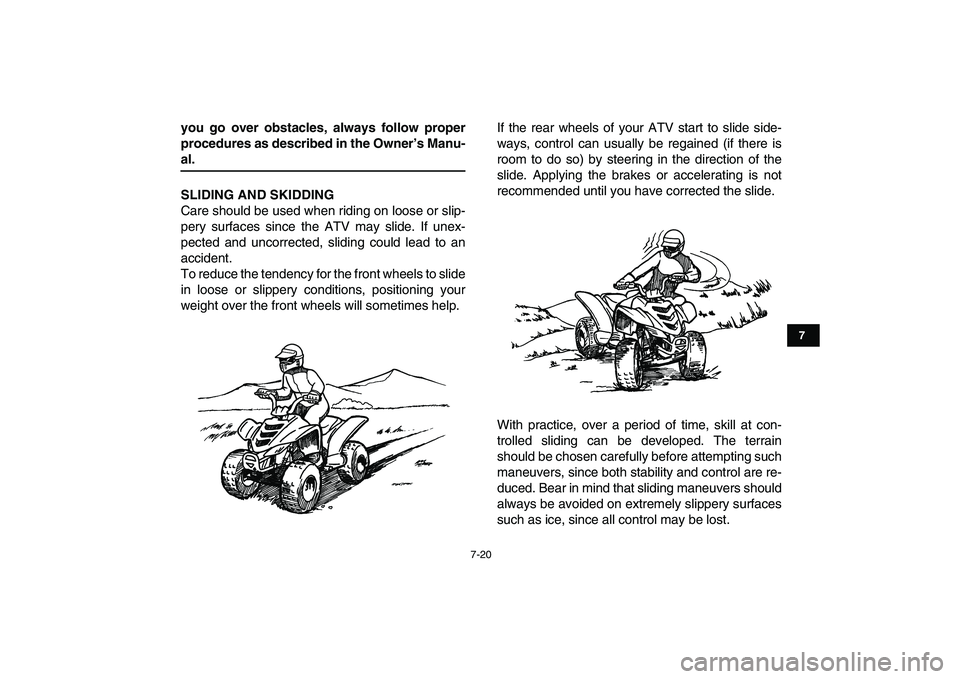
To reduce the tendency for the front wheels to slide
in loose or slippery conditions, positioning your
weight over the front wheels will sometimes help.If the rear wheels of your ATV start to slide side-
ways, control can usually be regained (if there is
room to do so) by steering in the direction of the
slide. Applying the brakes or accelerating is not
recommended until you have corrected the slide.
With practice, over a period of time, skill at con-
trolled sliding can be developed. The terrain
should be chosen carefully before attempting such
maneuvers, since both stability and control are re-
duced. Bear in mind that sliding maneuvers should
always be avoided on extremely slippery surfaces
such as ice, since all control may be lost.
Page 70 of 116

7-21
1
2
3
4
5
67
8
9
10
11
WARNING
EWB01661
Learn to safely control skidding or sliding by
practicing at low speeds and on level, smooth
terrain.
On extremely slippery surfaces, such as ice,
go slowly and be very cautious in order to re-
duce the chance of skidding or sliding out of
control.
WHAT TO DO IF...
This section is designed to be a reference guide
only. Be sure to read each section on riding tech-
niques completely.
WHAT TO DO...
�
If your ATV doesn’t turn when you want it to:
Bring the ATV to a stop and practice the turning
maneuvers again. Be sure you are putting your
weight on the footboard to the outside of the
turn. Position your weight over the front wheels
for better control. (See page 7-12.)
�
If your ATV begins to tip while turning:
Lean more into the turn to regain balance. If nec-
essary, gradually let off the throttle and/or steer
to the outside of the turn. (See page 7-12.)
�
If your ATV starts to slide sideways:
Steer in the direction of the slide if you have the
room. Applying the brakes or accelerating is not
recommended until you have corrected the
slide. (See page 7-20.)
�
If your ATV can’t make it up a hill you are trying
to climb:
Turn the ATV around if you still have forward
speed. If not, stop, dismount on the uphill side of
the ATV and physically turn the ATV around. If
the ATV starts to slip backwards, DO NOT USE
THE REAR BRAKE – the ATV may tip over on
top of you. Instead, apply the front brake or dis-
mount the ATV on the uphill side. (See
page 7-13.)
�
If your ATV is traversing a sloping surface:
Be sure to ride with your weight positioned to-
wards the uphill side of the ATV to maintain
proper balance. If the ATV starts to tip, steer
down the hill (if there are no obstacles in your
way) to regain balance. If you discover that the
ATV is going to tip over, dismount on the uphill
side. (See page 7-13.)
�
If your ATV encounters shallow water:
Ride slowly and carefully through slow moving
water, watching for obstacles. Be sure to let wa-
Page 71 of 116
7-22
1
2
3
4
5
67
8
9
10
11
ter drain from the ATV and CHECK YOUR
BRAKES FOR PROPER OPERATION when
you come out of the water. Do not continue to
ride your ATV until you have regained adequate
braking ability. (See page 7-18.)
Page 92 of 116
8-21
1
2
3
4
5
6
78
9
10
11
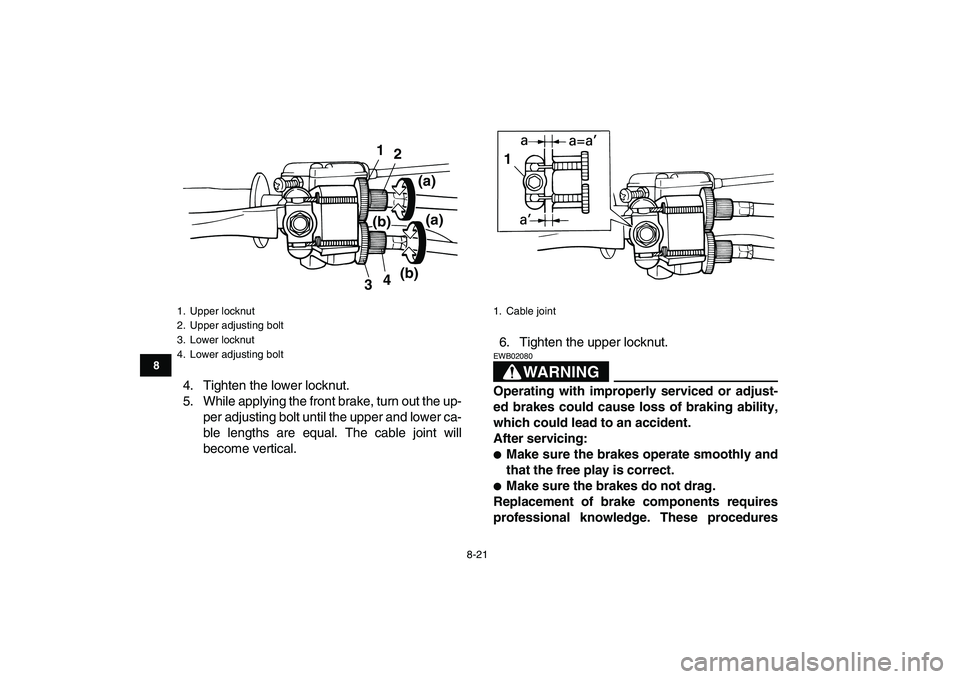
4. Tighten the lower locknut.
5. While applying the front brake, turn out the up-
per adjusting bolt until the upper and lower ca-
ble lengths are equal. The cable joint will
become vertical.6. Tighten the upper locknut.
WARNING
EWB02080
Operating with improperly serviced or adjust-
ed brakes could cause loss of braking ability,
which could lead to an accident.
After servicing:
�
Make sure the brakes operate smoothly and
that the free play is correct.
�
Make sure the brakes do not drag.
Replacement of brake components requires
professional knowledge. These procedures
1. Upper locknut
2. Upper adjusting bolt
3. Lower locknut
4. Lower adjusting bolt
1
2
4
3(a)(b)(a)
(b)
1. Cable joint
1
Page 94 of 116

8-23
1
2
3
4
5
6
78
9
10
11
adjusting nut on the brake cable at the rear
wheel hub in direction (a), and to decrease it,
turn the nut in direction (b).
7. Tighten the locknut at the brake lever.
NOTE:
If the specified free play cannot be obtained as de-
scribed above or if the rear brake does not operate
correctly, have a Yamaha dealer check the internal
rear brake mechanism.WARNING
EWB02080
Operating with improperly serviced or adjust-
ed brakes could cause loss of braking ability,
which could lead to an accident.
After servicing:
�
Make sure the brakes operate smoothly and
that the free play is correct.
�
Make sure the brakes do not drag.
Replacement of brake components requires
professional knowledge. These procedures
should be performed by a Yamaha dealer.
EBU24900
Checking and lubricating the cables
The operation and the condition of all control ca-
bles should be checked before each ride, and the
cables and cable ends should be lubricated if nec-
essary. If a cable is damaged or does not move
smoothly, have a Yamaha dealer check or replace
it.
1. Brake lever free play adjusting nut
1
(a)(b)
Recommended lubricant:
Engine oil