Page 18 of 78

INSTRUMENT AND CONTROL FUNCTIONS
3-3
3
EAUM1470
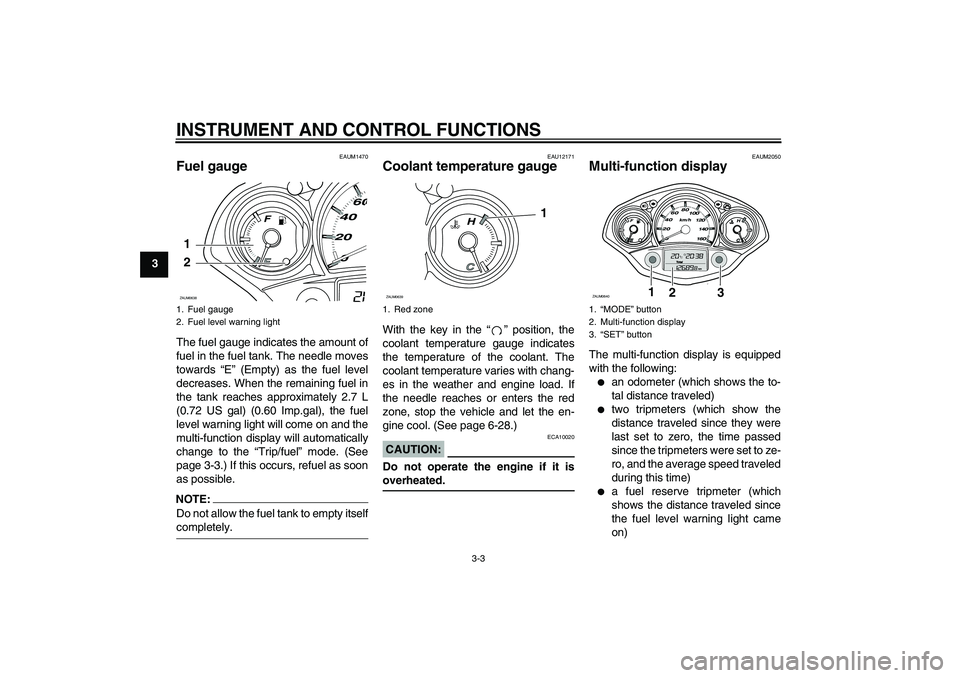
Fuel gauge The fuel gauge indicates the amount of
fuel in the fuel tank. The needle moves
towards “E” (Empty) as the fuel level
decreases. When the remaining fuel in
the tank reaches approximately 2.7 L
(0.72 US gal) (0.60 Imp.gal), the fuel
level warning light will come on and the
multi-function display will automatically
change to the “Trip/fuel” mode. (See
page 3-3.) If this occurs, refuel as soon
as possible.NOTE:Do not allow the fuel tank to empty itselfcompletely.
EAU12171
Coolant temperature gauge With the key in the “” position, the
coolant temperature gauge indicates
the temperature of the coolant. The
coolant temperature varies with chang-
es in the weather and engine load. If
the needle reaches or enters the red
zone, stop the vehicle and let the en-
gine cool. (See page 6-28.)CAUTION:
ECA10020
Do not operate the engine if it isoverheated.
EAUM2050
Multi-function display The multi-function display is equipped
with the following:�
an odometer (which shows the to-
tal distance traveled)
�
two tripmeters (which show the
distance traveled since they were
last set to zero, the time passed
since the tripmeters were set to ze-
ro, and the average speed traveled
during this time)
�
a fuel reserve tripmeter (which
shows the distance traveled since
the fuel level warning light came
on)
1. Fuel gauge
2. Fuel level warning light1
2ZAUM0638
1. Red zone
1
ZAUM0639
1.“MODE” button
2. Multi-function display
3.“SET” button
1
2
3
ZAUM0640
Page 22 of 78

INSTRUMENT AND CONTROL FUNCTIONS
3-7
3
EAUS1020
Dimmer switch “/”
Set this switch to “” for the high
beam and to “” for the low beam.
With the headlight on low beam, press
this switch downwards to flash the
headlight.
EAU12460
Turn signal switch “/”
To signal a right-hand turn, push this
switch to “”. To signal a left-hand
turn, push this switch to “”. When re-
leased, the switch returns to the center
position. To cancel the turn signal
lights, push the switch in after it has re-
turned to the center position.
EAU12500
Horn switch “”
Press this switch to sound the horn.
EAU12720
Start switch “”
With the sidestand up, push this switch
while applying the front or rear brake to
crank the engine with the starter.
CAUTION:
ECA10050
See page 5-1 for starting instruc-tions prior to starting the engine.
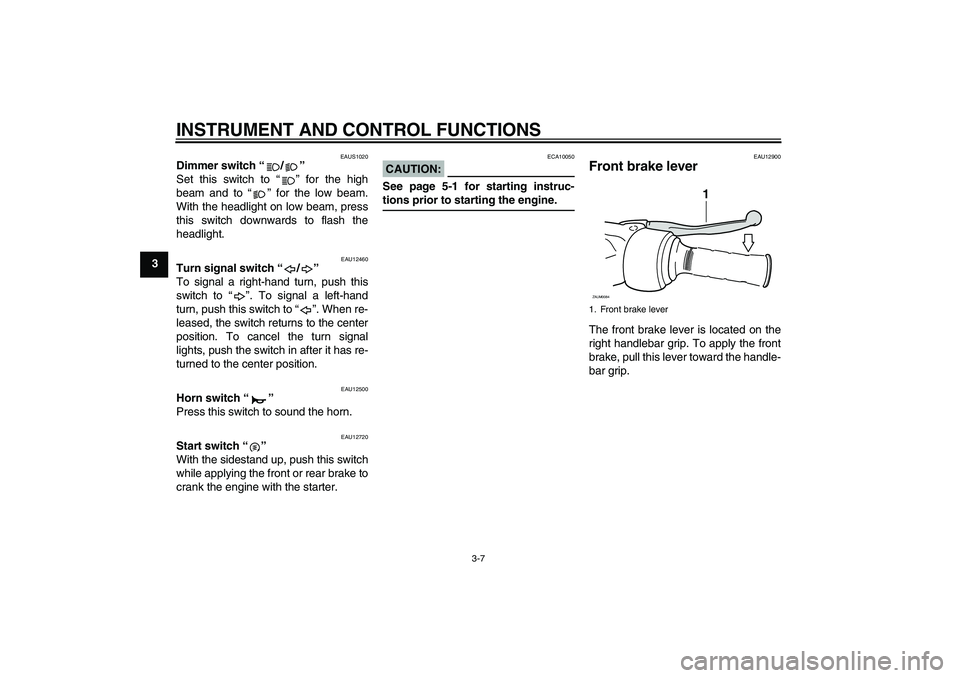
EAU12900
Front brake lever The front brake lever is located on the
right handlebar grip. To apply the front
brake, pull this lever toward the handle-
bar grip.1. Front brake lever
1
ZAUM0084
Page 23 of 78
INSTRUMENT AND CONTROL FUNCTIONS
3-8
3
EAU12950
Rear brake lever The rear brake lever is located on the
left handlebar grip. To apply the rear
brake, pull this lever toward the handle-
bar grip.
EAUM2160
Fuel tank cap To open the fuel tank cap
1. Open the fuel tank cap cover by
pushing in on the front end of it.
2. Insert the key in the lock and turn it
clockwise.
To close the fuel tank cap
1. Align the match marks, and then
push the fuel tank cap into the orig-
inal position.
2. Turn the key counterclockwise and
remove it.
3. Close the fuel tank cover.
EAU13211
Fuel Make sure that there is sufficient fuel in
the tank. Fill the fuel tank to the bottom
of the filler tube as shown.
WARNING
EWA10880
�
Do not overfill the fuel tank, oth-
erwise it may overflow when the
fuel warms up and expands.
�
Avoid spilling fuel on the hot en-gine.
1. Rear brake lever
1
ZAUM0085
1. Fuel tank cap
2. Fuel tank cap coverZAUM0643
1
2
1. Fuel tank filler tube
2. Fuel level
1
2
ZAUM0020
Page 34 of 78

OPERATION AND IMPORTANT RIDING POINTS
5-2
5
EAU16760
Starting off NOTE:Before starting off, allow the engine towarm up.
1. While pulling the rear brake lever
with your left hand and holding the
grab bar with your right hand, push
the scooter off the centerstand.
2. Sit astride the seat, and then ad-
just the rear view mirrors.
3. Switch the turn signal on.
4. Check for oncoming traffic, and
then slowly turn the throttle grip (on
the right) in order to take off.
5. Switch the turn signal off.
EAU16780
Acceleration and deceleration The speed can be adjusted by opening
and closing the throttle. To increase the
speed, turn the throttle grip in direction
(a). To reduce the speed, turn the throt-
tle grip in direction (b).
EAU16792
Braking 1. Close the throttle completely.
2. Apply both front and rear brakes
simultaneously while gradually in-
creasing the pressure.
WARNING
EWA10300
�
Avoid braking hard or suddenly
(especially when leaning over to
one side), otherwise the scooter
may skid or overturn.
�
Railroad crossings, streetcar
rails, iron plates on road con-
struction sites, and manhole
covers become extremely slip-
pery when wet. Therefore, slow
1. Grab bar
1
ZAUM0650
(b)
(a)
ZAUM0199
PUSHOPEN
ZAUM0651
Page 65 of 78

PERIODIC MAINTENANCE AND MINOR REPAIR
6-29
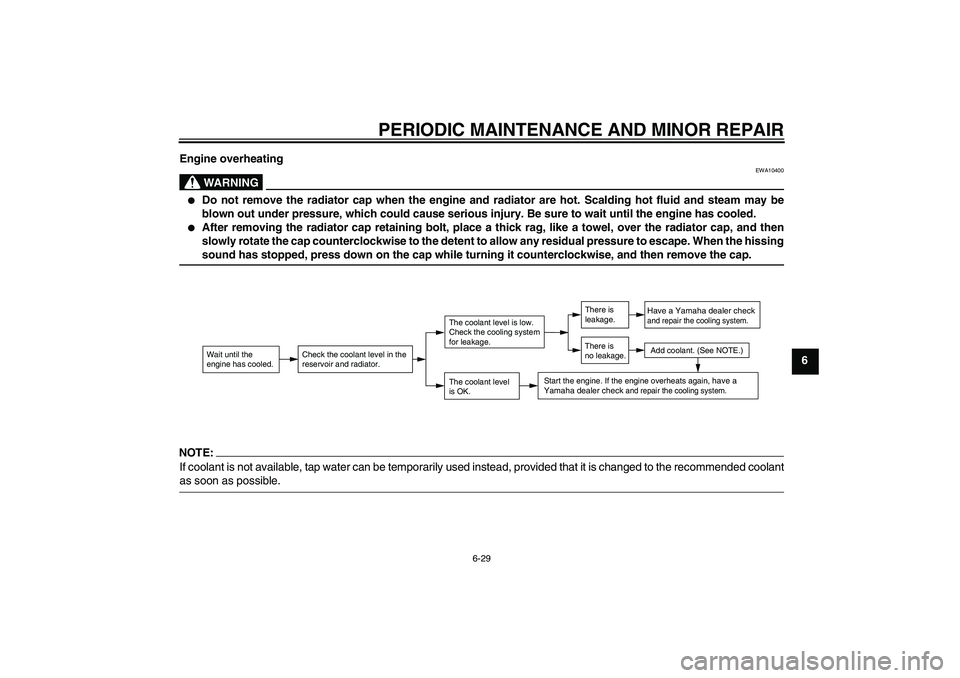
6 Engine overheating
WARNING
EWA10400
�
Do not remove the radiator cap when the engine and radiator are hot. Scalding hot fluid and steam may be
blown out under pressure, which could cause serious injury. Be sure to wait until the engine has cooled.
�
After removing the radiator cap retaining bolt, place a thick rag, like a towel, over the radiator cap, and then
slowly rotate the cap counterclockwise to the detent to allow any residual pressure to escape. When the hissingsound has stopped, press down on the cap while turning it counterclockwise, and then remove the cap.
NOTE:If coolant is not available, tap water can be temporarily used instead, provided that it is changed to the recommended coolantas soon as possible.
Wait until the
engine has cooled.
Check the coolant level in the
reservoir and radiator.
The coolant level
is OK.The coolant level is low.
Check the cooling system
for leakage.
Have a Yamaha dealer checkand repair the cooling system.Add coolant. (See NOTE.)
Start the engine. If the engine overheats again,
have a
Yamaha dealer check
and repair the cooling system.
There is
leakage.
There is
no leakage.