Page 106 of 156

8-22
85. Add the specified amount of the recommend-
ed final gear oil.
CAUTION:ECB00420Be sure no foreign material enters the finalgear case.
6. Install the oil filler bolt, and then tighten it to the
specified torque.
7. Check the final gear case for oil leakage. If oil
is leaking, check for the cause.
EBU23421Differential gear oil The differential gear case must be checked for oil
leakage before each ride. If any leakage is found,
have a Yamaha dealer check and repair the ATV.
In addition, the differential gear oil level must be
checked and the oil changed as follows at the in-
tervals specified in the periodic maintenance and
lubrication chart.
To check the differential gear oil level
1. Place the ATV on a level surface.NOTE:The differential gear oil level must be checked ona cold engine.
2. Remove the differential gear oil filler bolt, and
then check the oil level in the differential gear
case. Tightening torque:
Final gear oil drain bolt:
23 Nm (2.3 m·kgf, 17 ft·lbf)
Recommended final gear oil:
See page 10-1.
Oil quantity:
0.25 L (0.26 US qt) (0.22 Imp.qt)
Tightening torque:
Final gear oil filler bolt:
23 Nm (2.3 m·kgf, 17 ft·lbf)
U2C661E0.book Page 22 Thursday, March 16, 2006 10:45 AM
Page 107 of 156
8-23
8
NOTE:The oil level should be at the brim of the filler hole.
3. If the oil is below the brim of the filler hole, add
sufficient oil of the recommended type to raise
it to the correct level.
4. Install the oil filler bolt, and then tighten it to the
specified torque.To change the differential gear oil
1. Place the ATV on a level surface.
2. Place an oil pan under the differential gear
case to collect the used oil.
3. Remove the differential gear oil filler bolt and
the differential gear oil drain bolt to drain the
oil from the differential gear case.
4. Install the drain bolt, and then tighten it to the
specified torque.1. Differential gear oil
2. Differential gear oil filler bolt
3. Correct oil levelTightening torque:
Differential gear oil filler bolt:
23 Nm (2.3 m·kgf, 17 ft·lbf)
1. Differential gear oil drain boltTightening torque:
Differential gear oil drain bolt:
10 Nm (1.0 m·kgf, 7.2 ft·lbf)
U2C661E0.book Page 23 Thursday, March 16, 2006 10:45 AM
Page 108 of 156

8-24
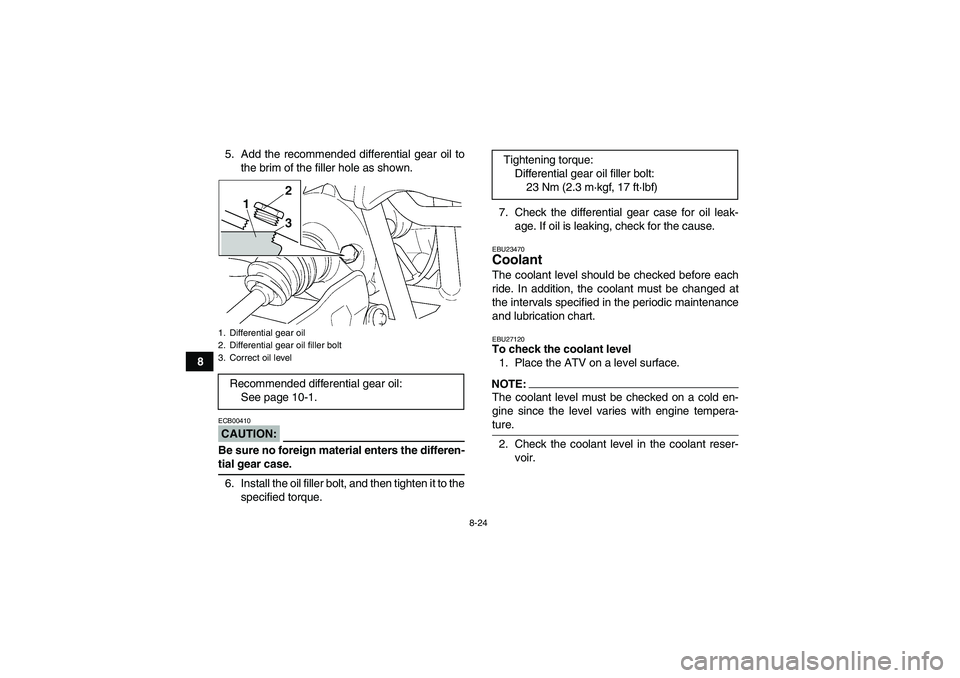
85. Add the recommended differential gear oil to
the brim of the filler hole as shown.
CAUTION:ECB00410Be sure no foreign material enters the differen-tial gear case.
6. Install the oil filler bolt, and then tighten it to the
specified torque.7. Check the differential gear case for oil leak-
age. If oil is leaking, check for the cause.
EBU23470Coolant The coolant level should be checked before each
ride. In addition, the coolant must be changed at
the intervals specified in the periodic maintenance
and lubrication chart.EBU27120To check the coolant level
1. Place the ATV on a level surface.NOTE:The coolant level must be checked on a cold en-
gine since the level varies with engine tempera-ture.
2. Check the coolant level in the coolant reser-
voir.
1. Differential gear oil
2. Differential gear oil filler bolt
3. Correct oil levelRecommended differential gear oil:
See page 10-1.
Tightening torque:
Differential gear oil filler bolt:
23 Nm (2.3 m·kgf, 17 ft·lbf)
U2C661E0.book Page 24 Thursday, March 16, 2006 10:45 AM
Page 111 of 156
8-27
8 5. Remove the radiator cap.
6. Remove panel D. (See page 8-8.)
7. Remove the coolant reservoir cap.
8. Disconnect the hose on the coolant reservoir
side, and then drain the coolant from the cool-
ant reservoir.9. After draining the coolant, thoroughly flush the
cooling system with clean tap water.
10. Replace the coolant drain bolt washer if it is
damaged, install the coolant drain bolt, and
then tighten it to the specified torque.
11. Connect the coolant reservoir hose.
12. Pour the recommended coolant into the reser-
voir to the maximum level mark, and then in-
stall the reservoir cap.
1. Radiator cap
1. Coolant reservoir hoseTightening torque:
Coolant drain bolt:
10 Nm (1.0 m·kgf, 7.2 ft·lbf)
U2C661E0.book Page 27 Thursday, March 16, 2006 10:45 AM
Page 137 of 156
8-53
8
�Tapered nuts are used for both the front and rear
wheels. Install the nuts with their tapered side to-wards the wheel.
2. Lower the ATV to the ground.
3. Tighten the wheel nuts to the specified
torques.1. Arrow mark
1. Tapered nutTightening torques:
Front wheel nut:
55 Nm (5.5 m·kgf, 40 ft·lbf)
Rear wheel nut:
55 Nm (5.5 m·kgf, 40 ft·lbf)
U2C661E0.book Page 53 Thursday, March 16, 2006 10:45 AM