Page 28 of 92

INSTRUMENT AND CONTROL FUNCTIONS
3-14
3
NOTE:The fuel tank cap cannot be closed un-
less the key is in the lock. In addition,
the key cannot be removed if the cap isnot properly closed and locked.
WARNING
EWA11090
Make sure that the fuel tank cap isproperly closed before riding.
EAU13220
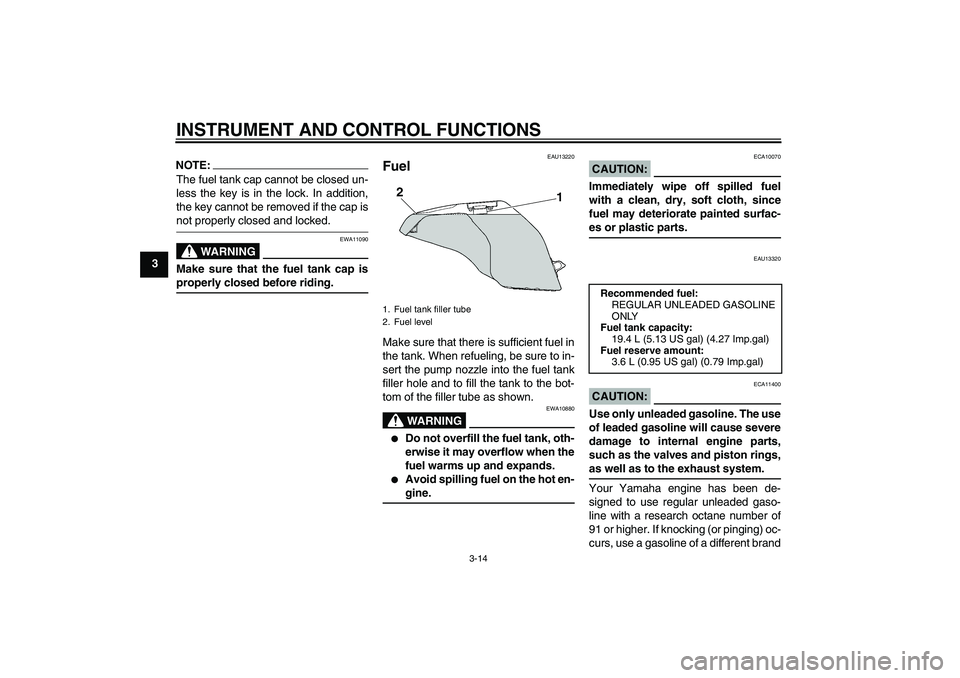
Fuel Make sure that there is sufficient fuel in
the tank. When refueling, be sure to in-
sert the pump nozzle into the fuel tank
filler hole and to fill the tank to the bot-
tom of the filler tube as shown.
WARNING
EWA10880
�
Do not overfill the fuel tank, oth-
erwise it may overflow when the
fuel warms up and expands.
�
Avoid spilling fuel on the hot en-gine.
CAUTION:
ECA10070
Immediately wipe off spilled fuel
with a clean, dry, soft cloth, since
fuel may deteriorate painted surfac-es or plastic parts.
EAU13320
CAUTION:
ECA11400
Use only unleaded gasoline. The use
of leaded gasoline will cause severe
damage to internal engine parts,
such as the valves and piston rings,as well as to the exhaust system.
Your Yamaha engine has been de-
signed to use regular unleaded gaso-
line with a research octane number of
91 or higher. If knocking (or pinging) oc-
curs, use a gasoline of a different brand
1. Fuel tank filler tube
2. Fuel level
Recommended fuel:
REGULAR UNLEADED GASOLINE
ONLY
Fuel tank capacity:
19.4 L (5.13 US gal) (4.27 Imp.gal)
Fuel reserve amount:
3.6 L (0.95 US gal) (0.79 Imp.gal)
U4P5E1E0.book Page 14 Monday, September 11, 2006 1:33 PM
Page 29 of 92

INSTRUMENT AND CONTROL FUNCTIONS
3-15
3 or premium unleaded fuel. Use of un-
leaded fuel will extend spark plug life
and reduce maintenance costs.
EAU13411
Fuel tank breather hose Before operating the motorcycle:�
Check the fuel tank breather hose
connection.
�
Check the fuel tank breather hose
for cracks or damage, and replace
it if damaged.
�
Make sure that the end of the fuel
tank breather hose is not blocked,
and clean it if necessary.
EAU13441
Catalytic converter This vehicle is equipped with catalytic
converters in the exhaust system.
WARNING
EWA10860
The exhaust system is hot after op-
eration. Make sure that the exhaust
system has cooled down before do-ing any maintenance work.CAUTION:
ECA10700
The following precautions must be
observed to prevent a fire hazard or
other damages.�
Use only unleaded gasoline.
The use of leaded gasoline will
cause unrepairable damage to
the catalytic converter.
�
Never park the vehicle near pos-
sible fire hazards such as grass
or other materials that easily
burn.
�
Do not allow the engine to idletoo long.
1. Fuel tank breather hose
2. Original position (paint mark)
U4P5E1E0.book Page 15 Monday, September 11, 2006 1:33 PM
Page 30 of 92
INSTRUMENT AND CONTROL FUNCTIONS
3-16
3
EAU32980
Seat To remove the seat
1. Insert the key into the seat lock,
and then turn it counterclockwise.
2. While holding the key in that posi-
tion, lift the rear of the seat up, and
then pull the seat off.
To install the seat
1. Insert the projection on the front of
the seat into the seat holder as
shown.2. Push the rear of the seat down to
lock it in place.
3. Remove the key.
NOTE:Make sure that the seat is properly se-cured before riding.
EAU14281
Helmet holder To open the helmet holder, insert the
key into the lock, and then turn the key
as shown.
To lock the helmet holder, place it in the
original position, and then remove the
key.
WARNING
EWA10160
Never ride with a helmet attached to
the helmet holder, since the helmet
may hit objects, causing loss of con-trol and possibly an accident.
1. Seat lock
2. Unlock.
1. Projection
2. Seat holder
1. Helmet holder
2. Unlock.
U4P5E1E0.book Page 16 Monday, September 11, 2006 1:33 PM
Page 31 of 92

INSTRUMENT AND CONTROL FUNCTIONS
3-17
3
EAU14422
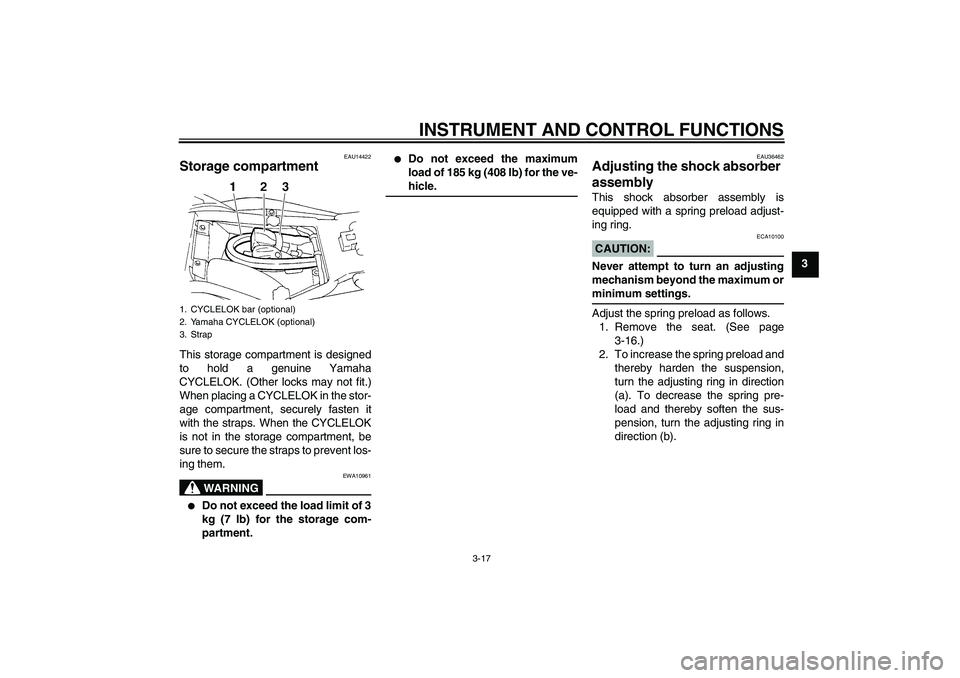
Storage compartment This storage compartment is designed
to hold a genuine Yamaha
CYCLELOK. (Other locks may not fit.)
When placing a CYCLELOK in the stor-
age compartment, securely fasten it
with the straps. When the CYCLELOK
is not in the storage compartment, be
sure to secure the straps to prevent los-
ing them.
WARNING
EWA10961
�
Do not exceed the load limit of 3
kg (7 lb) for the storage com-
partment.
�
Do not exceed the maximum
load of 185 kg (408 lb) for the ve-hicle.
EAU36462
Adjusting the shock absorber
assembly This shock absorber assembly is
equipped with a spring preload adjust-
ing ring.CAUTION:
ECA10100
Never attempt to turn an adjusting
mechanism beyond the maximum orminimum settings.
Adjust the spring preload as follows.
1. Remove the seat. (See page
3-16.)
2. To increase the spring preload and
thereby harden the suspension,
turn the adjusting ring in direction
(a). To decrease the spring pre-
load and thereby soften the sus-
pension, turn the adjusting ring in
direction (b).
1. CYCLELOK bar (optional)
2. Yamaha CYCLELOK (optional)
3. Strap
U4P5E1E0.book Page 17 Monday, September 11, 2006 1:33 PM
Page 63 of 92

PERIODIC MAINTENANCE AND MINOR REPAIR
6-22
6
EAU40260
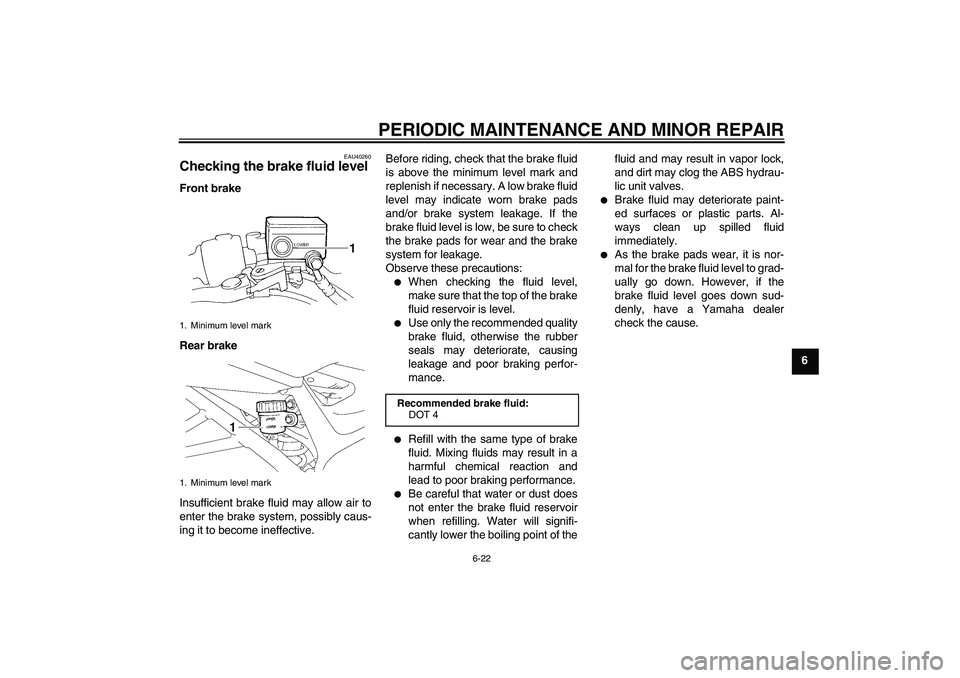
Checking the brake fluid level Front brake
Rear brake
Insufficient brake fluid may allow air to
enter the brake system, possibly caus-
ing it to become ineffective.Before riding, check that the brake fluid
is above the minimum level mark and
replenish if necessary. A low brake fluid
level may indicate worn brake pads
and/or brake system leakage. If the
brake fluid level is low, be sure to check
the brake pads for wear and the brake
system for leakage.
Observe these precautions:
�
When checking the fluid level,
make sure that the top of the brake
fluid reservoir is level.
�
Use only the recommended quality
brake fluid, otherwise the rubber
seals may deteriorate, causing
leakage and poor braking perfor-
mance.
�
Refill with the same type of brake
fluid. Mixing fluids may result in a
harmful chemical reaction and
lead to poor braking performance.
�
Be careful that water or dust does
not enter the brake fluid reservoir
when refilling. Water will signifi-
cantly lower the boiling point of thefluid and may result in vapor lock,
and dirt may clog the ABS hydrau-
lic unit valves.
�
Brake fluid may deteriorate paint-
ed surfaces or plastic parts. Al-
ways clean up spilled fluid
immediately.
�
As the brake pads wear, it is nor-
mal for the brake fluid level to grad-
ually go down. However, if the
brake fluid level goes down sud-
denly, have a Yamaha dealer
check the cause.
1. Minimum level mark
1. Minimum level mark
Recommended brake fluid:
DOT 4
U4P5E1E0.book Page 22 Monday, September 11, 2006 1:33 PM
Page 64 of 92

PERIODIC MAINTENANCE AND MINOR REPAIR
6-23
6
EAU22730
Changing the brake fluid Have a Yamaha dealer change the
brake fluid at the intervals specified in
the NOTE after the periodic mainte-
nance and lubrication chart. In addition,
have the oil seals of the master cylin-
ders and calipers as well as the brake
hoses replaced at the intervals listed
below or whenever they are damaged
or leaking.�
Oil seals: Replace every two
years.
�
Brake hoses: Replace every four
years.
EAU22760
Drive chain slack The drive chain slack should be
checked before each ride and adjusted
if necessary.
EAU22792
To check the drive chain slack
1. Place the motorcycle on the cen-
terstand.
2. Shift the transmission into the neu-
tral position.
3. Spin the rear wheel several times
to locate the tightest portion of the
drive chain.
4. Measure the drive chain slack as
shown.5. If the drive chain slack is incorrect,
adjust it as follows.
EAU34361
To adjust the drive chain slack
1. Loosen the axle nut, then loosen
the locknut at each end of the
swingarm.
2. To tighten the drive chain, turn the
adjusting nut at each end of the
swingarm in direction (a). To loos-
en the drive chain, turn the adjust-
ing nut at each end of the
swingarm in direction (b), and then
push the rear wheel forward.NOTE:Using the alignment marks on each
side of the swingarm, make sure that
both adjusting nuts are in the same po-sition for proper wheel alignment.
1. Drive chain slack
Drive chain slack:
45.0–55.0 mm (1.77–2.17 in)
U4P5E1E0.book Page 23 Monday, September 11, 2006 1:33 PM
Page 65 of 92

PERIODIC MAINTENANCE AND MINOR REPAIR
6-24
6
CAUTION:
ECA10570
Improper drive chain slack will over-
load the engine as well as other vital
parts of the motorcycle and can lead
to chain slippage or breakage. To
prevent this from occurring, keep
the drive chain slack within thespecified limits.
3. Tighten the locknuts, and then
tighten the axle nut to the specified
torque.
EAU23022
Cleaning and lubricating the
drive chain The drive chain must be cleaned and
lubricated at the intervals specified in
the periodic maintenance and lubrica-
tion chart, otherwise it will quickly wear
out, especially when riding in dusty or
wet areas. Service the drive chain as
follows.CAUTION:
ECA10581
The drive chain must be lubricated
after washing the motorcycle andriding in the rain.
1. Clean the drive chain with kero-
sene and a small soft brush.CAUTION:
ECA11120
To prevent damaging the O-rings, do
not clean the drive chain with steam
cleaners, high-pressure washers orinappropriate solvents.
2. Wipe the drive chain dry.
3. Thoroughly lubricate the drive
chain with a special O-ring chain
lubricant.
1. Axle nut
2. Drive chain slack adjusting nut
3. Locknut
4. Alignment marks
Tightening torques:
Locknut:
16 Nm (1.6 m·kgf, 11 ft·lbf)
Axle nut:
120 Nm (12.0 m·kgf, 85 ft·lbf)
U4P5E1E0.book Page 24 Monday, September 11, 2006 1:33 PM
Page 72 of 92
PERIODIC MAINTENANCE AND MINOR REPAIR
6-31
6
EAU40140
Replacing the fuses The main fuse and fuse box 1 are locat-
ed under the fuel tank. (See page
6-14.)
Fuse box 2 is located behind panel C.
(See page 6-6.)
If a fuse is blown, replace it as follows.
1. Turn the key to “OFF” and turn off
the electrical circuit in question.
2. Remove the blown fuse, and then
install a new fuse of the specified
amperage.1. Fuse box 1
2. Main fuse
3. Spare main fuse
1. ABS control unit fuse
2. ABS motor fuse
3. ABS motor spare fuse
1. Fuse box 2
1. Headlight fuse
2. Signaling system fuse
3. Ignition fuse
4. Radiator fan fuse
5. Backup fuse (for odometer, clock and immo-
bilizer system)
6. Fuel injection system fuse
7. Spare fuse
8. Taillight fuse
U4P5E1E0.book Page 31 Monday, September 11, 2006 1:33 PM