Page 45 of 94
PERIODIC MAINTENANCE AND MINOR REPAIR
6-5
6 Every two years replace the internal components of the brake master cylinders and calipers, and change the brake
fluid.
Replace the brake hoses every four years and if cracked or damaged.
U1B3E3E0.book Page 5 Friday, July 14, 2006 11:34 AM
Page 57 of 94
PERIODIC MAINTENANCE AND MINOR REPAIR
6-17
6
�
NEVER OVERLOAD THE
MOTORCYCLE! Operation of an
overloaded motorcycle may re-
sult in tire damage, loss of con-
trol, or severe injury. Make sure
that the total weight of rider,
passenger, cargo, and accesso-
ries does not exceed the speci-
fied maximum load for the
vehicle.
�
Do not carry along loosely
packed items, which can shift
during a ride.
�
Securely pack the heaviest
items close to the center of the
motorcycle and distribute the
weight evenly on both sides.
�
Adjust the suspension and tire
air pressure with regard to the
load.
�
Check the tire condition and airpressure before each ride.Tire inspection
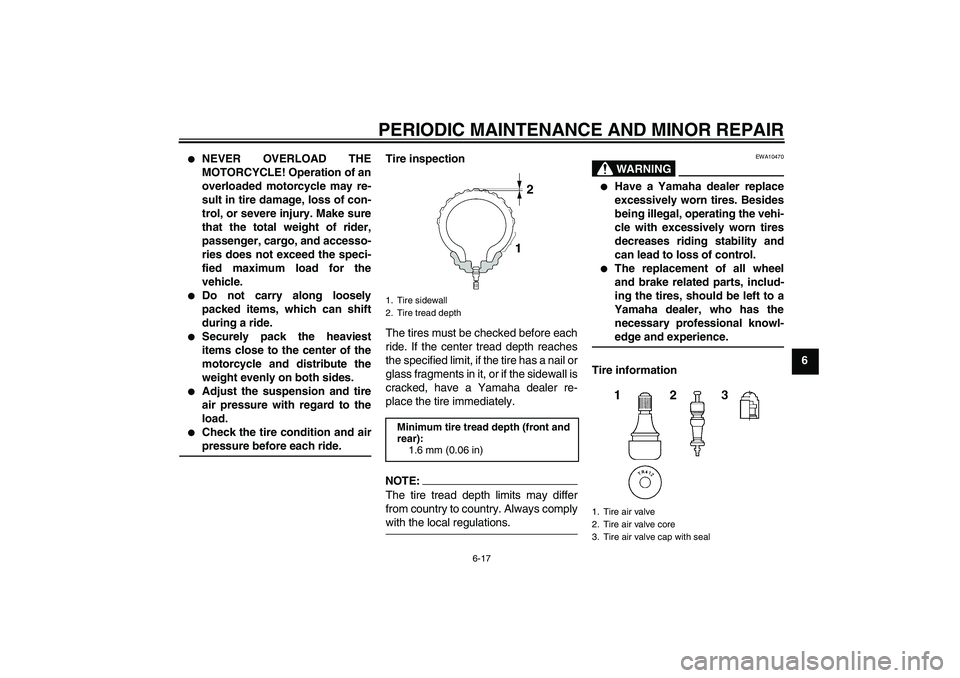
The tires must be checked before each
ride. If the center tread depth reaches
the specified limit, if the tire has a nail or
glass fragments in it, or if the sidewall is
cracked, have a Yamaha dealer re-
place the tire immediately.
NOTE:The tire tread depth limits may differ
from country to country. Always complywith the local regulations.
WARNING
EWA10470
�
Have a Yamaha dealer replace
excessively worn tires. Besides
being illegal, operating the vehi-
cle with excessively worn tires
decreases riding stability and
can lead to loss of control.
�
The replacement of all wheel
and brake related parts, includ-
ing the tires, should be left to a
Yamaha dealer, who has the
necessary professional knowl-edge and experience.
Tire information
1. Tire sidewall
2. Tire tread depth
Minimum tire tread depth (front and
rear):
1.6 mm (0.06 in)
1. Tire air valve
2. Tire air valve core
3. Tire air valve cap with seal
U1B3E3E0.book Page 17 Friday, July 14, 2006 11:34 AM
Page 60 of 94
PERIODIC MAINTENANCE AND MINOR REPAIR
6-20
6
EAU36501
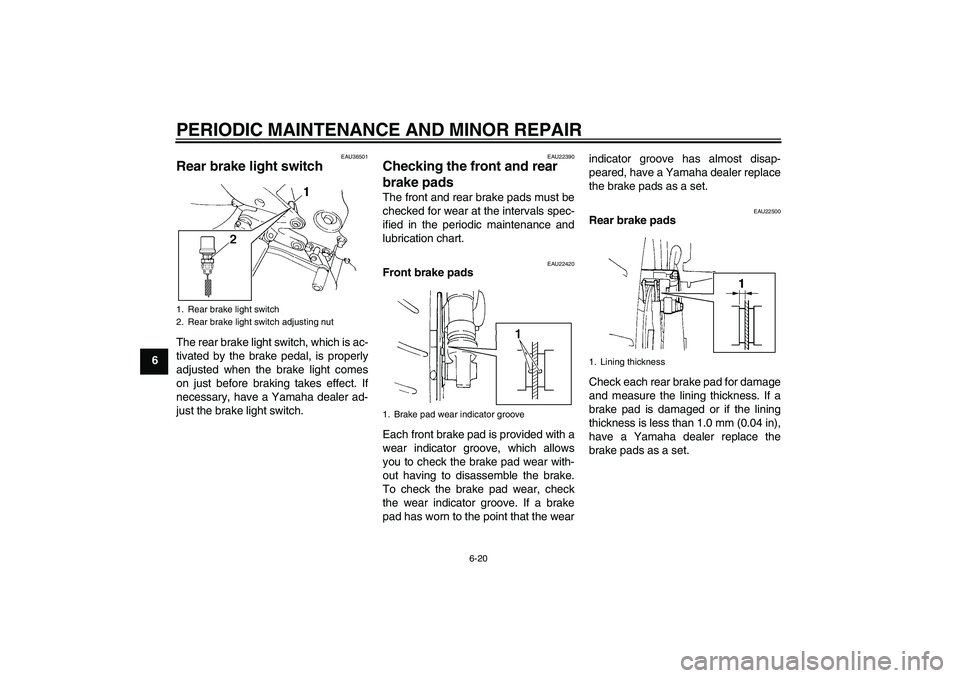
Rear brake light switch The rear brake light switch, which is ac-
tivated by the brake pedal, is properly
adjusted when the brake light comes
on just before braking takes effect. If
necessary, have a Yamaha dealer ad-
just the brake light switch.
EAU22390
Checking the front and rear
brake pads The front and rear brake pads must be
checked for wear at the intervals spec-
ified in the periodic maintenance and
lubrication chart.
EAU22420
Front brake pads
Each front brake pad is provided with a
wear indicator groove, which allows
you to check the brake pad wear with-
out having to disassemble the brake.
To check the brake pad wear, check
the wear indicator groove. If a brake
pad has worn to the point that the wearindicator groove has almost disap-
peared, have a Yamaha dealer replace
the brake pads as a set.
EAU22500
Rear brake pads
Check each rear brake pad for damage
and measure the lining thickness. If a
brake pad is damaged or if the lining
thickness is less than 1.0 mm (0.04 in),
have a Yamaha dealer replace the
brake pads as a set.
1. Rear brake light switch
2. Rear brake light switch adjusting nut
1. Brake pad wear indicator groove
1. Lining thickness
U1B3E3E0.book Page 20 Friday, July 14, 2006 11:34 AM
Page 61 of 94
PERIODIC MAINTENANCE AND MINOR REPAIR
6-21
6
EAU22580
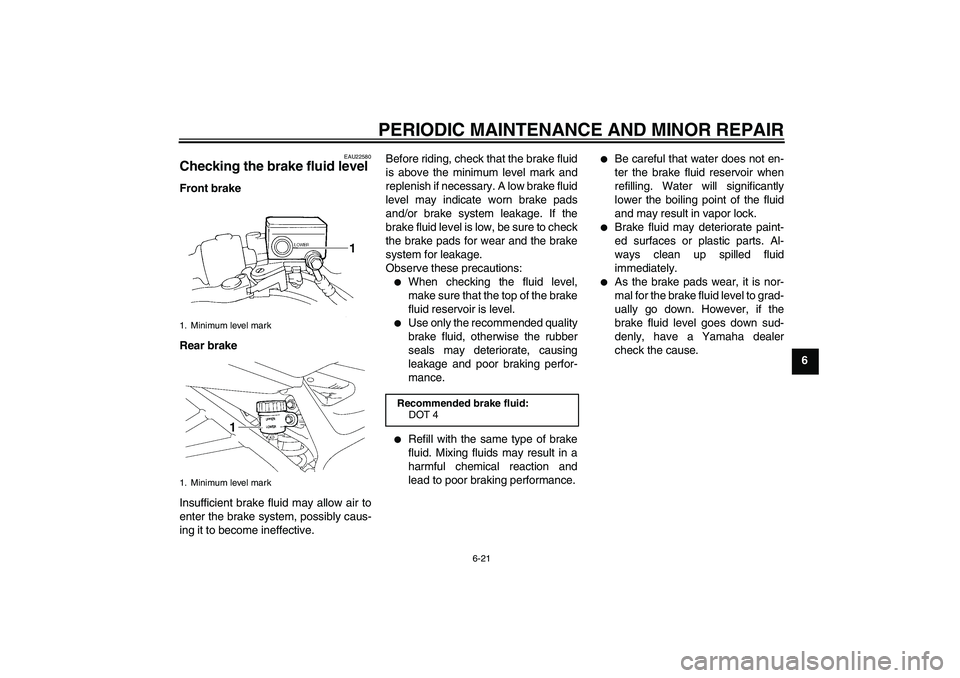
Checking the brake fluid level Front brake
Rear brake
Insufficient brake fluid may allow air to
enter the brake system, possibly caus-
ing it to become ineffective.Before riding, check that the brake fluid
is above the minimum level mark and
replenish if necessary. A low brake fluid
level may indicate worn brake pads
and/or brake system leakage. If the
brake fluid level is low, be sure to check
the brake pads for wear and the brake
system for leakage.
Observe these precautions:
�
When checking the fluid level,
make sure that the top of the brake
fluid reservoir is level.
�
Use only the recommended quality
brake fluid, otherwise the rubber
seals may deteriorate, causing
leakage and poor braking perfor-
mance.
�
Refill with the same type of brake
fluid. Mixing fluids may result in a
harmful chemical reaction and
lead to poor braking performance.
�
Be careful that water does not en-
ter the brake fluid reservoir when
refilling. Water will significantly
lower the boiling point of the fluid
and may result in vapor lock.
�
Brake fluid may deteriorate paint-
ed surfaces or plastic parts. Al-
ways clean up spilled fluid
immediately.
�
As the brake pads wear, it is nor-
mal for the brake fluid level to grad-
ually go down. However, if the
brake fluid level goes down sud-
denly, have a Yamaha dealer
check the cause.
1. Minimum level mark
1. Minimum level mark
Recommended brake fluid:
DOT 4
U1B3E3E0.book Page 21 Friday, July 14, 2006 11:34 AM
Page 62 of 94
PERIODIC MAINTENANCE AND MINOR REPAIR
6-22
6
EAU22730
Changing the brake fluid Have a Yamaha dealer change the
brake fluid at the intervals specified in
the NOTE after the periodic mainte-
nance and lubrication chart. In addition,
have the oil seals of the master cylin-
ders and calipers as well as the brake
hoses replaced at the intervals listed
below or whenever they are damaged
or leaking.�
Oil seals: Replace every two
years.
�
Brake hoses: Replace every four
years.
EAU22760
Drive chain slack The drive chain slack should be
checked before each ride and adjusted
if necessary.
EAU22772
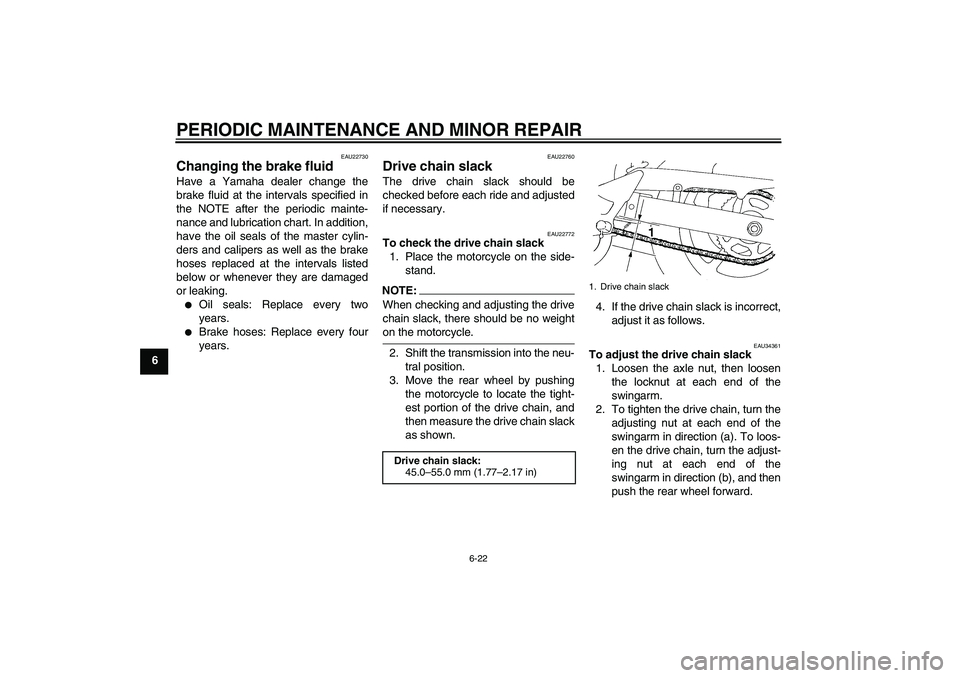
To check the drive chain slack
1. Place the motorcycle on the side-
stand.NOTE:When checking and adjusting the drive
chain slack, there should be no weighton the motorcycle.
2. Shift the transmission into the neu-
tral position.
3. Move the rear wheel by pushing
the motorcycle to locate the tight-
est portion of the drive chain, and
then measure the drive chain slack
as shown.4. If the drive chain slack is incorrect,
adjust it as follows.
EAU34361
To adjust the drive chain slack
1. Loosen the axle nut, then loosen
the locknut at each end of the
swingarm.
2. To tighten the drive chain, turn the
adjusting nut at each end of the
swingarm in direction (a). To loos-
en the drive chain, turn the adjust-
ing nut at each end of the
swingarm in direction (b), and then
push the rear wheel forward.
Drive chain slack:
45.0–55.0 mm (1.77–2.17 in)
1. Drive chain slack
U1B3E3E0.book Page 22 Friday, July 14, 2006 11:34 AM
Page 65 of 94
PERIODIC MAINTENANCE AND MINOR REPAIR
6-25
6
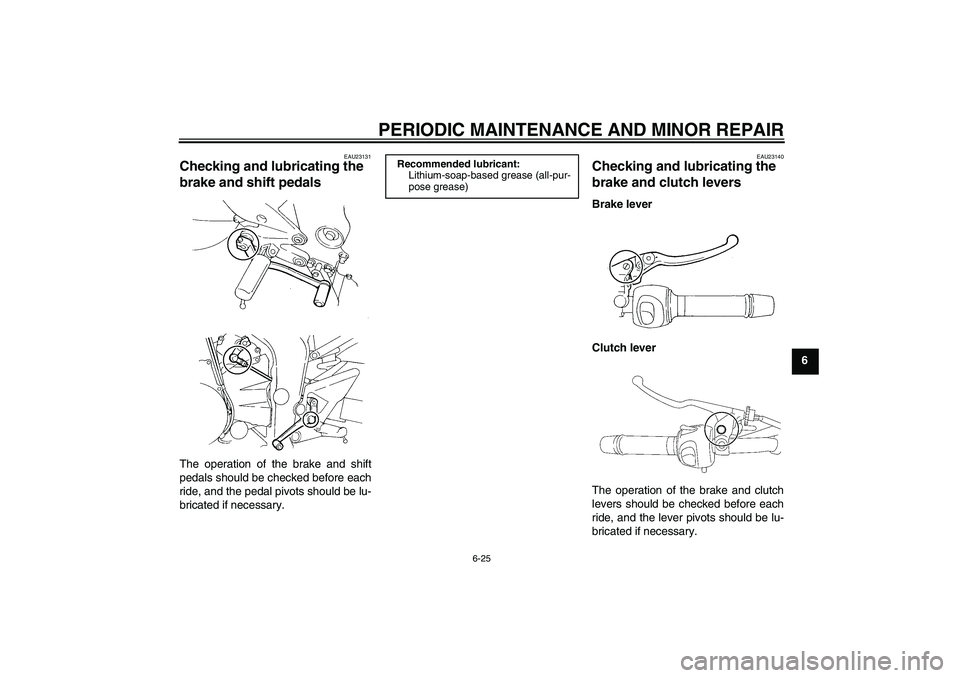
EAU23131
Checking and lubricating the
brake and shift pedals The operation of the brake and shift
pedals should be checked before each
ride, and the pedal pivots should be lu-
bricated if necessary.
EAU23140
Checking and lubricating the
brake and clutch levers Brake lever
Clutch lever
The operation of the brake and clutch
levers should be checked before each
ride, and the lever pivots should be lu-
bricated if necessary.
Recommended lubricant:
Lithium-soap-based grease (all-pur-
pose grease)
U1B3E3E0.book Page 25 Friday, July 14, 2006 11:34 AM
Page 67 of 94

PERIODIC MAINTENANCE AND MINOR REPAIR
6-27
6
EAU23271
Checking the front fork The condition and operation of the front
fork must be checked as follows at the
intervals specified in the periodic main-
tenance and lubrication chart.
To check the condition
WARNING
EWA10750
Securely support the vehicle so thatthere is no danger of it falling over.
Check the inner tubes for scratches,
damage and excessive oil leakage.
To check the operation
1. Place the vehicle on a level sur-
face and hold it in an upright posi-
tion.
2. While applying the front brake,
push down hard on the handlebars
several times to check if the front
fork compresses and rebounds
smoothly.
CAUTION:
ECA10590
If any damage is found or the front
fork does not operate smoothly,
have a Yamaha dealer check or re-pair it.
EAU23280
Checking the steering Worn or loose steering bearings may
cause danger. Therefore, the operation
of the steering must be checked as fol-
lows at the intervals specified in the pe-
riodic maintenance and lubrication
chart.
1. Place a stand under the engine to
raise the front wheel off the
ground.
WARNING
EWA10750
Securely support the vehicle so thatthere is no danger of it falling over.
2. Hold the lower ends of the front
fork legs and try to move them for-
ward and backward. If any free
play can be felt, have a Yamaha
dealer check or repair the steering.
U1B3E3E0.book Page 27 Friday, July 14, 2006 11:34 AM
Page 72 of 94
PERIODIC MAINTENANCE AND MINOR REPAIR
6-32
65. Install the headlight bulb cover,
and then connect the coupler.
6. Install the headlight unit by install-
ing the bolts.
7. Have a Yamaha dealer adjust the
headlight beam if necessary.
EAU32822
Replacing the tail/brake light
bulb 1. Remove the seat. (See page
3-15.)
2. Remove the socket (together with
the bulb) by turning it counter-
clockwise.
WARNING
EWA12301
Do not touch the muffler bracket un-til the exhaust system has cooled.
3. Remove the defective bulb by
pushing it in and turning it counter-
clockwise.4. Insert a new bulb into the socket,
push it in, and then turn it clock-
wise until it stops.
5. Install the socket (together with the
bulb) by turning it clockwise.
6. Install the seat.
1. Do not touch the glass part of the bulb.
1. Tail/brake light bulb socket
2. Muffler bracket cover
U1B3E3E0.book Page 32 Friday, July 14, 2006 11:34 AM