2007 VOLVO S80 battery
[x] Cancel search: batteryPage 68 of 251
76 03 Your driving environment
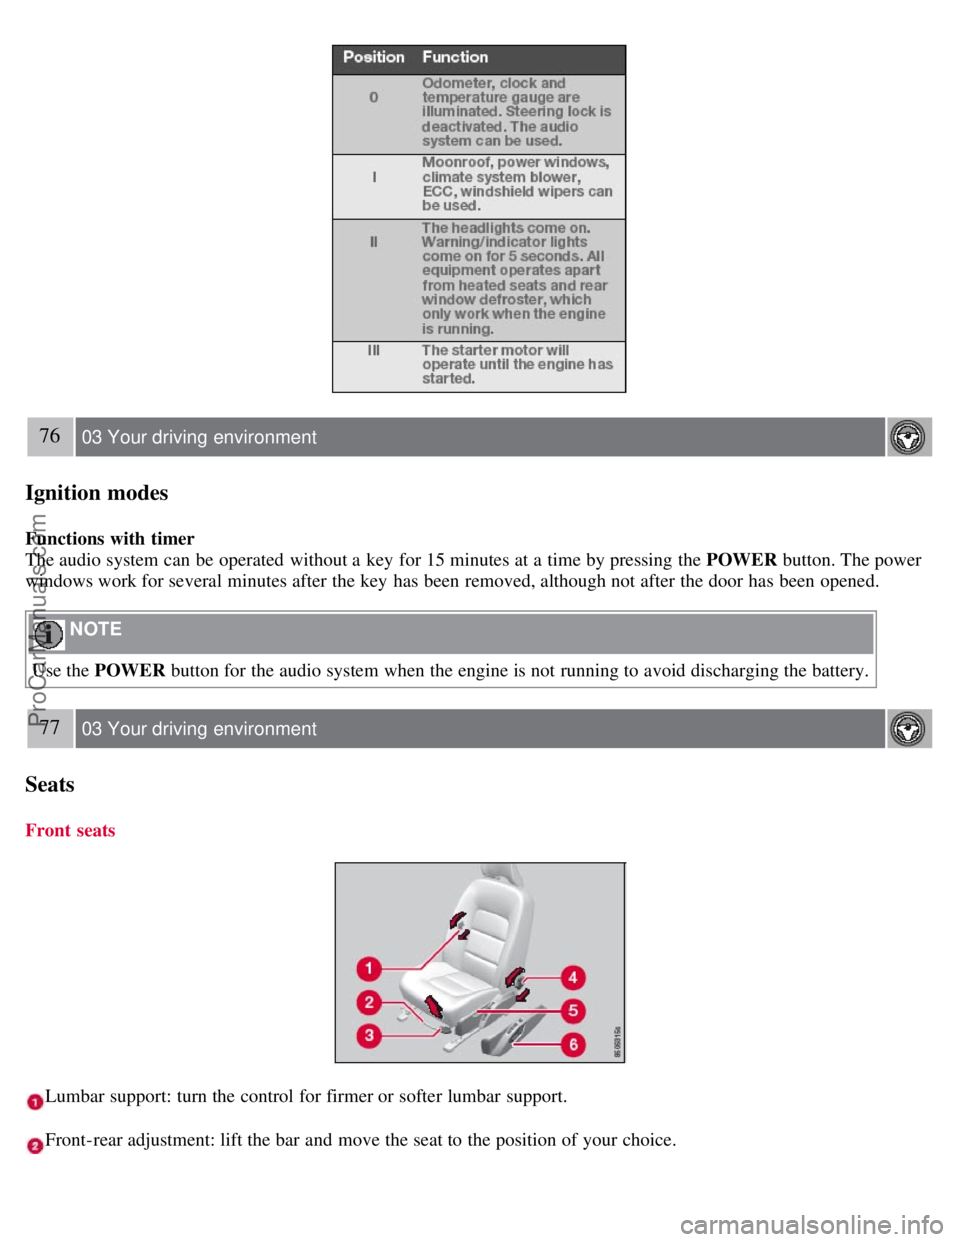
Ignition modes
Functions with timer
The audio system can be operated without a key for 15 minutes at a time by pressing the POWER button. The power
windows work for several minutes after the key has been removed, although not after the door has been opened.
NOTE
Use the POWER button for the audio system when the engine is not running to avoid discharging the battery.
77 03 Your driving environment
Seats
Front seats
Lumbar support: turn the control for firmer or softer lumbar support.
Front-rear adjustment: lift the bar and move the seat to the position of your choice.
ProCarManuals.com
Page 86 of 251
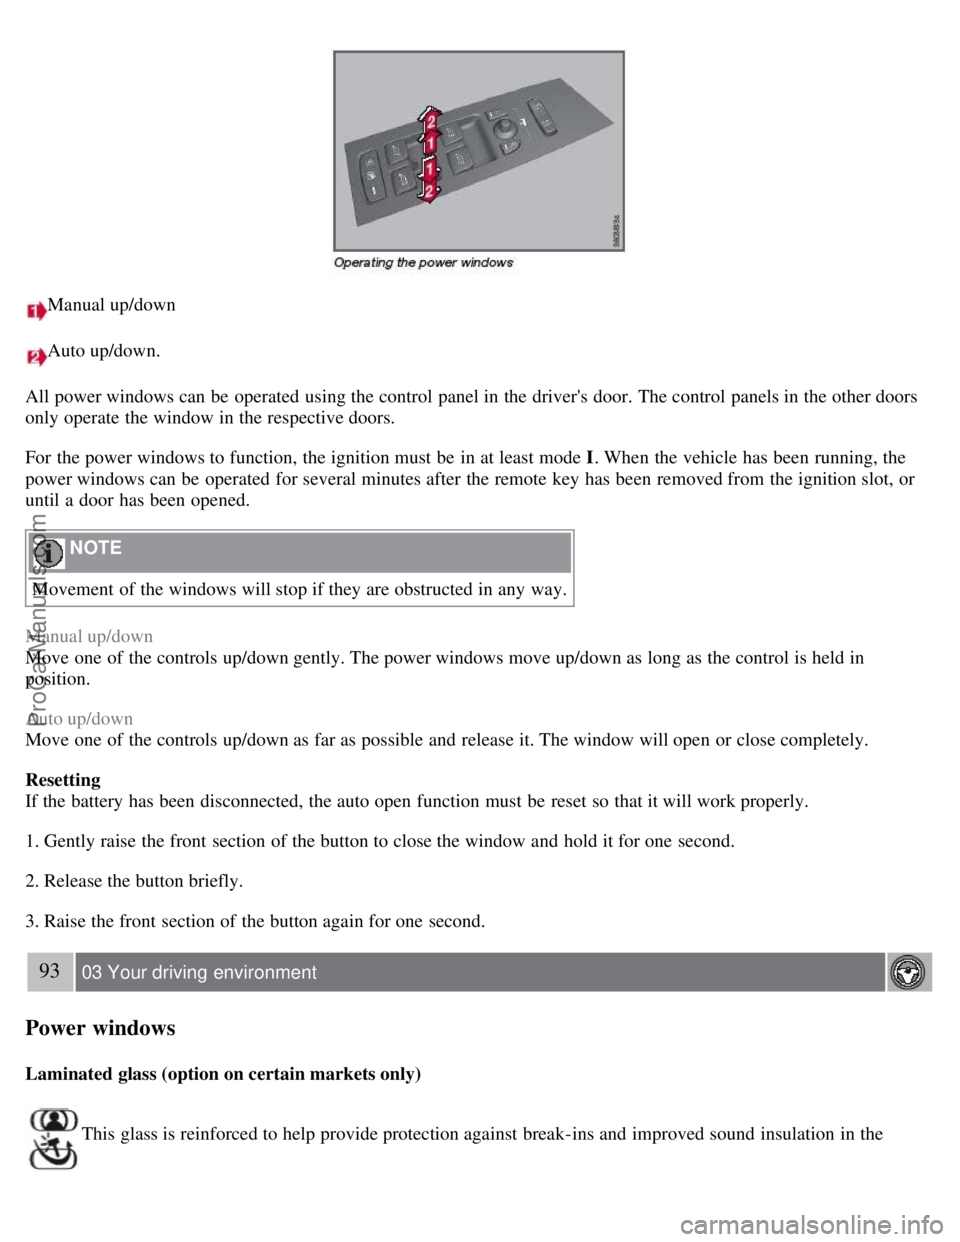
Manual up/down
Auto up/down.
All power windows can be operated using the control panel in the driver's door. The control panels in the other doors
only operate the window in the respective doors.
For the power windows to function, the ignition must be in at least mode I . When the vehicle has been running, the
power windows can be operated for several minutes after the remote key has been removed from the ignition slot, or
until a door has been opened.
NOTE
Movement of the windows will stop if they are obstructed in any way.
Manual up/down
Move one of the controls up/down gently. The power windows move up/down as long as the control is held in
position.
Auto up/down
Move one of the controls up/down as far as possible and release it. The window will open or close completely.
Resetting
If the battery has been disconnected, the auto open function must be reset so that it will work properly.
1. Gently raise the front section of the button to close the window and hold it for one second.
2. Release the button briefly.
3. Raise the front section of the button again for one second.
93 03 Your driving environment
Power windows
Laminated glass (option on certain markets only)
This glass is reinforced to help provide protection against break-ins and improved sound insulation in the
ProCarManuals.com
Page 97 of 251
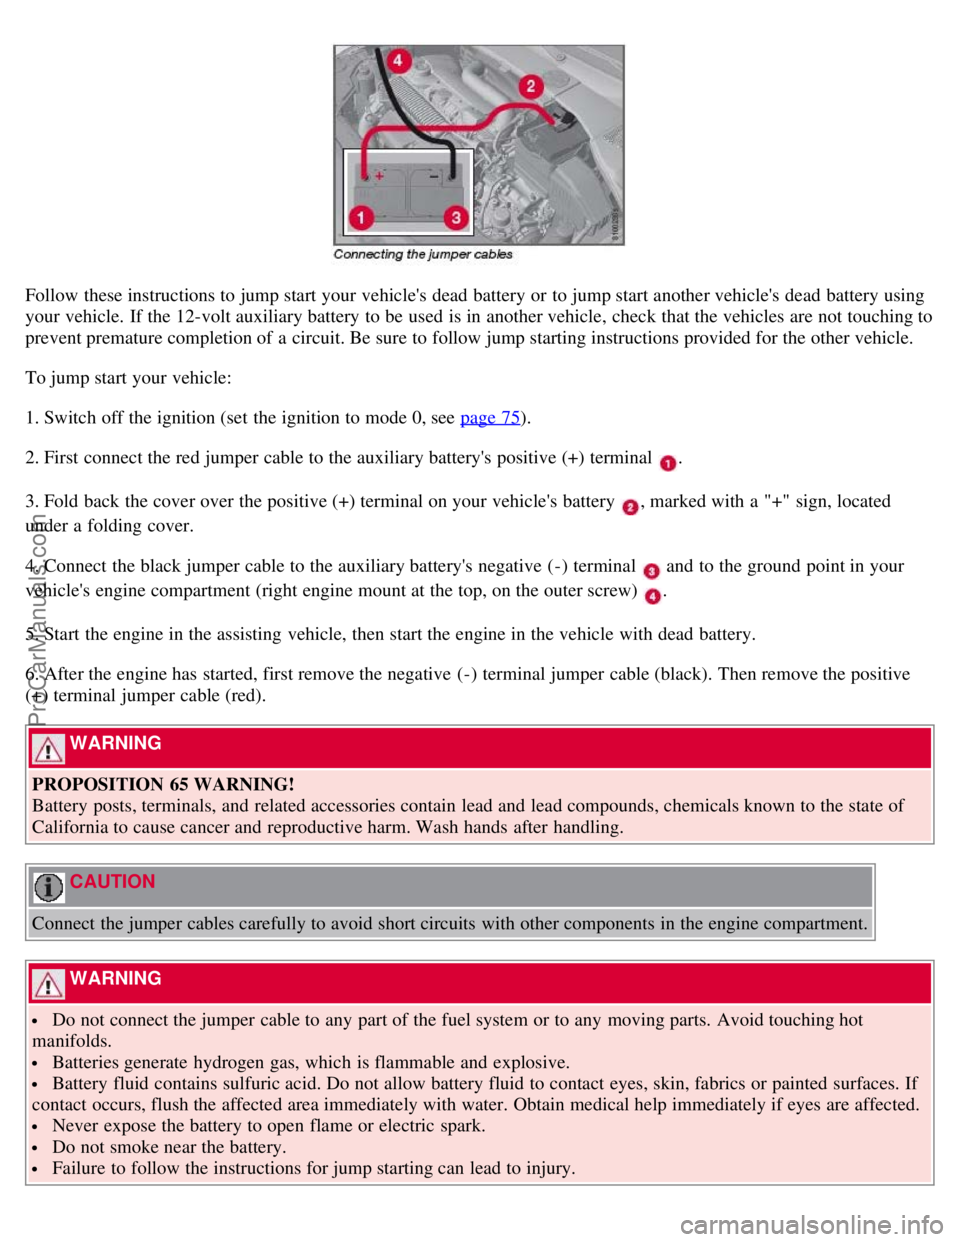
Follow these instructions to jump start your vehicle's dead battery or to jump start another vehicle's dead battery using
your vehicle. If the 12-volt auxiliary battery to be used is in another vehicle, check that the vehicles are not touching to
prevent premature completion of a circuit. Be sure to follow jump starting instructions provided for the other vehicle.
To jump start your vehicle:
1. Switch off the ignition (set the ignition to mode 0, see page 75
).
2. First connect the red jumper cable to the auxiliary battery's positive (+) terminal
.
3. Fold back the cover over the positive (+) terminal on your vehicle's battery
, marked with a "+" sign, located
under a folding cover.
4. Connect the black jumper cable to the auxiliary battery's negative (-) terminal
and to the ground point in your
vehicle's engine compartment (right engine mount at the top, on the outer screw)
.
5. Start the engine in the assisting vehicle, then start the engine in the vehicle with dead battery.
6. After the engine has started, first remove the negative (-) terminal jumper cable (black). Then remove the positive
(+) terminal jumper cable (red).
WARNING
PROPOSITION 65 WARNING!
Battery posts, terminals, and related accessories contain lead and lead compounds, chemicals known to the state of
California to cause cancer and reproductive harm. Wash hands after handling.
CAUTION
Connect the jumper cables carefully to avoid short circuits with other components in the engine compartment.
WARNING
Do not connect the jumper cable to any part of the fuel system or to any moving parts. Avoid touching hot
manifolds.
Batteries generate hydrogen gas, which is flammable and explosive.
Battery fluid contains sulfuric acid. Do not allow battery fluid to contact eyes, skin, fabrics or painted surfaces. If
contact occurs, flush the affected area immediately with water. Obtain medical help immediately if eyes are affected.
Never expose the battery to open flame or electric spark.
Do not smoke near the battery.
Failure to follow the instructions for jump starting can lead to injury.
ProCarManuals.com
Page 99 of 251
Reverse (R)
The vehicle must be stationary when position R is selected.
Neutral position (N)
No gear is engaged and the engine can be started with the gear selector in this position. Apply the parking brake if the
vehicle is stationary with the gear selector in position N .
Drive (D)
D is the normal driving position. The car automatically shifts between the various forward gears, based on the level of
acceleration and speed. The car must be at a standstill when shifting from position R to position D.
Geartronic-manual shifting
Geartronic allows you to manually shift between your vehicle's six forward speeds. Geartronic can be selected at any
time, including while the vehicle is moving.
To access the ( M)anual shifting position from ( D)rive, move the gear selector to the right to M .
To return to the (D)rive position from M , move the gear selector to the left.
106 03 Your driving environment
Transmission
While driving
If you select the M position while driving, the gear that was being used in the Drive position will also initially be
selected in the M position.
Move the gear selector forward (toward "+") to shift to a higher gear or rearward (toward "-") to shift to a lower
gear.
If you hold the gear selector toward "-", the transmission will downshift one gear at a time and will utilize the
braking power of the engine. If the current speed is too high for using a lower gear, the downshift will not occur until
the speed has decreased enough to allow the lower gear to be used.
If you slow to a very low speed, the transmission will automatically shift down.
Shiftlock - Neutral (N )
If the gear selector is in the N position and the vehicle has been stationary for at least 3 seconds (irrespective of
whether the engine is running) then the gear selector is locked.
To be able to move the gear selector from N to another gear position, the brake pedal must be depressed and the
ignition must be in position II , see page 75
.
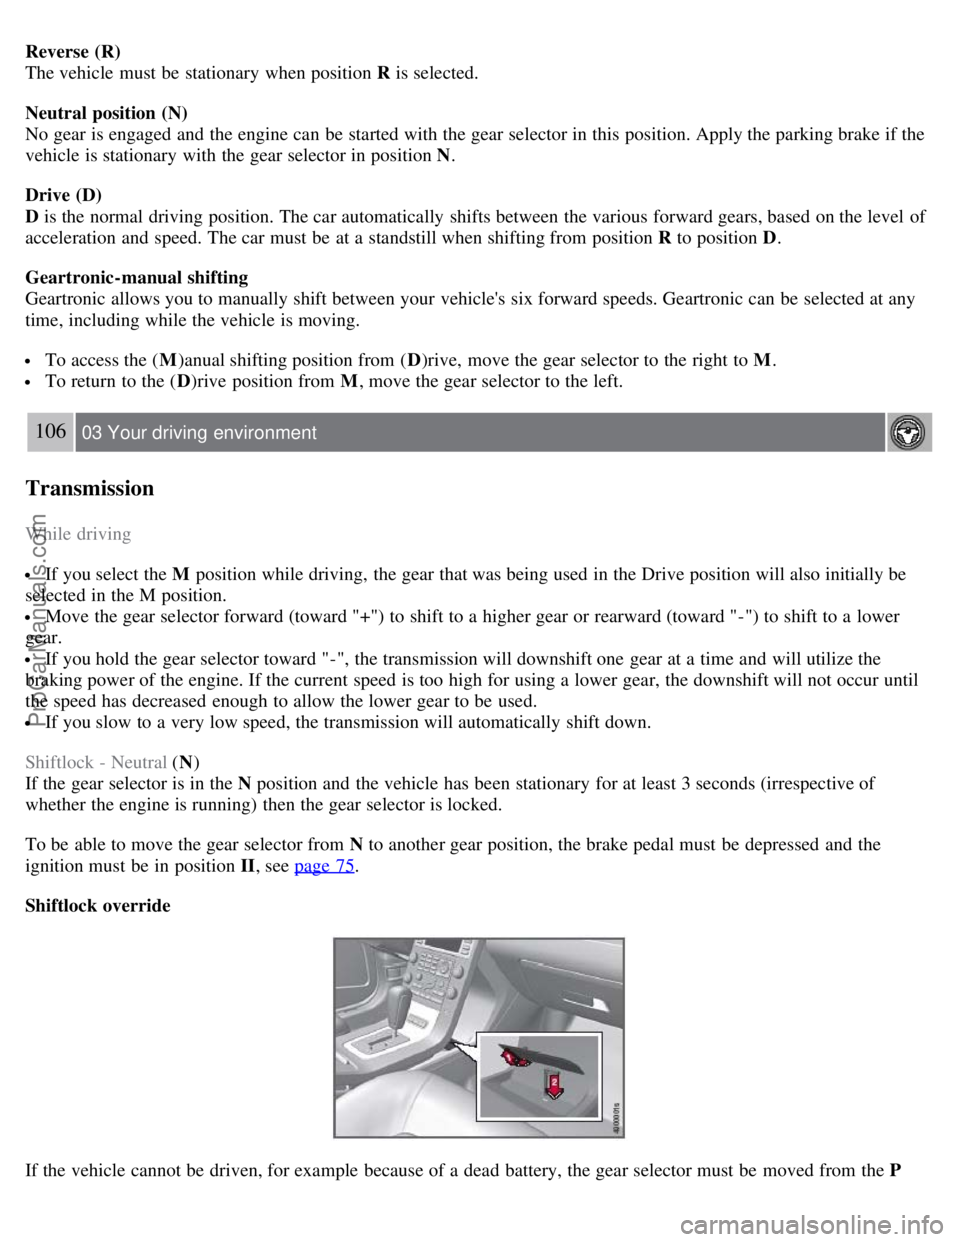
Shiftlock override
If the vehicle cannot be driven, for example because of a dead battery, the gear selector must be moved from the P
ProCarManuals.com
Page 100 of 251
position so that the vehicle can be moved1.
Lift away the rubber mat on the floor of the storage compartment behind the center console and open the hatch.
Insert the key blade into the opening as far as possible. Press the key blade down and keep it held down. Move the
gear selector from the P position. For information on the key blade, see page 48
.
All Wheel Drive - AWD
2
Your Volvo can be equipped with permanent All Wheel Drive, which means that power is distributed automatically
between the front and rear wheels. Under normal driving conditions, most of the engine's power is directed to the front
wheels. However, if there is any tendency for the front wheels to spin, an electronically controlled coupling distributes
power to the wheels that have the best traction.
1If the battery is dead, the optional electric parking brake cannot be applied or released. Connect an auxiliary battery if the battery voltage is too
low, see page 104
.
2Standard on certain models.
107 03 Your driving environment
Brakes
Brake system
The brake system is a hydraulic system consisting of two separate brake circuits. If a problem should occur in one of
these circuits, it is still possible to stop the vehicle with the other brake circuit.
If the brake pedal must be depressed farther than normal and requires greater foot pressure, the stopping distance will
be longer.
A warning light in the instrument panel will light up to warn the driver that a fault has occurred.
If this light comes on while driving or braking, stop immediately and check the brake fluid level in the reservoir.
NOTE
Press the brake pedal hard and maintain pressure on the pedal - do not pump the brakes.
WARNING
If the fluid level is below the MIN mark in the reservoir or if a brake system message is shown in the information
display: DO NOT DRIVE. Have the vehicle towed to a trained and qualified Volvo service technician and have the
brake system inspected.
Power brakes function only when the engine is running
The power brakes utilize vacuum pressure which is only created when the engine is running. Never let the vehicle roll
to a stop with the engine switched off.
If the power brakes are not working, the brake pedal must be pressed approximately five times harder than usual to
make up for the lack of power assistance. This can happen for example when towing your vehicle or if the engine is
switched off when the vehicle is rolling. The brake pedal feels harder than usual.
ProCarManuals.com
Page 103 of 251
5. When parking a vehicle always put the gear selector in P.
WARNING
Press down the parking brake pedal firmly to its full extent.
Parking on a hill
If the vehicle is pointing uphill, turn the front wheels so that they point away from the curb.
If the vehicle is pointing downhill, turn the front wheels so that they point toward the curb.
Releasing the parking brake
1. Press firmly on the brake pedal.
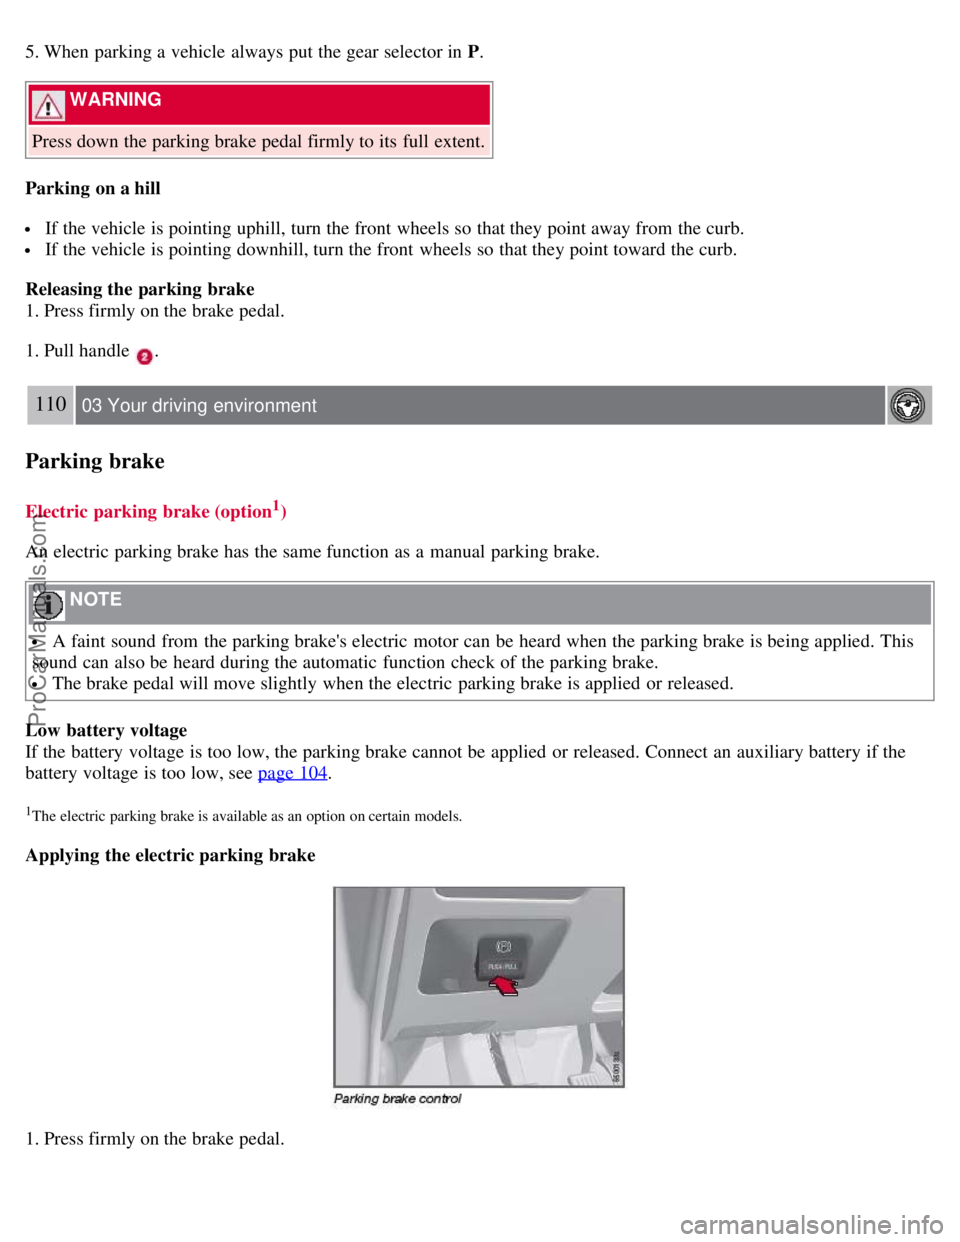
1. Pull handle
.
110 03 Your driving environment
Parking brake
Electric parking brake (option1)
An electric parking brake has the same function as a manual parking brake.
NOTE
A faint sound from the parking brake's electric motor can be heard when the parking brake is being applied. This
sound can also be heard during the automatic function check of the parking brake.
The brake pedal will move slightly when the electric parking brake is applied or released.
Low battery voltage
If the battery voltage is too low, the parking brake cannot be applied or released. Connect an auxiliary battery if the
battery voltage is too low, see page 104
.
1The electric parking brake is available as an option on certain models.
Applying the electric parking brake
1. Press firmly on the brake pedal.
ProCarManuals.com
Page 159 of 251
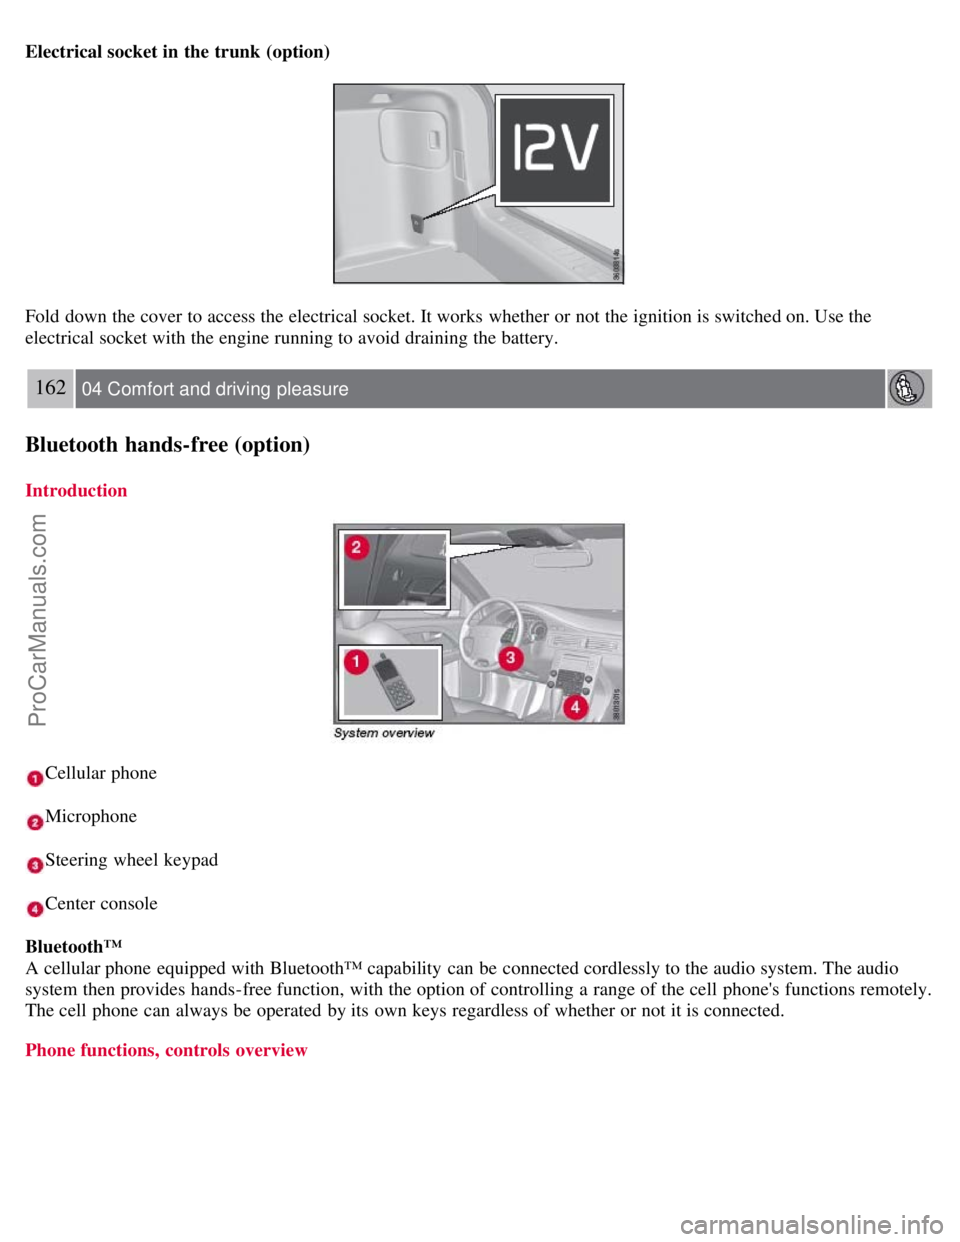
Electrical socket in the trunk (option)
Fold down the cover to access the electrical socket. It works whether or not the ignition is switched on. Use the
electrical socket with the engine running to avoid draining the battery.
162 04 Comfort and driving pleasure
Bluetooth hands-free (option)
Introduction
Cellular phone
Microphone
Steering wheel keypad
Center console
Bluetooth™
A cellular phone equipped with Bluetooth™ capability can be connected cordlessly to the audio system. The audio
system then provides hands-free function, with the option of controlling a range of the cell phone's functions remotely.
The cell phone can always be operated by its own keys regardless of whether or not it is connected.
Phone functions, controls overview
ProCarManuals.com
Page 168 of 251

CAUTION
Engine damage will occur if water is drawn into the air cleaner.
If the vehicle is driven through water deeper than 9 in (25 cm), water may enter the differential and the
transmission. This reduces the oil's lubricating capacity and may shorten the service life of these components.
Do not allow the vehicle to stand in water up to the door sills longer than absolutely necessary. This could result
in electrical malfunctions.
If the engine has been stopped while the vehicle is in water, do not attempt to restart the engine. Have the vehicle
towed out of the water.
Engine and cooling system
Under special conditions, for example when driving in hilly terrain, extreme heat or with heavy loads, there is a risk
that the engine and cooling system will overheat. Proceed as follows to avoid overheating the engine.
Maintain a low speed when driving with a trailer up long, steep hills.
Do not turn the engine off immediately you stop after a hard drive.
Remove any auxiliary lights from in front of the grille when driving in hot weather conditions.
Do not exceed engine speeds of 4500 rpm if driving with a trailer in hilly terrain. The oil temperature could become
too high.
Conserving electrical current
Keep the following in mind to help minimize battery drain:
When the engine is not running, avoid using ignition mode II. Many electrical systems (the audio system, the
optional navigation system, power windows, etc) will function in ignition modes 0 and I. These modes reduce drain on
the battery.
Please keep in mind that using systems, accessories, etc., that consume a great deal of current when the engine is not
running could result in the battery being completely drained.
The optional 12 volt socket in the trunk provides electrical current even with the ignition switched off, which drains
the battery.
Before a long distance trip
It is always worthwhile to have your vehicle checked by a trained and qualified Volvo service technician before
driving long distances. Your retailer will also be able to supply you with bulbs, fuses, spark plugs and wiper blades for
your use in the event that problems occur.
172 05 During your trip
Driving recommendations
As a minimum, the following items should be checked before any long trip:
Check that engine runs smoothly and that fuel consumption is normal.
Check for fuel, oil, and fluid leakage
Have the transmission oil level checked.
Check condition of drive belts.
Check state of the battery's charge.
Examine tires carefully (the spare tire as well), and replace those that are worn. Check tire pressures.
The brakes, front wheel alignment, and steering gear should be checked by a trained and qualified Volvo service
technician only.
Check all lights, including high beams.
Reflective warning triangles are legally required in some states/provinces.
ProCarManuals.com