2007 VOLKSWAGEN GOLF PLUS turn signal
[x] Cancel search: turn signalPage 96 of 541
How to if the passenger front airbag is on or off
Please first read and note the introductory information and heed the on page
Passenger fr ont airbag
if the weight on th e front passenger seat is less than the
a m ount programmed in the e lectro nic contro l
unit.
The fron t airbag on the passenger sid e of the front seat will als o be turned off if the weight regis ter ed on the seat (b y the weight -sensin g m at) is less than o r equal to the combined weight of -a typicall-year-old in fant and -any of the Safe ty Standard for whi ch th e
of the restraints that were used to
ce rtif y your vehicle' s compliance with U.S. Safety
Standard or BAG light comes
o n and stays on to tell you w he n th e front Advanced
A irb ag on the passenger sid e has bee n turned off.
P
assenger f ro nt airbag active
Switch on th e ig nition.
T he weight-sensin g mat regi sters the weight on the front passenger seat. lfthat weight is above the
refer ence val ue , the passenger fron t airbag be activa ted.
If th e ign it io n is on, and the ligh t or PASSENGER BAG light in the in strument pane l do es
light h as burn ed out (see below), yo u be able to tell wheth er the passen ge r front airbag is
active or n ot.
U sin g child restraints on th e f ront passenger seat
The airbag o n th e front passenger side m akes the
front seat a potentially dangerous place for a child
page For a listing of the child
re straints that were use d to certify you r vehicle' s compliance with U.S. Safe ty Standard see your authorized V olkswagen dea le r or auth o rize d Volkswage n Se1vice Facility or page
For more information, see C hi ld safety and child page in How to tell if nirbng is
know when th e passenger fro nt airbag
h
as been turned o ff by th e cont rol unit ?
Th e
BAG light come on and stay on to tell yo u when the front A dvanced A irbag on the passenger sid e has been turned off by t he
e lectron ic control unit. Un less th e ye llo w light
page
For safety reasons, yo u m ust never use a child straint sys te m on the front passenger seat unless the lig ht comes o n and stays on, haps in combinati o n w ith th e indicator light in the instrument clu ster. I f th e passenger front airbag deploye d in an accident. it would severel y injure and possibl y
light burns o ut, the airbag m onitorin g cator light will come on and signal a mal function of the A dva nced Airbag System. Although the bulb
light to make sure that the airbag
Have the airbag sys te m inspect e d ately b y your authorized Volkswagen deale r o r au-thorized Volk swag en Serv ice
94 95
Page 122 of 541
Please first read and no te th e im rod uc tory info rmation a nd heed th e on page
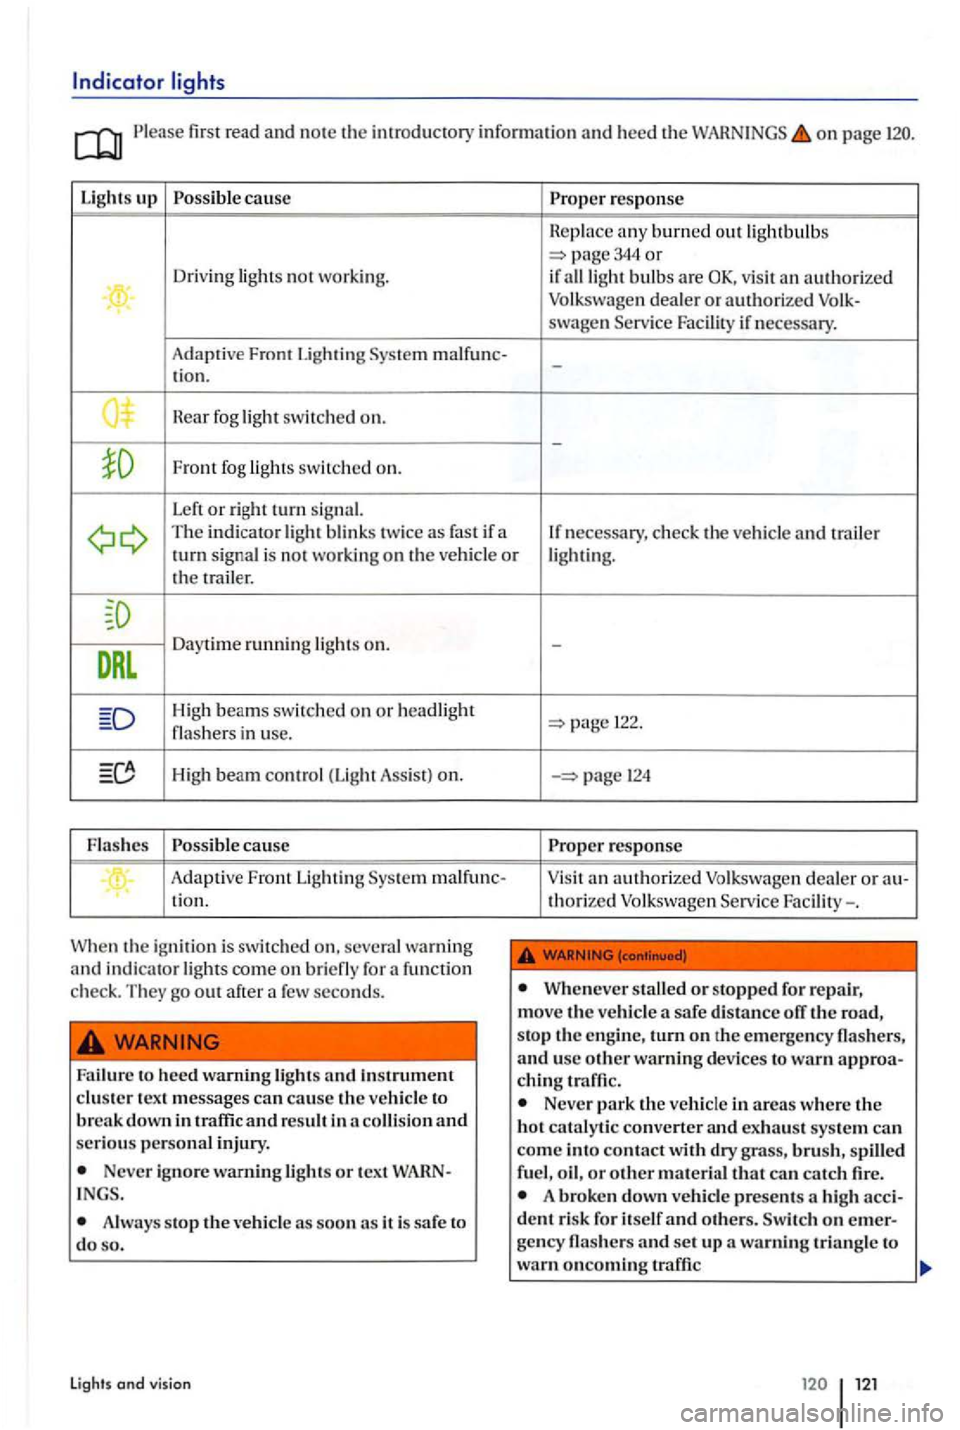
Light s up Possible cau se Proper re sponse
any burned out lightbulb s page 344 or Driving not worki ng.
if ligh t bulbs are d ea le r or authorized ... swage n Serv ice Facility if necess ary.
Adaptive Front Ligh
ting Sys te m malfunc-
t ion. -
near fog s witc h e d on.
-
Front fog
T he in dicato r blin ks twice as fas t if a
If necessary, ch ec k th e vehicle and t railer turn signal is not wo rking on the vehi cle or
DRL
Daytime runnin g on.
High beams switched on or headligh t in use.
High beam co ntrol (Lig ht Assis t) on.
F las h
es Poss ible cause
.. Adap tive Front Lighting Syste m malfun c-tio n.
Whe n the ig nition is swi tched
Failure to heed warning light s and Instrument clu ste r t ex t m essages can cause the vehicle to break down in traffic and result in and seriou s personal injury.
Never i gno re warn ing lights or t ex t INGS.
Alwa ys stop the as soon as it is safe to do so.
light s and vision
-
122.
Proper respon se
a n authorize d
Wheneve r safe di stance ofT the sto p th e e ng in e, turn on th e em erge ncy flasher s,
and usc other warning dev ices to warn chin g
Neve r park the ve hicl e in areas where th e
h o t catalyt ic converter and exhau st syst em can
come int o contact with dry grass, brush, oil , or other m ate rial that can catch fire. A broken down ve h icle present s a high
ge ncy flash ers and se t up warning triangl e to
wa rn oncoming traffic
Page 123 of 541
Note
Failure to heed warning lights or tex t can result in vehicle damage.
Turn signal le v e r and high beam switch
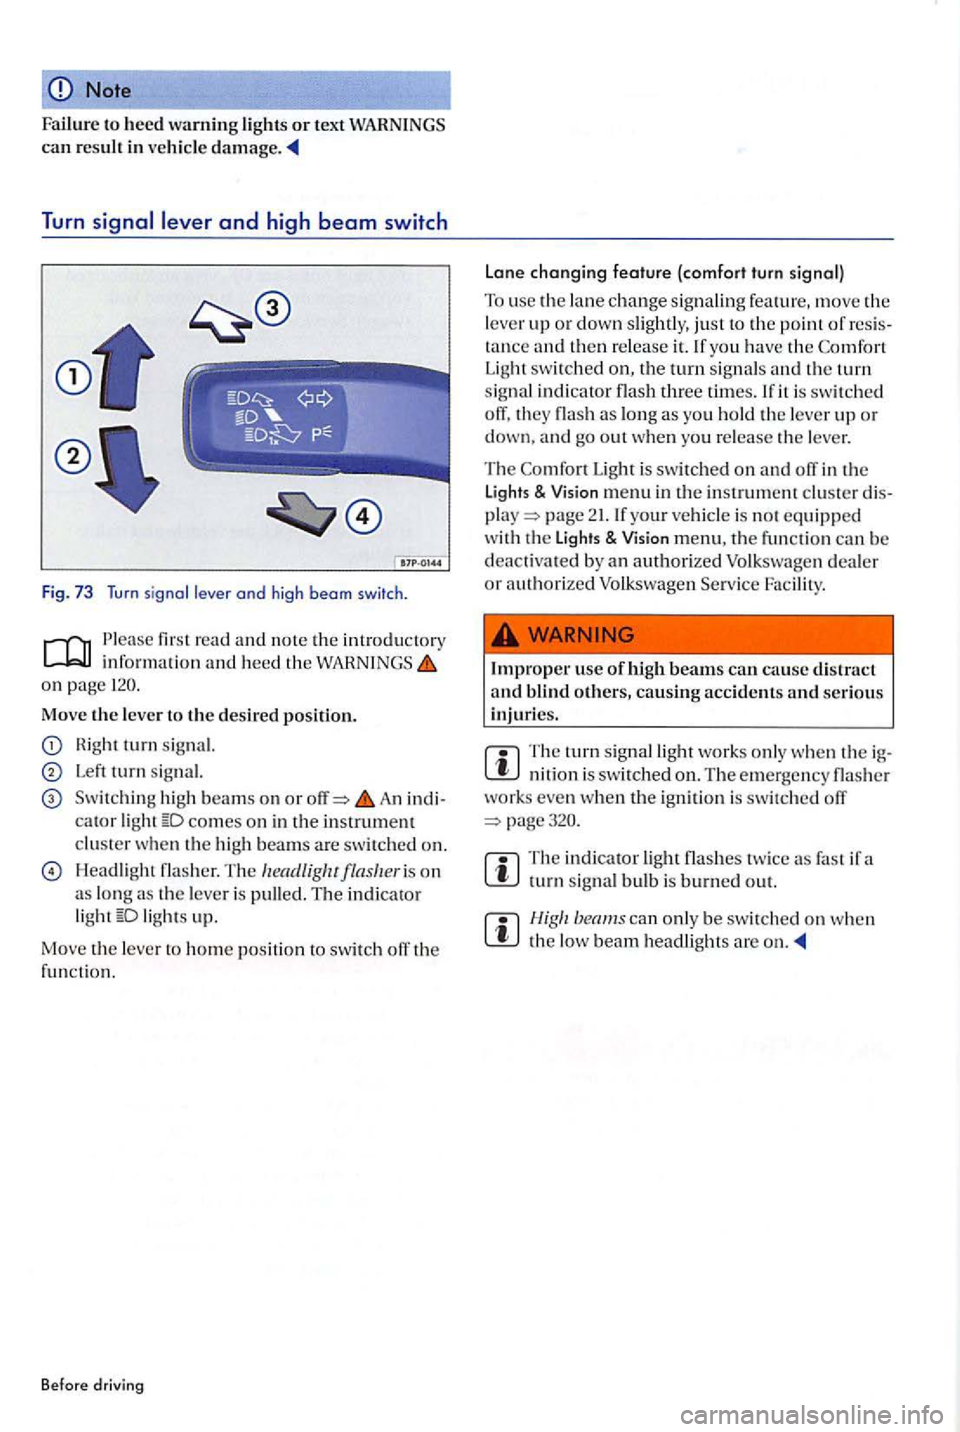
Fig. 73 Tu rn sig nal leve r and high b eam switch.
P lease first read and note the introduc to ry informa tio n and heed the on page
signal.
Left sig n al.
hi gh beams on o r An
H eadlig h t fla sh er. The headligluflash eris o n
a s lon g as th e lever i s pulled . The indicator light
Light is swi tc h ed on and off in the Lights & Visio n m enu in tl1e instrument clu ste r page 21. If your v e h icl e is not e q uipped
w ith th e Lights & Vision menu, the
The turn signal works only when the
The indicator light fla sh es tw ic e as fast if a turn s ignal bul b is burned out.
the beam headlights are on .
Page 125 of 541
Lights and Vision functions
Please first read and note the introdu ctory information and heed the on page
Da ytime running lights
Separa te l
amps are installed in the
Turning on daytime running light s
Press a
nd hold the turn signal leve r and high beam switch and to th e back (right s ig nal an d
h eadlight flash e r).
The daytime running lights are switched on every
tim e the ignitio n is swit ch ed on and the light
swi t
ch is in pos ition or T he indicato r light DRL in the in slrument cluster in dicates th e t iva te d function page 121.
If the light sw itch is in position
page
Automatic headlight control
Aut omati c headl ight contro l is resource only and cannot a lways recogn ize all driv ing situ ations.
Automatic activati on:
I f th e tw
ilig ht sensor reg isters darkness, for
km /h ).
If the ra in
sensor recog nizes rain and switches th e windshield wipe rs o n.
Adoptive
Front Lighting
T he Adaptive Front Lightin g
mounte d lamps automatically improve road mination durin g co rnerin g.
veh icles equipped with th e feature is sw itched o n and page
som e m ode ls. the headlight s move dentl y of eac h other, eve n in strai ght-ahead
drivi ng. They adapt to weather con diti ons and speed to be n er illum in ate th e roadway. The light s return to t heir orig in al posit io n after a delay ,
dependin g on th e s pee d of the ve hicle.
B
efor e driv in g If
the light switch is
in the positio n , veh icle
lighti ng, as as instrument and switc h nati on, automatically turn on and off in the lowing
brightness is regis te red.
I f drivi ng u
nder mph (65 km /h ) for
tlles.
I f
the win dshie ld wipe rs have no t moved for
an d other accidents can happen w hen yo u cannot see the road ahead and w hen yo u
cannot b e seen by other motorists.
Never use daytime running lights to see where you a re going . Daytime running lights a re
not bright enough to
T he ta illi ghts do not come on w he n the time runni.n g lights are switch ed on. A vehicle without ta illight s on cannot be seen by o th ers
w hen it is dark or raining or v is ibility is o ther-
wis e poor.
Page 154 of 541
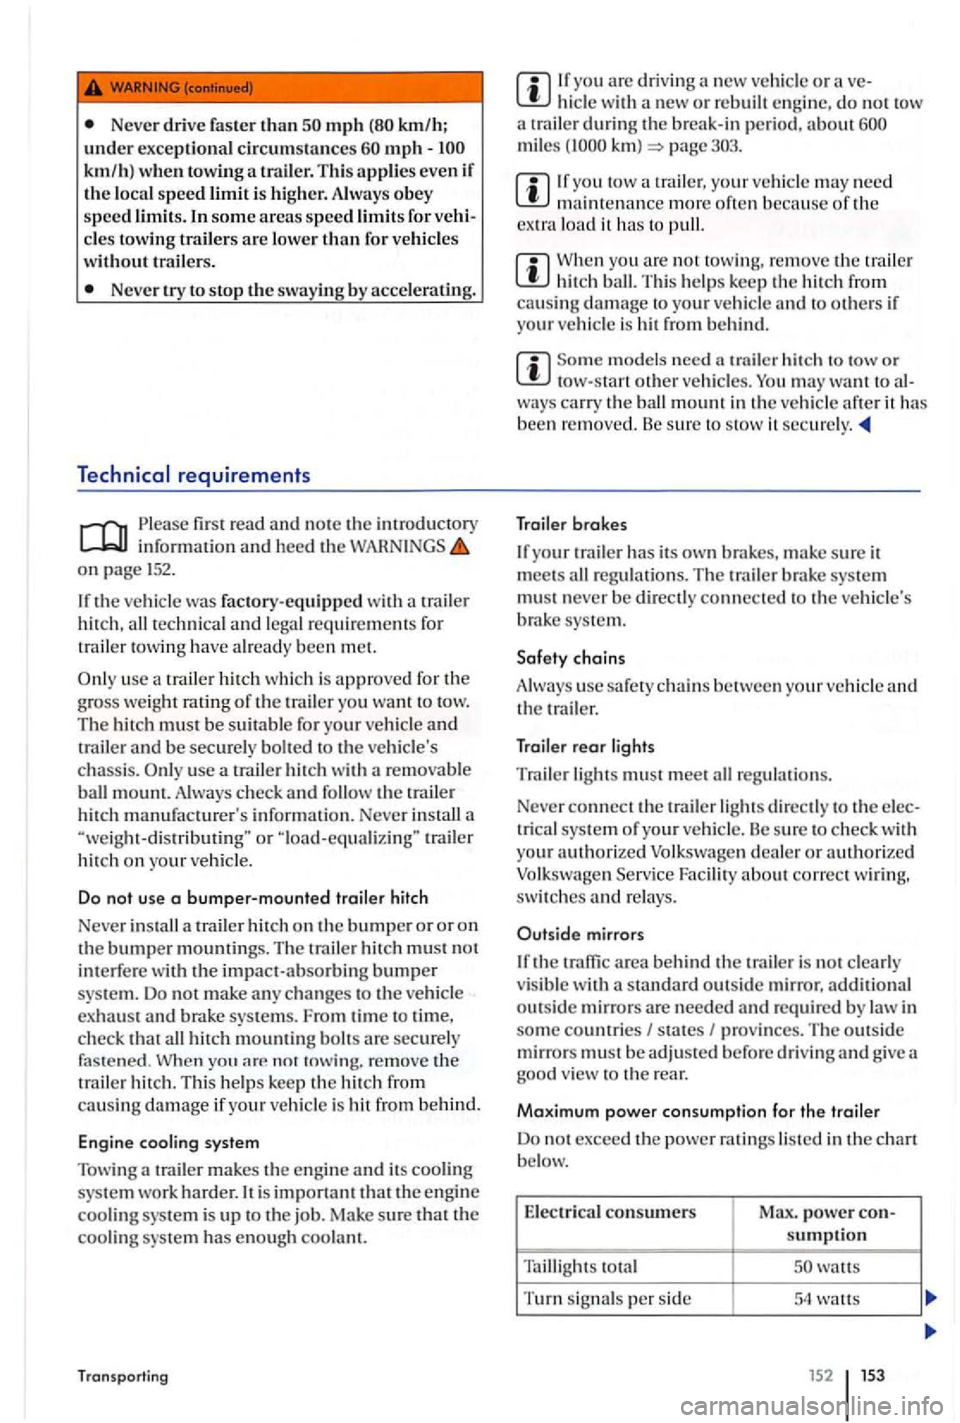
Never drive fa ster than mph mph -
Never try to stop the swaying by accelerating.
fir st read a nd note the imroductory informatio n and heed the on page
If the ve hicle was fac tory-equipped with a trail er
hi tch, all technical and lega l require m em s fo r
trailer towi ng have already been m et.
use a trai le r hitc h w hich is approve d for the
g ro ss wei ght rating of the trailer yo u want to tow. The hit ch mus t be s uitabl e fo r your vehicle and
tr ailer and be securely bolt ed to the ve hicle's chassis. use a trail er hitc h with a re movable ball mount. Alway s check and follow the trail er
hi tch manufacturer's information. Neve r in stall a o r tra ile r hitch on yo u r vehicle.
D o n
ot use a bumper-mounted trai le r h itch
Never insta
ll a trailer hitch on the bumper o r or on th e bumper mountings. The traile r hit ch mus t not in terfe re wit h the impact-absorbing bumper syste m . D o not make any changes to the ve hicl e exhaust and brake sys te m s. From time to time, check that all hitch m oumin g bolts are securely fas ten ed . W hen not towing. re m ove the trailer hi tch. Thi s help s ke ep the hitch from causin g damage if your ve hicl e is hit from behind.
Eng ine cooling syste m
Tow ing a tra
iler makes the e ngin e
If you arc dri ving a new ve hicle or ave-do not tow
a t railer
mil es
need
load it h as to pull.
When you are not towin g, remove the trailer
models need trail er hit ch to tow or tow -s tart other ve hicl es. may
Trailer brakes
If your trail er has its own brake s, make sure it
meet s all regulati ons. Th e trailer bmke sys te m
mu st never be directly connecte d to the ve hicle's brake system .
Safety c
hain s
A lways u
se safety chains be tween yo ur vehicle and
th e trailer.
Trail er rear lights
Tra
ile r lights must meet all regulation s.
Neve r
connect the tmil er l ights directly to the e lec
trica l s ys tem of your ve hicl e. Be su re to check wit h
your authorized Volkswagen dealer or authorized Volk swagen Faci lit y about correct w iring, sw itches and re lay s.
Outside mirrors
I f
the s ta ndard ou ts id e mirror, addition al outs ide m irrors are needed and required b y law in so me coumrie s I states I provin ces. The o uts id e
mirr o rs mus t b e adjuste d b efore driv in g and g ive good v iew to the rear.
Max im um power consump tio n f or th e trailer
D o no t excee d the power ratin gs liste d in the chart below.
E l
ectrical consumers power con-sumptio n
Taillight s
Turn signals pe r sid e 54 wat ts
Page 235 of 541
Refueling checklist
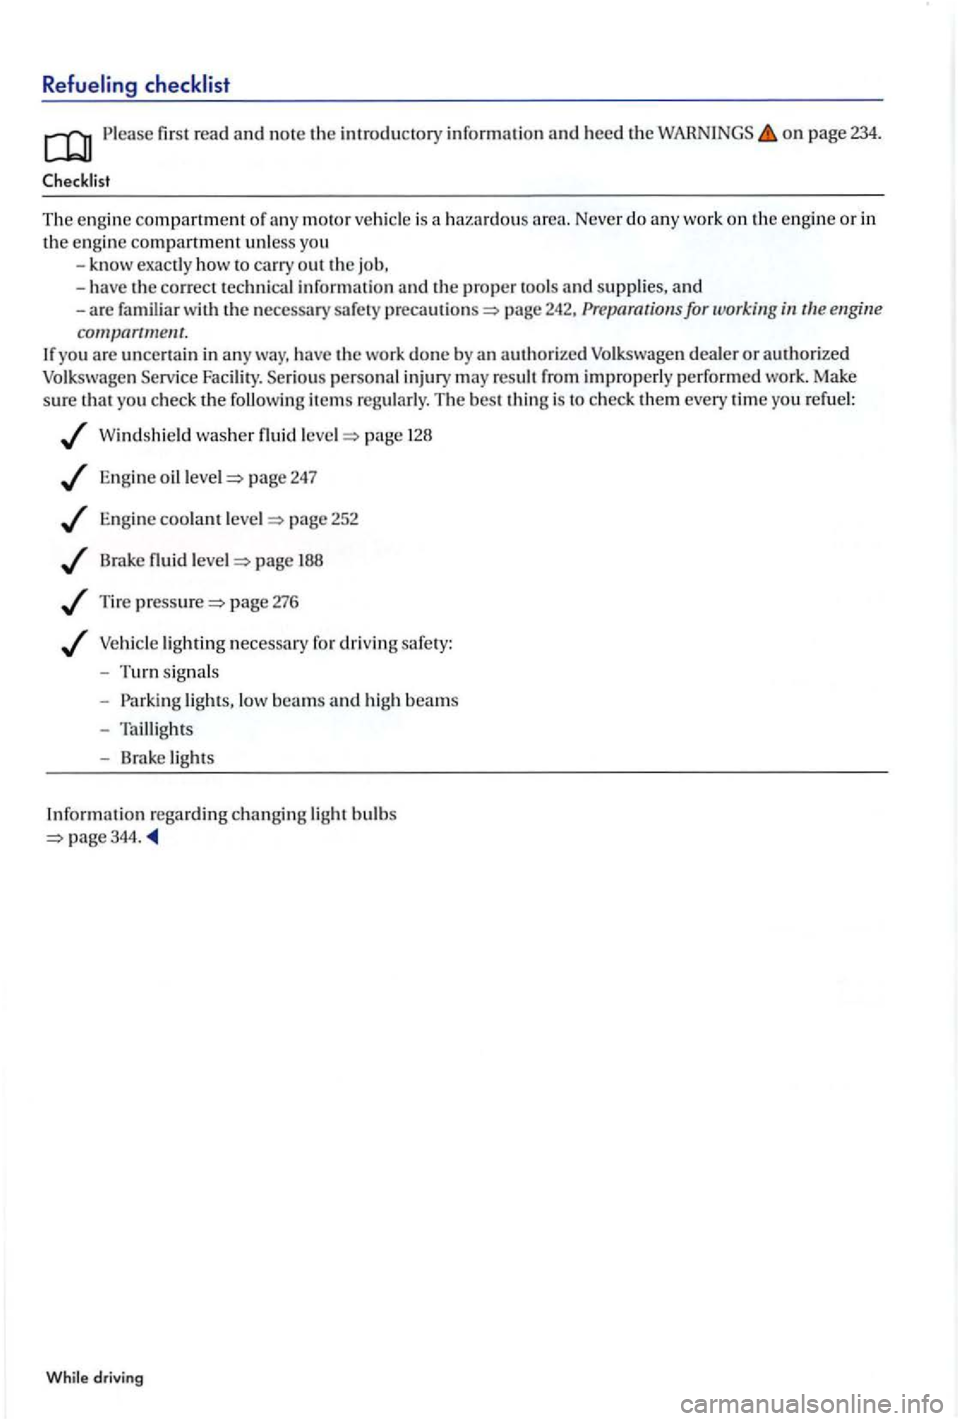
first rea d an d note the introductory information and heed the on page 234.
The engi ne compartment of moto r vehicle is a haza rdous engine or in the engin e compartment unless yo u -know exac tl y how to carry o ut the job,
-have the correct technical in formation and the proper too ls and supplies, and -ar e familiar with the necessary safety precautions page 242, Preparation s for working
have the work done by an authorized Volkswagen dealer or authorized Volkswag e n Serv ice Facility. Ser ious personal injury may result from improperly perform ed work. Make
s ure that y ou check the followin g item s re gu larly. The bes t thin g is to check them every time you refue l:
Wind sh ie ld was her fluid leve l page 128
E ng in e oil leve l page 247
Engin e coolant leve l page 252
Brake fluid level page 188
Tire pressure page 276
Vehicle lighting necessary for drivin g safe ty:
-Turn signal s
-
li ghts, low beams and high beams
- Taillights
- Brak e light s
Inf
ormat ion regard ing changing light bul bs page 344.
While dri ving
Page 343 of 541
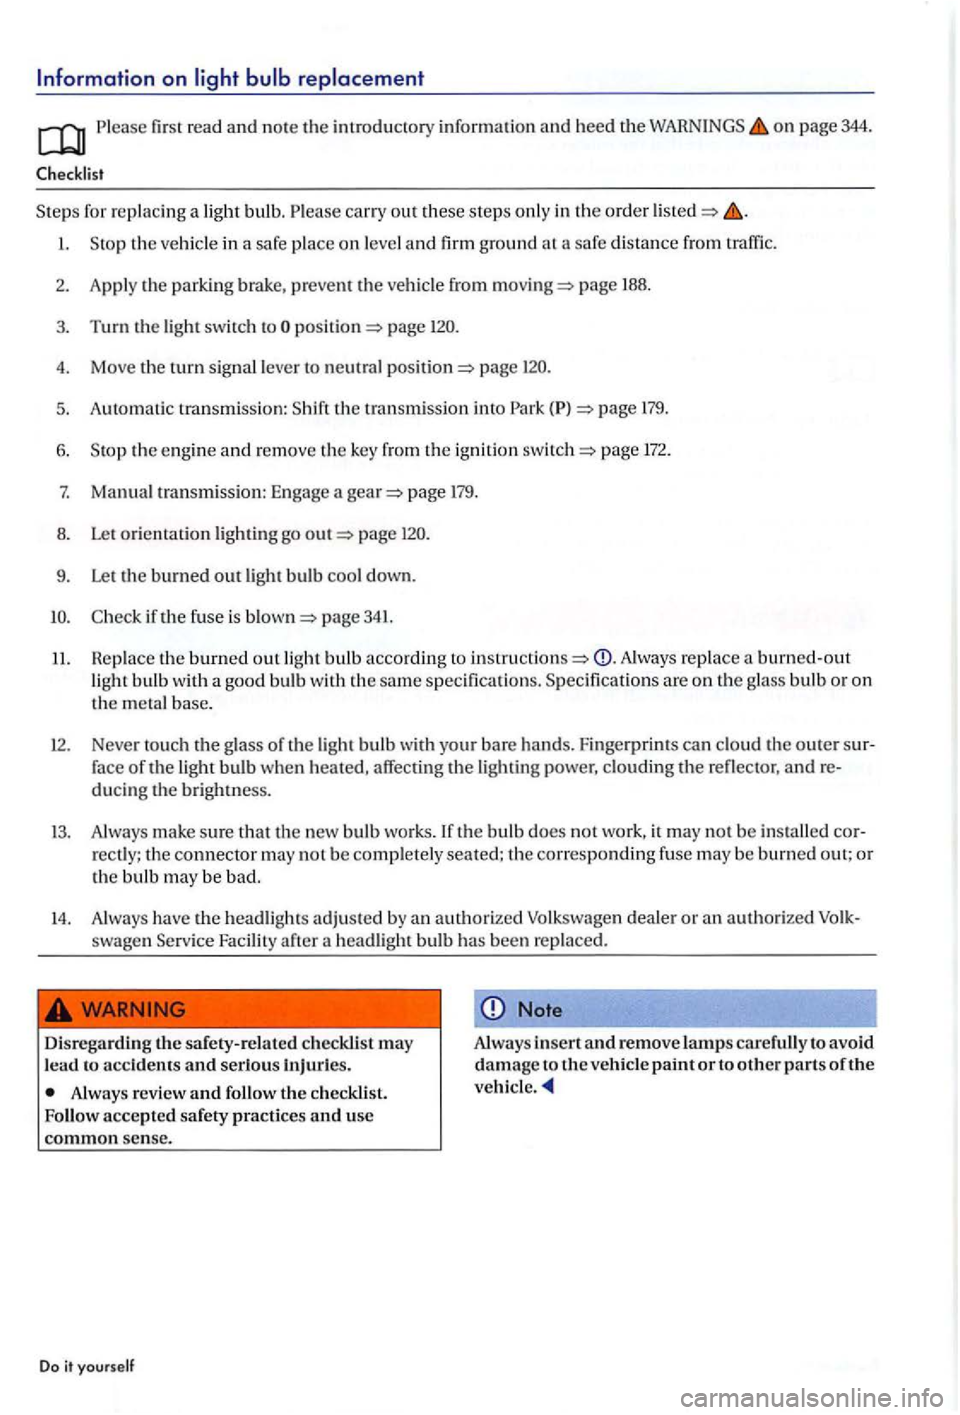
Please first read and note the introdu cto ry information and heed the on page 344.
for re pla cing a light bulb. Please carry out these ste p s only in the order
page 188.
3. Turn the light switch page
4. Move the tu rn signal lever to neutral page
5. Auto mati c transmission: 179.
6. the eng ine and re move the key from the ig ni tion page 172.
7. Manu al transmission: Engage a page 179.
8. Let orie nt ation lighting go page
9. Let the burned out light bulb cool down.
page 341.
11. R e place the burned out light bulb accordi ng Always replace a burned-out light bulb with a good bulb with the sa me s pecifications. Specifications are on the g lass bulb or on
the meta l base.
12. Neve r tou ch the glass of th e light bulb with your bare hands. Finge rprin ts can clo ud t he o uter sur
f ace of the light bulb when heated, affec ting the lighting power, clouding the reflector, andre
d u ci ng th e brightness.
13. Always make sure th at the new bulb works. the bulb does not work, it may not be installed cor
rectly; the connector may no t be co mplet ely seated; the correspondin g fuse may be burned out; or the bulb may be bad.
14. Always have th e headligh ts adj usted by an authorized Vol k swage n dealer or an a uth orized swagen Service Facility
to accidents and serious Injuries.
Always review and follow the
Note
Alway s insert and remove lamps car efully to avoid damage to the vehicle paint or to other parts of the
Page 344 of 541
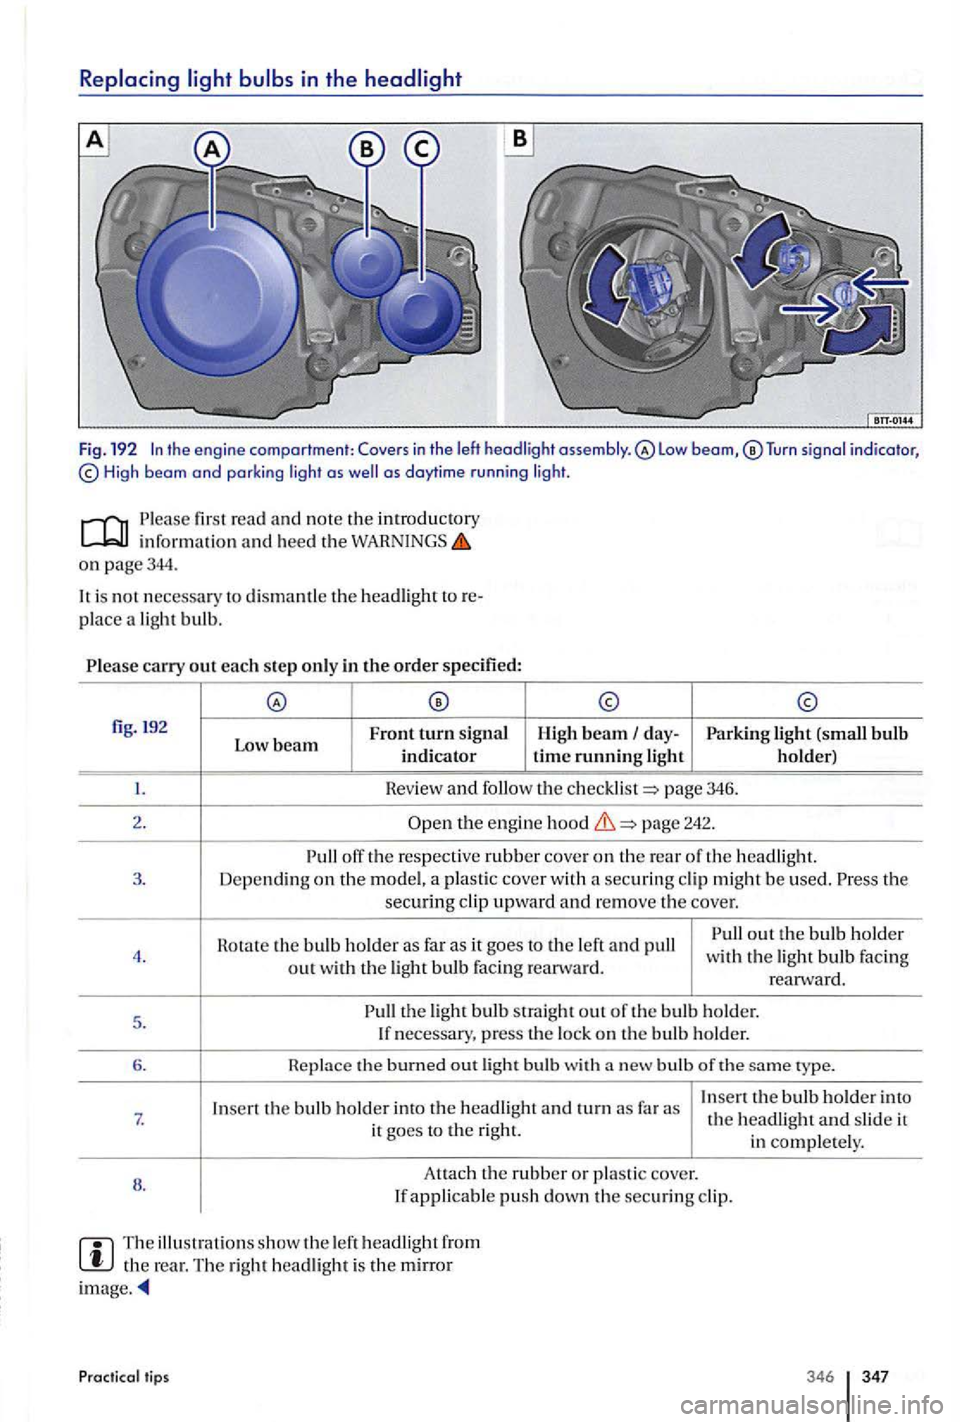
in the
Tu rn signal indicator, High beam and parki ng light as as daytime r u n ni ng lig ht.
fir st read and no te the introductory inform ation and heed the o n page344.
is no t necessary to dismantle th e headlight
pl ace a light bulb.
carry out each step only in the order specified:
fig. !92
Front turn sig n al
Low beam indicator H ig h beam day-Parking light (small bulb time running light h older)
Hev ie w and follow th e page 3 46.
2.
t h e engine page 2 42.
off the respective rubber co ve r on th e re a r o f th e 3. Dep endi ng on the model, a plas tic cove r w ith a securing cl ip mig h t be used. th e secu ring cl ip upward and r emove the c o ve r.
Rotate th e bulb h older as far as it goes to the left and pull out the bul b h old e r 4. with the light bulb Faci ng
out with t h e ligh t bulb facing rearw ard. rearward.
5 .
the light bulb straight out o f th e bulb ho ld er.
I f necessary, press the lo ck on th e bulb holder.
6. the burned out light bulb with bulb of th e ty pe.
I n
sert the bulb holder into the headlight and turn far as Insert th e bulb holder into 7. th e headligh t and sli d e it
it goes to the right.
in complete ly .
8 . Attac
h
the rubber or pla sti c c over. If applicable push down the securing cl ip.
The illu stra ti ons s how the le ft headlight fro m the re ar. The right h eadlight is the mirror ima ge.
Practical lips 346 347