2007 VOLKSWAGEN BEETLE check engine
[x] Cancel search: check enginePage 65 of 138

Downloaded from www.Manualslib.com manuals search engine To adjust, turn the control CD to:
-Set~ng I Vehicle load lev~la) -------
1
2
3
Fron t seats occupied and luggage
compa rtment
empty.
All seats occupied and luggage com
partment empty.
All sea ts occ upi ed and luggage com
partm ent fully loaded . Towing a trai le r
wit h a
lo w drawbar load .
Only the driver sea t occupi ed and lug
ga ge compartm ent fully load ed . Tow
ing a trai le r w ith maximum drawbar
l
oad.
a) If you have diff ere nt loads. you can select a positi on be
tween th e settings.
Dynamic headlight range control
Th ere is no control CD for headlight range if the ve
hicle
has dynamic headli ght control. The head light
r ange is
automatically adapted to suit the ve hicle
load level as soon as the headli ghts are switched
on~&.
Instrument and switch lighting
The brightness of the in strument and switch li gh t
ing can be adjusted using the @ill button and the
~and !Ltght] function buttons in the infot ainm ent
system
~page 31 .
Depending on the vehicle equipment level, it may
be possible to adjust the brightness of the instru
ment and switch lighting to suit your requirements
by turning control® when the headlights are
switched on.
Interior and reading lights
Instrument cluster lighting
The instrumen t cl uste r ligh ting sw it c hes off auto
mati cally
in darkness and at other times, e.g . when
driving through a tunnel. This is in tended to prompt
the driver to switch on the dipped beam so that the
v e hi cle' s rea r l
ights are swit c hed on ~page 109.
.A WARNING
-
Heavy objects in the vehicle can cause the
headlights to dazzle and distract other road
users. This can lead to accidents and serious
injuries.
• The light cone should always be adjusted
to the load level of the vehicle to ensure that
other road users are not dazzled.
A WARNING
A failure or malfunction in the dynamic head
light range control can cause the headlights
to dazzle or distract other road users. This
can lead to accidents and serious injuries.
• Proceed to a qualified workshop to have
the headlight range control checked immedi
I
ately. ~--------------- --------------------~
ClJ] First read and observe the introductory information and safety warnings & on page 105.
Button
~REAR
Function
Switches the front interior lights on or off.
Switches the rear interior lights on or off.
Switches the door contact switch on or off.
The interior lights are switche d on automatically when the vehicle is unlocked , a door
is opened, or the ve hicle key is removed from the ignition lock.
The light will go out a few seconds after all doors are closed, the vehicle is locked, or
the ignition is switched on.
/q'j/
---------j Switches the reading lights on or off.
Lights and vision 113
Page 67 of 138

Downloaded from www.Manualslib.com manuals search engine ..,
Windscr n wiper and washer
illlr t,lt 1pl11t t;OIII tlt H il.f orrn tllon nn ll tfl followln~J
\Id !jOt .I :
l t
Hih;r tl n t ltntp ... o o •• ,,,.,,, 0,,., 0
0,,... 117
Wll t(h <:r,
fltVI<;Il ponltlon fm l!H l front wind · ,ro n
wl1 )()I~ I I I I I I f I I I f f I I I I I I I f t o 1 1 1 1 1 1 1 o 1 o o 119
Hnln 1 lltuo r ... , , • , •. , .... , • . • . . . • . . . . . . 120
Cl10c:klng ntKJ r()fllll nn lllc wlnd scroc n wa her
fllt ld lo vo l ........ , .... , ................ 12 1
Additio na l Information and w arnings:
• xto rlor vlo w ~~ p:-~ge 6
• Chnnoino o or ~ pnf:Jo 1 9
• Hoo ting , v ntil n ting , O()ling ~page 256
• ropr:m1tlon fo r w orkin g In th e e ng in e compart -
m ont -, p ago 2 77
• C l anl ng a nd carin g fo r th e ve hi cle ex te rio r
~ Pi1QO 29 4
A WARNING
Without adequate frost protection, the wash
er fluid c a n freeze on the windscreen and ob
scure your view of the road.
Indicator lamp
A W AR NIN G (Co ntinue d) 7 ~--· -cc . I
·~
• In winte r t emperatures, the windscree n
w as h er yste m s
hould only be used when ad
equate fro, t protection has been adde d .
• N evo r use the windscreen wash er system
a t winter t emperatures b efore the windscreen
has boo n h eate d by the ventilation s y ste m .
T he
anti-free ze mixture may otherwis e freeze
on tho windscree n and restrict vision.
A WARNING
.. · ._,
Worn or dirty windscreen wiper blades re
duce visibility and increas e the ris k of acci
d ents and severe Injuries.
-
• Windscreen wiper blades should therefore
always be changed if they are damaged or
worn and no longer clean the windscreen
properly.
In icy conditions, always check that the wiper
blades are not frozen to the glass before using
the wipers. When parking the vehicle in cold
weather, it may be helpful to leave the front
windscreen wipers in the service position
~page119.
Lit up Possible cause
Windscreen washe r fluid le ve l too lo w .
Seve ra l w arn in g and indica to r lamps ~ill lig ht ~ p
brie fly a s a fun cttonal c heck when th e 1gnttto n IS
s wi tched on. The y will sw it c h off afte r a fe w sec-
o nd s.
Solution
F ill up t he washe r fluid r ese rvoi r as soon a s
p oss ible
~page 12 1.
Failure to observe illuminated indicator lamps
and text messages can lead to your vehicle be-
ing damaged.
Page 79 of 138

Downloaded from www.Manualslib.com manuals search engine • Please note that the driven wheels can
\start to spin and the vehicle can skid If the
lCS i w1tched off, especially If the road Is
slippery.
•
Switch the TCS back on after acceleration.
attempt to stop it from rolling back by depress·
lng the accelerator while a position is still se
lected. The automatic gearbox could overheat
and be damage d .
• Never allow the vehicle to roll In posi tion N ,
particularly If the Ignition is s w itched off. The
automatic gearbox w ill not be lubricated and
could be damaged .
r-'('n F irst read and observe the introductory
L-Wl Information and safety warnings .&. on
page 169 .
Emergency programme
There is a fault in the system if all the displays on
the mstrument clu ste r for the se lector le ve r posi
tions have a light background. The automatic gear
box is running in an emergency programme. The
vehicle can still be driven in the eme rg ency pro
gramme, but only at reduced speed and not in all
gear s.
In vehicles with a dual clutch gearbox DSG®, y o u
may
no longer be able to select reverse gear.
In all cases the automatic gearbox should be
checke d
by a qualified workshop immediately.
Overheating of the dual clutch gearbox
DSG®
The dual clutch gearbox can overheat when th e
vehicle pulls off re
gularly, travels at a crawl for long
penods, or in s
top and go traffic . Gearbox over- .
heating
is i ndi cate d by the w arning lamp 0 and tn
some cases by a text m essage in the instrument
cluste r d1splay . An acoustic warni ng may also be
heard . Stop the ve hi cle and allow th e gea rbox to
cool down
~CD.
The vehicle will not move forwards or
backwards even though a gear has been
selected
If the veh1cle w11l not move in the requi red direc
tio n, the system may have selected the pos1tion m
correctly Depress the bra e pedal and reselect the
pOSitiOn
If th e vehicle st1ll does not move tn the requ1red di
re ction , th ere IS a system fault. Seek expert assis
tance and have the system checked
• If the display indicates that the gearbox is
overheating for the first time, the vehicle will
have to be parked safely or driven faster than
20 km/h (12 mph) .
• If the text message and acoustic warning
are repeated approximately every 10 seconds,
the vehicle must be parked safely immediately
and the engine switched off. Allow the gearbox
to cool down.
•
In order to prevent damage to the gearbox,
you should not drive on unti l the acousti c
warning stops. You should not pull away or
drive the vehicle at very low speeds while the
gearbox is overheated.
' 177
~
l
I
i
t
Page 81 of 138
Downloaded from www.Manualslib.com manuals search engine • o;;--"cc A WAR'I'G (Contmued)
tf the brake warning lamp 0 does not go
'Jt or if it lights up when driving, the brake Ol , . • fluid level in the reservoir IS too low or there
is a fault in the brake system. Stop the vehi
c le immediately and seek expert assistance
=>page 188 , Brake fluid.
, tf the brake warning lamp ID lights up to
gether with the ABS indicator lamp 8, the
control function of the ABS may have failed.
This can cause the rear wheels to lock quick
ly when you brake. Locked rear wheels can
lead to a loss of control of the vehicle. If pos
s ible, reduce your speed and drive carefully
at low speed to the nearest qualified work
shop in order to have the brake system tes
ted . Avoid sudden braking and driving ma
noeuvres on the way.
• The ABS is not functioning correctly if the
ABS indicator lamp Et does not go out or
com es on while the vehicle is in motion. The
Electronic parking brake
BSIV)•~9
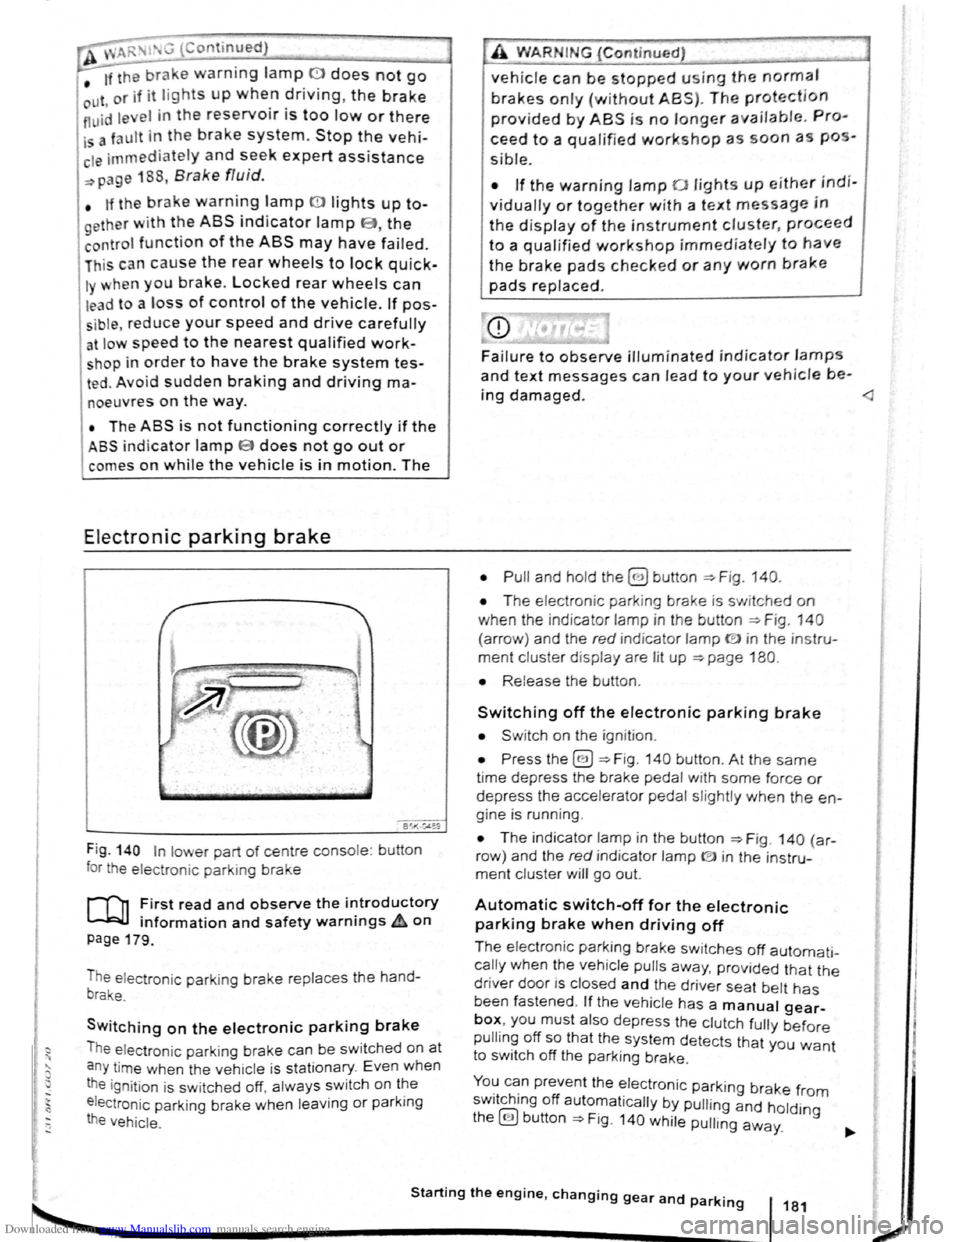
Fig . 140 In lower part of centre console : bu tton
for the electron ic parkin g brake
rf'n First read and observe the i~troductory
~ information and safety warnmgs A on
page 179.
The electronic parking brake replaces the hand
brake.
Switching on the electronic parking brake
The elec tron ic park ing brake can be swit ched on at
a n y time when the vehic le
is stationary . Even when
the ignition is sw itched off, always switch on the
e lectroni c parking brake when leaving
or parking
the vehicle .
_,
A WARN IN.G (Continued) .,~ ,1
vehicle can be stopped using the normal
brakes only {without ABS). The protection
provided by ABS is no longer available. Pro
ceed to a qualified workshop as soon a s pos
s ible.
• If the warning lamp 0 lights up either indi
vidually or together with a text message in
the d isplay of the instrument cluster, proceed
to a qualified workshop immediately to have
the brake pads checked or any worn brake
pads replaced.
Fa i
lure to observe illuminated indicator lamps
and text messages can lead to your vehicle be-
ing damaged.
• T he electron ic park ing brake is switched on
when the indicato r lamp in the button ::;;. Fig. 140
(a rro w) and the red indicator lamp ID in the instru
ment cluster displ ay are lit up ::;;. page 180.
• Release the button .
Switching off the electronic parking brake
• Swit ch on the ignition .
• Press the@) ::;;. Fig . 140 button . At the same
time depress the brake pedal with some force or
depress the accele rator pedal slightly when the en
gine is run ning .
• The indicator lamp in the button =:;.Fig . 140 (a r
row ) and the red indicator lamp ® in the instru
ment cluster will go out.
Automatic switch-off for the electronic
parking brake when driving off
The elec tronic parking brake switches off automati
cally when the vehi cle pulls away, prov ided that the
driver door is closed and the drive r sea t belt has
been fastened . If the vehicle has a manual gear
box, you must also depress the clutch fully before
pulling off so that the system detects that you want
to switch off the parking brake.
You can prevent the electronic parking brake f 0 . h. ff r m sw1tc 1ng o automat ically by pulling and hold.
the@) button::;;. Fig. 140 while pulling away. lng
Starting the engine, changing gear and parking 181
2
Page 82 of 138
Downloaded from www.Manualslib.com manuals search engine Aut mall wit h-o n of the electronic
p ar kin IJr ke If n o t activated properly whe n
th drlv r I av s the v ehicle
I h e .lec,lr uni park ing br ake s wit ch es itsel f on au
lortmlh ,RIIy In the fu llowlng Insta nces wh en the
JrivP-r I . avqs Ill v hlt,le :
• Wlr
t1 tile v hicl Is in gea r posi trons 0, S or R ,
ur If ll r lo t.! o r I v r Is I n t11e T ip tro nic posi tion
• Wl r c n tl re lgr rlll un is s wit ch d o n
• Wi 1 rt tire V l li c le Is s tatio na ry
• If ll re driv r uoor Is o pe n .
rn rge ncy braking function
1 11 n 1 rg on y br kin g fun ction sho uld only be
u s
d In those sit u atio ns wh ere the vehicle cannot
be slurped u ln g the foot br ake ~ &!
• Pull and hold the 8 butt on ~Fig. 14 0 to br ake
tir e ve hl
le sharply. An aco ustic sig na l ca n b e
hoa rd at the sa me lime.
•
T o sto p the br ak ing proced ure, re lease the§
b utt on or d epress th e acce le ra to r pedal.
The Incorrect use of the electronic parking
brake can cause accidents and serious inju
ries.
P arking
r-f11 First read and observe the introductory
l-J,.:JJ Information and safety warnings A on
page 179.
P lea e adhere to re leva nt legisla tion when stop
p in g
a nd pa rk in g your ve h icle .
S
topping the vehicle
Th e ta p s ho uld only be carr ied out in t he speci
flo d o rd or.
• Sto p the ve hi cle o n a sui tab le s urface ~ &,
• Depress a nd ho ld th e br ake ped al u ntil th e e n
gi ne ha
stoppe d .
• Swit ch o n the electr onic pa rking brake
. ~ pnye 18 1.
• With a n auto m atic gea rbox, move the selecto r
lo ve r to pos ition P .... #..
• Swit ch off th e engi ne a nd take your foo t off the
br ake pedal.
• Rem ove th a ve hi cle k e y from t he ignit ion lock .
• rurn the stee ring wheel s lig htly if necessa ry to
engage th e vtee ring lo ck mec h anism .
While driving
• The electronic parking brake should ne
be used to brake the vehicle, except in em '>'er
gencies. The braking distance is considerae.r .
bly longer as only the rear wheels are braked.
Always use the foot brake.
• Never activate the accelerator from the en.
gine compartment if a position or gear has
been selected and the engine is running. The
vehicle could move, even if the electronic
parking brake is applied.
m In veh rcles with a manual gea rbox: v. hen the
l..!J clu tch peda l is released a nd t he accelera
pedal depr essed at th e sa me time , th e e lectron
parkin g bra ke will be re leased autom aticall y
m If th e ve hicl e ba ttery is flat it w ill not be po~<:
L!J ble to re lease th e e lectro nic parking bra e.
U se
jump lead s =:>page 370 .
m Some norses ma y be hea rd wh en the elec·
W Iron ic p ark in g b ra ke is sw itch ed on or ff.
r::l If th e e le ctron ic park in g b ra ke has not been
W used fo r a long period , th e s ys te m will carry
out occa siona l automa tic a nd acou stic check s
when the ve hicl e is pa rk ed .
• With a m anu al gearbox , se lect 1st gea r for f.at
groun d and u phill incl in es , or re ve rse ge ar ()(
downh ill incl ines , a nd then r elease e dutch.
• Ple a se ensur e t hat all o ccup an s. i n pa
ch ildren , lea ve th e ve h icl e.
laf
• Take a ll ve hicl e ke ys with yo u w en you tea 'e
th e ve h icl e.
• lock the ve h icle .
Additional points for ascending and
descending inclines
Be fore SVIitchin g off th e e ng in e , turn e s eeriP:1
wheel so that th e fron t wheels w ill roll aga i st me
kerb if the parked ve icle start s to mo e.
• Whe n fa cing downhill , turn tl e ~s SO tf'\3!
they fa ce e ke rb.
•
Whe n fa cing up ill , turn e omeels so IP8t tt
<
1821
---------------------- ------~~
Page 91 of 138
Downloaded from www.Manualslib.com manuals search engine • When a vehi cle doo r is opened .
• When the TCS or ESC systems are taking cor
rective action.
• If the vehicle is sta tionary for longe r than ap
proximately
3 minutes .
~ ~~ .....
A WARNING
'"
Do not allow the images shown on the screen
to distract you from the traffic around you.
ParkPilot menu
r-('n First read and observe the i~troductory
l.-.l.:JJ information and safety warnmgs on
page 201.
ParkPilot settings in the infotainment
system menu
Switch on the ignition .
If necessary , switch on the infota inment system .
Function button: action
CD
Failure to observe thhe.ill
1
umbi~ated text messag.
es can lead to the ve tc e emg damaged .
1:1 lt can take a fe w seconds be for e the area
L!J scanned by the sensors ls displayed on the
screen
of the factory- fitted infot ainm ent system .
Press the@) button .
Touch the
G fu n ction button .
Touch the
(Parkmg and mAnoeuverin g) fun ction button.
Select the required settings in the ParkPilot
menu .
[10Act1vate automatically ): 1f the checkbox 1n the functio n button is t1cked ~.the mini display will be SWitched
on automat ically when the vehicle slowly approaches an obstacle located to the front. Touc h .
[10Act1vate automat1ca lly) again to switch off this function . After deactiva tion, the ParkPilot will no t be activated
automatically when the veh1cle approa ches an obstacle located to the front.
(Front volume): d1fferent volumes can be set separately fo r the acoustic warnings for the fron t by touching
the 8 or 8 funct ion butt ons , or by adJusting the control. ___
(Front p1tch): different pit ches can be set for the acoustic warnings for the front by touching the 0 or G
fun ction buttons , o r by adjust1ng the control.
(Rear volume) : different volumes can be set for the acoustic warnings for the rear by touchtng the 0 or G
function buttons. o r by adjusting the control. _
(Rear p1tc h ): different pitches can be set for the acoust ic warmngs for the rear by tou ch ing the 0 or 8 tunc·
tio n buttons . o r by adjusting the control. _
~~==~==~~~~-=~~--~~~-----------------------------~---(AudiO volume reduct1on): settmg the level to which the infota inment system volume should be reduced when
the ParkPilot 1s act1ve.
Audio volume reduction
Menu option Explanation
r.O:-ff ___________________ -+-=T~he::.._ . ..:.v.:..ol:.:u::.m.:..:e~i~n:,:th~e~~n~fotamment sytem is not reduced. __ ----
Low Th e volume in the infota1nmen t sytem IS red~c;;d ~~~~tly. _..
Medium The volume in the infota inment syt e m is red uced to ~~~d1unl. -
Strong Th e 1 . - -11111un1. vo ume m the infota1nmen t sytem is reduced to a 11111
Muting the ParkPilot
You can mute the acoustic signals from the ParkPi
lot by touching the (!) fun ction button on the info
tainment system screen. Pr ess the functio n button
again to switch the acoustic warnings back on.
206 While driving
park Pilot The mute setting will be ca ncelled 1f the rn·
system is switched off and on again . Error w a
ings canno t be swi tc h ed off.
. d off ntJfl'
If the ParkPilot display has been sw1tcl'~9 et·
ually
and ParkP1Iot remains act1ve. the nnlt s t
tlng is also cance lled .
Page 94 of 138
Downloaded from www.Manualslib.com manuals search engine ~ ; ) J
Reverse assist system (Rear Assist)
eo Introduction
ThiS c hflp t r co nlc:tln s Informa tio n on th e fo llowing
subjor.ts :
G 11 rat Infor m ation . . . . . . . . . . . . . . . . . . . . . . 210
Parking ....... ········· ....... . ........ 2 12
A cam era in th e ta il g a te he lp s th e driver when re
ve rsing o r m an o e uv ring the ve hi cle . The came ra
picture and th e o rienta tio n lin e s projecte d by the
syste m are di sp la ye d o n the s creen of th e facto ry
littcd ra d io or n avi gatio n sy ste m .
Additional information and warnings:
• Exte rio r v ie ws ~p age 6
• Accessories, modifica tio ns , re pai rs a nd re ne w al
of parts ::>p ag e 32 0
•
=>Bookle t R ad io o r ~Booklet N av iga tio n sy s
te m
A WARNING
Using cameras to estimate the distance from
obstacles (persons, vehicle etc. ) is inaccurate
and can cause accidents and severe injuries.
• The camera lens enlarges and distorts the
field of vision and makes objects on the
screen appear to be different and imprecise.
• Certain objects, for example narrow posts
or grids , may be difficult or impossible to see
on the screen because of its low resolution or
poor light conditions.
• The camera has blind spots within which
obstacles and people cannot be detected.
• Keep the camera lens clean, free of snow
and ice and do not cover it.
A WARNING
~------------~--------~~~------~ The technology of the Rear Assist system
cannot overcome the laws of physics or sys
tem-related vehicle limitations. Careless or
unintentional use of the Rear Assist system
can cause accidents and severe injuries. The
system is not a substitute for the full concen
tration of the driver.
• Adapt your speed and driving style to suit
visibility, weather, road and traffic conditions.
• Keep looking to check the direction in
which you are parking and the relevant area
around the vehicle. The front of the vehicle
swings out more than the rear of the vehicle.
•
Do not allow the images shown on the
screen to distract you from the traffic around
you.
• Always monitor the area around the vehi
cle as the cameras will not always detect in
fants, animals and objects.
• The system may not be able to d isplay all
areas clearly.
• The Rear Assist system should only be
used when the tailgate is fully closed.
• The camera only shows two-dimensional
images on the screen. The lack of depth of field
means that recesses and protruding objects on
the ground may only be detected with difficulty,
or may not be detected at all.
• The camera may not always be able to de
tect objects such as thin rails, fences, posts,
trees etc. This can result in damage to your ve
hicle.
Driver assist systems 209
Page 96 of 138
Downloaded from www.Manualslib.com manuals search engine 1) The Roar A
ss is t s y ste m should not be used in the following situations:
-If the rear of the ve hi cle is heavily loaded.
-If tl'e driv er is no t famili a r with the sy s tem .
-If the pos ition or angl e of the cam era has changed, e.g . following a rear-end collision. The system
sh ould be checked by a qualifi ed workshop.
2) Optica l deception by the camera :
The Rear Ass is t r eve rs ing camera only supplies two-dimen sional image s. Due to the lack of depth of field
on the sc ree n, potho les and dips in the ground , protruding parts on another ve hicle or protruding objects
on the gro und may be difficult or impossible to see on the image .
Objects or other ve hicles m ay appear closer or further away on the screen than they actually are.
-If you d rive from a le ve l surface onto an upward or downward slope.
-If you drive from an upward or downward slope onto a level surface .
-If the rear of th e ve hi cle is hea vily loaded .
-
Whe n app roac hing protruding objects. Su ch obje cts can leave the camera 's field of vision while you are
r e ve rs
ing.
Cleaning the camera lens
Keep the cam era le ns clean and free of ice and
s n o w :
• Switch o n the ignition .
• Switch on the electronic parking brake.
• Selec t re ve rse gea r.
• Moisten the le ns with a commercially available
alcohol- b ase d glass clea ner and clean the le ns
with a dry clot h ~CD.
• Remove snow with a brush .
• Remove ice with a de -ice r spray ~CD.
• Never use an abrasive cleaning product to
clean the lens.
•
Never use warm or hot water to remove
snow and ice from the lens of the camera . The
lens could otherwise be damaged.
m lt is not possible to open the tailgate if the
W V olkswagen badge is folded out.
m Volkswagen reco mmends that you practise
W parking with the rear assist system in a traf
fic-calmed area or car park with good vision and
we ather conditions .
In this way you can become
familiar with the system and the orientation lines in
a safer environment.
m The rear assist system cannot be switched
W on if the tailgate is open . <1
Driver assist systems