Page 158 of 611

1492007 TUNDRA from Jul. ’07 Prod. (OM34463U)
XS13096
Canada only
Ty p e B
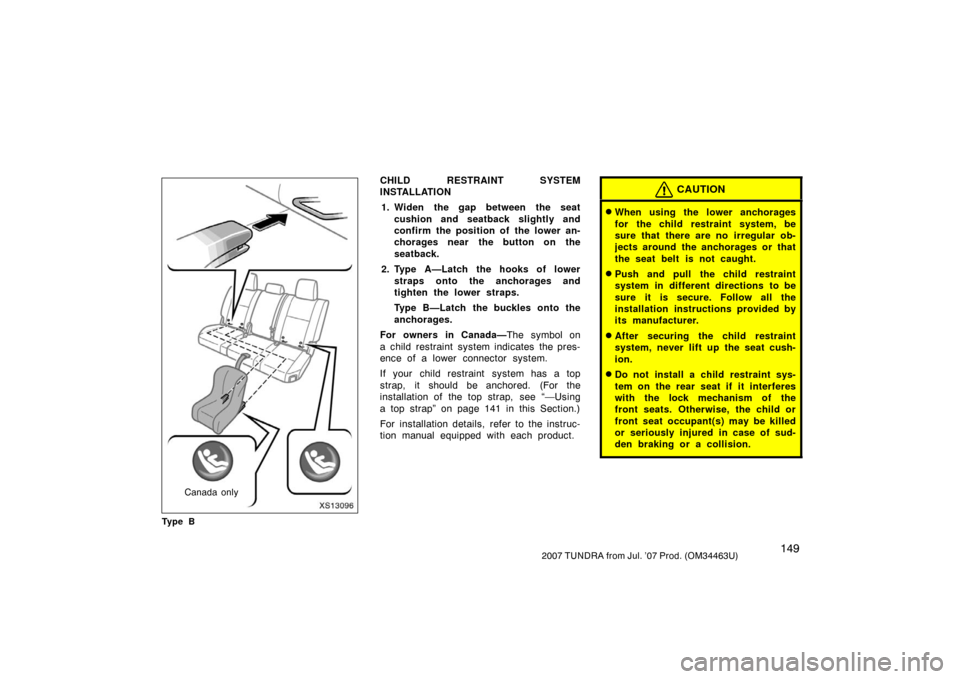
CHILD RESTRAINT SYSTEM
INSTALLATION1. Widen the gap between the seat cushion and seatback slightly and
confirm the position of the lower an-
chorages near the button on the
seatback.
2. Type A—Latch the hooks of lower straps onto the anchorages and
tighten the lower straps.
Type B—Latch the buckles onto the
anchorages.
For owners in Canada— The symbol on
a child restraint system indicates the pres-
ence of a lower connector system.
If your child restraint system has a top
strap, it should be anchored. (For the
installation of the top strap, see “—Using
a top strap” on page 141 in this Section.)
For installation details, refer to the instruc-
tion manual equipped with each product.CAUTION
�When using the lower anchorages
for the child restraint system, be
sure that there are no irregular ob-
jects around the anchorages or that
the seat belt is not caught.
�Push and pull the child restraint
system in different directions to be
sure it is secure. Follow all the
installation instructions provided by
its manufacturer.
�After securing the child restraint
system, never lift up the seat cush-
ion.
�Do not install a child restraint sys-
tem on the rear seat if it interferes
with the lock mechanism of the
front seats. Otherwise, the child or
front seat occupant(s) may be killed
or seriously injured in case of sud-
den braking or a collision.
Page 159 of 611
1502007 TUNDRA from Jul. ’07 Prod. (OM34463U)
XS13203
Lower anchorages for the child restraint
systems complying with the FMVSS225
or CMVSS210.2 specifications are
installed in the rear seat.
The anchorages are installed in the gap
between the seat cushion and seatback of
both outside rear seats as shown in the
illustration.
Child restraint systems complying with the
FMVSS213 or CMVSS213 specification
can be fixed to these anchorages. In this
case, it is not necessary to fix the child
restraint system with a seat belt on the
vehicle.
XS13206
3rd lock
position1st lock
position
CHILD RESTRAINT SYSTEM
INSTALLATION
1. Fold down the seatback and back to the 1st lock position (most upright
position) until it locks into place.
Adjust the seatback to the 3rd lock
position.
Make sure the seatback is locked secure-
ly.XS13204
Canada only
Ty p e A
—Installation with child
restraint lower anchorages
( C rew Max mo d els)
Page 160 of 611

1512007 TUNDRA from Jul. ’07 Prod. (OM34463U)
XS13205
Canada only
Ty p e B
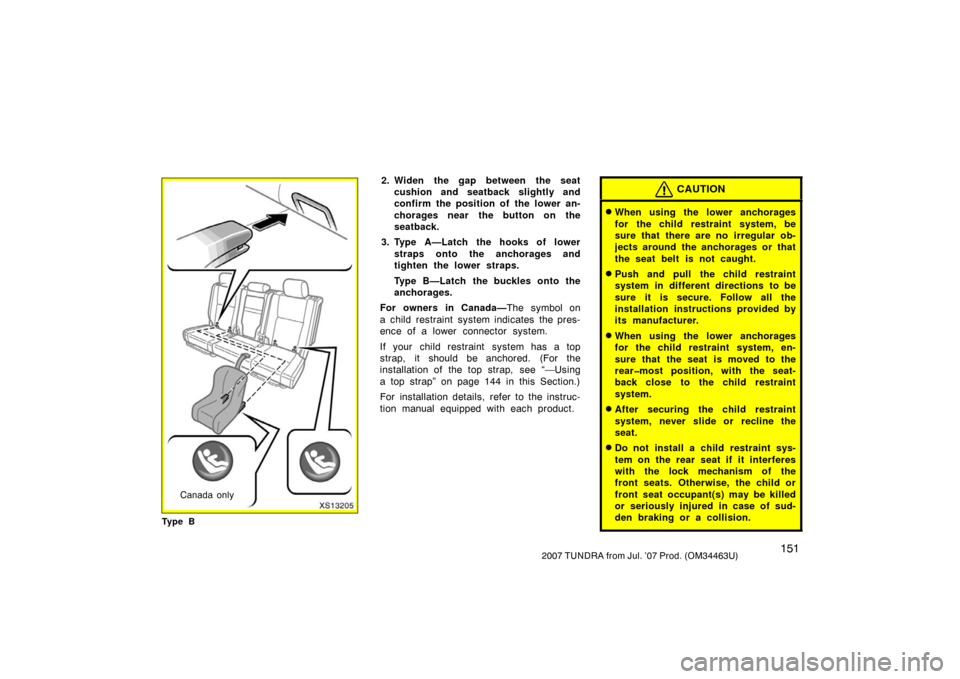
2. Widen the gap between the seat cushion and seatback slightly and
confirm the position of the lower an-
chorages near the button on the
seatback.
3. Type A—Latch the hooks of lower straps onto the anchorages and
tighten the lower straps.
Type B—Latch the buckles onto the
anchorages.
For owners in Canada— The symbol on
a child restraint system indicates the pres-
ence of a lower connector system.
If your child restraint system has a top
strap, it should be anchored. (For the
installation of the top strap, see “—Using
a top strap” on page 144 in this Section.)
For installation details, refer to the instruc-
tion manual equipped with each product.CAUTION
�When using the lower anchorages
for the child restraint system, be
sure that there are no irregular ob-
jects around the anchorages or that
the seat belt is not caught.
�Push and pull the child restraint
system in different directions to be
sure it is secure. Follow all the
installation instructions provided by
its manufacturer.
�When using the lower anchorages
for the child restraint system, en-
sure that the seat is moved to the
rear�most position, with the seat-
back close to the child restraint
system.
�After securing the child restraint
system, never slide or recline the
seat.
�Do not install a child restraint sys-
tem on the rear seat if it interferes
with the lock mechanism of the
front seats. Otherwise, the child or
front seat occupant(s) may be killed
or seriously injured in case of sud-
den braking or a collision.
Page 318 of 611

3092007 TUNDRA from Jul. ’07 Prod. (OM34463U)
The audio system controls in the instru-
ment panel allow the operation of the rear
seat entertainment system by rear seat
passengers to be disabled.
Turning on the rear system lock prevents
small children from using the remote con-
troller or operation panel of the DVD play-
er unit to operate the rear seat entertain-
ment system during driving.
Turn the audio system on. Push the
“AUDIO CONTROL” knob repeatedly until
“RSE” is displayed. Then, turn the “AUDIO
CONTROL” knob until “ON” is displayed,
and then push the “AUDIO CONTROL”
knob.
Z18031E
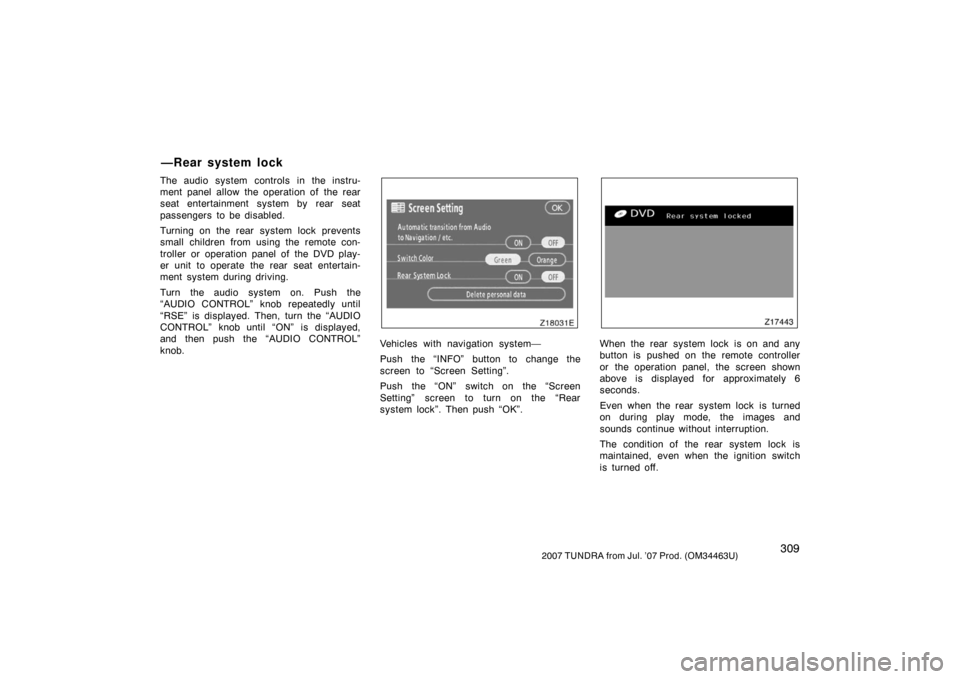
Vehicles with navigation system—
Push the “INFO” button to change the
screen to “Screen Setting”.
Push the “ON” switch on the “Screen
Setting” screen to turn on the “Rear
system lock”. Then push “OK”.
Z17443
When the rear system lock is on and any
button is pushed on the remote controller
or the operation panel, the screen shown
above is displayed for approximately 6
seconds.
Even when the rear system lock is turned
on during play mode, the images and
sounds continue without interruption.
The condition of the rear system lock is
maintained, even when the ignition switch
is turned off.
—Rear system lock