Page 179 of 458
179
27p190
(b) manually
When the auto connection failed or
turned off, you have to connect
Bluetooth� manually.
Touch the “Connect” switch after hav-
ing enabled the Bluetooth � connection
on the phone.
27p191
When the connection is completed, this
screen is displayed.
Now you can use the Bluetooth � phone.
�Reconnecting the Bluetooth � phone
If the Bluetooth � phone is disconnected
with a poor reception from the
Bluetooth � network when the “ACC” or
“IG�ON” mode is enabled, the system
automatically reconnects the Bluetooth �
phone. In this case, the connection
result is not displayed.
If the Bluetooth � is disconnected on pur-
pose such as you turned your cellular
phone off, this does not happen. Recon-
nect it by the following methods.
�Select the Bluetooth � phone again.
�Enter the Bluetooth � phone.
Page 202 of 458
202
27p244
2. Do the detailed settings of thescreen and touch “OK”.
27p245
�Receiving Call Display
You can select the method of the re-
ceiving call display.
Touch the “Full” or “Icon” switch.
Full mode When a call is received, . . . . . .
the hands −free screen is
displayed and you can
operate it on the screen.
Icon mode The message is . . . . .
displayed on the upper
side of the screen. You
can only operate the
steering switch.
27p246
�Auto answer
When a call is received, the display
automatically changes to the talking
screen and you can start to talk on the
phone (without touching any switch) af-
ter the preset time.
Touch the “ON” switch of “Auto An-
swer” and “�” or “+” switch to adjust
the waiting time of auto answer within
1 � 60 seconds.
Page 255 of 458
255
26p126
Ty p e 3
Scan tuning: Push the “SCAN” button or
touch the “SCAN” switch (AM mode only)
briefly. “SCAN” appears on the display.
The radio will find the next station up or
down the band, stay there for a few se-
conds, and then scan again. To select a
station, push the “SCAN” button a second
time. Preset scan tuning:
Push the “SCAN”
button or touch the “SCAN” switch (AM
mode only) and hold it until you hear a
beep. “P. SCAN” appears on the display.
The radio will tune in the next preset sta-
tion up or down the band, stay there for
a few seconds, and then move to the next
preset station. To select a station, push
the “SCAN” button a second time.
26p263
Ty p e 1
Ty p e 2
Page 277 of 458
277
26p246b
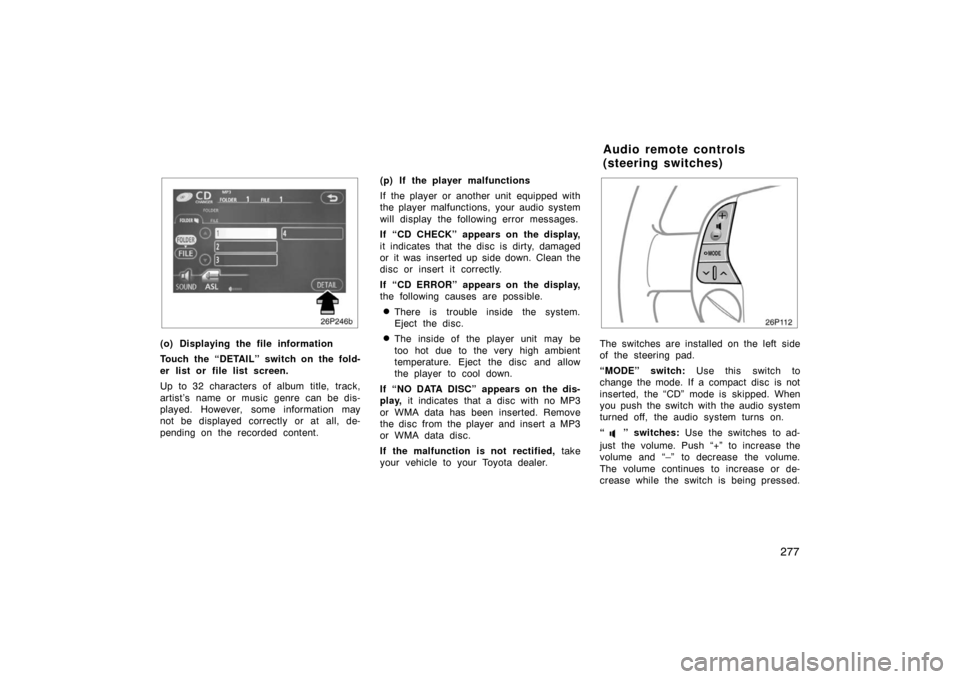
(o) Displaying the file information
Touch the “DETAIL” switch on the fold-
er list or file list screen.
Up to 32 characters of album title, track,
artist’s name or music genre can be dis-
played. However, some information may
not be displayed correctly or at all, de-
pending on the recorded content.(p) If the player malfunctions
If the player or another unit equipped with
the player malfunctions, your audio system
will display the following error messages.
If “CD CHECK” appears on the display,
it indicates that the disc is dirty, damaged
or it was inserted up side down. Clean the
disc or insert it correctly.
If “CD ERROR” appears on the display,
the following causes are possible.
�There is trouble inside the system.
Eject the disc.
�The inside of the player unit may be
too hot due to the very high ambient
temperature. Eject the disc and allow
the player to cool down.
If “NO DATA DISC” appears on the dis-
play, it indicates that a disc with no MP3
or WMA data has been inserted. Remove
the disc from the player and insert a MP3
or WMA data disc.
If the malfunction is not rectified, take
your vehicle to your Toyota dealer.
26p112
The switches are installed on the left side
of the steering pad.
“MODE” switch: Use this switch to
change the mode. If a compact disc is not
inserted, the “CD” mode is skipped. When
you push the switch with the audio system
turned off, the audio system turns on.
“
” switches: Use the switches to ad-
just the volume. Push “+” to increase the
volume and “–” to decrease the volume.
The volume continues to increase or de-
crease while the switch is being pressed.
Audio remote controls
(steering switches)
Page 296 of 458
296
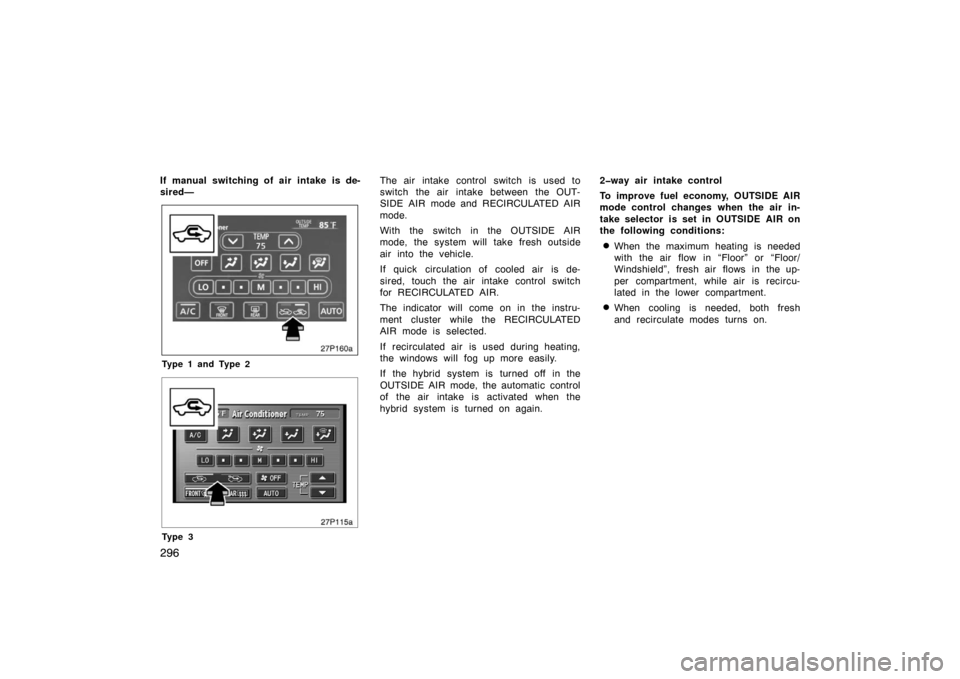
If manual switching of air intake is de-
sired—
27p160a
Type 1 and Type 2
27p115a
Ty p e 3
The air intake control switch is used to
switch the air intake between the OUT-
SIDE AIR mode and RECIRCULATED AIR
mode.
With the switch in the OUTSIDE AIR
mode, the system will take fresh outside
air into the vehicle.
If quick circulation of cooled air is de-
sired, touch the air intake control switch
for RECIRCULATED AIR.
The indicator will come on in the instru-
ment cluster while the RECIRCULATED
AIR mode is selected.
If recirculated air is used during heating,
the windows will fog up more easily.
If the hybrid system is turned off in the
OUTSIDE AIR mode, the automatic control
of the air intake is activated when the
hybrid system is turned on again.2�way air intake control
To improve fuel economy, OUTSIDE AIR
mode control changes when the air in-
take selector is set in OUTSIDE AIR on
the following conditions:
�When the maximum heating is needed
with the air flow in “Floor” or “Floor/
Windshield”, fresh air flows in the up-
per compartment, while air is recircu-
lated in the lower compartment.
�When cooling is needed, both fresh
and recirculate modes turns on.
Page 297 of 458
297
If manual on�off of the air conditioning
is desired—
Touch the “A/C” switch to turn the air
conditioning on and touch it again to turn
the air conditioning off.
If the system is used for ventilation, heat-
ing in dry weather or removing frost or
exterior fog on the windshield, turn the air
conditioning off once it is no longer re-
quired. This will improve fuel economy.
The air conditioning can be used for year−
round automatic temperature control in-
cluding cooling and dehumidifying opera-
tion.
27p161
Type 1 and Type 2
27p116a
Ty p e 3
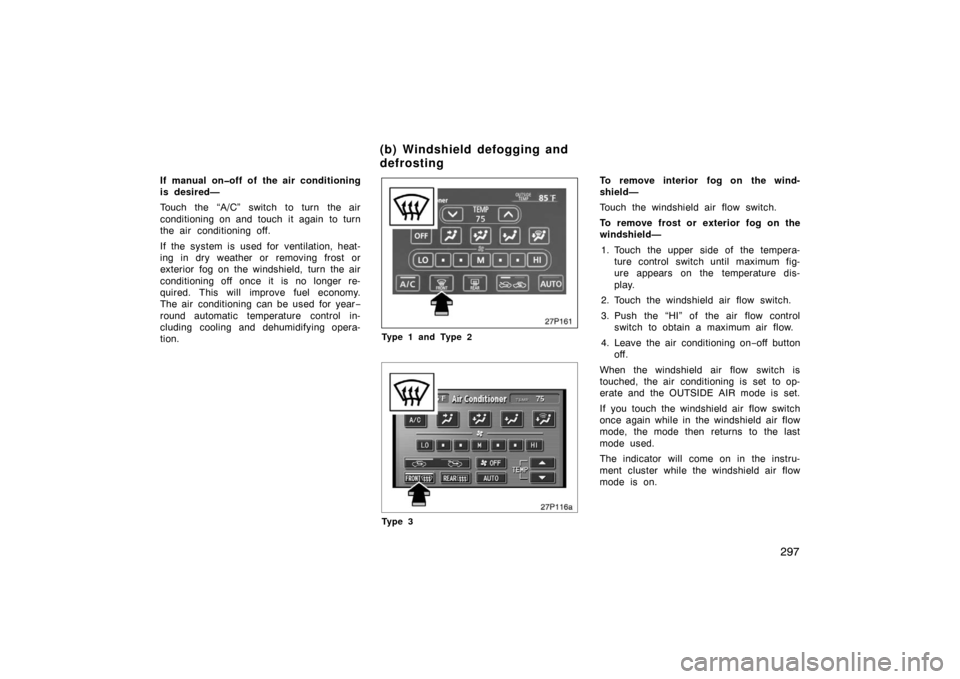
To remove interior fog on the wind-
shield—
Touch the windshield air flow switch.
To remove frost or exterior fog on the
windshield— 1. Touch the upper side of the tempera- ture control switch until maximum fig-
ure appears on the temperature dis-
play.
2. Touch the windshield air flow switch.
3. Push the “HI” of the air flow control switch to obtain a maximum air flow.
4. Leave the air conditioning on −off button
off.
When the windshield air flow switch is
touched, the air conditioning is set to op-
erate and the OUTSIDE AIR mode is set.
If you touch the windshield air flow switch
once again while in the windshield air flow
mode, the mode then returns to the last
mode used.
The indicator will come on in the instru-
ment cluster while the windshield air flow
mode is on.
(b) Windshield defogging and
defrosting
Page 312 of 458
312
28p133
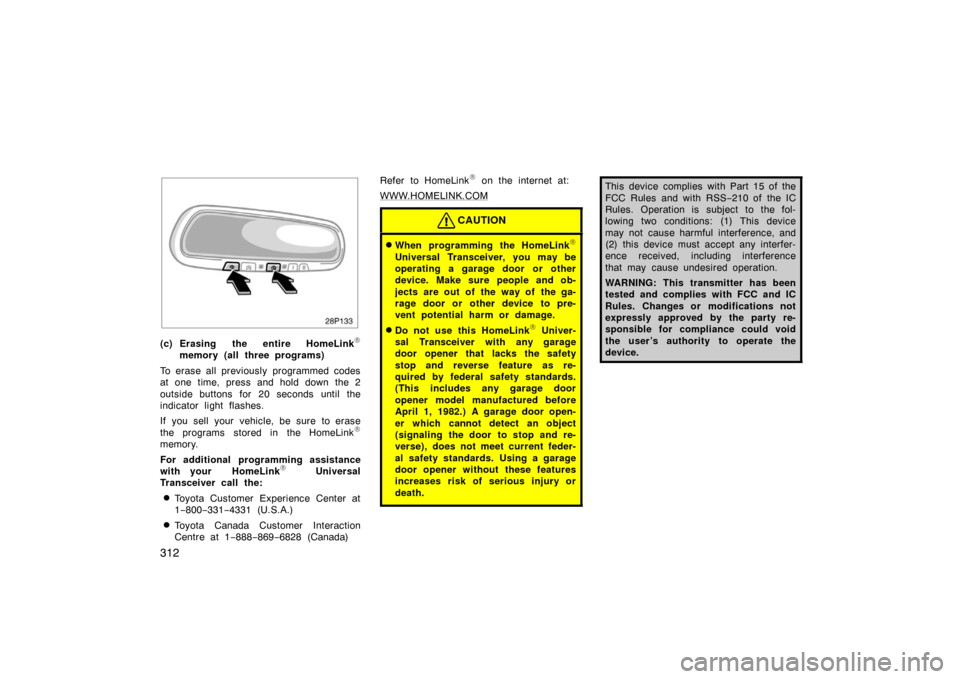
(c) Erasing the entire HomeLink\f
memory (all three programs)
To erase all previously programmed codes
at one time, press and hold down the 2
outside buttons for 20 seconds until the
indicator light flashes.
If you sell your vehicle, be sure to erase
the programs stored in the HomeLink
\f
memory.
For additional programming assistance
with your HomeLink
\f Universal
Transceiver call the:
�Toyota Customer Experience Center at
1 −800− 331−4331 (U.S.A.)
�Toyota Canada Customer Interaction
Centre at 1 −888− 869−6828 (Canada) Refer to HomeLink
\f on the internet at:
WWW.HOMELINK.COM
CAUTION
�When programming the HomeLink\f
Universal Transceiver, you may be
operating a garage door or other
device. Make sure people and ob-
jects are out of the way of the ga-
rage door or other device to pre-
vent potential harm or damage.
�Do not use this HomeLink\f Univer-
sal Transceiver with any garage
door opener that lacks the safety
stop and reverse feature as re-
quired by federal safety standards.
(This includes any garage door
opener model manufactured before
April 1, 1982.) A garage door open-
er which cannot detect an object
(signaling the door to stop and re-
verse), does not meet current feder-
al safety standards. Using a garage
door opener without these features
increases risk of serious injury or
death.
This device complies with Part 15 of the
FCC Rules and with RSS −210 of the IC
Rules. Operation is subject to the fol-
lowing two conditions: (1) This device
may not cause harmful interference, and
(2) this device must accept any interfer-
ence received, including interference
that may cause undesired operation.
WARNING: This transmitter has been
tested and complies with FCC and IC
Rules. Changes or modifications not
expressly approved by the party re-
sponsible for compliance could void
the user’s authority to operate the
device.
Page 322 of 458
322
FUEL TANK CAPACITY45 L (11.9 gal., 9.9 lmp.gal.)
The given fuel tank capacity is measured
on EPA/CARB ORVR testing condition
which is approved for nominal capacity
measurement condition.
The fuel tank capacity is decreased at low
ambient temperature. (decreased by about
5 L (1.3 gal., 1.1 lmp.gal.) at −10 \bC
(14 \bF).)
Fuel pump shut�off system
The fuel pump shut −off system stops sup-
plying fuel to the engine to minimize the
risk of fuel leakage when the engine stalls
or an airbag inflates upon collision. To
restart the hybrid system after the fuel
pump shut −off system activates, press the
“POWER” switch to the “OFF” mode and
start it.
CAUTION
Inspect the ground under the vehicle
before restarting the hybrid system. If
you find that fuel has leaked onto the
ground, the fuel system has been
damaged and is in need of repair. In
this case, do not restart the hybrid
system.
If you plan to drive your Toyota in
another country...
First , comply with the vehicle registration
laws.
Second, confirm the availability of the cor-
rect fuel (unleaded and minimum octane
number).
Operation in foreign
countries