Page 16 of 374
2
1. Side vents
2. Side defroster outlets
3. Instrument cluster
4. Center vents
5. Electric moon roof switches and/orpersonal lights
6. Tire pressure warning select switch (in the glove box)
7. Glove box
8. Power door lock switches
9. Power window switches
10. Automatic transmission selector lever 11. Seat heater switches
12. Rear seat audio system
13. Cup holder
14. Parking brake lever
15. Second start mode selector button and driving pattern selector button
16. Four −wheel drive control lever
17. Active height control suspension and skyhook TEMS switches
18. Lower vent
19. Hood lock release lever
20. Fuel filler door opener
21. Window lock switch
Instrument panel overview
� View A
I11038b
Page 20 of 374
6
Instrument cluster overview
11C501b
1. Voltmeter
2. Speedometer
3. Service reminder indicators and indicator lights 4. Tachometer
5. Height control indicator light
6. Engine oil pressure gauge
7. Engine coolant temperature gauge 8. Odometer and two trip meters
9. Trip meter reset knob
10. Fuel gauge
Page 21 of 374
7
Indicator symbols on the instrument panel
Brake system warning light∗1
Malfunction indicator lamp∗1Headlight high beam indicator light Turn signal indicator lights
Driver ’s seat belt reminder light∗1
Anti −lock brake system warning light∗
1
Open door warning light∗1
SRS warning light∗1
Low fuel level warning light∗1
Automatic transmission fluid temperature warning
light∗1
Unengaged “Park” warning light∗1
Charging system warning light∗1
Engine oil replacement reminder light
Center differential lock indicator light Driving pattern (“POWER” mode) indicator
light
Automatic transmission second start indicator
light
Cruise control indicator light∗2
Tire pressure warning light∗1
Page 22 of 374
8
∗1: For details, see “Service reminder indicators and warning
buzzers” on page 132.
∗2: If this light flashes, see “Cruise control” on page 164.
∗3: For details, see “Roll sensing of curtain shield airbags off
switch” on page 70.
Vehicle stability control system off indicator
light∗1
Vehicle stability control system and active
traction control system warning light∗1
Active traction control system indicator light
Slip indicator light
Roll sensing of curtain shield airbags off indicator light∗ 3
Automatic transmission indicator lights
Page 29 of 374

15
To lock and unlock all the side doors
and back door, push the switches slow-
ly and securely.
To lock: Push the “LOCK” switch. All the
side doors and back door are locked si-
multaneously. At this time, turn signal
lights flash once.*
NOTE: *The turn signal lights can be set
not to flash. Ask your Toyota dealer for
details.
Check to see that all the side doors and
back door are securely locked.
If any of the side doors or back door is
not securely closed, or if the key is in the
ignition switch, locking cannot be per-
formed by the “LOCK” switch.
To unlock: Push the “UNLOCK” switch
once to unlock the driver ’s door alone.
Pushing the switch twice within 3 seconds
unlocks all the side doors and back door
simultaneously.* At this time, turn signal
lights flash twice.**
NOTE: *The 2�step unlocking function can
be changed. **The turn signal lights can
be set not to flash. Ask your Toyota deal-
er for details.Together with the activation of unlocking,
the interior light comes on for 15 seconds
if the interior light switch is in “DOOR”
position.* However, this function does not
work when the ignition key is in the “ACC”
or “ON” position. (For detailed information,
see “Interior lights” on page 121.)
You have 30 seconds to open a door after
using the wireless remote unlock fea-
ture.** If a door is not opened by then, all
the side doors and back door will be auto-
matically locked again.
NOTE: *The interior light can be set not
to come on or the duration of lighting can
be changed. **The time before automatic
re�locking can be changed. Ask your
Toyota dealer for details.
If the “LOCK” or “UNLOCK” switch is kept
pressed in, the locking or unlocking opera-
tion is not repeated. Release the switch
and then push again.
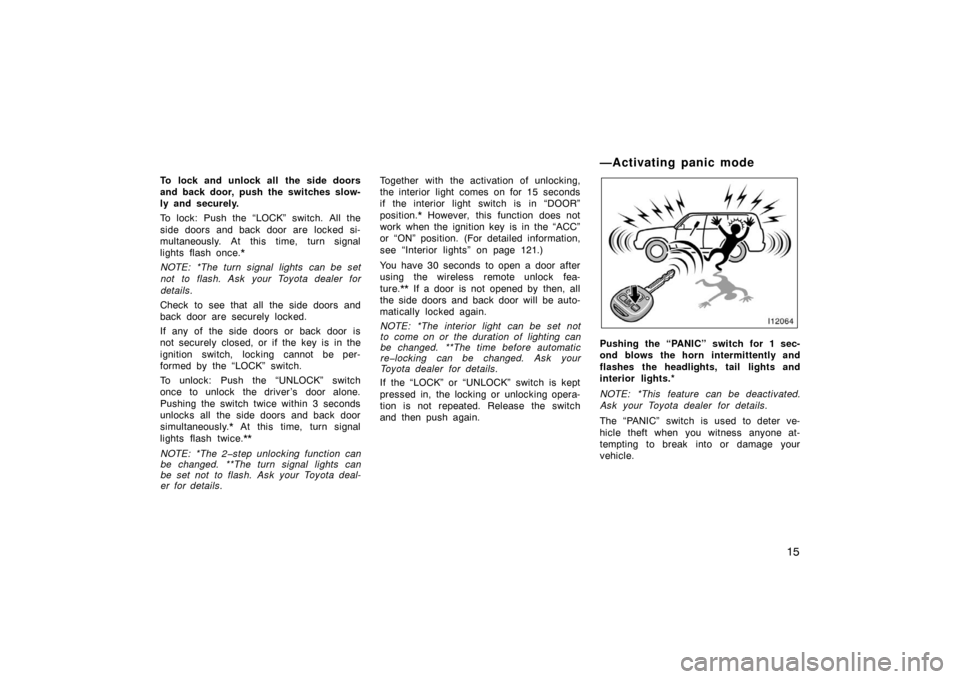
Pushing the “PANIC” switch for 1 sec-
ond blows the horn intermittently and
flashes the headlights, tail lights and
interior lights.*
NOTE: *This feature can be deactivated.
Ask your Toyota dealer for details.
The “PANIC” switch is used to deter ve-
hicle theft when you witness anyone at-
tempting to break into or damage your
vehicle.
—Activating panic mode
Page 37 of 374

23
12C011a
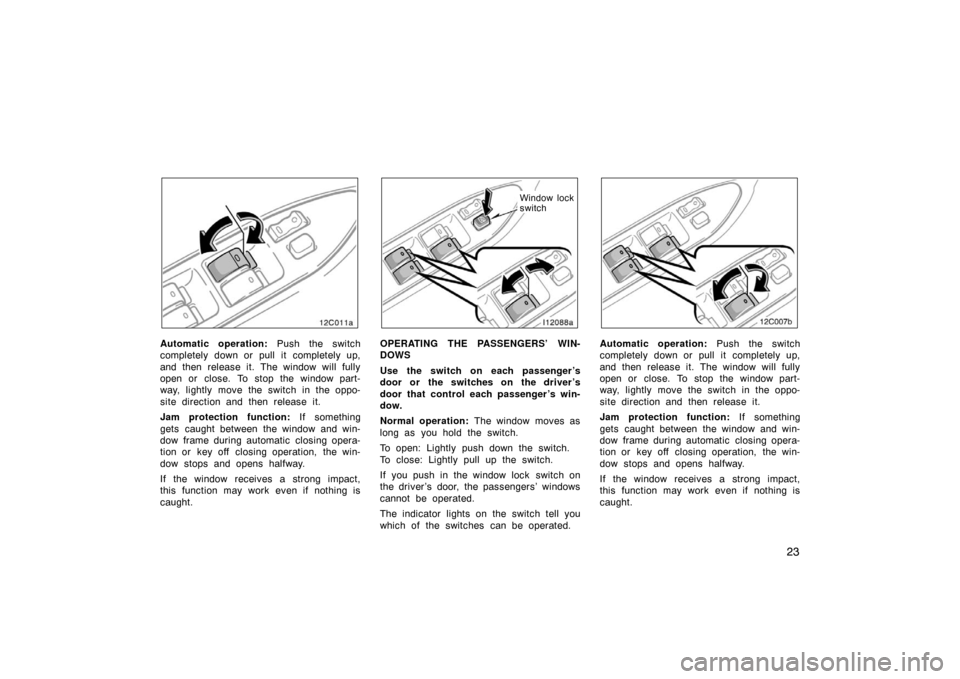
Automatic operation:
Push the switch
completely down or pull it completely up,
and then release it. The window will fully
open or close. To stop the window part-
way, lightly move the switch in the oppo-
site direction and then release it.
Jam protection function: If something
gets caught between the window and win-
dow frame during automatic closing opera-
tion or key off closing operation, the win-
dow stops and opens halfway.
If the window receives a strong impact,
this function may work even if nothing is
caught.
l12088a
Window lock
switch
OPERATING THE PASSENGERS’ WIN-
DOWS
Use the switch on each passenger ’s
door or the switches on the driver ’s
door that control each passenger ’s win-
dow.
Normal operation: The window moves as
long as you hold the switch.
To open: Lightly push down the switch.
To close: Lightly pull up the switch.
If you push in the window lock switch on
the driver ’s door, the passengers’ windows
cannot be operated.
The indicator lights on the switch tell you
which of the switches can be operated.
12C007b
Automatic operation: Push the switch
completely down or pull it completely up,
and then release it. The window will fully
open or close. To stop the window part-
way, lightly move the switch in the oppo-
site direction and then release it.
Jam protection function: If something
gets caught between the window and win-
dow frame during automatic closing opera-
tion or key off closing operation, the win-
dow stops and opens halfway.
If the window receives a strong impact,
this function may work even if nothing is
caught.
Page 41 of 374

27
CAUTION
�Keep the back door closed while
driving. This not only keeps the
luggage from being thrown out but
also prevents exhaust gases from
entering the vehicle.
�If the open back door hides the
stop and tail lights, rear turn signal
lights or rear retro reflectors while
you are parked, other road users
must be warned of the presence of
your vehicle by a warning triangle
or other device.
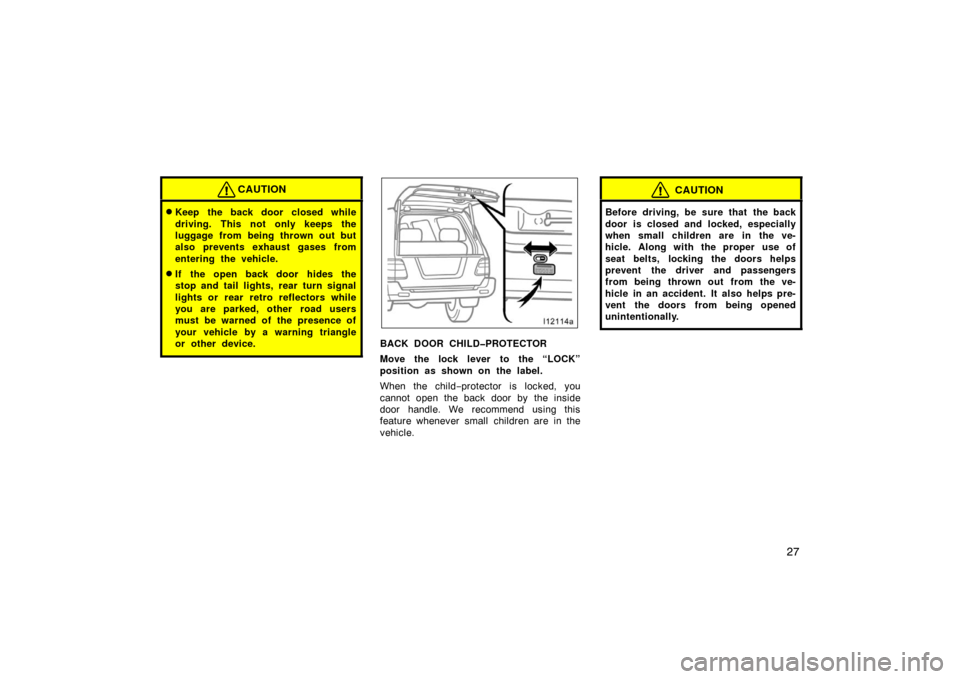
BACK DOOR CHILD�PROTECTOR
Move the lock lever to the “LOCK”
position as shown on the label.
When the child−protector is locked, you
cannot open the back door by the inside
door handle. We recommend using this
feature whenever small children are in the
vehicle.
CAUTION
Before driving, be sure that the back
door is closed and locked, especially
when small children are in the ve-
hicle. Along with the proper use of
seat belts, locking the doors helps
prevent the driver and passengers
from being thrown out from the ve-
hicle in an accident. It also helps pre-
vent the doors from being opened
unintentionally.
Page 42 of 374
28
Hood
To open the hood:1. Pull the hood lock release lever. The hood will spring up slightly.
CAUTION
Before driving, be sure that the hood
is closed and securely locked. Other-
wise, the hood may open unexpected-
ly while driving and an accident may
occur.
2. In front of the vehicle, pull up theauxiliary catch l ever and lift the
hood.
Before closing the hood, check to see that
you have not forgotten any tools, rags,
etc. Then lower the hood and make sure
it locks into place. If necessary, press
down gently on the front edge to lock it.
Theft deterrent system
To deter vehicle theft, the system is
designed to sound an alarm if any of
the side doors, back door or hood is
forcibly unlocked or opened or the bat-
tery terminal is disconnected and then
reconnected when the vehicle is locked.
The alarm blows the horn intermittently
and flashes the headlights, tail lights and
other exterior lights.