Page 356 of 436
’07 HIGHLANDER HV_U (L/O 0608)
344
2007 HIGHLANDER HV from July ’06 Prod. (OM48685U)
Vehicles with third seat
Vehicles without third seat
1. Get the required tools andspare tire.
1. Spare tire
2. Front towing eyelet
∗
3. Jack handle
4. Wheel nut wrench
5. Adapter socket
6. Jack
To prepare yourself for an emergency,
you should familiarize yourself with
the use of the jack, each of the tools
and their storage locations.
∗: For details, see “—Emergency tow-
ing” on page 355 in this Section.
Before removing the jack, unhook the
tightening strap.
— R eq u ired to o ls an d sp are
tire
Page 357 of 436
’07 HIGHLANDER HV_U (L/O 0608)
345
2007 HIGHLANDER HV from July ’06 Prod. (OM48685U)
To remove the jack, rotate the jack
joint by hand until the jack becomes
free.To store the jack, ro tate the jack joint
until the jack is firmly secured.
After storing the jack, make sure it is
securely held by the tightening strap.
This prevents the jack from flying for-
ward during a collision or sudden
stop.To detach the spare tire:
1. Remove the inside spare tire cov- er by turning it counterclockwise.
Page 358 of 436
’07 HIGHLANDER HV_U (L/O 0608)
346
2007 HIGHLANDER HV from July ’06 Prod. (OM48685U)
2. Remove the cover as shown in theillustration.3. Put the adapter socket (for remov-ing a spar e tir e) on the spar e tir e
clamp bolt.4. Threading the jack handle throughthe adapter socket, turn the jack
handle counterclockwise. Contin-
ue until the spare tire is lowered
completely to the ground.
Page 359 of 436
’07 HIGHLANDER HV_U (L/O 0608)
347
2007 HIGHLANDER HV from July ’06 Prod. (OM48685U)
5. Pull out the spare tire and standit up against the bumper.6. Remove the hold ing br ac k et and
the spare tire cover.2. Block the wheel diagonally op- posite the flat tire to keep the
vehicle from rolling when it is
jacked up.
When blocking the wheel, place a
wheel block in front of one of the front
wheels or behind one of the rear
wheels.
—Blocking the wheel
Page 361 of 436

’07 HIGHLANDER HV_U (L/O 0608)
349
2007 HIGHLANDER HV from July ’06 Prod. (OM48685U)
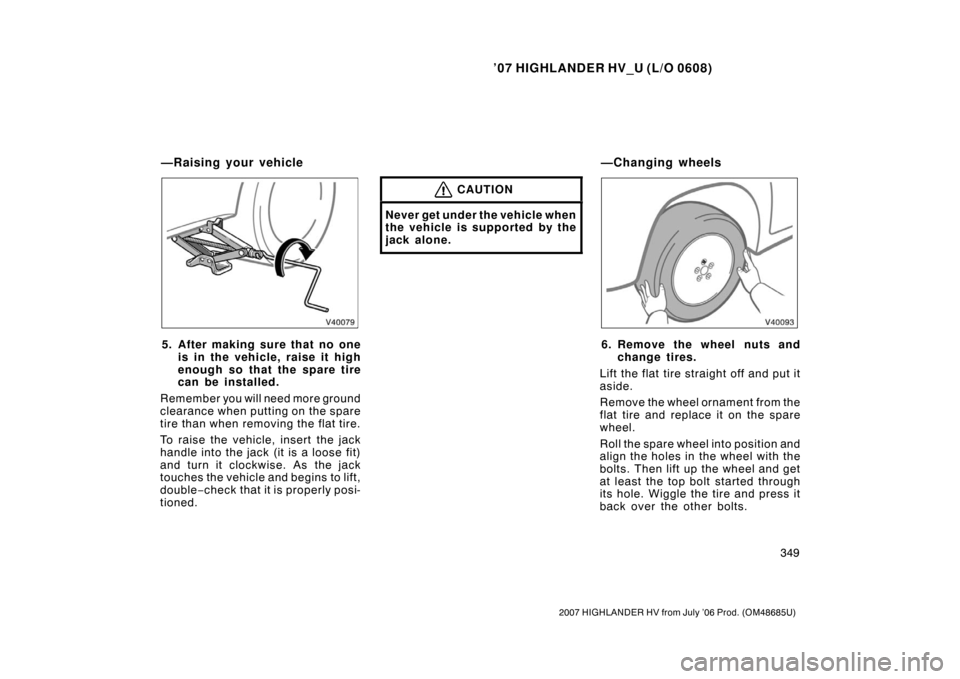
5. After making sure that no oneis in the vehicle, raise it high
enough so that the spare tire
can be installed.
Remember you will need more ground
clearance when putting on the spare
tire than when removing the flat tire.
To raise the vehicl e, insert the jack
handle into the jack (it is a loose fit)
and turn it clockwise. As the jack
touches the vehicle and begins to lift,
double −check that it is properly posi-
tioned.
CAUTION
Never get under the vehicle when
the vehicle is supported by the
jack alone.
6. Remove the wheel nuts and change tires.
Lift the flat tire straight off and put it
aside.
Remove the wheel ornament from the
flat tire and replace it on the spare
wheel.
Roll the spare wheel into position and
align the holes in the wheel with the
bolts. Then lift up the wheel and get
at least the top bolt started through
its hole. Wiggle the tire and press it
back over the other bolts.
—Raising your vehicle —Changing wheels
Page 363 of 436

’07 HIGHLANDER HV_U (L/O 0608)
351
2007 HIGHLANDER HV from July ’06 Prod. (OM48685U)
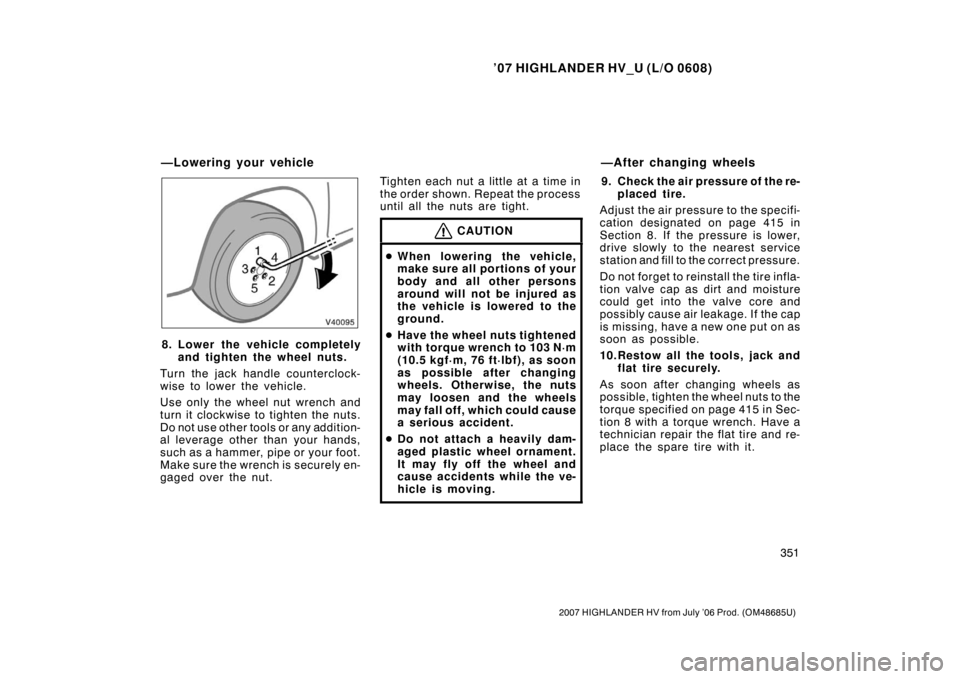
8. Lower the vehicle completelyand tighten the wheel nuts.
Turn the jack handle counterclock-
wise to lower the vehicle.
Use only the wheel nut wrench and
turn it clockwise to tighten the nuts.
Do not use other tools or any addition-
al leverage other than your hands,
such as a hammer, pipe or your foot.
Make sure the wrench is securely en-
gaged over the nut. Tighten each nut a little at a time in
the order shown. Repeat the process
until all the nuts are tight.
CAUTION
�
When lowering the vehicle,
make sure all portions of your
body and all other persons
around will not be injured as
the vehicle is lowered to the
ground.
� Have the wheel nuts tightened
with torque wrench to 103 N·m
(10.5 kgf·m, 76 ft·lbf), as soon
as possible after changing
wheels. Otherwise, the nuts
may loosen and the wheels
may fall off, which could cause
a serious accident.
� Do not attach a heavily dam-
aged plastic wheel ornament.
It may fly off the wheel and
cause accidents while the ve-
hicle is moving.
9. Check the air pressure of the re-
placed tire.
Adjust the air pressu re to the specifi-
cation designated on page 415 in
Section 8. If the pressure is lower,
drive slowly to the nearest service
station and fill to the correct pressure.
Do not forget to reinstall the tire infla-
tion valve cap as dirt and moisture
could get into th e valve core and
possibly cause air leakage. If the cap
is missing, have a new one put on as
soon as possible.
10.Restow all the tools, jack and flat tire securely.
As soon after changing wheels as
possible, tighten the wheel nuts to the
torque specified on page 415 in Sec-
tion 8 with a torque wrench. Have a
technician repair the flat tire and re-
place the spare tire with it.
—Lowering your vehicle —After changing wheels
Page 368 of 436
’07 HIGHLANDER HV_U (L/O 0608)
356
2007 HIGHLANDER HV from July ’06 Prod. (OM48685U)
1. Remove the front towing eyelet coveron the front bumper by pushing the
outside of the cover.2. Use the front towing eyelet in the lug-gage compartment. Secure it to the
hole on the bumper by turning clock-
wise.
For the towing eyelet location, see
“—Required tools and spare tire” on
page 344 in this Section.3. Tighten the front towing eyelet securelyby a wheel nut wrench.
CAUTION
When installing the eyelet on the ve-
hicle, be sure to tighten the front
eyelet securely. If the eyelet is loose,
it may come off when being towed
and result in death or serious injury.
—Installing front towing eyelet
Page 403 of 436

’07 HIGHLANDER HV_U (L/O 0608)
391
2007 HIGHLANDER HV from July ’06 Prod. (OM48685U)
Ty p e B
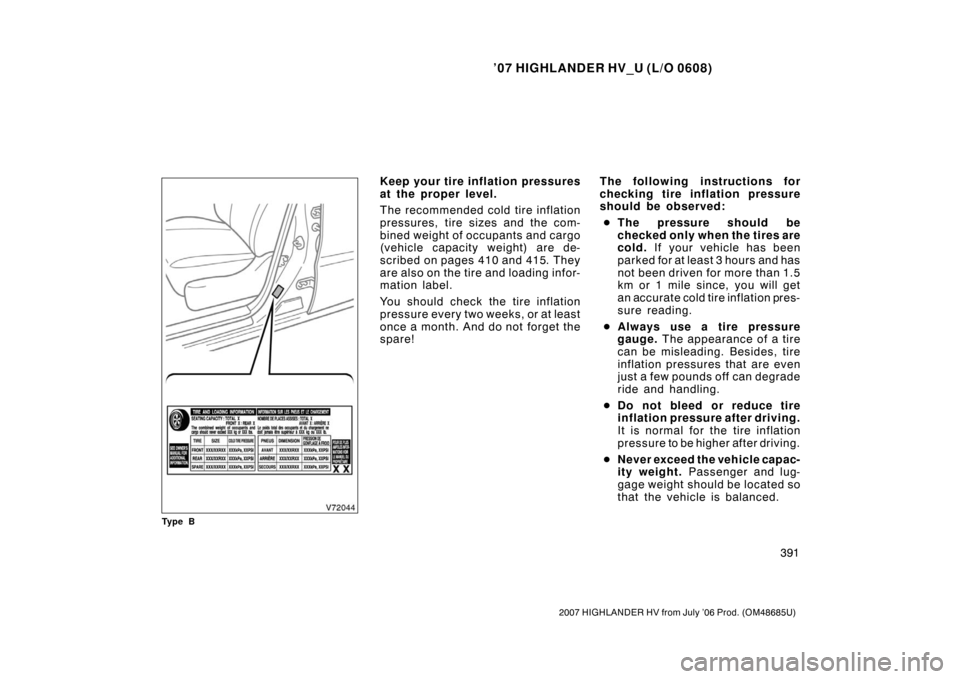
Keep your tire inflation pressures
at the proper level.
The recommended cold tire inflation
pressures, tire sizes and the com-
bined weight of occupants and cargo
(vehicle capacity weight) are de-
scribed on pages 410 and 415. They
are also on the tire and loading infor-
mation label.
You should check the tire inflation
pressure every two weeks, or at least
once a month. And do not forget the
spare! The following instructions for
checking tire inflation pressure
should be observed:
� The pressure s hould be
checked only when the tires are
cold. If your vehicle has been
parked for at least 3 hours and has
not been driven for more than 1.5
km or 1 mile since, you will get
an accurate cold tire inflation pres-
sure reading.
� Always use a tire pressure
gauge. The appearance of a tire
can be misleading. Besides, tire
inflation pressures that are even
just a few pounds off can degrade
ride and handling.
� Do not bleed or reduce tire
inflation pressure after driving.
It is normal for the tire inflation
pressure to be higher after driving.
� Never exceed the vehicle capac-
ity weight. Passenger and lug-
gage weight should be located so
that the vehicle is balanced.