Page 65 of 207
54
Setting route —
— Search condition
You can designate the route conditions of the
route to the destination.
1. Touch “Route”.
2. Touch “Search Condition”.
3. Touch “Quick”, “Quick1”, “Quick2” or
“Short” and touch “OK”.
The entire route from the starting point to the
destination is displayed.
“Guide”: To start guidance.
“Route”: To change a route. (See pages 51
and 54.)
— Detour setting
While the route guidance is operating, you
can change the route to detour around a sec-
tion of the route where a delay is caused by
road repairs, or an accident, etc.
1. Touch “Route”.
2. Touch “Detour”.
Page 66 of 207

55
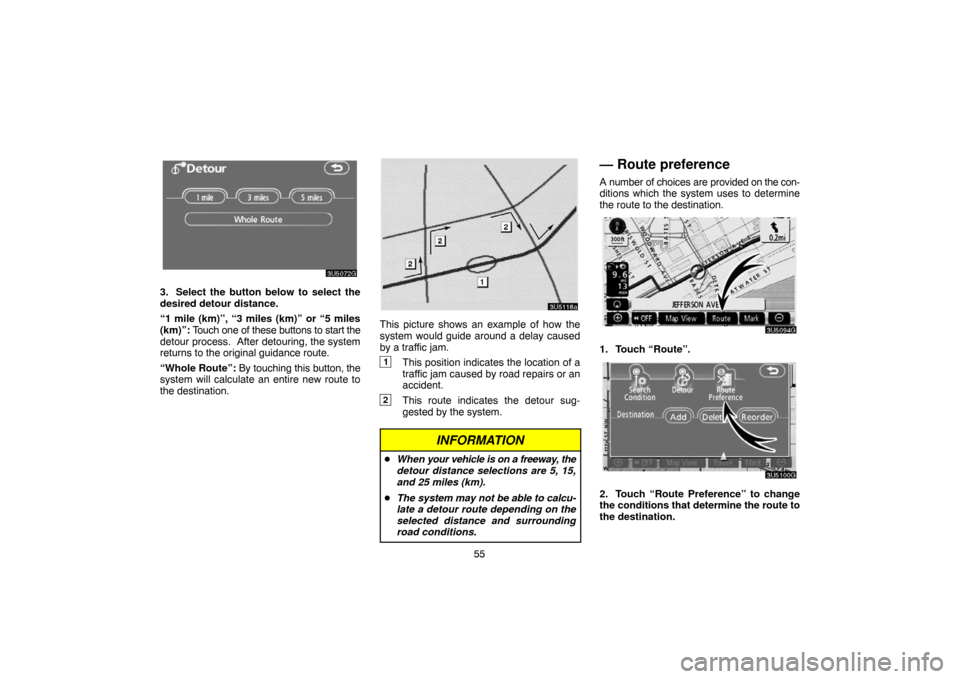
3. Select the button below to select the
desired detour distance.
“1 mile (km)”, “3 miles (km)” or “5 miles
(km)”: Touch one of these buttons to start the
detour process. After detouring, the system
returns to the original guidance route.
“Whole Route”: By touching this button, the
system will calculate an entire new route to
the destination.
This picture shows an example of how the
system would guide around a delay caused
by a traffic jam.
1This position indicates the location of a
traffic jam caused by road repairs or an
accident.
2This route indicates the detour sug-
gested by the system.
INFORMATION
�When your vehicle is on a freeway, the
detour distance selections are 5, 15,
and 25 miles (km).
�The system may not be able to calcu-
late a detour route depending on the
selected distance and surrounding
road conditions.
— Route preference
A number of choices are provided on the con-
ditions which the system uses to determine
the route to the destination.
1. Touch “Route”.
2. Touch “Route Preference” to change
the conditions that determine the route to
the destination.
Page 103 of 207

92
Maintenance information —
— Maintenance information
setting
When the navigation System is turned on, the
“Information” screen displays when it is time
to replace a part or certain components. (See
page 2.)
1. Push the “INFO” button.
2. Touch “Maintenance”.
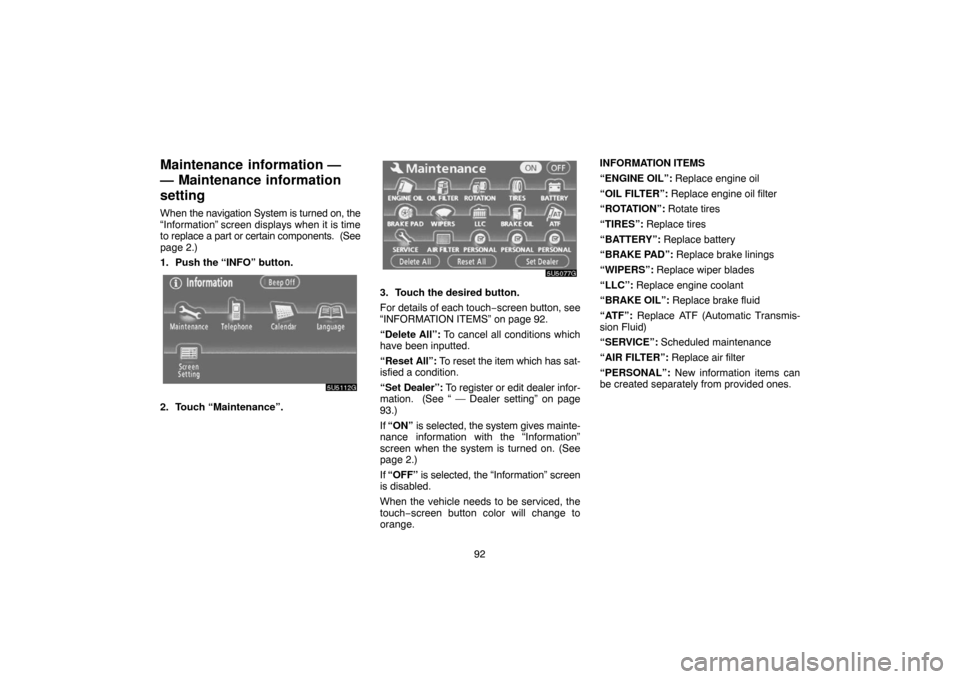
3. Touch the desired button.
For details of each touch−screen button, see
“INFORMATION ITEMS” on page 92.
“Delete All”: To cancel all conditions which
have been inputted.
“Reset All”: To reset the item which has sat-
isfied a condition.
“Set Dealer”: To register or edit dealer infor-
mation. (See “ — Dealer setting” on page
93.)
If “ON” is selected, the system gives mainte-
nance information with the “Information”
screen when the system is turned on. (See
page 2.)
If “OFF” is selected, the “Information” screen
is disabled.
When the vehicle needs to be serviced, the
touch−screen button color will change to
orange.INFORMATION ITEMS
“ENGINE OIL”: Replace engine oil
“OIL FILTER”: Replace engine oil filter
“ROTATION”: Rotate tires
“TIRES”: Replace tires
“BATTERY”: Replace battery
“BRAKE PAD”: Replace brake linings
“WIPERS”: Replace wiper blades
“LLC”: Replace engine coolant
“BRAKE OIL”: Replace brake fluid
“ATF”: Replace ATF (Automatic Transmis-
sion Fluid)
“SERVICE”: Scheduled maintenance
“AIR FILTER”: Replace air filter
“PERSONAL”: New information items can
be created separately from provided ones.
Page 111 of 207

100
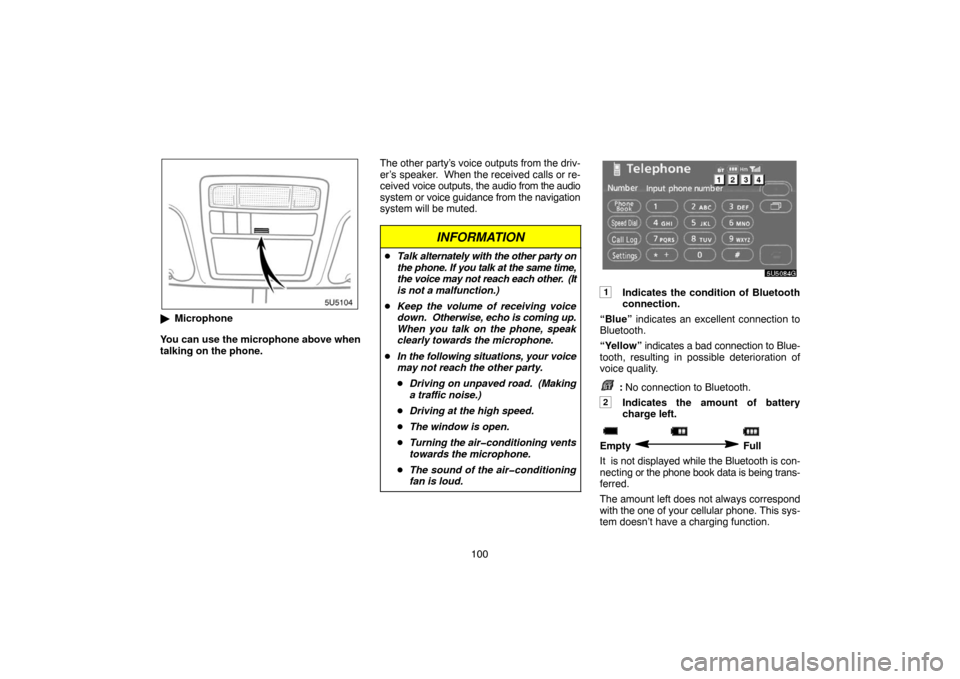
�Microphone
You can use the microphone above when
talking on the phone.The other party’s voice outputs from the driv-
er’s speaker. When the received calls or re-
ceived voice outputs, the audio from the audio
system or voice guidance from the navigation
system will be muted.
INFORMATION
�Talk alternately with the other party on
the phone. If you talk at the same time,
the voice may not reach each other. (It
is not a malfunction.)
�Keep the volume of receiving voice
down. Otherwise, echo is coming up.
When you talk on the phone, speak
clearly towards the microphone.
�In the following situations, your voice
may not reach the other party.
�Driving on unpaved road. (Making
a traffic noise.)
�Driving at the high speed.
�The window is open.
�Turning the air�conditioning vents
towards the microphone.
�The sound of the air�conditioning
fan is loud.
1Indicates the condition of Bluetooth
connection.
“Blue” indicates an excellent connection to
Bluetooth.
“Yellow” indicates a bad connection to Blue-
tooth, resulting in possible deterioration of
voice quality.
: No connection to Bluetooth.
2Indicates the amount of battery
charge left.
Empty Full
It is not displayed while the Bluetooth is con-
necting or the phone book data is being trans-
ferred.
The amount left does not always correspond
with the one of your cellular phone. This sys-
tem doesn’t have a charging function.
Page 189 of 207
178 CARING FOR YOUR CD CHANGER AND
DISCS
�Your CD changer is intended for use with
12 cm (4.7 in.) discs only.
�Extremely high temperature can keep
your CD changer from working. On hot
days, use air conditioning to cool the ve-
hicle interior before you listen to a disc.
�Bumpy roads or other vibrations may
make your CD changer skip.
�If moisture gets into your CD changer, you
may not hear any sound even though your
CD changer appears to be working. Re-
move the discs from the CD changer and
wait until it dries.
CAUTION
CD changer uses an invisible laser
beam which could cause hazardous
radiation exposure if directed outside
the unit. Be sure to operate the changer
correctly.
CD changer
Audio CDs
�Use only compact discs marked as shown
above. The following products may not be
playable on your CD changer.
SACDs
dts−CDs
Copy−protected CDs
�Special shaped discs
�Transparent/translucent discs
Page 195 of 207

184
Limitations of the
navigation system
This navigation system calculates the cur-
rent vehicle position using satellite sig-
nals, various vehicle signals, map data,
etc. However, the accurate position may
not be shown depending on the satellite
condition, road configuration, vehicle
condition or other circumstances.
The Global Positioning System (GPS) devel-
oped and operated by the U.S. Department of
Defense provides an accurate current vehicle
position using 3 to 4 satellites. The GPS sys-
tem has a certain level of inaccuracy. While
the navigation system will compensate for
this most of the time, occasional positioning
errors of up to 300 feet (100 m) can and
should be expected. Generally, position er-
rors will be corrected within a few seconds.
When your vehicle is receiving signals from
the satellites, the “GPS” mark appears at the
top left of the screen.
The GPS signal may be physically ob-
structed, leading to inaccurate vehicle posi-
tion on the map display. Tunnels, tall build-
ings, trucks, or even the placement of objects
on the instrument panel may obstruct the
GPS signals.
The GPS satellites may not send signals due
to repairs or improvements being made to
them.
Even when the navigation system is receiving
clear GPS signals, the vehicle position may
not be shown accurately or inappropriate
route guidance may occur in some cases.
NOTICE
The installation of window tinting may
obstruct the GPS signals. Most window
tinting contains some metallic content
that will interfere with GPS signal recep-
tion. We advise against the use of win-
dow tinting on vehicles equipped with
navigation systems.