Page 171 of 207

160
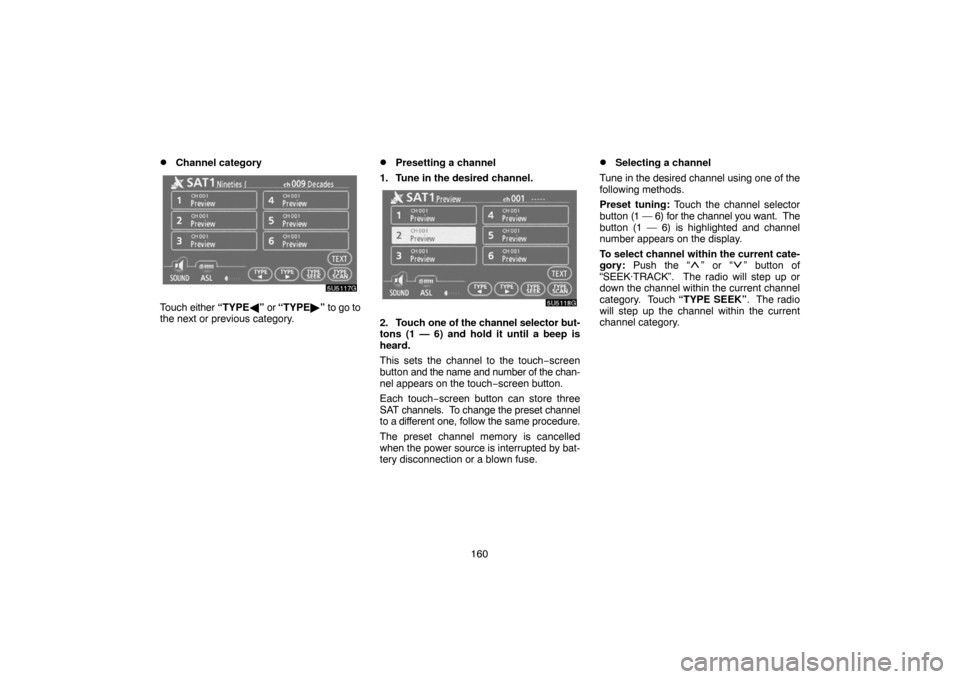
�Channel category
Touch either “TYPE�” or “TYPE�” to go to
the next or previous category.
�Presetting a channel
1. Tune in the desired channel.
2. Touch one of the channel selector but-
tons (1 — 6) and hold it until a beep is
heard.
This sets the channel to the touch−screen
button and the name and number of the chan-
nel appears on the touch−screen button.
Each touch−screen button can store three
SAT channels. To change the preset channel
to a different one, follow the same procedure.
The preset channel memory is cancelled
when the power source is interrupted by bat-
tery disconnection or a blown fuse.
�Selecting a channel
Tune in the desired channel using one of the
following methods.
Preset tuning: Touch the channel selector
button (1 — 6) for the channel you want. The
button (1 — 6) is highlighted and channel
number appears on the display.
To select channel within the current cate-
gory: Push the “
” or “” button of
“SEEK·TRACK”. The radio will step up or
down the channel within the current channel
category. Touch “TYPE SEEK”. The radio
will step up the channel within the current
channel category.
Page 172 of 207
161
To scan the currently selected channel
category: Touch “TYPE SCAN” or push the
“SCAN” button briefly. “SCAN” appears on
the display. The radio will find the next chan-
nel in the same channel category, stay there
for a few seconds, and then scan again. To
select a channel, touch “TYPE SCAN” or
push the “SCAN” button a second time.
To scan the preset channels: Push the
“SCAN” button and hold it until you hear a
beep. “P.SCAN” appears on the display. The
radio will find the next preset channel, stay
there for a few seconds, and then move to the
next preset channel. To select a channel,
push the “SCAN” button a second time.
�Displaying the title and name
When you touch “TEXT”, the song/program
title and the artist name/feature are displayed.
Up to 16 alphanumeric characters can be dis-
played. (Some information will not be fully
displayed.)
When you touch “TEXT” again, the display
returns.
Page 184 of 207

173
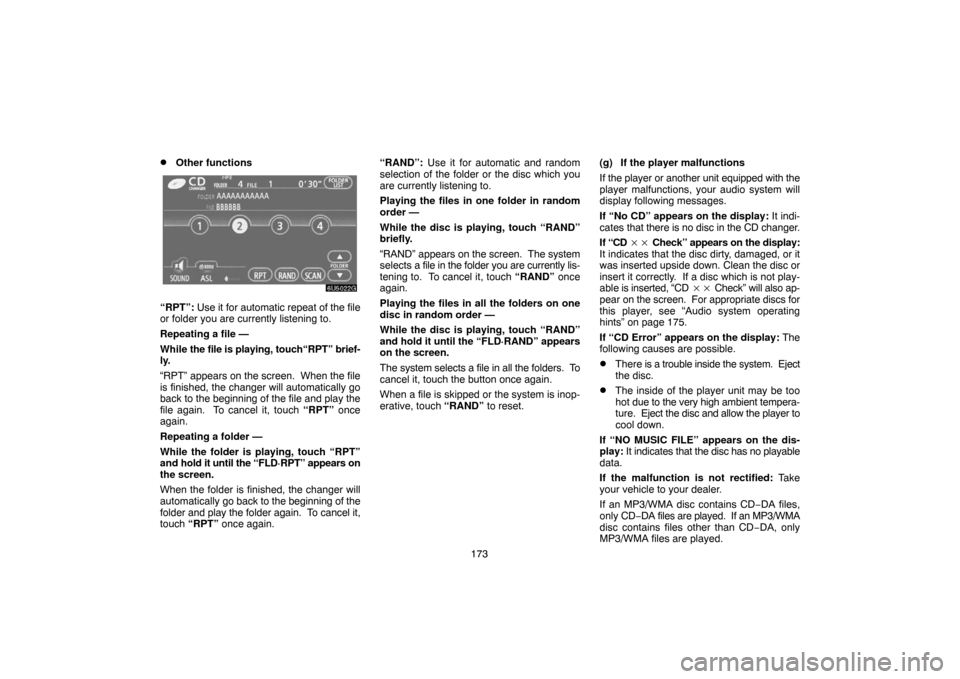
�Other functions
“RPT”: Use it for automatic repeat of the file
or folder you are currently listening to.
Repeating a file —
While the file is playing, touch“RPT” brief-
ly.
“RPT” appears on the screen. When the file
is finished, the changer will automatically go
back to the beginning of the file and play the
file again. To cancel it, touch “RPT” once
again.
Repeating a folder —
While the folder is playing, touch “RPT”
and hold it until the “FLD·RPT” appears on
the screen.
When the folder is finished, the changer will
automatically go back to the beginning of the
folder and play the folder again. To cancel it,
touch “RPT” once again.“RAND”: Use it for automatic and random
selection of the folder or the disc which you
are currently listening to.
Playing the files in one folder in random
order —
While the disc is playing, touch “RAND”
briefly.
“RAND” appears on the screen. The system
selects a file in the folder you are currently lis-
tening to. To cancel it, touch “RAND” once
again.
Playing the files in all the folders on one
disc in random order —
While the disc is playing, touch “RAND”
and hold it until the “FLD·RAND” appears
on the screen.
The system selects a file in all the folders. To
cancel it, touch the button once again.
When a file is skipped or the system is inop-
erative, touch “RAND” to reset.(g) If the player malfunctions
If the player or another unit equipped with the
player malfunctions, your audio system will
display following messages.
If “No CD” appears on the display: It indi-
cates that there is no disc in the CD changer.
If “CD �� Check” appears on the display:
It indicates that the disc dirty, damaged, or it
was inserted upside down. Clean the disc or
insert it correctly. If a disc which is not play-
able is inserted, “CD �� Check” will also ap-
pear on the screen. For appropriate discs for
this player, see “Audio system operating
hints” on page 175.
If “CD Error” appears on the display: The
following causes are possible.
�There is a trouble inside the system. Eject
the disc.
�The inside of the player unit may be too
hot due to the very high ambient tempera-
ture. Eject the disc and allow the player to
cool down.
If “NO MUSIC FILE” appears on the dis-
play: It indicates that the disc has no playable
data.
If the malfunction is not rectified: Take
your vehicle to your dealer.
If an MP3/WMA disc contains CD−DA files,
only CD−DA files are played. If an MP3/WMA
disc contains files other than CD−DA, only
MP3/WMA files are played.
Page 185 of 207

174
Audio remote controls —
— Steering switches
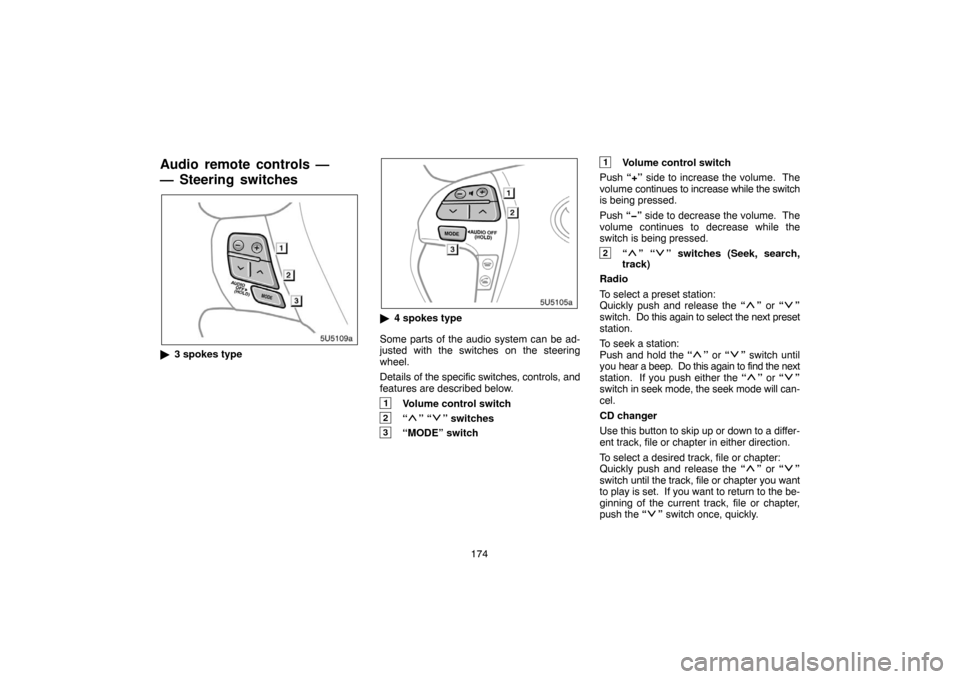
�3 spokes type
�4 spokes type
Some parts of the audio system can be ad-
justed with the switches on the steering
wheel.
Details of the specific switches, controls, and
features are described below.
1Volume control switch
2“” “” switches
3“MODE” switch
1Volume control switch
Push “+” side to increase the volume. The
volume continues to increase while the switch
is being pressed.
Push “�” side to decrease the volume. The
volume continues to decrease while the
switch is being pressed.
2“” “” switches (Seek, search,
track)
Radio
To select a preset station:
Quickly push and release the “
” or “”
switch. Do this again to select the next preset
station.
To seek a station:
Push and hold the “
” or “” switch until
you hear a beep. Do this again to find the next
station. If you push either the “
” or “”
switch in seek mode, the seek mode will can-
cel.
CD changer
Use this button to skip up or down to a differ-
ent track, file or chapter in either direction.
To select a desired track, file or chapter:
Quickly push and release the “
” or “”
switch until the track, file or chapter you want
to play is set. If you want to return to the be-
ginning of the current track, file or chapter,
push the “
” switch once, quickly.