Page 106 of 207
95
�To edit “Phone #” (telephone number)
1. Touch “Phone #” on the “Edit Dealer”
screen.
2. Enter the number using number keys.
3. Touch “OK”.
The previous screen will be displayed.
Calendar with memo —
It is possible to enter memos for particular
dates on the calendar. The system informs
you of the memo entry when the system is
turned on. (See page 3.)
Memos can also be used for route guidance
if the memo has been registered with location
information.
1. Push the “INFO” button.
2. Touch “Calendar”.
On this screen, the current date is highlighted
in yellow.
or : To change month.
or : To change year.
“Today”: To display the current month calen-
dar (if another month will be displayed).
“List”: To display the list of registered me-
mos. (See “ — Memo list” on page 98.)
Touching a date button on the “Calendar”
screen displays the “Memo” screen.
Page 155 of 207
144 The screen goes off when “Screen Off” is
touched. To turn the display screen back on,
push any button such as “INFO”, etc. The se-
lected screen appears.
INFORMATION
When you do not touch any button on
the “Display” screen for 20 seconds, the
previous screen will be displayed.
Depending on the position of the headlight
switch, the screen changes to the day mode
or night mode.
To display the screen in the day mode even
with the headlight switch on, touch “Day
Mode” on the adjustment screen for bright-
ness and contrast control.
If the screen is set in the day mode with the
headlight switch turned on, this condition is
memorized in the system even with the en-
gine turned off.
Screen setting
1. Push the “INFO” button to display the
“Information” screen.
2. Touch “Screen Setting”.
Page 157 of 207
146
1. Touch “Delete personal data”.
The “Delete personal data” screen appears.
2. Touch “Delete”.
The “Confirmation to delete all personal data”
screen appears.
3. Touch “Yes”.
Beep setting
You can set a beep sound off.
1. Push the “INFO” button.
2. Touch “Beep Off”.
“Beep Off” is highlighted.
To switch the beep sound on, touch “Beep
Off” again.
Page 164 of 207

153
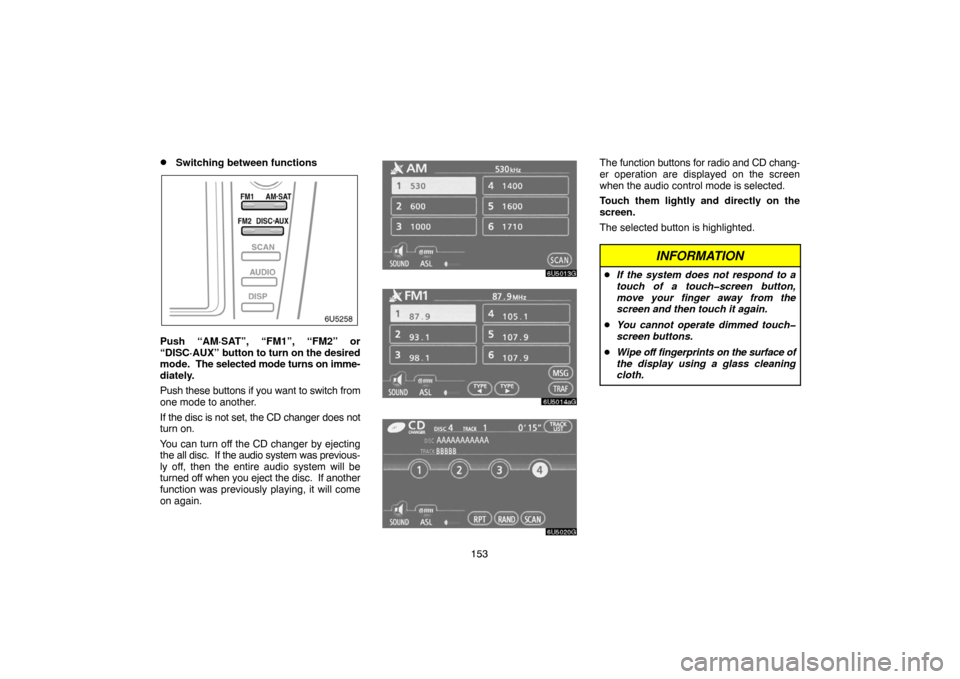
�Switching between functions
Push “AM·SAT”, “FM1”, “FM2” or
“DISC·AUX” button to turn on the desired
mode. The selected mode turns on imme-
diately.
Push these buttons if you want to switch from
one mode to another.
If the disc is not set, the CD changer does not
turn on.
You can turn off the CD changer by ejecting
the all disc. If the audio system was previous-
ly off, then the entire audio system will be
turned off when you eject the disc. If another
function was previously playing, it will come
on again.
The function buttons for radio and CD chang-
er operation are displayed on the screen
when the audio control mode is selected.
Touch them lightly and directly on the
screen.
The selected button is highlighted.
INFORMATION
�If the system does not respond to a
touch of a touch�screen button,
move your finger away from the
screen and then touch it again.
�You cannot operate dimmed touch�
screen buttons.
�Wipe off fingerprints on the surface of
the display using a glass cleaning
cloth.
Page 167 of 207

156
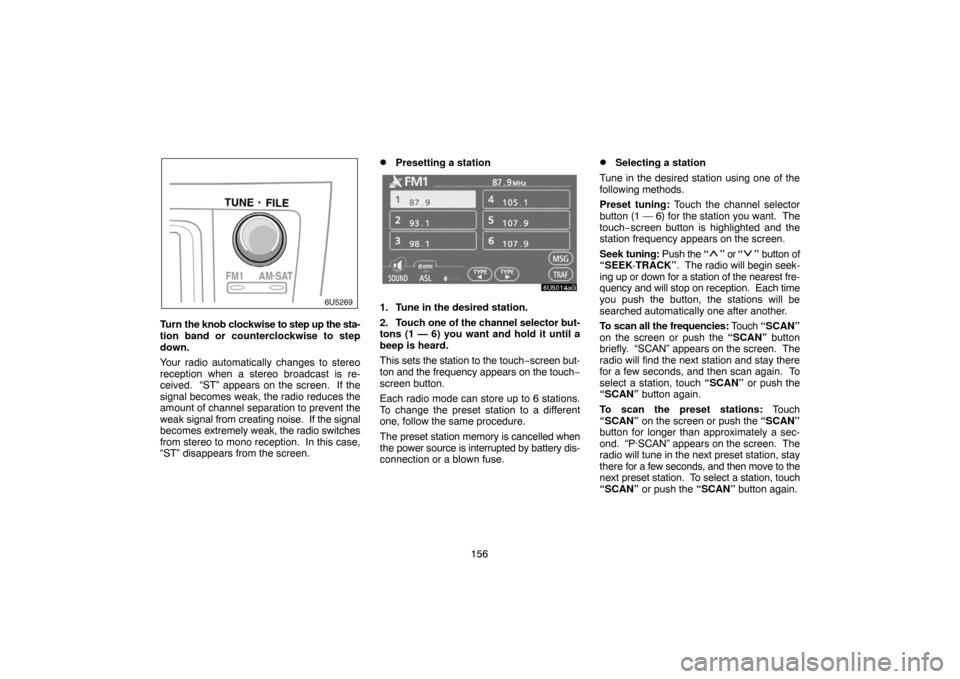
Turn the knob clockwise to step up the sta-
tion band or counterclockwise to step
down.
Your radio automatically changes to stereo
reception when a stereo broadcast is re-
ceived. “ST” appears on the screen. If the
signal becomes weak, the radio reduces the
amount of channel separation to prevent the
weak signal from creating noise. If the signal
becomes extremely weak, the radio switches
from stereo to mono reception. In this case,
“ST” disappears from the screen.
�Presetting a station
1. Tune in the desired station.
2. Touch one of the channel selector but-
tons (1 — 6) you want and hold it until a
beep is heard.
This sets the station to the touch−screen but-
ton and the frequency appears on the touch−
screen button.
Each radio mode can store up to 6 stations.
To change the preset station to a different
one, follow the same procedure.
The preset station memory is cancelled when
the power source is interrupted by battery dis-
connection or a blown fuse.
�Selecting a station
Tune in the desired station using one of the
following methods.
Preset tuning: Touch the channel selector
button (1 — 6) for the station you want. The
touch−screen button is highlighted and the
station frequency appears on the screen.
Seek tuning: Push the “
” or “” button of
“SEEK·TRACK”. The radio will begin seek-
ing up or down for a station of the nearest fre-
quency and will stop on reception. Each time
you push the button, the stations will be
searched automatically one after another.
To scan all the frequencies: Touch “SCAN”
on the screen or push the “SCAN” button
briefly. “SCAN” appears on the screen. The
radio will find the next station and stay there
for a few seconds, and then scan again. To
select a station, touch “SCAN” or push the
“SCAN” button again.
To scan the preset stations: Touch
“SCAN” on the screen or push the “SCAN”
button for longer than approximately a sec-
ond. “P·SCAN” appears on the screen. The
radio will tune in the next preset station, stay
there for a few seconds, and then move to the
next preset station. To select a station, touch
“SCAN” or push the “SCAN” button again.
Page 171 of 207

160
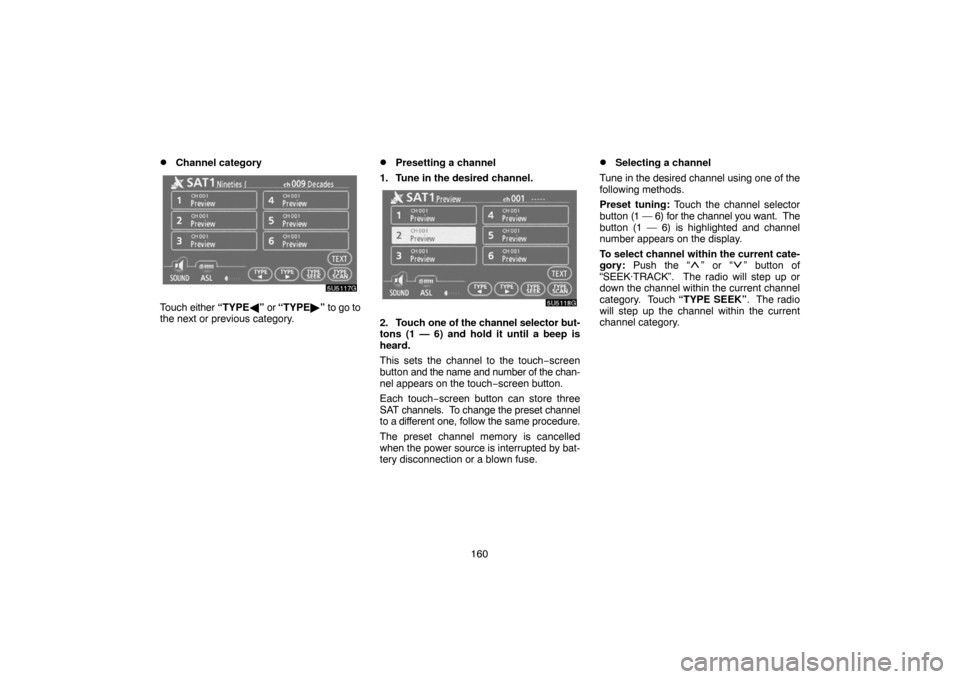
�Channel category
Touch either “TYPE�” or “TYPE�” to go to
the next or previous category.
�Presetting a channel
1. Tune in the desired channel.
2. Touch one of the channel selector but-
tons (1 — 6) and hold it until a beep is
heard.
This sets the channel to the touch−screen
button and the name and number of the chan-
nel appears on the touch−screen button.
Each touch−screen button can store three
SAT channels. To change the preset channel
to a different one, follow the same procedure.
The preset channel memory is cancelled
when the power source is interrupted by bat-
tery disconnection or a blown fuse.
�Selecting a channel
Tune in the desired channel using one of the
following methods.
Preset tuning: Touch the channel selector
button (1 — 6) for the channel you want. The
button (1 — 6) is highlighted and channel
number appears on the display.
To select channel within the current cate-
gory: Push the “
” or “” button of
“SEEK·TRACK”. The radio will step up or
down the channel within the current channel
category. Touch “TYPE SEEK”. The radio
will step up the channel within the current
channel category.
Page 178 of 207

167 (d) Selecting a desired disc
Touch the desired disc number on the
screen.
The selected disc number is highlighted.
The changer will start playing the selected
disc from the first track.(e) Operating an audio CD
�Playing an audio CD
Push the “AUDIO” button to display this
screen.
CD text only — The disc title and track title will
appear on the screen when pushing the
“DISC·AUX” button.
You can operate the touch−screen buttons
and choose the number of the disc you want
to play. The selected disc is automatically
played.
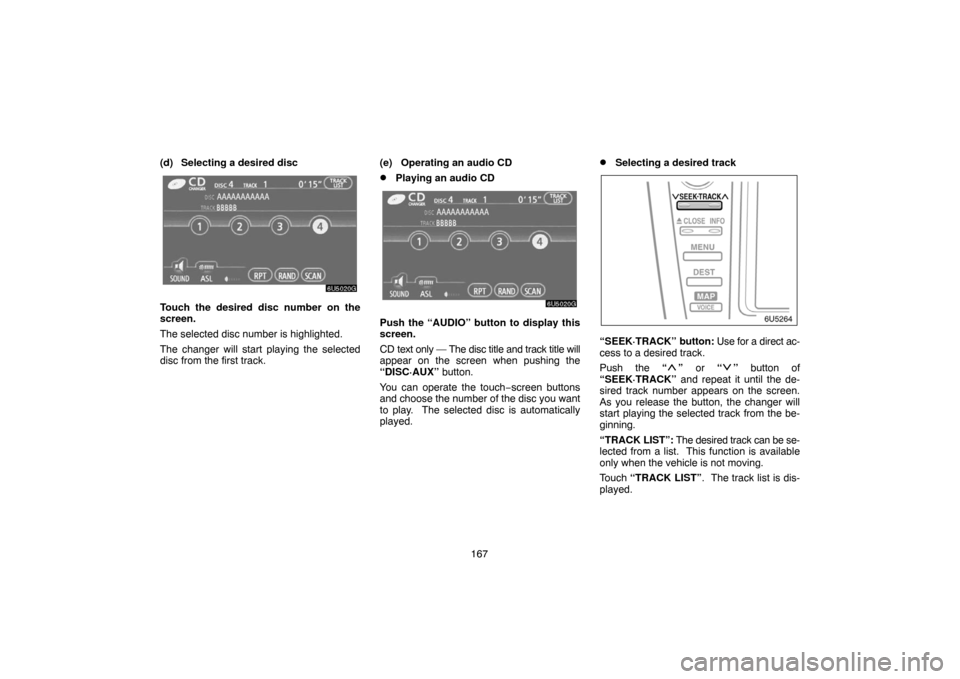
�Selecting a desired track
“SEEK·TRACK” button: Use for a direct ac-
cess to a desired track.
Push the “
” or “” button of
“SEEK·TRACK” and repeat it until the de-
sired track number appears on the screen.
As you release the button, the changer will
start playing the selected track from the be-
ginning.
“TRACK LIST”: The desired track can be se-
lected from a list. This function is available
only when the vehicle is not moving.
Touch “TRACK LIST”. The track list is dis-
played.
Page 187 of 207

176 Static and fluttering — These occur when
signals are blocked by buildings, trees, or oth-
er large objects. Increasing the bass level
may reduce static and fluttering.
Station swapping — If the FM signal you are
listening to is interrupted or weakened, and
there is another strong station nearby on the
FM band, your radio may tune in the second
station until the original signal can be picked
up again.
AM
Fading — AM broadcasts are reflected by the
upper atmosphere — especially at night.
These reflected signals can interfere with
those received directly from the radio station,
causing the radio station to sound alternately
strong and weak.
Station interference — When a reflected
signal and a signal received directly from a ra-
dio station are very nearly the same frequen-
cy, they can interfere with each other, making
it difficult to hear the broadcast.
Static — AM is easily affected by external
sources of electrical noise, such as high ten-
sion power lines, lightening, or electrical mo-
tors. This results in static.MP3/WMA files
�MP3 (MPEG Audio Layer 3) and WMA
(Windows Media Audio) are audio com-
pression standards.
�The MP3/WMA player can play MP3 and
WMA files on CD−ROM, CD−R and CD−
RW discs.
The unit can play disc recordings compat-
ible with ISO 9660 level 1 and level 2 and
with the Romeo and Joliet file system.
�When naming an MP3 or WMA file, add
the appropriate file extension (.mp3 or
.wma).
�The MP3/WMA player plays back files
with .mp3 or .wma file extensions as MP3
or WMA files. To prevent noise and play-
back errors, use the appropriate file ex-
tensions.
�The player can play only the first session
using multi−session compatible CDs.
�MP3 files are compatible with the ID3 Tag
Ver. 1.0, Ver. 1.1, Ver. 2.2, and Ver. 2.3 for-
mats. The unit cannot display disc title,
track title and artist name in other formats.
�WMA files can contain a WMA tag that is
used in the same way as an ID3 tag. WMA
tags carry information such as track title,
artist name.
�The emphasis function is available only
when playing MP3/WMA files recorded at
32, 44.1 and 48 kHz. (The system can
play MP3 files with sampling frequencies
of 16, 22.05, and 24 kHz. However, the
emphasis function is not available for files
recorded at these frequencies.)
�The sound quality of MP3/WMA files gen-
erally improves with higher bit rates. In or-
der to achieve a reasonable level of sound
quality, discs recorded with a bit rate of at
least 128 kbps are recommended.
Playable bit rates
MP3 files:
MPEG1 LAYER3—64 to 320 kbps
MPEG2 LSF LAYER3—64 to 160 kbps
WMA files:
Ver. 7, 8 CBR—48 to 192 kbps
Ver. 9 CBR—48 to 320 kbps
�The MP3/WMA player does not play back
MP3/WMA files from discs recorder using
packet write data transfer (UDF format).
Discs should be recorded using “pre−
mastering” software rather than packet−
write software.
�The m3u playlists are not compatible with
the audio player.
�MP3i (MP3 interactive) and MP3PRO for-
mats are not compatible with the audio
player.