2007 SUZUKI FORENZA specifications
[x] Cancel search: specificationsPage 101 of 225

3-25 INSTRUMENT PANEL
85Z03-03E
See “Fog Lamps” under Exterior Lamps in
this section for more information.Cruise Control LightIf your vehicle has this feature, this light will
come on briefly when the ignition is turned
on.
The CRUISE light comes on whenever the
cruise control is set. See “Cruise Control”
in this section. The light will turn off when
the cruise control is turned off.High beam On LightThis light comes on whenever the high-
beam headlamps are on.
See “Headlamp High/Low-Beam Changer”
under “Turn Signal/Multifunction Lever” in
this section for additional information.
Fuel GaugeYour fuel gauge tells you approximately
how much fuel you have left, when the igni-
tion is on. When the indicator nears empty,
the low fuel warning light will come on. You
still have a little fuel left, but you should get
more soon. See “Low Fuel Warning Light”
in this section for more information.
Here are four things that some owners ask
about. None of these show a problem with
your fuel gauge:
At the service station, the gas pump
shuts off before the gauge reads full.
It takes a little more or less fuel to fill up
than the gauge indicated. For example,
the gauge may have indicated the tank
was half full, but it actually took a little
more or less than half the tank’s capacity
to fill the tank. The indicator moves a little when you
turn a corner or speed up.
The gauge goes back to empty when
you turn off the ignition.
For your fuel tank capacity, see “Capacities
and Specifications” in section 5.
Low Fuel Warning LightThis light will come on when the fuel tank is
low on fuel.
To turn it off, add fuel to the fuel tank. See
“Filling Your Tank” in section 5.
N5U3004A
Warning Lights, Gauges and Indicators:
Page 144 of 225

SERVICE AND APPEARANCE CARE
5
85Z03-03E
SERVICE AND APPEARANCE CAREService ................................................................................. 5-1
Fuel ....................................................................................... 5-1
Checking Things Under the Hood ..................................... 5-4
Headlamp Aiming ................................................................ 5-23
Bulb Replacement ............................................................... 5-23
Windshield Wiper Blade Replacement .............................. 5-28
Tires ...................................................................................... 5-28
Tire Pressure Monitoring System ...................................... 5-33
Appearance Care ................................................................. 5-45
Vehicle Identification .......................................................... 5-49
Electrical System ................................................................ 5-49
Capacities and Specifications ........................................... 5-54
Page 145 of 225
5-1 SERVICE AND APPEARANCE CARE
85Z03-03E
ServiceYour SUZUKI dealer knows your vehicle
best and wants you to be happy with it. We
hope you’ll go to your SUZUKI dealer for
all your service needs. You’ll get genuine
SUZUKI parts and SUZUKI trained and
supported service people.
We hope you’ll want to keep your SUZUKI
vehicle all SUZUKI. Doing Your Own Service WorkYour vehicle has an air bag system. Before
attempting to do your own service work,
see “Servicing Your Air Bag-Equipped
Vehicle” in section 1.
You should keep a record with all parts
receipts and list the mileage and the date
of any service work you perform. See
“Maintenance Record” in section 6.
Adding Equipment to the Outside of
Your VehicleThings you might add to the outside of your
vehicle can affect the airflow around it. This
may cause wind noise and affect wind-
shield washer performance. Check with
your SUZUKI dealer before adding equip-
ment to the outside of your vehicle.
FuelUse of the recommended fuel is an impor-
tant part of the proper maintenance of your
vehicle.Gasoline OctaneUse only unleaded gasoline with a posted
octane rating of 87 or higher. In an emer-
gency, you may be able to use a lower
octane rating – as low as 85 – if heavy
knocking does not occur. Refill your tank
with proper fuel as soon as possible. Oth-
erwise, you might damage your engine. If
you are using 87 or higher-octane rating
fuel and you hear heavy knocking, your
engine needs service.California FuelIf your vehicle is certified to meet California
Emission Standards (see the underhood
emission control label), it is designed to
operate on fuels that meet California spec-
ifications. If this fuel is not available in
states adopting California emissions stan-
dards, your vehicle will operate satisfacto-
rily on fuels meeting federal specifications,
but emission control system performance
may be affected. The malfunction indicator
lamp may turn on (see Malfunction Indica-
tor Lamp in section 3) and your vehicle
may fail a smog-check test. If this occurs,
return to your SUZUKI dealer for diagno-
sis.
WARNING
You can be injured and your vehicle
could be damaged if you try to do
service work on a vehicle without
knowing enough about it.
Be sure you have sufficient knowl-
edge, experience, the proper
replacement parts and tools before
you attempt any vehicle mainte-
nance task.
Be sure to use the proper nuts,
bolts and other fasteners.
“English” and “metric” fasteners
can be easily confused. If you use
the wrong fasteners, parts can later
break or fall off. You could be hurt.
Service:
Fuel:
Page 151 of 225
5-7 SERVICE AND APPEARANCE CARE
85Z03-03E
Engine OilIf the oil pressure light appears on the
instrument cluster, it means you need to
check your engine oil level right away.
For more information, see “Oil Pressure
Light” in section 3.
You should check your engine oil level reg-
ularly; this is an added reminder.
Checking Engine Oil
It’s a good idea to check your engine oil
every time you get fuel. In order to get an
accurate reading, the oil must be warm
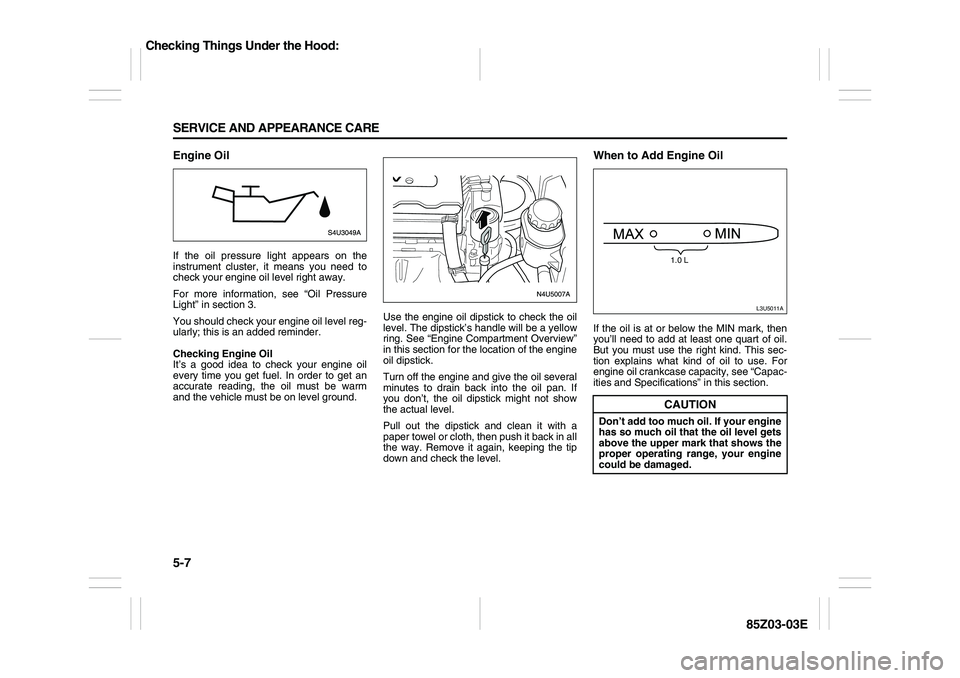
and the vehicle must be on level ground.Use the engine oil dipstick to check the oil
level. The dipstick’s handle will be a yellow
ring. See “Engine Compartment Overview”
in this section for the location of the engine
oil dipstick.
Turn off the engine and give the oil several
minutes to drain back into the oil pan. If
you don’t, the oil dipstick might not show
the actual level.
Pull out the dipstick and clean it with a
paper towel or cloth, then push it back in all
the way. Remove it again, keeping the tip
down and check the level.
When to Add Engine OilIf the oil is at or below the MIN mark, then
you’ll need to add at least one quart of oil.
But you must use the right kind. This sec-
tion explains what kind of oil to use. For
engine oil crankcase capacity, see “Capac-
ities and Specifications” in this section.
CAUTION
Don’t add too much oil. If your engine
has so much oil that the oil level gets
above the upper mark that shows the
proper operating range, your engine
could be damaged.
L3U5011A
1.0 L
Checking Things Under the Hood:
Page 158 of 225

5-14 SERVICE AND APPEARANCE CARE
85Z03-03E
When replacing the pressure cap, make
sure it is hand-tight.Coolant Surge Tank Pressure Cap
Engine OverheatingYou will find a coolant temperature gauge
on your vehicle’s instrument panel. See
“Engine Coolant Temperature Gauge” in
section 3.If Steam Is Coming From Your Engine
If No Steam Is Coming From Your
Engine
If you get an engine overheat warning, but
see or hear no steam, the problem may not
be too serious. Sometimes the engine can
get a little too hot when you:
Climb a long hill on a hot day.
Stop after high-speed driving.
Idle for long periods in traffic.
If you get the overheat warning with no
sign of steam, try this for a minute or so:
1) In heavy traffic, let the engine idle in
NEUTRAL while stopped. If it is safe to
do so, pull off the road, shift to PARK
(P) or NEUTRAL and let the engine
idle.
2) Turn on your heater to full hot at the
highest fan speed and open the window
as necessary.
If you no longer have the overheat warn-
ing, you can drive. Just to be safe, drive
slower for about 10 minutes. If the warning
doesn’t come back on, you can drive nor-
mally.
CAUTION
Your coolant surge tank cap is a
pressure-type cap and must be
tightly installed to prevent coolant
loss and possible engine damage
from overheating. See “Capacities
and Specifications” for more informa-
tion.
WARNING
Steam from an overheated engine
can burn you badly, even if you just
open the hood. Stay away from the
engine if you see or hear steam com-
ing from it. Just turn it off and get
everyone away from the vehicle until
it cools down. Wait until there is no
sign of steam or coolant before you
open the hood.
If you keep driving when your engine
is overheated, the liquids in it can
catch fire. You or others could be
badly burned. Stop your engine if it
overheats, and get out of the vehicle
until the engine is cool.
CAUTION
If your engine catches fire because
you keep driving with no coolant,
your vehicle can be badly damaged.
The costly repairs would not be cov-
ered by your warranty.
Checking Things Under the Hood:
Page 187 of 225

5-43 SERVICE AND APPEARANCE CARE
85Z03-03E
Don’t try to put a wheel cover on your com-
pact spare tire. It won’t fit. Store the wheel
cover in the trunk until you have the flat tire
repaired or replaced.Storing the Flat Tire and Tools
Store the flat tire in the compact spare tire
compartment. Place the tire in the com-
partment, then secure the retainer. Store
the jack in its housing in the cargo area.
Secure the jack by turning the retainer
clockwise. Store the tools securely in the
foam tray and place the tray on top of the
tire. Replace the trim cover.
Storing the Spare Tire and Tools
The compact spare tire is for temporary
use only. Replace the compact spare tire
with a full-size tire as soon as you can. See
“Compact Spare Tire” in this section.
WARNING
Incorrect wheel nuts or improperly
tightened wheel nuts can cause the
wheel to come loose and even come
off. This could lead to an accident. Be
sure to use the correct wheel nuts. If
you have to replace them, be sure to
get new SUZUKI original equipment
wheel nuts. Stop somewhere as soon
as you can and have the nuts tight-
ened with a torque wrench to the
proper torque specification. See
“Capacities and Specifications” in
the Index for the wheel nut torque
specification.
CAUTION
Improperly tightened wheel nuts can
lead to brake pulsation and rotor
damage. To avoid expensive brake
repairs, evenly tighten the wheel nuts
in the proper sequence and to the
proper torque specification. See
“Capacities and Specifications” in
the index for the wheel nut torque
specification.
CAUTION
If you install a full-size tire rather than
your compact spare tire, reinstall the
wheel cover as follows:
1) Put the wheel cover on the full-
size tire.
2) Fasten the 4 plastic caps snugly
by hand.
3) Tighten the caps by turning them
an additional 90° with the wheel
wrench.
– The proper tightening torque is a
maximum of 5.9 lb-ft (8 N·m).
– Tightening to the improper
torque can cause damage to the
plastic caps.
CAUTION
Wheel covers will not fit on your com-
pact spare. If you try to put a wheel
cover on the compact spare, you
could damage the cover or the spare.
WARNING
Improperly storing a jack, a tire, or
other equipment in the passenger
compartment of the vehicle could
cause injury. In a sudden stop or col-
lision, loose equipment could strike
someone. Store all these items in the
proper place.
WARNING
Storing a jack, a tire, or other equip-
ment in the passenger compartment
of the vehicle could cause injury. In a
sudden stop or collision, loose
equipment could strike someone.
Store all these in the proper place.
Appearance Care:
Page 193 of 225
5-49 SERVICE AND APPEARANCE CARE
85Z03-03E
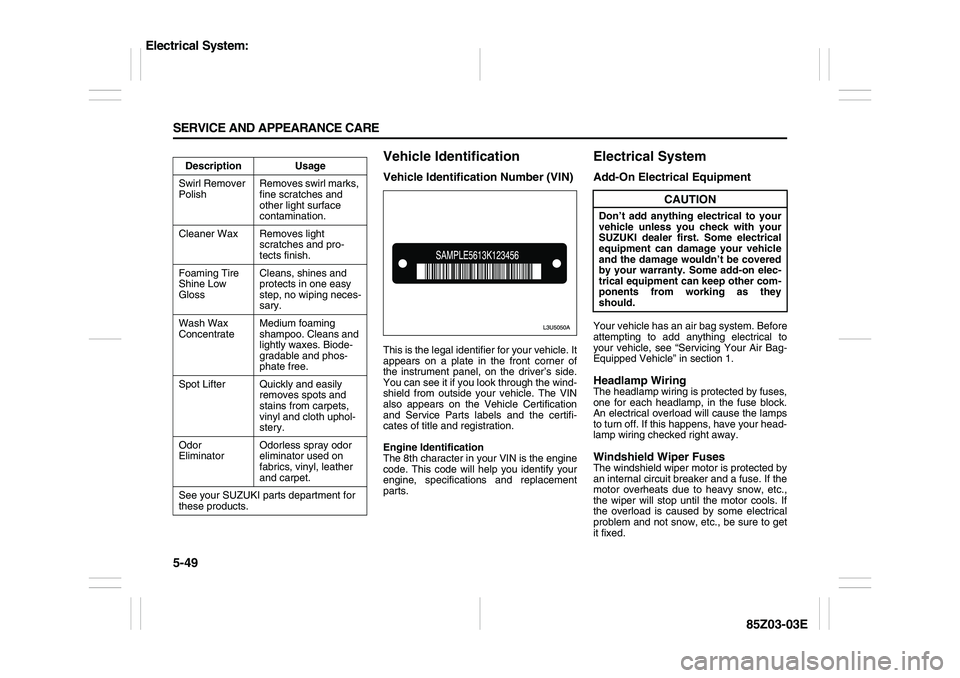
Vehicle IdentificationVehicle Identification Number (VIN)This is the legal identifier for your vehicle. It
appears on a plate in the front corner of
the instrument panel, on the driver’s side.
You can see it if you look through the wind-
shield from outside your vehicle. The VIN
also appears on the Vehicle Certification
and Service Parts labels and the certifi-
cates of title and registration.
Engine Identification
The 8th character in your VIN is the engine
code. This code will help you identify your
engine, specifications and replacement
parts.
Electrical SystemAdd-On Electrical EquipmentYour vehicle has an air bag system. Before
attempting to add anything electrical to
your vehicle, see “Servicing Your Air Bag-
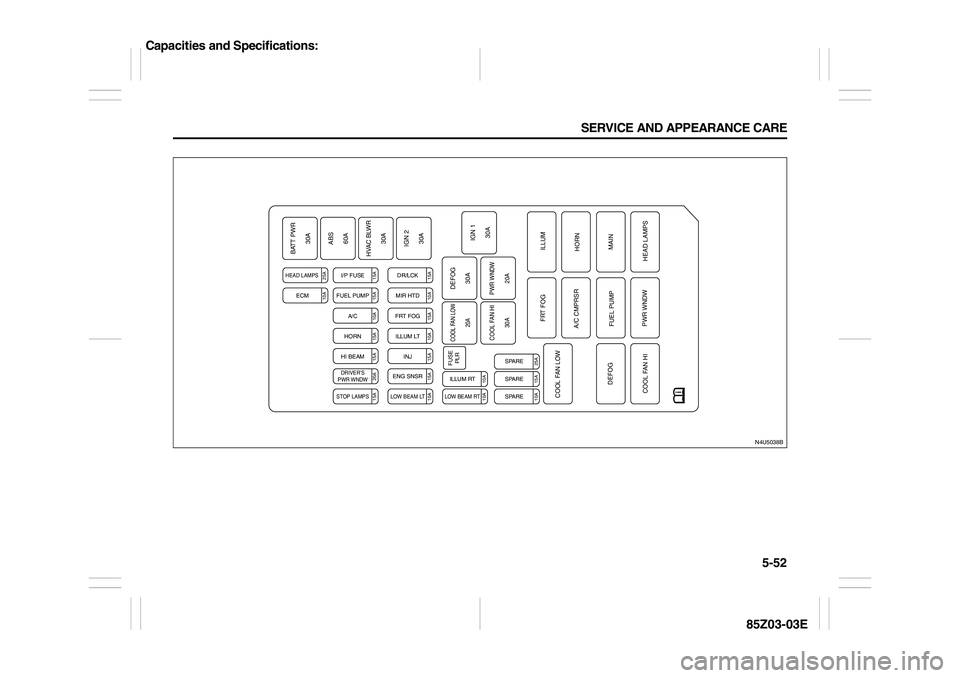
Equipped Vehicle” in section 1.Headlamp WiringThe headlamp wiring is protected by fuses,
one for each headlamp, in the fuse block.
An electrical overload will cause the lamps
to turn off. If this happens, have your head-
lamp wiring checked right away.Windshield Wiper FusesThe windshield wiper motor is protected by
an internal circuit breaker and a fuse. If the
motor overheats due to heavy snow, etc.,
the wiper will stop until the motor cools. If
the overload is caused by some electrical
problem and not snow, etc., be sure to get
it fixed. Description Usage
Swirl Remover
PolishRemoves swirl marks,
fine scratches and
other light surface
contamination.
Cleaner Wax Removes light
scratches and pro-
tects finish.
Foaming Tire
Shine Low
GlossCleans, shines and
protects in one easy
step, no wiping neces-
sary.
Wash Wax
ConcentrateMedium foaming
shampoo. Cleans and
lightly waxes. Biode-
gradable and phos-
phate free.
Spot Lifter Quickly and easily
removes spots and
stains from carpets,
vinyl and cloth uphol-
stery.
Odor
EliminatorOdorless spray odor
eliminator used on
fabrics, vinyl, leather
and carpet.
See your SUZUKI parts department for
these products.
CAUTION
Don’t add anything electrical to your
vehicle unless you check with your
SUZUKI dealer first. Some electrical
equipment can damage your vehicle
and the damage wouldn’t be covered
by your warranty. Some add-on elec-
trical equipment can keep other com-
ponents from working as they
should.
Electrical System:
Page 196 of 225
5-52 SERVICE AND APPEARANCE CARE
85Z03-03EN4U5038B
HEAD LAMPSBATT PWR
30A
ABS
60A
HVAC BLWR
30A
IGN 2
30A
IGN 1
30A
ILLUM
HORN
MAIN
HEAD LAMPS FRT FOG
A/C CMPRSR
FUEL PUMP
PWR WNDW COOL FAN LOW
DEFOG
COOL FAN HIDEFOG
30A
COOL FAN LOW
20A
PWR WNDW
20A COOL FAN HI
30A
25A
I/P FUSE
15A
DR/LCK
15A
ECM
10AFUEL PUMP
15A
MIR HTD
10A
A/C
10A
FRT FOG
15A
HORN
15A
ILLUM LT
10A
HI BEAM
15A
INJ
15A
DRIVER’S
PWR WNDW
20A
ENG SNSR
15A
STOP LAMPS
15A
LOW BEAM LT
10A
LOW BEAM RT
10A
SPARE
10A
ILLUM RT
10A
SPARE
15A
FUSE
PLR
SPARE
25A
Capacities and Specifications: