2007 SUZUKI FORENZA tires
[x] Cancel search: tiresPage 184 of 225
5-40 SERVICE AND APPEARANCE CARE
85Z03-03E
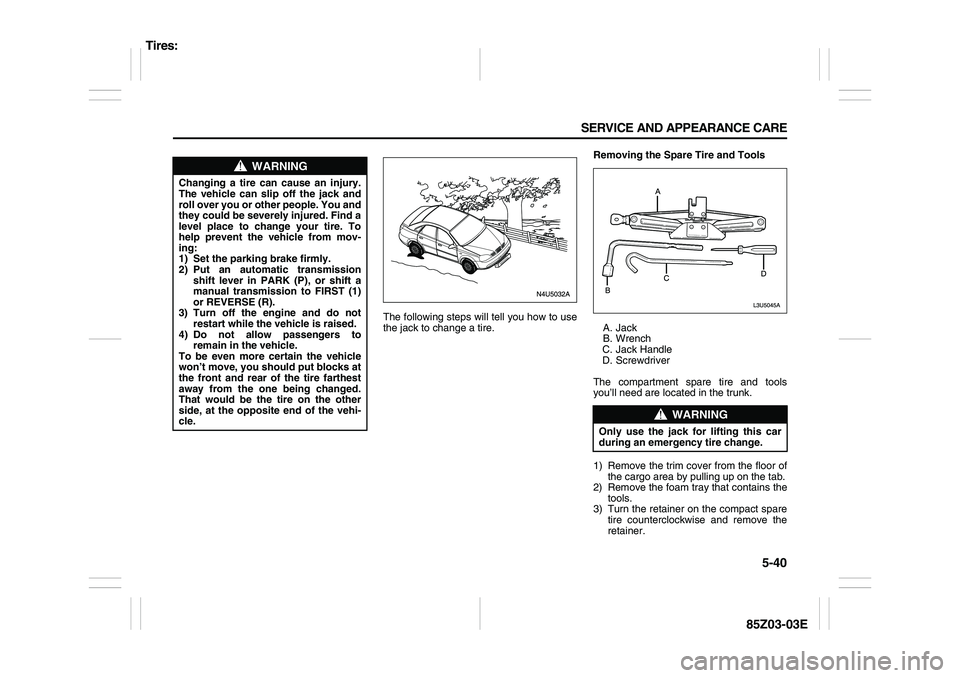
The following steps will tell you how to use
the jack to change a tire.Removing the Spare Tire and Tools
A. Jack
B. Wrench
C. Jack Handle
D. Screwdriver
The compartment spare tire and tools
you’ll need are located in the trunk.
1) Remove the trim cover from the floor of
the cargo area by pulling up on the tab.
2) Remove the foam tray that contains the
tools.
3) Turn the retainer on the compact spare
tire counterclockwise and remove the
retainer.
WARNING
Changing a tire can cause an injury.
The vehicle can slip off the jack and
roll over you or other people. You and
they could be severely injured. Find a
level place to change your tire. To
help prevent the vehicle from mov-
ing:
1) Set the parking brake firmly.
2) Put an automatic transmission
shift lever in PARK (P), or shift a
manual transmission to FIRST (1)
or REVERSE (R).
3) Turn off the engine and do not
restart while the vehicle is raised.
4) Do not allow passengers to
remain in the vehicle.
To be even more certain the vehicle
won’t move, you should put blocks at
the front and rear of the tire farthest
away from the one being changed.
That would be the tire on the other
side, at the opposite end of the vehi-
cle.
WARNING
Only use the jack for lifting this car
during an emergency tire change.
Tires:
Page 185 of 225
5-41 SERVICE AND APPEARANCE CARE
85Z03-03E
4) Remove the compact spare tire. See
“Compact Spare Tire” in this section for
more information.
5) Remove the jack, jack handle and the
wheel wrench. The jack is located in the
cargo area. Turn the jack retainer,
located on the right side of the jack,
counterclockwise to release it. The jack
handle and the wheel wrench are
located inside the foam tray.
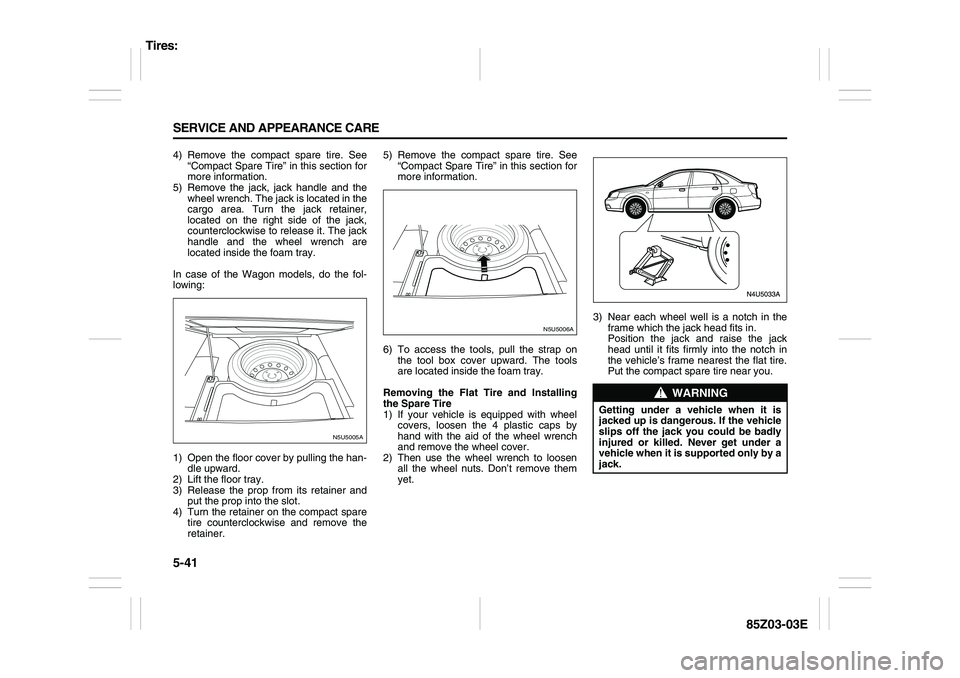
In case of the Wagon models, do the fol-
lowing:
1) Open the floor cover by pulling the han-
dle upward.
2) Lift the floor tray.
3) Release the prop from its retainer and
put the prop into the slot.
4) Turn the retainer on the compact spare
tire counterclockwise and remove the
retainer.5) Remove the compact spare tire. See
“Compact Spare Tire” in this section for
more information.
6) To access the tools, pull the strap on
the tool box cover upward. The tools
are located inside the foam tray.
Removing the Flat Tire and Installing
the Spare Tire
1) If your vehicle is equipped with wheel
covers, loosen the 4 plastic caps by
hand with the aid of the wheel wrench
and remove the wheel cover.
2) Then use the wheel wrench to loosen
all the wheel nuts. Don’t remove them
yet.3) Near each wheel well is a notch in the
frame which the jack head fits in.
Position the jack and raise the jack
head until it fits firmly into the notch in
the vehicle’s frame nearest the flat tire.
Put the compact spare tire near you.
N5U5005A
N5U5006A
WARNING
Getting under a vehicle when it is
jacked up is dangerous. If the vehicle
slips off the jack you could be badly
injured or killed. Never get under a
vehicle when it is supported only by a
jack.
Tires:
Page 186 of 225
5-42 SERVICE AND APPEARANCE CARE
85Z03-03E
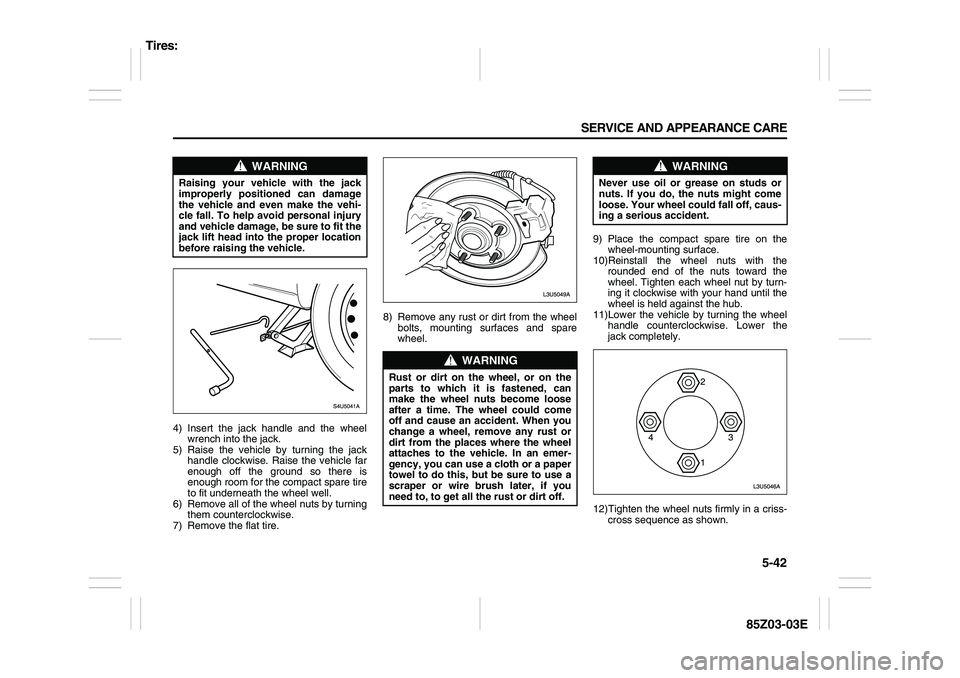
4) Insert the jack handle and the wheel
wrench into the jack.
5) Raise the vehicle by turning the jack
handle clockwise. Raise the vehicle far
enough off the ground so there is
enough room for the compact spare tire
to fit underneath the wheel well.
6) Remove all of the wheel nuts by turning
them counterclockwise.
7) Remove the flat tire.8) Remove any rust or dirt from the wheel
bolts, mounting surfaces and spare
wheel.9) Place the compact spare tire on the
wheel-mounting surface.
10)Reinstall the wheel nuts with the
rounded end of the nuts toward the
wheel. Tighten each wheel nut by turn-
ing it clockwise with your hand until the
wheel is held against the hub.
11)Lower the vehicle by turning the wheel
handle counterclockwise. Lower the
jack completely.
12)Tighten the wheel nuts firmly in a criss-
cross sequence as shown.
WARNING
Raising your vehicle with the jack
improperly positioned can damage
the vehicle and even make the vehi-
cle fall. To help avoid personal injury
and vehicle damage, be sure to fit the
jack lift head into the proper location
before raising the vehicle.
WARNING
Rust or dirt on the wheel, or on the
parts to which it is fastened, can
make the wheel nuts become loose
after a time. The wheel could come
off and cause an accident. When you
change a wheel, remove any rust or
dirt from the places where the wheel
attaches to the vehicle. In an emer-
gency, you can use a cloth or a paper
towel to do this, but be sure to use a
scraper or wire brush later, if you
need to, to get all the rust or dirt off.
WARNING
Never use oil or grease on studs or
nuts. If you do, the nuts might come
loose. Your wheel could fall off, caus-
ing a serious accident.
Tires:
Page 188 of 225
5-44 SERVICE AND APPEARANCE CARE
85Z03-03E
Compact Spare TireAlthough the compact spare tire was fully
inflated when your vehicle was new, it can
lose air after a time. Check the inflation
pressure regularly. It should be 60 psi (420
kPa).
After installing the compact spare tire on
your vehicle, you should stop as soon as
possible and make sure your compact
spare tire is correctly inflated. The compact
spare tire is made to perform well at
speeds up to 50 mph (80 km/h), so you
can finish your trip and have your full-size
tire repaired or replaced where you want.
Of course, it’s best to replace your spare
with a full-size tire as soon as you can.
Your spare will last longer and be in good
shape in case you need it again.
Don’t use your compact spare tire on other
vehicles.
And don’t mix your compact spare tire or
wheel with other wheels or tires. They
won’t fit. Keep your compact spare tire and
its wheel together.
CAUTION
When the compact spare Tire is
installed, don’t take your vehicle
through an automatic car wash with
guide rails. The compact spare can
get caught on the rails. That can
damage the tire and wheel, and
maybe other parts of your vehicle.
CAUTION
Tire chains won’t fit your compact
spare tire. Using them can damage
your vehicle and can damage the
chains too. Don’t use tire chains on
your compact spare.
WARNING
The compact spare tire and wheel are
intended for temporary emergency
use only. Continuous use of the com-
pact spare tire can result in tire fail-
ure and loss of control. Always
observe these precautions when
using the compact spare tire:
Your vehicle will handle differently
with this temporary spare.
Do not exceed 80 km/h (50 mph)
speed.
Replace the compact spare tire
with a standard tire and wheel as
soon as possible.
Use of the compact spare tire will
reduce ground clearance.
Recommended air pressure for the
compact spare tire is 420 kPa (60
psi).
(Continued)
WARNING
(Continued)
Do not use tire chains on the com-
pact spare tire. If you must use tire
chains, rearrange the wheels so
standard tires and wheels are fitted
to the front axle.
The compact spare tire has a much
shorter tread life than the conven-
tional tires on your vehicle.
Replace the tire as soon as the
tread wear indicator appears.
When replacing the compact spare
tire, use a replacement tire with the
exact same size and construction.
Appearance Care:
Page 191 of 225
5-47 SERVICE AND APPEARANCE CARE
85Z03-03E
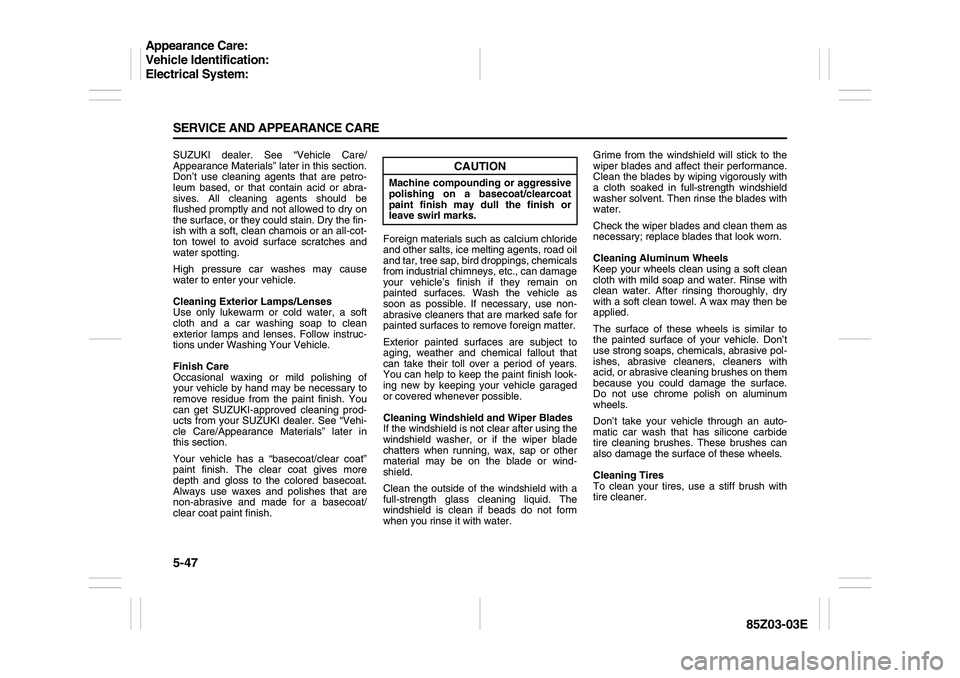
SUZUKI dealer. See “Vehicle Care/
Appearance Materials” later in this section.
Don’t use cleaning agents that are petro-
leum based, or that contain acid or abra-
sives. All cleaning agents should be
flushed promptly and not allowed to dry on
the surface, or they could stain. Dry the fin-
ish with a soft, clean chamois or an all-cot-
ton towel to avoid surface scratches and
water spotting.
High pressure car washes may cause
water to enter your vehicle.
Cleaning Exterior Lamps/Lenses
Use only lukewarm or cold water, a soft
cloth and a car washing soap to clean
exterior lamps and lenses. Follow instruc-
tions under Washing Your Vehicle.
Finish Care
Occasional waxing or mild polishing of
your vehicle by hand may be necessary to
remove residue from the paint finish. You
can get SUZUKI-approved cleaning prod-
ucts from your SUZUKI dealer. See “Vehi-
cle Care/Appearance Materials” later in
this section.
Your vehicle has a “basecoat/clear coat”
paint finish. The clear coat gives more
depth and gloss to the colored basecoat.
Always use waxes and polishes that are
non-abrasive and made for a basecoat/
clear coat paint finish.Foreign materials such as calcium chloride
and other salts, ice melting agents, road oil
and tar, tree sap, bird droppings, chemicals
from industrial chimneys, etc., can damage
your vehicle’s finish if they remain on
painted surfaces. Wash the vehicle as
soon as possible. If necessary, use non-
abrasive cleaners that are marked safe for
painted surfaces to remove foreign matter.
Exterior painted surfaces are subject to
aging, weather and chemical fallout that
can take their toll over a period of years.
You can help to keep the paint finish look-
ing new by keeping your vehicle garaged
or covered whenever possible.
Cleaning Windshield and Wiper Blades
If the windshield is not clear after using the
windshield washer, or if the wiper blade
chatters when running, wax, sap or other
material may be on the blade or wind-
shield.
Clean the outside of the windshield with a
full-strength glass cleaning liquid. The
windshield is clean if beads do not form
when you rinse it with water.Grime from the windshield will stick to the
wiper blades and affect their performance.
Clean the blades by wiping vigorously with
a cloth soaked in full-strength windshield
washer solvent. Then rinse the blades with
water.
Check the wiper blades and clean them as
necessary; replace blades that look worn.
Cleaning Aluminum Wheels
Keep your wheels clean using a soft clean
cloth with mild soap and water. Rinse with
clean water. After rinsing thoroughly, dry
with a soft clean towel. A wax may then be
applied.
The surface of these wheels is similar to
the painted surface of your vehicle. Don’t
use strong soaps, chemicals, abrasive pol-
ishes, abrasive cleaners, cleaners with
acid, or abrasive cleaning brushes on them
because you could damage the surface.
Do not use chrome polish on aluminum
wheels.
Don’t take your vehicle through an auto-
matic car wash that has silicone carbide
tire cleaning brushes. These brushes can
also damage the surface of these wheels.
Cleaning Tires
To clean your tires, use a stiff brush with
tire cleaner.
CAUTION
Machine compounding or aggressive
polishing on a basecoat/clearcoat
paint finish may dull the finish or
leave swirl marks.
Appearance Care:
Vehicle Identification:
Electrical System:
Page 192 of 225
5-48 SERVICE AND APPEARANCE CARE
85Z03-03E
Sheet Metal DamageIf your vehicle is damaged and requires
sheet metal repair or replacement, make
sure the body repair shop applies anti-cor-
rosion material to parts repaired or
replaced to restore corrosion protection.
Original manufacturer replacement parts
will provide the corrosion protection while
maintaining the warranty.Finish DamageAny stone chips, fractures or deep
scratches in the finish should be repaired
right away. Bare metal will corrode quickly
and may develop into major repair
expense.
Minor chips and scratches can be repaired
with touch-up materials available from your
SUZUKI dealer. Larger areas of finish
damage can be corrected in your SUZUKI
dealer’s body and paint shop.
Underbody MaintenanceChemicals used for ice and snow removal
and dust control can collect on the under-
body. If these are not removed, acceler-
ated corrosion (rust) can occur on the
underbody parts such as fuel lines, frame,
floor pan and exhaust system even though
they have corrosion protection.
At least every spring, flush these materials
from the underbody with plain water. Clean
any areas where mud and debris can col-
lect. Dirt packed in close areas of the
frame should be loosened before being
flushed. Your SUZUKI dealer or an under-
body car washing system can do this for
you.Chemical Paint SpottingSome weather and atmospheric conditions
can create a chemical fallout. Airborne pol-
lutants can fall upon and attack painted
surfaces on your vehicle. This damage can
take two forms: blotchy, ring-shaped discol-
orations, and small, irregular dark spots
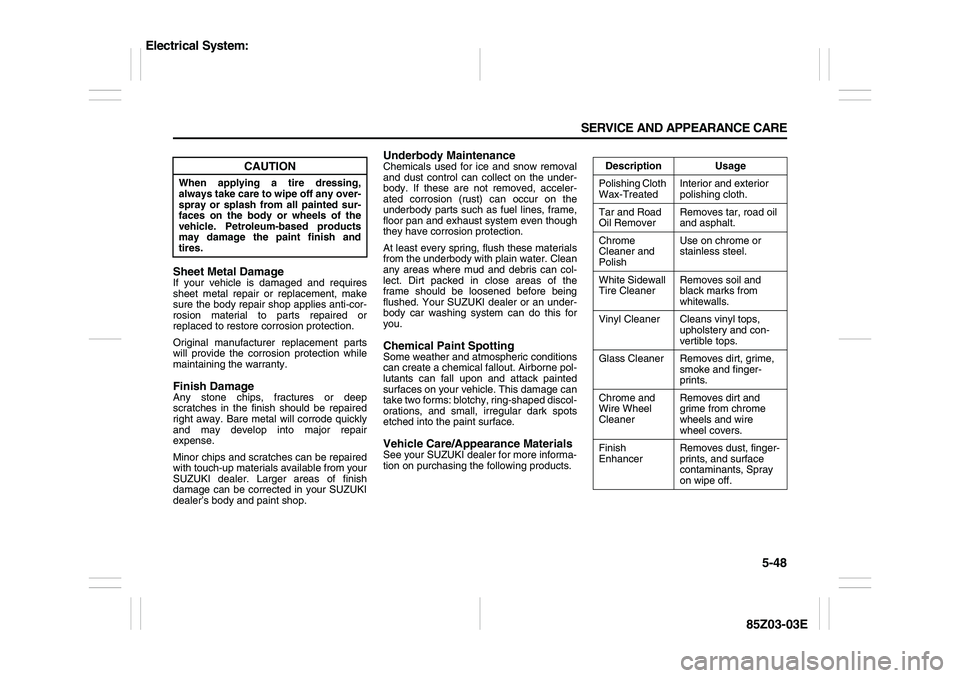
etched into the paint surface.Vehicle Care/Appearance MaterialsSee your SUZUKI dealer for more informa-
tion on purchasing the following products.
CAUTION
When applying a tire dressing,
always take care to wipe off any over-
spray or splash from all painted sur-
faces on the body or wheels of the
vehicle. Petroleum-based products
may damage the paint finish and
tires.
Description Usage
Polishing Cloth
Wax-TreatedInterior and exterior
polishing cloth.
Tar and Road
Oil RemoverRemoves tar, road oil
and asphalt.
Chrome
Cleaner and
PolishUse on chrome or
stainless steel.
White Sidewall
Tire CleanerRemoves soil and
black marks from
whitewalls.
Vinyl Cleaner Cleans vinyl tops,
upholstery and con-
vertible tops.
Glass Cleaner Removes dirt, grime,
smoke and finger-
prints.
Chrome and
Wire Wheel
CleanerRemoves dirt and
grime from chrome
wheels and wire
wheel covers.
Finish
EnhancerRemoves dust, finger-
prints, and surface
contaminants, Spray
on wipe off.
Electrical System:
Page 220 of 225
8-1 INDEX
88
85Z03-03E
INDEXAAccessory Power Outlet
.....................................................3-11
Adding Equipment to the Outside of Your Vehicle
..........5-1
Adding Equipment to Your Air Bag-Equipped Vehicle
....1-32
Additives
..............................................................................5-2
Add-On Electrical Equipment
.............................................5-49
Air Bag Readiness Light
.....................................................3-20
Antenna
................................................................................2-25
Anti-Lock Brake System (ABS)
..........................................4-3
Anti-Lock Brake System Warning Light
............................3-21
Appearance Care
.................................................................5-45
Ashtrays and Cigarette Lighter
..........................................3-11
Audio System
.......................................................................3-28
Automatic Transmission Fluid
...........................................5-10
Automatic Transmission Operation
...................................2-13
BBattery
..................................................................................5-20
Before Driving
......................................................................2-11
Before Leaving on a Long Trip
...........................................4-11
Brake System Warning Light
..............................................3-21
Brakes
...................................................................................5-18
Braking .................................................................................4-3
Bulb Replacement
...............................................................5-23
Buying New Tires ................................................................5-37
CCalifornia Fuel
......................................................................5-1
Capacities
.............................................................................5-54
Capacities and Specifications
............................................5-54CD CHANGER OPERATION (Optional)
............................. 3-44
Center High-Mounted Stop Lamp (Sedan) ........................ 5-25
Center High-Mounted Stop Lamp (Wagon) ...................... 5-25
Central Door Locking System
............................................ 2-5
Changing a Flat Tire
........................................................... 5-39
Charging System Light ....................................................... 3-20
Checking Things Under the Hood
..................................... 5-4
Checking Your Restraint Systems .................................... 1-34
Chemical Paint Spotting
..................................................... 5-48
Child Restraint Systems ..................................................... 1-19
Child Restraints
.................................................................. 1-16
City Driving
.......................................................................... 4-10
Cleaning the Inside of Your Vehicle
.................................. 5-45
Cleaning the Outside of Your Vehicle ............................... 5-46
Climate Control System
..................................................... 3-13
Climate Controls
................................................................. 3-13
Clock
.................................................................................... 3-12
Control of a Vehicle
............................................................ 4-2
Coolant Surge Tank Pressure Cap
.................................... 5-14
Cooling System
................................................................... 5-15
Correcting the Tire Pressure
............................................. 5-34
Cruise Control
..................................................................... 3-7
Cruise Control Light
........................................................... 3-25
Cupholder(s)
........................................................................ 2-22
DDaily Inspection Checklist
................................................. 2-11
Daytime Running Lamps Indicator Light
.......................... 3-26
Defensive Driving
................................................................ 4-1
Page 224 of 225
8-5 INDEX
85Z03-03E
Steering
................................................................................4-5
STEERING WHEEL REMOTE OPERATION
............. 3-36
, 3-44
Storage Areas
......................................................................2-22
Sun Visors
............................................................................2-9
Sunglasses Storage Compartment
....................................2-23
Sunroof
.................................................................................2-26
Supplemental Restraint System (air bags)
.......................1-27
TTachometer
..........................................................................3-19
Tail/Stop Lamps, Turn Signal Lamps and Backup Lamps
(Sedan)
.................................................................................5-26
Tail/Stop Lamps, Turn Signal Lamps and Backup Lamps
(Wagon) ................................................................................5-26
Theft-Deterrent Systems
.....................................................2-10
Tilt Wheel
..............................................................................3-4
Tire Chains ...........................................................................5-39
Tire Inflation Pressure
.........................................................5-35
Tire Inspection and Rotation
..............................................5-35
Tire Pressure Monitoring System
......................................5-33
Tire Pressure Monitoring System Warning Light
.............3-26
Tire Sidewall Labeling
.........................................................5-28
Tire Size
................................................................................5-30
Tires
......................................................................................5-28
Top Strap
..............................................................................1-21
Top Strap Anchor Location
................................................1-22
Towing
..................................................................................4-16
Towing a Trailer
...................................................................4-19
Towing Your Vehicle
...........................................................4-16
Trip Odometer
......................................................................3-19
Trunk (Sedan) ......................................................................2-6
Trunk Ajar Light ...................................................................3-26Turn Signal/Multifunction Lever
........................................ 3-4
UUnder Floor Bins (Wagon only)
......................................... 2-24
Underbody Maintenance
.................................................... 5-48
Uniform Tire Quality Grading
............................................. 5-37
VVehicle Care/Appearance Materials
.................................. 5-48
Vehicle Identification
.......................................................... 5-49
Vehicle Identification Number
........................................... 7-1
Vehicle Identification Number (VIN)
.................................. 5-49
Vehicle Loading
.................................................................. 5-36
WWarning Lights, Gauges and Indicators
........................... 3-18
Warranties
........................................................................... 7-2
Weatherstrips ...................................................................... 5-46
What Makes an Air Bag Inflate?
........................................ 1-33
What Will You See After an Air Bag Inflates?
.................. 1-33
Wheel Alignment and Tire Balance
................................... 5-38
Wheel Replacement
............................................................ 5-38
When It Is Time for New Tires
............................................ 5-36
When Should an Air Bag Inflate?
...................................... 1-32
When to Add Engine Oil
..................................................... 5-7
Where Are the Air Bags? .................................................... 1-30
Where to Put the Restraint ................................................. 1-20
Windows
.............................................................................. 2-8
Windshield Washer Fluid
................................................... 5-18
Windshield Wiper Blade Replacement
.............................. 5-28
Windshield Wiper Fuses
.................................................... 5-49
Windshield Wiper/Washer Lever
....................................... 3-5
Winter Driving
..................................................................... 4-13