Page 112 of 225

3-36 INSTRUMENT PANEL
85Z03-03E
AUX Mode
Press this button to listen to the audio con-
tents from other devices; Walkman, Porta-
ble CD Player, Portable MP3 Player, i-pod,
XM receiver, etc.
1) Connect the output port of the device to
the aux jack of the head unit with an
aux connector.
2) Turn the device on.
3) Press this button.
If you want to control the volume level, use
the volume buttons of the head unit or the
device.
Using the Auxiliary Input Jack
Your radio system has an auxiliary input
jack located on the lower right side of the
faceplate. This is not an audio output; do
not plug a headphone set into the front
auxiliary input jack. You can however, con-
nect an external audio device such as an
iPod, laptop computer, MP3 player, CD
changer, or cassette tape player, etc. to the
auxiliary input jack for use as another
source for audio listening.
The auxiliary input jack will also accept cell
phone connectors. Plug the cell phone
connector into the auxiliary input jack to
hear the other side of a cell phone’s con-
versation through the vehicle sound sys-
tem.
Drivers are encouraged to set up their por-
table audio player while the vehicle isparked. See Defensive Driving for more
information on driver distraction.
To use a portable audio player, connect a
3.5 mm (1/8 inch) cable to the radio’s front
auxiliary input jack. When a device is con-
nected, press the radio CD/AUX button as
needed to begin playing audio from the
device over the car speakers.
CD/AUX (CD/Auxiliary) button (9):
Press this button once to play a CD while a
portable audio device is playing. Press this
button a second time and the system will
begin playing audio from the connected
portable audio player. Once in this mode,
“Auxinput” will appear on the display. If the
auxiliary jack does not detect the presence
of an output jack, the aux mode will be pre-
vented from coming up.
Power/Volume knob (1):
Turn this knob clockwise or counterclock-
wise to increase or decrease the volume of
the portable player. You may need to make
additional volume adjustments from the
portable device if the volume does not go
loud or soft enough.
STEERING WHEEL REMOTE OPER-
ATION (if equipped in the vehicle)Power Button
Press this button to turn the system on and
off. Press this button for a short time to
MUTE the sound. Press the button again
to cancel MUTE.
Volume Up Button
Press this button to increase the volume
level.
Volume Down Button
Press this button to decrease the volume
level.
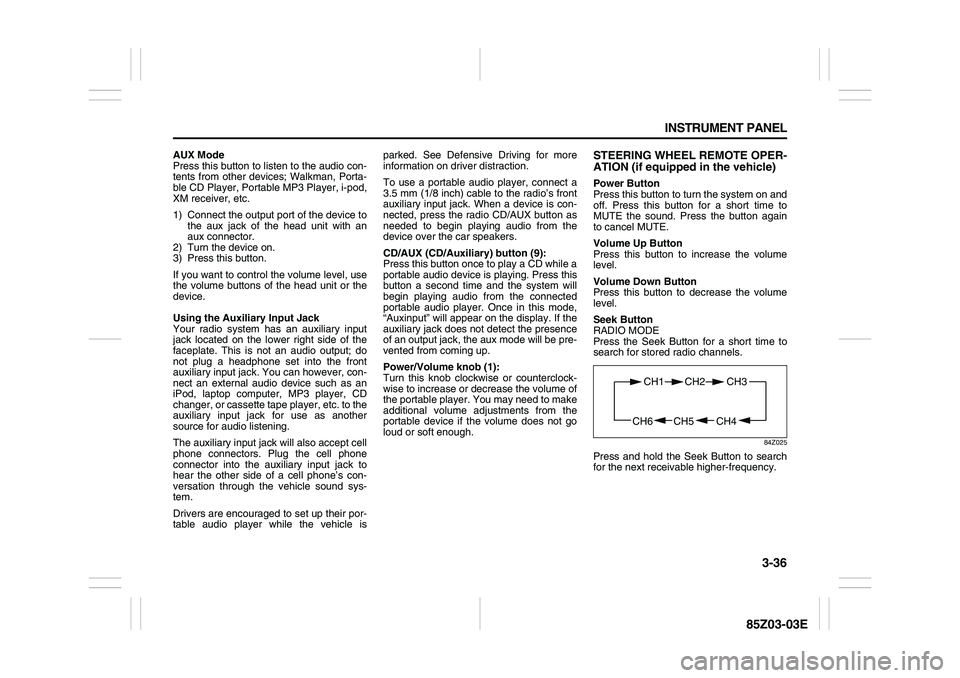
Seek Button
RADIO MODE
Press the Seek Button for a short time to
search for stored radio channels.
84Z025
Press and hold the Seek Button to search
for the next receivable higher-frequency.
CH4 CH5
CH1 CH2
CH6
CH3
Page 120 of 225

3-44 INSTRUMENT PANEL
85Z03-03E
STEERING WHEEL REMOTE OPER-
ATION (if equipped in the vehicle)Power Button
Press this button to turn the system on and
off. Press this button for a short time to
MUTE the sound. To cancel MUTE, press
this button again.
Volume Up Button
Press this button to increase the volume
level.
Volume Down Button
Press this button to decrease the volume
level.
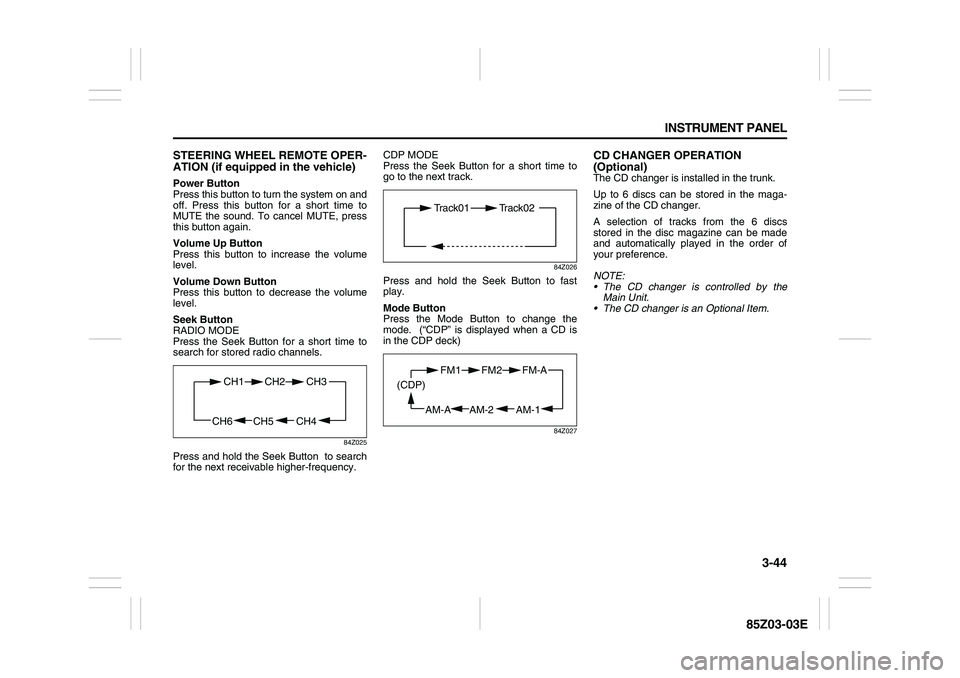
Seek Button
RADIO MODE
Press the Seek Button for a short time to
search for stored radio channels.
84Z025
Press and hold the Seek Button to search
for the next receivable higher-frequency.CDP MODE
Press the Seek Button for a short time to
go to the next track.
84Z026
Press and hold the Seek Button to fast
play.
Mode Button
Press the Mode Button to change the
mode. (“CDP” is displayed when a CD is
in the CDP deck)
84Z027
CD CHANGER OPERATION
(Optional)The CD changer is installed in the trunk.
Up to 6 discs can be stored in the maga-
zine of the CD changer.
A selection of tracks from the 6 discs
stored in the disc magazine can be made
and automatically played in the order of
your preference.
NOTE:
The CD changer is controlled by the
Main Unit.
The CD changer is an Optional Item.
CH4 CH5
CH1 CH2
CH6
CH3
Track01 Track02
AM-1 AM-2
FM1 FM2
AM-A (CDP)
FM-A
Page 132 of 225

4-8 DRIVING YOUR VEHICLE
85Z03-03E
steer the way you want the vehicle to go. If
you start steering quickly enough, your
vehicle may straighten out. Always be
ready for a second skid if it occurs.
Of course, traction is reduced when water,
snow, ice, gravel or other material is on the
road. For safety, you’ll want to slow down
and adjust your driving to these conditions.
It is important to slow down on slippery
surfaces because stopping distance will be
longer and vehicle control more limited.
While driving on a surface with reduced
traction, try your best to avoid sudden
steering, acceleration or braking (including
engine braking by shifting to a lower gear).
Any sudden changes could cause the tires
to slide. You may not realize the surface is
slippery until your vehicle is skidding.
Learn to recognize warning clues – such
as enough water, ice or packed snow on
the road to make a “mirrored surface” –
and slow down when you have any doubt.
If you have the anti-lock braking system,
remember: It helps avoid only the braking
skid. If you do not have anti-lock, then in a
braking skid (where the wheels are no
longer rolling), release enough pressure
on the brakes to get the wheels rolling
again. This restores steering control. Push
the brake pedal down steadily when you
have to stop suddenly. As long as the
wheels are rolling, you will have steering
control.
Driving at NightNight driving is more dangerous than day
driving. One reason is that some drivers
are likely to be impaired – by alcohol or
drugs, with night vision problems, or by
fatigue.
Here are some tips on night driving.
Drive defensively.
Don’t drink and drive.
Adjust your inside rearview mirror to
reduce the glare from headlamps behind
you.
Since you can’t see as well, you may
need to slow down and keep more space
between you and other vehicles.
Slow down, especially on higher speed
roads. Your headlamps can light up only
so much road ahead.
In remote areas, watch for animals. If you’re tired, pull off the road in a safe
place and rest.
No one can see as well at night as in the
daytime. But as we get older these differ-
ences increase. A 50-year-old driver may
require at least twice as much light to see
the same thing at night as a 20-year-old.
What you do in the daytime can also affect
your night vision. For example, if you
spend the day in bright sunshine you are
wise to wear sunglasses. Your eyes will
have less trouble adjusting to night. But if
you’re driving, don’t wear sunglasses at
night. They may cut down on glare from
headlamps, but they also make a lot of
things invisible.
You can be temporarily blinded by
approaching headlamps. It can take a sec-
ond or two, or even several seconds, for
your eyes to readjust to the dark. When
you are faced with severe glare (as from a
driver who doesn’t lower the high beams,
or a vehicle with misaimed headlamps),
slow down a little. Avoid staring directly
into the approaching headlamps.
Keep your windshield and all the glass on
your vehicle clean – inside and out. Glare
at night is made much worse by dirt on the
glass. Even the inside of the glass can
build up a film caused by dust. Dirty glass
makes lights dazzle and flash more than
clean glass would, making the pupils of
your eyes contract repeatedly.
Your Driving, the Road, and Your Vehicle:
Page 195 of 225

5-51 SERVICE AND APPEARANCE CARE
85Z03-03E
Engine Compartment Fuse Block
The engine compartment fuse block is
located on the driver’s side of the vehicle,
near the battery. See “Engine Compart-
ment Overview” in this section for more
information on location.
To access the fuses, press in the side flaps
to release the cover.
To reinstall the cover, push until it is
secure. Fuses Usages
AIRBAG Air Bag
WPR Wiper
RADIO/CLK Radio/Clock
ECMEngine Control
Module
AIRBAGOccupation Classifi-
cation Sensor
AUX LTR Extra Jack
TRN SIG LAMPS Turn Signal Lamps
ABSAntilock Brake
System
LTR Cigar Lighter
CLSTR, BTSICluster, BTSI
Solenoid
RKERemote keyless
Entry
BCK/UP Back-up
BLANK Not Used
TCMTransmission
Control Module
Fuses Usages
ENG FUSE BOX,
DRLEngine Fuse box,
Daytime Running
Light
HAZRD LAMPS Hazard Lamps
A/C, CLK A/C Switch, Clock
HVACHeating, Ventilation
and Air Conditioning
RKERemote Keyless
Entry
RADIO Radio
S/ROOF Sunroof
DLC Data link Connector
SPARE Spare
Electrical System: