2007 SUZUKI FORENZA climate control
[x] Cancel search: climate controlPage 89 of 225

3-13 INSTRUMENT PANEL
85Z03-03E
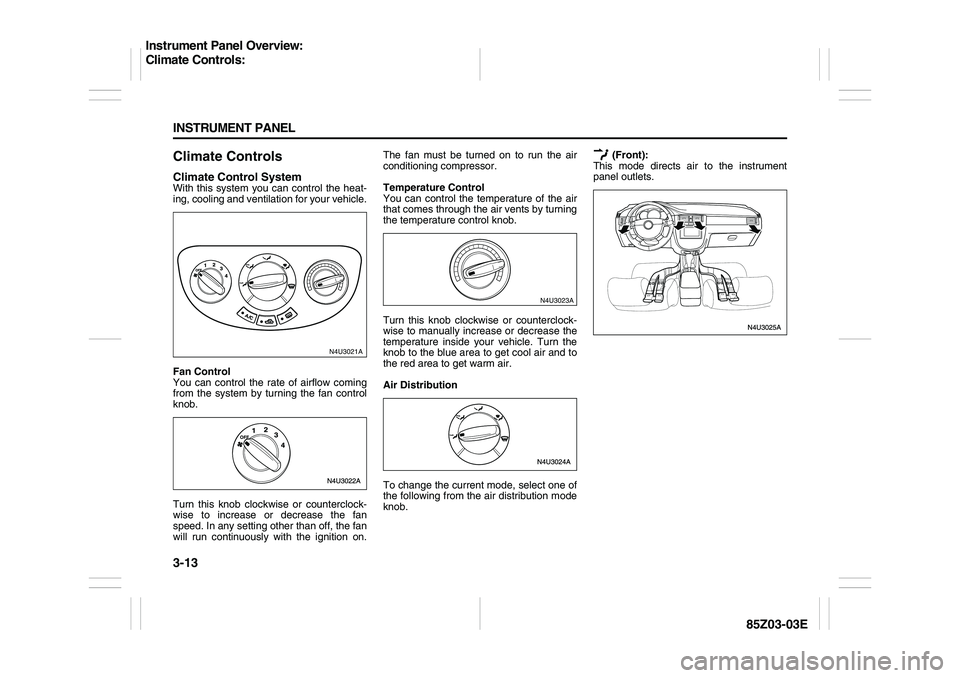
Climate ControlsClimate Control SystemWith this system you can control the heat-
ing, cooling and ventilation for your vehicle.
Fan Control
You can control the rate of airflow coming
from the system by turning the fan control
knob.
Turn this knob clockwise or counterclock-
wise to increase or decrease the fan
speed. In any setting other than off, the fan
will run continuously with the ignition on.The fan must be turned on to run the air
conditioning compressor.
Temperature Control
You can control the temperature of the air
that comes through the air vents by turning
the temperature control knob.
Turn this knob clockwise or counterclock-
wise to manually increase or decrease the
temperature inside your vehicle. Turn the
knob to the blue area to get cool air and to
the red area to get warm air.
Air Distribution
To change the current mode, select one of
the following from the air distribution mode
knob. (Front):
This mode directs air to the instrument
panel outlets.
N4U3021AN4U3021A
N4U3023A
Instrument Panel Overview:
Climate Controls:
Page 90 of 225

3-14 INSTRUMENT PANEL
85Z03-03E
(Bi-Level):
This mode directs approximately half of the
air to the instrument panel outlets, and
then directs the remaining air to the floor
outlets. (Floor):
This mode directs most of the air to the
floor outlets. Some of the air will also be
directed to the windshield, instrument
panel side outlets, and rear outlets. Be
sure to keep the area under the front seats
clear to allow the flow of air to the rear
compartment.Recirculation
Press this button when driving in dusty
conditions or to avoid traffic or outside
fumes, and when quick cooling or heating
of the passenger area is required. The
indicator light will illuminate and interior air
will be reclaculated.
Pressing the recirculation mode button
again will draw outside air into the passen-
ger compartment. The indicator will go out.
Your windows may fog if you use the recir-
culation mode for extended periods. If this
happens, select the defrost mode.
N4U3027AN4U3027A
N4U3028AN4U3028A
Climate Controls:
Page 91 of 225

3-15 INSTRUMENT PANEL
85Z03-03E
Air Conditioning
If your vehicle has air conditioning, follow
these steps to use the system. Start the
engine and set the fan control knob to the
desired speed. The air conditioning com-
pressor does not operate when the fan
control knob is in the off position. Press the
air conditioning button to turn the air condi-
tioning system on. When this button is
pressed, the indicator light on the button
will come on to let you know the air condi-
tioning is activated.
To turn off the air conditioning, press the
button again. The indicator button will then
turn off to let you know that the air condi-
tioning is deactivated.
On hot days, open the windows to let hot
inside air escape; then close them. This
helps to reduce the time it takes for yourvehicle to cool down. It also helps the sys-
tem to operate more efficiently.
For quick cool down on hot days, do the
following:
1) Press the recirculation button.
2) Press the A/C button.
3) Select the coolest temperature on the
temperature control knob.
4) Select the highest fan speed on the fan
control knob.
Using these settings together for long peri-
ods of time may cause the air inside of
your vehicle to become too dry. To prevent
this from happening, after the air in your
vehicle has cooled, turn off the recircula-
tion mode by pressing the button again.
The air-conditioning system removes mois-
ture from the air, so you may sometimes
notice a small amount of water dripping
underneath your vehicle while idling or
after turning off the engine. This is normal.Defogging and Defrosting
Fog on the inside of windows is a result of
high humidity (moisture) condensing on
the cool window glass. This can be mini-
mized if the climate control system is used
properly. There are two modes to clear fog
or frost from your windshield and side win-
dows. Use the defog mode to clear the
windows of fog or moisture and warm the
passengers. Use the defrost mode to
remove fog or frost from the windshield
more quickly. For best results, clear all
snow and ice from the windshield before
defrosting. Turn the air distribution knob to
select the defog or defrost mode.
N4U3029AN4U3029A
Climate Controls:
Page 92 of 225

3-16 INSTRUMENT PANEL
85Z03-03E
(Defog):
This mode directs air to the windshield,
side window outlets and floor outlets.
When you select this mode, the system
runs the air-conditioning compressor. To
defog the windows faster, turn the temper-
ature control knob clockwise to the warm-
est setting. (Defrost):
This mode directs most of the air to the
windshield, with some air directed to the
side window outlets. When you select this
mode, the system runs the air-conditioning
compressor. To defrost the windows faster,
turn the temperature control knob clock-
wise to the warmest setting.
Rear Window and Outside Rearview
Mirror DefoggerYour vehicle may have a rear window and
outside mirror defogger.
The rear window defogger uses a warming
grid to remove fog or frost from the rear
window. This feature will only work when
the ignition is in ON.
(Rear):
Press the button to turn the rear window
and outside mirror defogger on or off. The
defogger will turn off approximately 10 min-
utes after the button is pressed. Be sure to
clear as much snow from the rear window
as possible. An indicator light on the button
will come on to let you know that the fea-
ture is activated.
N4U3030B
N4U3032B
N4U3032AN4U3032A
Climate Controls:
Page 93 of 225

3-17 INSTRUMENT PANEL
85Z03-03E
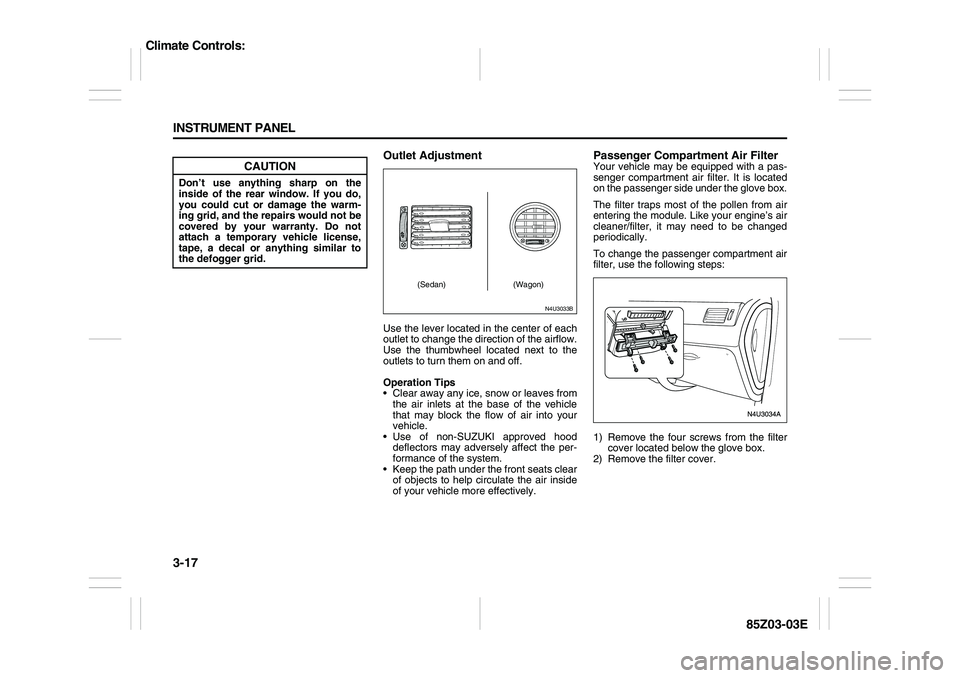
Outlet AdjustmentUse the lever located in the center of each
outlet to change the direction of the airflow.
Use the thumbwheel located next to the
outlets to turn them on and off.
Operation Tips
Clear away any ice, snow or leaves from
the air inlets at the base of the vehicle
that may block the flow of air into your
vehicle.
Use of non-SUZUKI approved hood
deflectors may adversely affect the per-
formance of the system.
Keep the path under the front seats clear
of objects to help circulate the air inside
of your vehicle more effectively.
Passenger Compartment Air FilterYour vehicle may be equipped with a pas-
senger compartment air filter. It is located
on the passenger side under the glove box.
The filter traps most of the pollen from air
entering the module. Like your engine’s air
cleaner/filter, it may need to be changed
periodically.
To change the passenger compartment air
filter, use the following steps:
1) Remove the four screws from the filter
cover located below the glove box.
2) Remove the filter cover.
CAUTION
Don’t use anything sharp on the
inside of the rear window. If you do,
you could cut or damage the warm-
ing grid, and the repairs would not be
covered by your warranty. Do not
attach a temporary vehicle license,
tape, a decal or anything similar to
the defogger grid.
N4U3033B
(Sedan) (Wagon)
Climate Controls:
Page 182 of 225

5-38 SERVICE AND APPEARANCE CARE
85Z03-03E
relative performance of tires depends upon
the actual conditions of their use, however,
and may depart significantly from the norm
due to variations in driving habits, service
practices and differences in road charac-
teristics and climate.
Traction – AA, A, B, C
The traction grades, from highest to low-
est, are AA, A, B, and C. Those grades
represent the tire’s ability to stop on wet
pavement as measured under controlled
conditions on specified government test
surfaces of asphalt and concrete. A tire
marked C may have poor traction perfor-
mance.
Temperature – A, B, C
The temperature grades are A (the high-
est), B, and C, representing the tire’s resis-
tance to the generation of heat and its
ability to dissipate heat when tested under
controlled conditions on a specified indoor
laboratory test wheel. Sustained high tem-
perature can cause the material of the tire
to degenerate and reduce tire life, and
excessive temperature can lead to suddentire failure. The grade C corresponds to a
level of performance which all passenger
car tires must meet under the Federal
Motor Vehicle Safety Standard No.109.
Grades B and A represent higher levels of
performance on the laboratory test wheel
than the minimum required by law.
Wheel Alignment and Tire BalanceThe wheels on your vehicle were aligned
and balanced carefully at the factory to
give you the longest tire life and best over-
all performance.
Scheduled wheel alignment and wheel bal-
ancing are not needed. However, if you
notice unusual tire wear or your vehicle
pulling one way or the other, the alignment
may need to be reset. If you notice your
vehicle vibrating when driving on a smooth
road, your wheels may need to be rebal-
anced.
Wheel ReplacementReplace any wheel that is bent, cracked or
badly rusted or corroded. If wheel nuts
keep coming loose, the wheel, wheel bolts
and wheel nuts should be replaced. If the
wheel leaks air, replace it (except some
aluminum wheels, which can sometimes
be repaired). See your SUZUKI dealer if
any of these conditions exist.
Your SUZUKI dealer will know the kind of
wheel you need.
Each new wheel should have the same
load-carrying capacity, diameter, width, off-
set and be mounted the same way as the
one it replaces.
If you need to replace any of your wheels,
wheel bolts or wheel nuts, replace them
only with new SUZUKI original equipment
parts. This way, you will be sure to have
the right wheel, wheel bolts and wheel nuts
for your vehicle.
WARNING
The traction grade assigned to this
tire is based on straight-ahead brak-
ing traction tests, and does not
include acceleration, cornering,
hydroplaning, or peak traction char-
acteristics.
WARNING
The temperature grade for this tire is
established for a tire that is properly
inflated and not overloaded. Exces-
sive speed, underinflation, or exces-
sive loading, either separately or in
combination, can cause heat buildup
and possible tire failure.
WARNING
Using the wrong replacement wheels,
wheel bolts or wheel nuts on your
vehicle can be dangerous. It could
affect the braking and handling of
your vehicle, make your tires lose air
and make you lose control. You could
have a collision in which you or oth-
ers could be injured. Always use the
correct wheel, wheel bolts and wheel
nuts for replacement.
Tires:
Page 220 of 225

8-1 INDEX
88
85Z03-03E
INDEXAAccessory Power Outlet
.....................................................3-11
Adding Equipment to the Outside of Your Vehicle
..........5-1
Adding Equipment to Your Air Bag-Equipped Vehicle
....1-32
Additives
..............................................................................5-2
Add-On Electrical Equipment
.............................................5-49
Air Bag Readiness Light
.....................................................3-20
Antenna
................................................................................2-25
Anti-Lock Brake System (ABS)
..........................................4-3
Anti-Lock Brake System Warning Light
............................3-21
Appearance Care
.................................................................5-45
Ashtrays and Cigarette Lighter
..........................................3-11
Audio System
.......................................................................3-28
Automatic Transmission Fluid
...........................................5-10
Automatic Transmission Operation
...................................2-13
BBattery
..................................................................................5-20
Before Driving
......................................................................2-11
Before Leaving on a Long Trip
...........................................4-11
Brake System Warning Light
..............................................3-21
Brakes
...................................................................................5-18
Braking .................................................................................4-3
Bulb Replacement
...............................................................5-23
Buying New Tires ................................................................5-37
CCalifornia Fuel
......................................................................5-1
Capacities
.............................................................................5-54
Capacities and Specifications
............................................5-54CD CHANGER OPERATION (Optional)
............................. 3-44
Center High-Mounted Stop Lamp (Sedan) ........................ 5-25
Center High-Mounted Stop Lamp (Wagon) ...................... 5-25
Central Door Locking System
............................................ 2-5
Changing a Flat Tire
........................................................... 5-39
Charging System Light ....................................................... 3-20
Checking Things Under the Hood
..................................... 5-4
Checking Your Restraint Systems .................................... 1-34
Chemical Paint Spotting
..................................................... 5-48
Child Restraint Systems ..................................................... 1-19
Child Restraints
.................................................................. 1-16
City Driving
.......................................................................... 4-10
Cleaning the Inside of Your Vehicle
.................................. 5-45
Cleaning the Outside of Your Vehicle ............................... 5-46
Climate Control System
..................................................... 3-13
Climate Controls
................................................................. 3-13
Clock
.................................................................................... 3-12
Control of a Vehicle
............................................................ 4-2
Coolant Surge Tank Pressure Cap
.................................... 5-14
Cooling System
................................................................... 5-15
Correcting the Tire Pressure
............................................. 5-34
Cruise Control
..................................................................... 3-7
Cruise Control Light
........................................................... 3-25
Cupholder(s)
........................................................................ 2-22
DDaily Inspection Checklist
................................................. 2-11
Daytime Running Lamps Indicator Light
.......................... 3-26
Defensive Driving
................................................................ 4-1