2007 SUBARU TRIBECA heater
[x] Cancel search: heaterPage 6 of 377
3
– CONTINUED –
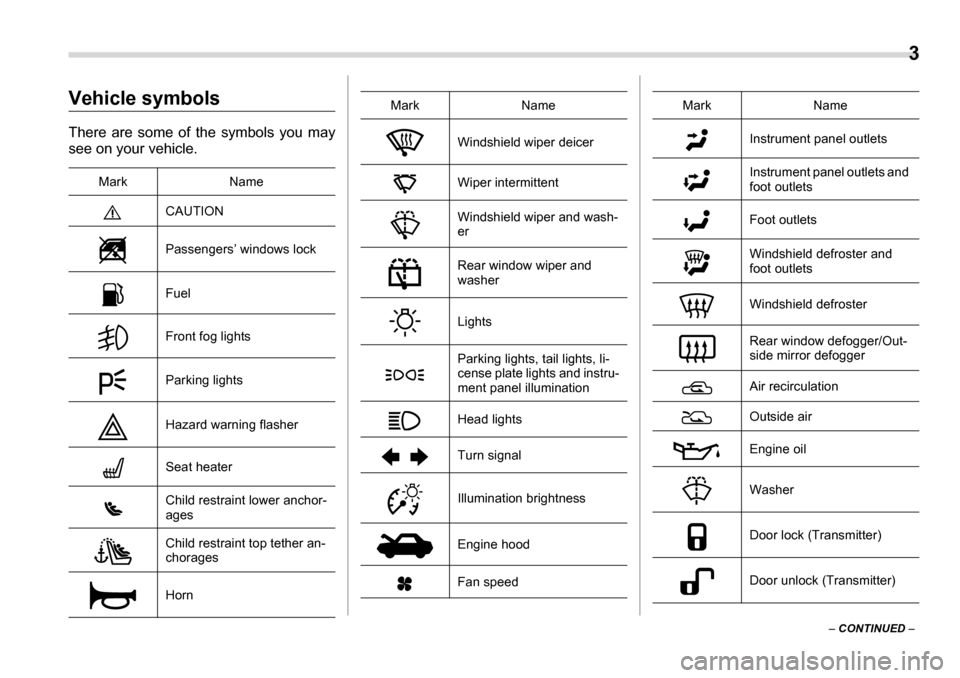
Vehicle symbols
There are some of the symbols you may
see on your vehicle.
Mark Name CAUTION Passengers’ windows lock
Fuel
Front fog lights
Parking lights
Hazard warning flasher
Seat heater
Child restraint lower anchor-
ages
Child restraint top tether an-
chorages
Horn
Windshield wiper deicer
Wiper intermittent
Windshield wiper and wash- er
Rear window wiper and
washer Lights
Parking lights, tail lights, li-
cense plate lights and instru-
ment panel illumination
Head lights
Turn signal
Illumination brightness
Engine hood
Fan speed
Mark NameInstrument panel outlets
Instrument panel outlets and foot outlets
Foot outlets
Windshield defroster and foot outlets
Windshield defroster
Rear window defogger/Out-
side mirror defogger
Air recirculation
Outside air Engine oil Washer
Door lock (Transmitter)
Door unlock (Transmitter)
Mark Name
Page 26 of 377
1
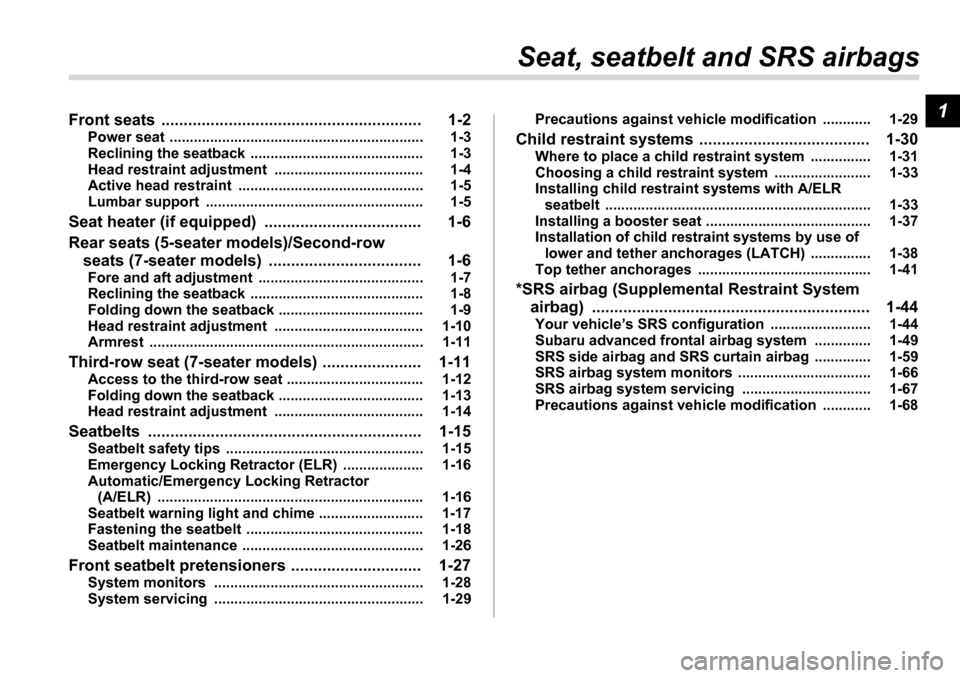
Seat, seatbelt and SRS airbags
Front seats .......................................................... 1-2 Power seat ............................................................... 1-3
Reclining the seatback ........................................... 1-3
Head restraint adjustment ..................................... 1-4
Active head restraint .............................................. 1-5
Lumbar support ...................................................... 1-5
Seat heater (if equipped) ................................... 1-6
Rear seats (5-seater models)/Second-row seats (7-seater models) .................................. 1-6Fore and aft adjustment ......................................... 1-7
Reclining the seatback ........................................... 1-8
Folding down the seatback .................................... 1-9
Head restraint adjustment ..................................... 1-10
Armrest .................................................................... 1-11
Third-row seat (7-seater models) ...................... 1-11 Access to the third-row seat .................................. 1-12
Folding down the seatback .................................... 1-13
Head restraint adjustment ..................................... 1-14
Seatbelts ............................................................. 1-15 Seatbelt safety tips ................................................. 1-15
Emergency Locking Retractor (ELR) .................... 1-16
Automatic/Emergency Locking Retractor (A/ELR) .................................................................. 1-16
Seatbelt warning light and chime .......................... 1-17
Fastening the seatbelt ............................................ 1-18
Seatbelt maintenance ............................................. 1-26
Front seatbelt pretensioners ............................. 1-27 System monitors .................................................... 1-28
System servicing .................................................... 1-29 Precautions against vehicle modification ............ 1-29
Child restraint systems ...................................... 1-30 Where to place a child restraint system ............... 1-31
Choosing a child restraint system ........................ 1-33
Installing child restraint systems with A/ELR seatbelt .................................................................. 1-33
Installing a booster seat ......................................... 1-37
Installation of child restraint systems by use of lower and tether anchorages (LATCH) ............... 1-38
Top tether anchorages ........................................... 1-41
*SRS airbag (Supplemental Restraint System airbag) .............................................................. 1-44Your vehicle’s SRS configuration ......................... 1-44
Subaru advanced frontal airbag system .............. 1-49
SRS side airbag and SRS curtain airbag .............. 1-59
SRS airbag system monitors ................................. 1-66
SRS airbag system servicing ................................ 1-67
Precautions against vehicle modification ............ 1-68
Page 31 of 377
1-6 Seat, seatbelt and SRS airbags
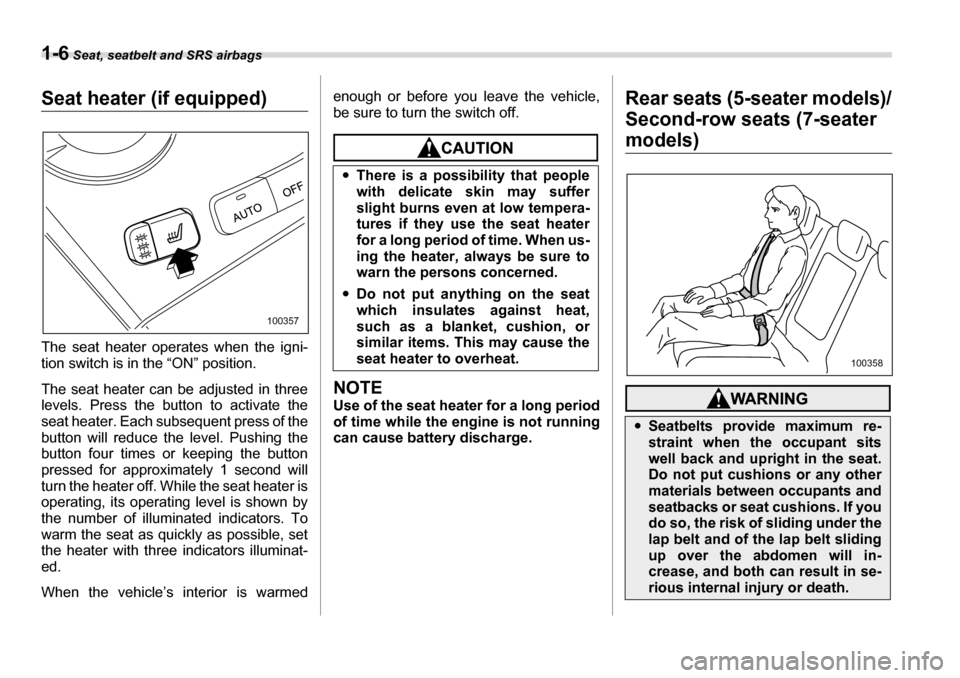
Seat heater (if equipped)
The seat heater operates when the igni-
tion switch is in the “ON” position.
The seat heater can be adjusted in three
levels. Press the button to activate the
seat heater. Each subsequent press of the
button will reduce the level. Pushing the
button four times or keeping the button
pressed for approximately 1 second will
turn the heater off. While the seat heater is
operating, its operating level is shown by
the number of illuminated indicators. To
warm the seat as quickly as possible, set
the heater with three indicators illuminat-
ed.
When the vehicle’s interior is warmed enough or before you leave the vehicle,
be sure to turn the switch off.
NOTE
Use of the seat heater for a long period
of time while the engine is not running
can cause battery discharge.
Rear seats (5-seater models)/
Second-row seats (7-seater
models)
100357
�y
There is a possibility that people
with delicate skin may suffer
slight burns even at low tempera-
tures if they use the seat heater
for a long period of time. When us-
ing the heater, always be sure to
warn the persons concerned.
�y Do not put anything on the seat
which insulates against heat,
such as a blanket, cushion, or
similar items. This may cause the
seat heater to overheat.
�ySeatbelts provide maximum re-
straint when the occupant sits
well back and upright in the seat.
Do not put cushions or any other
materials between occupants and
seatbacks or seat cushions. If you
do so, the risk of sliding under the
lap belt and of the lap belt sliding
up over the abdomen will in-
crease, and both can result in se-
rious internal injury or death.
100358
Page 156 of 377
Instruments and controls 3-35
– CONTINUED –
ton, the compass display is toggled on or
off. When the compass is on, an illuminat-
ed compass reading will appear in the
lower part of the mirror.
Even with the mirror in anti-glare mode,
the mirror surface turns bright if the trans-
mission is shifted into reverse. This is to
ensure good rearward visibility during re-
versing. �T
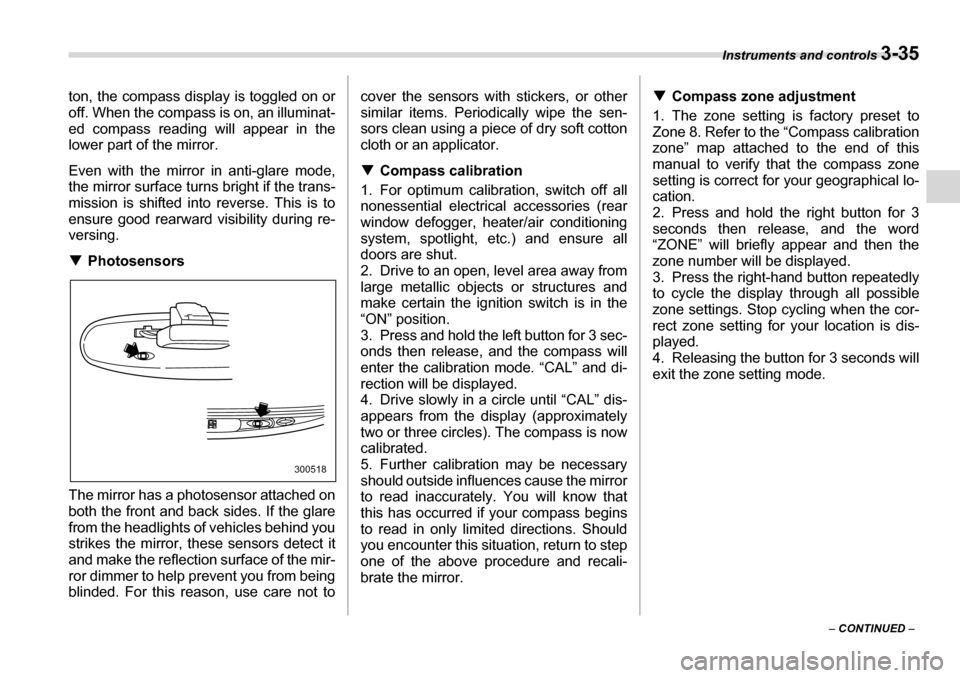
Photosensors
The mirror has a photosensor attached on
both the front and back sides. If the glare
from the headlights of vehicles behind you
strikes the mirror, these sensors detect it
and make the reflection surface of the mir-
ror dimmer to help prevent you from being
blinded. For this reason, use care not to cover the sensors with stickers, or other
similar items. Periodically wipe the sen-
sors clean using a piece of dry soft cotton
cloth or an applicator. �T
Compass calibration
1. For optimum calibration, switch off all
nonessential electrical accessories (rear
window defogger, heater/air conditioning
system, spotlight, etc.) and ensure all
doors are shut.
2. Drive to an open, level area away from
large metallic objects or structures and
make certain the ignition switch is in the“ON” position.
3. Press and hold the left button for 3 sec-
onds then release, and the compass will
enter the calibration mode. “CAL” and di-
rection will be displayed.
4. Drive slowly in a circle until “CAL” dis-
appears from the display (approximately
two or three circles). The compass is now
calibrated.
5. Further calibration may be necessary
should outside influences cause the mirror
to read inaccurately. You will know that
this has occurred if your compass begins
to read in only limited directions. Should
you encounter this situation, return to step
one of the above procedure and recali-
brate the mirror. �T
Compass zone adjustment
1. The zone setting is factory preset to
Zone 8. Refer to the “Compass calibration
zone” map attached to the end of this
manual to verify that the compass zone
setting is correct for your geographical lo- cation.
2. Press and hold the right button for 3
seconds then release, and the word
“ZONE” will briefly appear and then the
zone number will be displayed.
3. Press the right-hand button repeatedly to cycle the display through all possible
zone settings. Stop cycling when the cor-
rect zone setting for your location is dis-
played.
4. Releasing the button for 3 seconds will
exit the zone setting mode.
300518
Page 160 of 377
4
Climate control
Ventilator ............................................................. 4-2 Air flow ..................................................................... 4-2
Ventilator ................................................................. 4-4
Automatic climate control system .................... 4-5 Control panel ........................................................... 4-5
Rear air conditioner (if equipped) ......................... 4-9
Temperature sensors ............................................. 4-9
Operating tips for heater and air conditioner .. 4-10 Cleaning ventilator grille ........................................ 4-10
Efficient cooling after parking in direct sunlight ................................................................. 4-10
Lubrication oil circulation in the refrigerant circuit ..................................................................... 4-10
Checking air conditioning system before
summer season .................................................... 4-10
Cooling and dehumidifying in high humidity and low temperature weather condition .................... 4-10
Air conditioner compressor shut-off when
engine is heavily loaded ...................................... 4-10
Refrigerant for your climate control system ........ 4-10
Air filtration system ............................................ 4-11 Replacing the air filter ............................................ 4-11
Page 168 of 377
Climate control 4-9
�„Rear air conditioner (if
equipped)
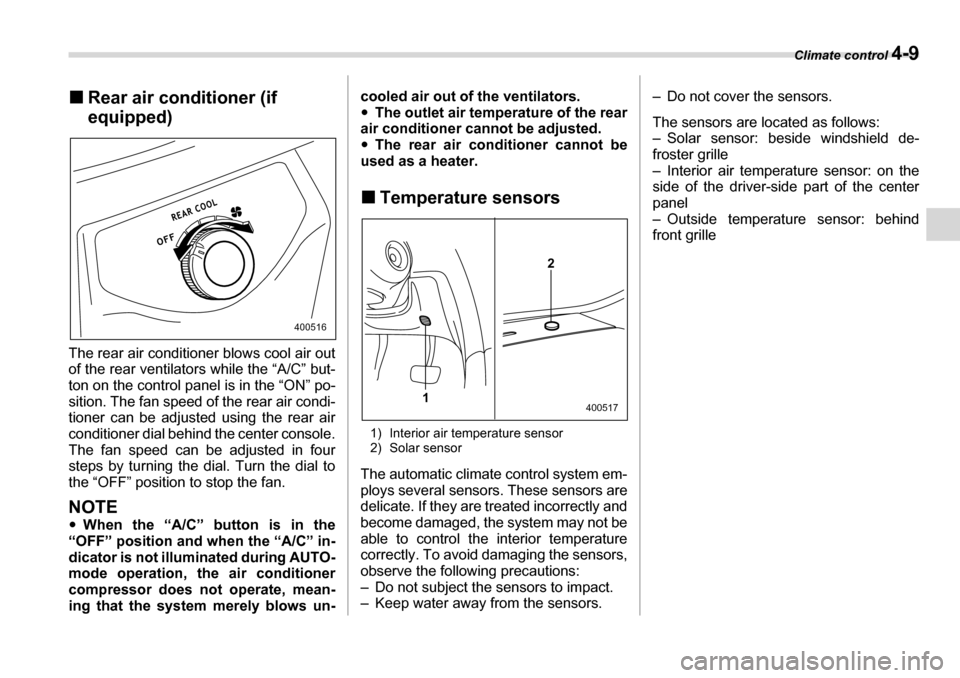
The rear air conditioner blows cool air out
of the rear ventilators while the “A/C” but-
ton on the control panel is in the “ON” po-
sition. The fan speed of the rear air condi-
tioner can be adjusted using the rear air
conditioner dial behind the center console.
The fan speed can be adjusted in four
steps by turning the dial. Turn the dial to
the “OFF” position to stop the fan.
NOTE �y When the “A/C” button is in the
“OFF” position and when the “A/C” in-
dicator is not illuminated during AUTO-
mode operation, the air conditioner
compressor does not operate, mean-
ing that the system merely blows un- cooled air out of the ventilators. �y
The outlet air temperature of the rear
air conditioner cannot be adjusted. �y The rear air conditioner cannot be
used as a heater. �„ Temperature sensors
1) Interior air temperature sensor
2) Solar sensor
The automatic climate control system em-
ploys several sensors. These sensors are
delicate. If they are treated incorrectly and
become damaged, the system may not be
able to control the interior temperature
correctly. To avoid damaging the sensors,
observe the following precautions:
– Do not subject the sensors to impact.
– Keep water away from the sensors. – Do not cover the sensors.
The sensors are located as follows:
– Solar sensor: beside windshield de-
froster grille
– Interior air temperature sensor: on the
side of the driver-side part of the center
panel
– Outside temperature sensor: behind front grille
400516
2
1
400517
Page 169 of 377
4-10 Climate control
Operating tips for heater and
air conditioner �„Cleaning ventilator grille
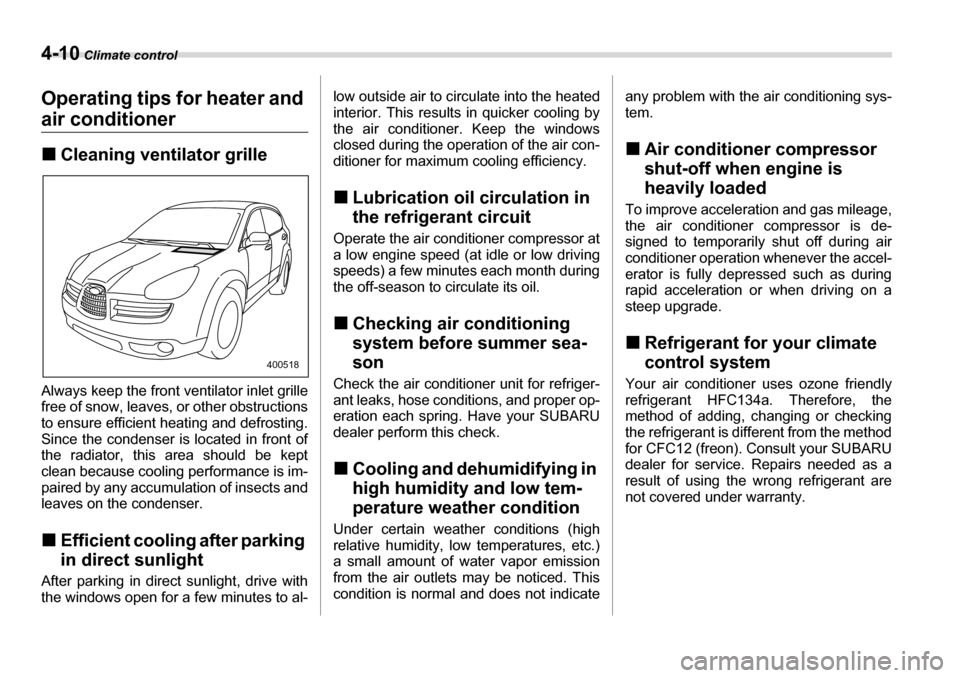
Always keep the front ventilator inlet grille
free of snow, leaves, or other obstructions
to ensure efficient heating and defrosting.
Since the condenser is located in front of
the radiator, this area should be kept
clean because cooling performance is im-
paired by any accumulation of insects and
leaves on the condenser. �„ Efficient cooling after parking
in direct sunlight
After parking in direct sunlight, drive with
the windows open for a few minutes to al- low outside air to circulate into the heated
interior. This results in quicker cooling by
the air conditioner. Keep the windows
closed during the operation of the air con-
ditioner for maximum cooling efficiency. �„
Lubrication oil circulation in
the refrigerant circuit
Operate the air conditioner compressor at
a low engine speed (at idle or low driving
speeds) a few minutes each month during
the off-season to circulate its oil. �„ Checking air conditioning
system before summer sea-son
Check the air conditioner unit for refriger-
ant leaks, hose conditions, and proper op-
eration each spring. Have your SUBARU
dealer perform this check. �„ Cooling and dehumidifying in
high humidity and low tem-
perature weather condition
Under certain weather conditions (high
relative humidity, low temperatures, etc.)
a small amount of water vapor emission
from the air outlets may be noticed. This
condition is normal and does not indicate any problem with the air conditioning sys-
tem. �„
Air conditioner compressor
shut-off when engine is
heavily loaded
To improve acceleration and gas mileage,
the air conditioner compressor is de-
signed to temporarily shut off during air
conditioner operation whenever the accel-
erator is fully depressed such as during
rapid acceleration or when driving on a
steep upgrade. �„ Refrigerant for your climate
control system
Your air conditioner uses ozone friendly
refrigerant HFC134a. Therefore, the
method of adding, changing or checking
the refrigerant is different from the method
for CFC12 (freon). Consult your SUBARU
dealer for service. Repairs needed as a
result of using the wrong refrigerant are
not covered under warranty.
400518
Page 195 of 377
5-24 Audio
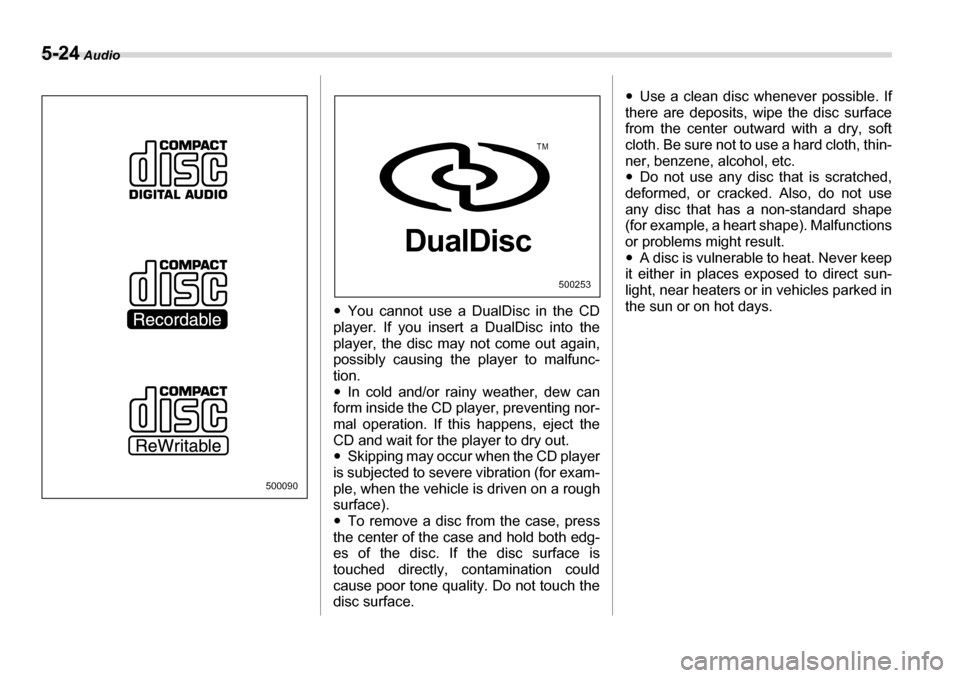
�yYou cannot use a DualDisc in the CD
player. If you insert a DualDisc into the
player, the disc may not come out again,
possibly causing the player to malfunc-
tion. �y In cold and/or rainy weather, dew can
form inside the CD player, preventing nor-
mal operation. If this happens, eject the
CD and wait for the player to dry out.�y Skipping may occur when the CD player
is subjected to severe vibration (for exam-
ple, when the vehicle is driven on a roughsurface). �y To remove a disc from the case, press
the center of the case and hold both edg-
es of the disc. If the disc surface is
touched directly, contamination could
cause poor tone quality. Do not touch thedisc surface. �y
Use a clean disc whenever possible. If
there are deposits, wipe the disc surface
from the center outward with a dry, soft
cloth. Be sure not to use a hard cloth, thin-
ner, benzene, alcohol, etc. �y Do not use any disc that is scratched,
deformed, or cracked. Also, do not use
any disc that has a non-standard shape
(for example, a heart shape). Malfunctions
or problems might result. �y A disc is vulnerable to heat. Never keep
it either in places exposed to direct sun-
light, near heaters or in vehicles parked in
the sun or on hot days.
500090
500253
TM
DualDisc