2007 SUBARU OUTBACK brake fluid
[x] Cancel search: brake fluidPage 149 of 442

3-28Instruments and controls
km/h). Be sure to install the speci-
fied size for the front and rear tires.
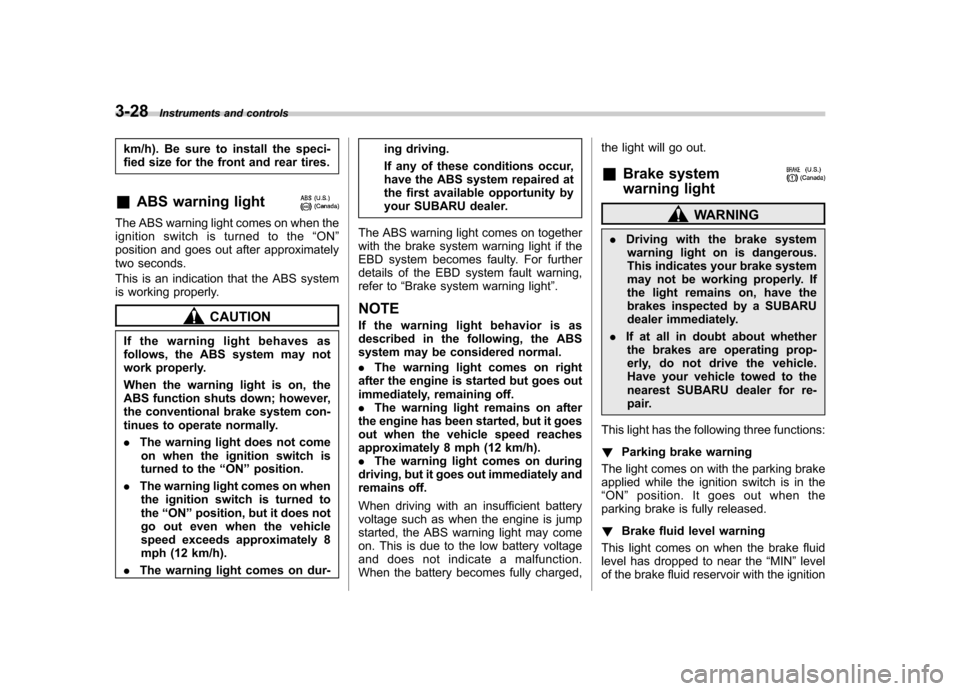
& ABS warning light
The ABS warning light comes on when the
ignition switch is turned to the “ON ”
position and goes out after approximately
two seconds.
This is an indication that the ABS system
is working properly.
CAUTION
If the warning light behaves as
follows, the ABS system may not
work properly.
When the warning light is on, the
ABS function shuts down; however,
the conventional brake system con-
tinues to operate normally. . The warning light does not come
on when the ignition switch is
turned to the “ON ”position.
. The warning light comes on when
the ignition switch is turned to the “ON ”position, but it does not
go out even when the vehicle
speed exceeds approximately 8
mph (12 km/h).
. The warning light comes on dur- ing driving.
If any of these conditions occur,
have the ABS system repaired at
the first available opportunity by
your SUBARU dealer.
The ABS warning light comes on together
with the brake system warning light if the
EBD system becomes faulty. For further
details of the EBD system fault warning,
refer to “Brake system warning light ”.
NOTE
If the warning light behavior is as
described in the following, the ABS
system may be considered normal. . The warning light comes on right
after the engine is started but goes out
immediately, remaining off.. The warning light remains on after
the engine has been started, but it goes
out when the vehicle speed reaches
approximately 8 mph (12 km/h).. The warning light comes on during
driving, but it goes out immediately and
remains off.
When driving with an insufficient battery
voltage such as when the engine is jump
started, the ABS warning light may come
on. This is due to the low battery voltage
and does not indicate a malfunction.
When the battery becomes fully charged, the light will go out. &
Brake system
warning light
WARNING
. Driving with the brake system
warning light on is dangerous.
This indicates your brake system
may not be working properly. If
the light remains on, have the
brakes inspected by a SUBARU
dealer immediately.
. If at all in doubt about whether
the brakes are operating prop-
erly, do not drive the vehicle.
Have your vehicle towed to the
nearest SUBARU dealer for re-
pair.
This light has the following three functions: ! Parking brake warning
The light comes on with the parking brake
applied while the ignition switch is in the“ ON ”position. It goes out when the
parking brake is fully released. ! Brake fluid level warning
This light comes on when the brake fluid
level has dropped to near the “MIN ”level
of the brake fluid reservoir with the ignition
Page 150 of 442

switch in the“ON ”position and with the
parking brake fully released.
If the brake system warning light should
come on while driving (with the parking
brake fully released and with the ignition
switch positioned in “ON ”), it could be an
indication of leaking of brake fluid or worn
brake pads. If this occurs, immediately
stop the vehicle at the nearest safe place
and check the brake fluid level. If the fluid
level is below the “MIN ”mark in the
reservoir, do not drive the vehicle. Have
the vehicle towed to the nearest SUBARU
dealer for repair. ! Electronic Brake Force Distribution
(EBD) system warning
The brake system warning light also
illuminates if a malfunction occurs in the
EBD system. In that event, it comes on
together with the ABS warning light.
The EBD system may be faulty if the
brake system warning light and ABS
warning light illuminate simultaneously
during driving.
Even if the EBD system fails, the conven-
tional braking system will still function.
However, the rear wheels will be more
prone to locking when the brakes are
applied harder than usual and the vehi-cle ’s motion may therefore become some-
what harder to control. If the brake system warning light and ABS
warning light illuminate simultaneously,
take the following steps:
1. Stop the vehicle in the nearest safe,
flat place.
2. Shut down the engine, then restart it.
3. Release the parking brake. If both
warning lights go out, the EBD system
may be faulty.
Drive carefully to the nearest SUBARU
dealer and have the system inspected.
4. If both warning lights come on again
and stay illuminated after the engine has
been restarted, shut down the engine
again, apply the parking brake, and check
the brake fluid level.
5. If the brake fluid level is not below the “
MIN ”mark, the EBD system may be
faulty. Drive carefully to the nearest
SUBARU dealer and have the systeminspected.
6. If the brake fluid level is below the “ MIN ”mark, DO NOT drive the vehicle.
Instead, have the vehicle towed to the
nearest SUBARU dealer for repair.
& Low fuel warning light
The low fuel warning light comes on when
the tank is nearly empty approximately 2.6
US gal (10.0 liters, or 2.2 Imp gal). It only
operates when the ignition switch is in the “
ON ”position.
NOTE
This light does not go out unless the
tank is replenished up to an internal
fuel quantity of approximately 3.7 US
gal (14 liters, 3.1 Imp gal).
CAUTION
(Turbo model only) Promptly put
fuel in the tank whenever the low
fuel warning light comes on. Engine
misfires as a result of an empty tank
could cause damage to the engine.
& Door open warning light
When any of the doors, the rear gate
(Station wagon) or the trunk lid (Sedan) is
not fully closed, the door warning light
comes on.
For non-turbo models, the open door is
indicated by the corresponding part of the
door warning light.
For turbo models, the opening door is
indicated on the multi-information display.
Always make sure this light is out before
you start to drive. Instruments and controls
3-29
– CONTINUED –
Page 246 of 442

Preparing to drive
You should perform the following checks
and adjustments every day before you
start driving.
1. Check that all windows, mirrors, and
lights are clean and unobstructed.
2. Check the appearance and condition
of the tires. Also check tires for properinflation.
3. Look under the vehicle for any sign of leaks.
4. Check that the hood, trunk (Sedan)
and rear gate (Station wagon) are fullyclosed.
5. Check the adjustment of the seat.
6. Check the adjustment of the inside
and outside mirrors.
7. Fasten your seatbelt. Check that your
passengers have fastened their seatbelts.
8. Check the operation of the warning
and indicator lights when the ignition
switch is turned to the“ON ”position.
9. Check the gauges, indicator and warn-
ing lights after starting the engine. NOTE
Engine oil, engine coolant, brake fluid,
washer fluid and other fluid levels
should be checked daily, weekly or at
fuel stops.
Starting the engine
CAUTION
Do not operate the starter motor
continuously for more than ten
seconds. If the engine fails to start
after operating the starter for five to
ten seconds, wait for ten seconds or
more before trying again.
& Manual transmission vehicle
1. Apply the parking brake.
2. Turn off unnecessary lights and ac- cessories.
3. Press the clutch pedal to the floor and
shift the shift lever into neutral.
Hold the clutch pedal to the floor while
starting the engine. The starter motor will
only operate when the clutch pedal is
pressed fully to the floor.
4. Turn the ignition switch to the “ON ”
position and check the operation of the
warning and indicator lights. Refer to the“ Warning and indicator lights ”section
(chapter 3).
5. Turn the ignition switch to the “START ”
position without depressing the accelera-
tor pedal. Release the key immediately
after the engine has started. Starting and operating
7-9
– CONTINUED –
Page 255 of 442

7-18Starting and operating
engine over-revving and this in turn
can result in engine damage.
In addition, sudden application of
engine brakes when the vehicle is
travelling on a slippery surface can
lead to wheel locking; as a conse-
quence, control of the vehicle may
be lost and the risk of an accidentincreased.
The following tables show the maximum
speeds that are possible with each differ-
ent gear. The tachometer ’s needle will
enter the red area if these speeds areexceeded.
With the exception of cases where sudden
acceleration is required, the vehicle
should not be driven with the tachometer ’s
needle inside the red area. Failure to
observe this precaution can lead to
excessive engine wear and poor fuel
economy.
Gear mph (km/h)1st 33 (54)
2nd 51 (83)
3rd 69 (112)4th 90 (147)
5th 125 (204) 6th Top speed NOTE
Never exceed posted speed limits. &
Driving tips
Do not drive with your foot resting on the
clutch pedal and do not use the clutch to
hold your vehicle at a standstill on an
upgrade. Either of those actions may
cause clutch damage.
Do not drive with your hand resting on the
shift lever. This may cause wear on the
transmission components.
When it is necessary to reduce vehicle
speed due to slow traffic, turning corners,
or driving up steep hills, downshift to a
lower gear before the engine starts to
labor.
On steep downgrades, downshift the
transmission to 5th, 4th, 3rd or 2nd gear
as necessary; this helps to maintain a safe
speed and to extend brake pad life.
In this way, the engine provides a braking
effect. Remember, if you “ride ”(over use)
the brakes while descending a hill, they
may overheat and not work properly.
The engine may, on rare occasions, knock
when the vehicle rapidly accelerates or
rapidly pulls away from a standstill. This
phenomenon does not indicate a problem. Automatic transmission
–4-
speed
The automatic transmission is electroni-
cally controlled and provides 4 forward
speeds and 1 reverse speed. Also, it has a
manual mode and a SPORT mode.
WARNING
Do not shift from the “P ” or “N ”
position into the “D ” or “R ” position
while depressing the accelerator
pedal. This may cause the vehicle
to jump forward or backward.
CAUTION
. Shift into the “P ” or “R ” position
only after the vehicle is comple-
tely stopped. Shifting while the
vehicle is moving may cause
damage to the transmission.
. Do not race the engine for more
than five seconds in any position
except the “N ” or “P ” position
when the brake is set or when
chocks are used in the wheels.
This may cause the automatic
transmission fluid to overheat.
. Avoid shifting from one of the
Page 256 of 442

forward driving positions into the “R ” position or vice versa until
the vehicle has completely
stopped. Such shifting may
cause damage to the transmis-sion.
. When parking the vehicle, first
securely apply the parking brake
and then place the selector lever
in the “P ” position. Avoid parking
for a long time with the selector
lever in any other position as
doing so could result in a dead
battery.
NOTE . When the engine coolant tempera-
ture is still low, your vehicle ’s auto-
matic transmission will up-shift at
higher engine speeds than when the
coolant temperature is sufficiently high
in order to shorten the warm-up time
and improve driveability. The gearshift
timing will automatically shift to the
normal timing after the engine has
warmed up.. Immediately after ATF (automatic
transmission fluid) is replaced, you
may feel that the automatic transmis-
sion operation is somewhat unusual.
This results from invalidation of data which the on-board computer has
collected and stored in memory to
allow the transmission to shift at the
most appropriate times for the current
condition of your vehicle. Optimized
shifting will be restored as the vehicle
continues to be driven for a while.
& Selector lever
: Shift possible with brake pedal de-
pressed
: Shift possible with brake pedal not
depressed
The selector lever has four positions, “P ”,
“ R ”, “N ”, “D ”and also has manual gate for
using “SPORT ”mode or manual mode. !
P (Park)
This position is for parking the vehicle and
starting the engine.
In this position, the transmission is me-
chanically locked to prevent the vehicle
from rolling freely.
When you park the vehicle, first set the
parking brake fully, then shift into the “P ”
position. Do not hold the vehicle with only
the transmission.
To shift the selector lever from the “P ” to
any other position, you should depress the
brake pedal fully then move the selector
lever. This prevents the vehicle from
lurching when it is started. ! R (Reverse)
This position is for backing the vehicle.
To shift from the “N ”to “R ”position, stop
the vehicle completely then move the
lever to the “R ”position.
! N (Neutral)
This position is for restarting a stalledengine.
In this position the wheels and transmis-
sion are not locked. In this position, the
transmission is neutral; the vehicle will roll
freely, even on the slightest incline unless
the parking brake or foot brake is on. Starting and operating
7-19
– CONTINUED –
Page 261 of 442

7-24Starting and operating
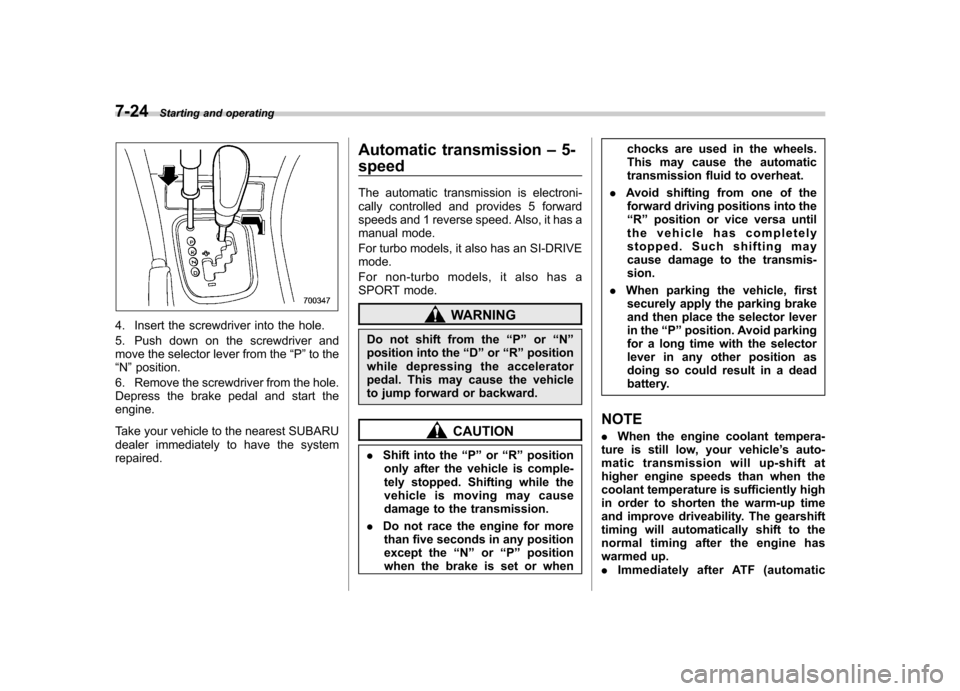
4. Insert the screwdriver into the hole.
5. Push down on the screwdriver and
move the selector lever from the “P ”to the
“ N ”position.
6. Remove the screwdriver from the hole.
Depress the brake pedal and start theengine.
Take your vehicle to the nearest SUBARU
dealer immediately to have the systemrepaired. Automatic transmission
–5-
speed
The automatic transmission is electroni-
cally controlled and provides 5 forward
speeds and 1 reverse speed. Also, it has a
manual mode.
For turbo models, it also has an SI-DRIVE mode.
For non-turbo models, it also has a
SPORT mode.WARNING
Do not shift from the “P ” or “N ”
position into the “D ” or “R ” position
while depressing the accelerator
pedal. This may cause the vehicle
to jump forward or backward.
CAUTION
. Shift into the “P ” or “R ” position
only after the vehicle is comple-
tely stopped. Shifting while the
vehicle is moving may cause
damage to the transmission.
. Do not race the engine for more
than five seconds in any position
except the “N ” or “P ” position
when the brake is set or when chocks are used in the wheels.
This may cause the automatic
transmission fluid to overheat.
. Avoid shifting from one of the
forward driving positions into the“ R ” position or vice versa until
the vehicle has completely
stopped. Such shifting may
cause damage to the transmis-sion.
. When parking the vehicle, first
securely apply the parking brake
and then place the selector lever
in the “P ” position. Avoid parking
for a long time with the selector
lever in any other position as
doing so could result in a dead
battery.
NOTE . When the engine coolant tempera-
ture is still low, your vehicle ’s auto-
matic transmission will up-shift at
higher engine speeds than when the
coolant temperature is sufficiently high
in order to shorten the warm-up time
and improve driveability. The gearshift
timing will automatically shift to the
normal timing after the engine has
warmed up.. Immediately after ATF (automatic
Page 262 of 442

transmission fluid) is replaced, you
may feel that the automatic transmis-
sion operation is somewhat unusual.
This results from invalidation of data
which the on-board computer has
collected and stored in memory to
allow the transmission to shift at the
most appropriate times for the current
condition of your vehicle. Optimized
shifting will be restored as the vehicle
continues to be driven for a while. &Selector lever
: Shift possible with brake pedal de-
pressed
: Shift possible with brake pedal not
depressed
The selector lever has four positions, “P ”,
“ R ”, “N, “D ”and also has manual gate for using
“SPORT ”mode (Non-turbo models)
or manual mode. ! P (Park)
This position is for parking the vehicle and
starting the engine.
In this position, the transmission is me-
chanically locked to prevent the vehicle
from rolling freely.
When you park the vehicle, first set the
parking brake fully, then shift into the “P ”
position. Do not hold the vehicle with only
the transmission.
To shift the selector lever from the “P ” to
any other position, you should depress the
brake pedal fully then move the selector
lever. This prevents the vehicle from
lurching when it is started.
NOTE (3.0-liter models only)
To protect the engine while the “P ”
position is selected, the engine is
controlled such that the engine speed
does not become too high even if the
accelerator pedal is pressed hard. ! R (Reverse)
This position is for backing the vehicle.
To shift from the “N ”to “R ” position, stop
the vehicle completely then move the
lever to the “R ”position. !
N (Neutral)
This position is for restarting a stalledengine.
In this position the wheels and transmis-
sion are not locked. In this position, the
transmission is neutral; the vehicle will roll
freely, even on the slightest incline unless
the parking brake or foot brake is on.
Avoidcoastingwiththetransmission neutral.
During coasting, there is no engine brak-
ing effect.
NOTE (3.0-liter models only)
To protect the engine while the “N ”
position is selected, the engine is
controlled such that the engine speed
does not become too high even if the
accelerator pedal is pressed hard. NOTE
If the selector lever is in the “N ”
position when you stop the engine for
parking, you may not subsequently be
able to move it to the “R ” and “P ”
positions. If this happens, turn the
ignition switch to the “ON ”position.
You will then be able to move the
selector lever to the “P ” position.
Starting and operating
7-25
– CONTINUED –
Page 266 of 442

the selector lever or a steering-wheel
switch twice in rapid succession..The transmission automatically se-
lects 1st gear when the vehicle stopsmoving.. If the temperature of the automatic
transmission fluid becomes too high,the “AT OIL TEMP ”warning light will
come on and upshifts to 5th gear will
not be possible. If the light comes on
while driving, it is unnecessary to stop
the vehicle, but avoid driving up steep
grades or in stop-and-go traffic. &
Maximum speeds
WARNING
When down shifting, ensure that the
vehicle is not travelling at a speed
exceeding the Maximum Allowable
Speed for the gear which is about to
be selected. Failure to observe this
precaution can lead to engine over-
revving and this in turn can result in
engine damage.
In addition, sudden application of
engine braking caused by down
shifting when the vehicle is travel-
ling on a slippery surface can lead
to wheel locking; as a consequence,
control of the vehicle may be lost
and the risk of an accident in-creased.
The following tables show the maximum
speeds that are possible with each differ-
ent gear.
When down shifting, it is important to
confirm that the current vehicle speed is
not in excess of the Maximum Allowable
Speed of the gear which is about to beselected. mph (km/h)
Position 2.5-liter turbo
models 3.0-liter mod-
els
1 26 (42) 27 (43)
2 50 (81) 61 (98)
3 87 (140) 96 (154)
Never exceed posted speed limits. & Driving tips
. On a road surface where there is a risk
of wheelspin (for example, a snow- or
gravel-covered road), you can pull away
from a standstill safely and easily by first
selecting the 2nd gear of the manualmode. . Always apply the foot or parking brake
when the vehicle is stopped in the “D ”or
“ R ”position.
. Always set the parking brake when
parking your vehicle. Do not hold the
vehicle with only the transmission. . Do not keep the vehicle in a stationary
position on an uphill grade by using the “ D ”position. Use the brake instead.
. The engine may, on rare occasions,
knock when the vehicle rapidly acceler-
ates or rapidly pulls away from a standstill.
This phenomenon does not indicate a fault. . A slight reduction in output torque may
occur in the models with a 3.0-liter or 2.5- Starting and operating
7-29
– CONTINUED –