2007 SUBARU OUTBACK conditioner
[x] Cancel search: conditionerPage 182 of 442

!OFF button
The Automatic Climate Control system
turns off (the air conditioner compressor
and fan turn off) when the “OFF ”button is
pressed.
When the “OFF ”button is pressed, the
outside air introduction mode (air inlet
selection OFF) is automatically selected. !
Temperature control dialDriver ’s side
Passenger ’s side
It is possible to make separate tempera-
ture settings for the driver ’ssideand
passenger ’s side. Each temperature setting is shown on the display. With the
dial set at your desired temperature, the
system automatically adjusts the tempera-
ture of air supplied from the outlets such
that the desired temperature is achieved
and maintained.
If the dial is turned fully counterclockwise,
the system gives maximum cooling per-
formance. If the dial is turned fully clock-
wise, the system gives maximum heatingperformance. !
–
Defroster button
To defrost or dehumidify the windshield
and front door windows, push the defros-
ter button “
”. When the “”button is
pushed, regardless whether the air condi-
tioner is operating or not, outside air is
drawn into the passenger compartment, Climate control
4-9
– CONTINUED –
Page 183 of 442

4-10Climate control
the air conditioner compressor turns on,
air flow is directed towards the windshield
and front door windows, and the indicator
light on the button comes on.
After eliminating the fogging from the
windshield, return the climate control
system to the AUTO mode by pushingthe “AUTO ”button or turn off by pushing
the “OFF ”button.
Alternatively, push the “
”button again
to return the system to the setting that was
selected before you activated the defros-
ter. ! Fan speed control button
The fan speed control button has 6
different fan speed positions.
The fan speed is shown by the display. !
A/C –Air conditioner button
If the windshield starts to fog when the
climate control system is operated in the
AUTO mode, push the air conditionerbutton “A/C ”to defog and dehumidify.
When this button is pushed, the air
conditioner compressor turns on and the
indicator light “A/C ”on the display comes
on. After eliminating the fogging from the
windshield, set the system back to the
AUTO mode by pushing the “AUTO ”
button.
NOTE
The air conditioner compressor does
not operate when the outside air tem-
perature is below 32 8F(0 8C). !
Air flow mode selection buttonSelect the desired air flow mode by
pushing the air flow mode selection
button. The selected air flow mode is
shown by the display.
(Ventilation): Ai r flows through the
instrument panel outlets.
(Bi-level): Air flows through the instru-
ment panel outlets and the foot outlets.
(Heat): Air flows through the instrument
panel outlets, the foot outlets, and some
through the windshield defroster outlets.
(Heat-def): Air flows through the instru-
ment panel outlets, the windshield defros-
ter outlets, and the foot outlets.
Page 185 of 442

4-12Climate control
–Interior air temperature sensor: on the
side of the driver-side part of the center panel – Outside temperature sensor: behind
front grille. Operating tips for heater and
air conditioner &
Cleaning ventilator grille
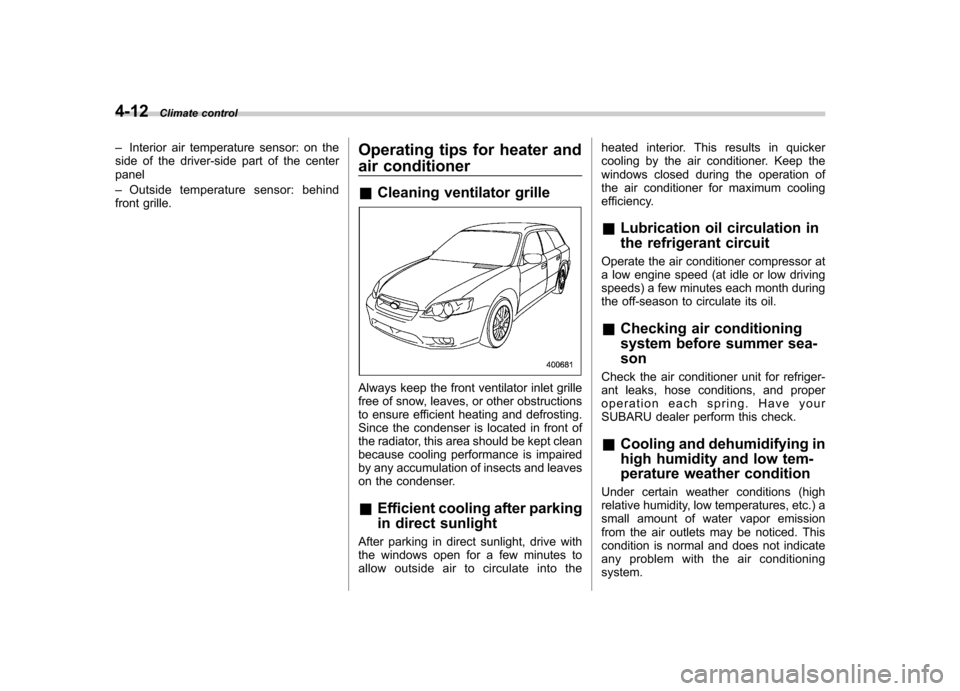
Always keep the front ventilator inlet grille
free of snow, leaves, or other obstructions
to ensure efficient heating and defrosting.
Since the condenser is located in front of
the radiator, this area should be kept clean
because cooling performance is impaired
by any accumulation of insects and leaves
on the condenser. &Efficient cooling after parking
in direct sunlight
After parking in direct sunlight, drive with
the windows open for a few minutes to
allow outside air to circulate into the heated interior. This results in quicker
cooling by the air conditioner. Keep the
windows closed during the operation of
the air conditioner for maximum cooling
efficiency. &
Lubrication oil circulation in
the refrigerant circuit
Operate the air conditioner compressor at
a low engine speed (at idle or low driving
speeds) a few minutes each month during
the off-season to circulate its oil. & Checking air conditioning
system before summer sea-son
Check the air conditioner unit for refriger-
ant leaks, hose conditions, and proper
operation each spring. Have your
SUBARU dealer perform this check. & Cooling and dehumidifying in
high humidity and low tem-
perature weather condition
Under certain weather conditions (high
relative humidity, low temperatures, etc.) a
small amount of water vapor emission
from the air outlets may be noticed. This
condition is normal and does not indicate
any problem with the air conditioningsystem.
Page 186 of 442

&Air conditioner compressor
shut-off when engine is
heavily loaded
To improve acceleration and gas mileage,
the air conditioner compressor is designed
to temporarily shut off during air condi-
tioner operation whenever the accelerator
is fully depressed such as during rapid
acceleration or when driving on a steepupgrade. & Refrigerant for your climate
control system
Your air conditioner uses ozone friendly
refrigerant HFC134a. Therefore, the meth-
od of adding, changing or checking the
refrigerant is different from the method for
CFC12 (freon). Consult your SUBARU
dealer for service. Repairs needed as a
result of using the wrong refrigerant are
not covered under warranty. Air filtration system (if equipped)
If your vehicle
’s air conditioning system is
equipped with an air filtration system,
replace the filter element according to
the replacement schedule shown in the
following. This schedule should be fol-
lowed to maintain the filter ’s dust collec-
tion ability. Under extremely dusty
conditions, the filter should be replaced
more frequently. Have your filter checked
or replaced by your SUBARU dealer. For
replacement, we recommend the use of a
genuine SUBARU air filter kit.
Replacement schedule: Every 12 months or 9,300 miles (15,000
km) whichever comes first
CAUTION
Contact your SUBARU dealer if the
following occurs, even if it is not yet
time to change the filter: – Reduction of the air flow through
the vents.
– Windshield gets easily fogged or
misted. NOTE
The filter can influence the air condi-
tioning, heating and defroster perfor-
mance if not properly maintained.
Climate control
4-13
Page 289 of 442

8-2Driving tips
New vehicle break-in driving –the first 1,000 miles (1,600
km)
The performance and long life of your
vehicle are dependent on how you handle
and care for your vehicle while it is new.
Follow these instructions during the first
1,000 miles (1,600 km): . Do not race the engine. And do not
allow engine speed to exceed 4,000 rpm
except in an emergency. . Do not drive at one constant engine or
vehicle speed for a long time, either fast or
slow. . Avoid starting suddenly and rapid
acceleration, except in an emergency.. Avoid hard braking, except in an
emergency.
The same break-in procedures should be
applied to a newly installed or overhauled
engine or when brake pads or brake
linings are replaced with new ones. Fuel economy hints
The following suggestions will help to save
your fuel. .
Select the proper gear position for the
speed and road conditions.. Avoid sudden acceleration or decelera-
tion. Always accelerate gently until you
reach the desired speed. Then try to
maintain that speed for as long aspossible. . Do not pump the accelerator and avoid
racing the engine.. Avoid unnecessary engine idling.
. Keep the engine properly tuned.
. Keep the tires inflated to the correct
pressure shown on the tire placard, which
is located under the door latch on thedriver ’s side. Low pressure will increase
tire wear and fuel consumption. . Use the air conditioner only when
necessary.. Keep the front and rear wheels in
proper alignment.. Avoid carrying unnecessary luggage or
cargo.. For the turbo model, the indication of
the ECO gauge shows a reference for
saving fuel. Refer to the “ECO gauge ”of
meter and gauges (turbo models) section
in chapter 3 for details. Engine exhaust gas (Carbon
monoxide)
WARNING
. Never inhale engine exhaust gas.
Engine exhaust gas contains
carbon monoxide, a colorless
and odorless gas which is dan-
gerous, or even lethal, if inhaled.
. Always properly maintain the en-
gine exhaust system to prevent
engine exhaust gas from enter-
ing the vehicle.
. Never run the engine in a closed
space, such as a garage, except
for the brief time needed to drive
the vehicle in or out of it.
. Avoid remaining in a parked
vehicle for a lengthy time while
the engine is running. If that is
unavoidable, then use the venti-
lation fan to force fresh air into
the vehicle.
. Always keep the front ventilator
inlet grille free from snow, leaves
or other obstructions to ensure
that the ventilation system al-
ways works properly.
. If at any time you suspect that
Page 316 of 442

the trailer and have repairs performed
immediately by the nearest SUBARU
dealer. !Driving on grades
. Before going down a steep hill, slow
down and shift into lower gear (if neces-
sary, use 1st gear) in order to utilize the
engine braking effect and prevent over-
heating of your vehicle ’s brakes. Do not
make sudden downshifts. . When driving uphill in hot weather, the
air conditioner may turn off automatically
to protect the engine from overheating. . When driving uphill in hot weather, pay
attention to the water temperature gauge
pointer (for all vehicles) and AT OIL TEMP
warning light (for AT vehicles) since the
engine and transmission are relatively
prone to overheating under these condi-
tions. If the water temperature gauge
pointer approaches the OVERHEAT zone
or the AT OIL TEMP warning light illumi-
nates, immediately switch off the air
conditioner and stop the vehicle at the
nearest safe place. Refer to the “Engine
overheating ”section in chapter 9, and
“ Warning and indicator lights ”section in
chapter 3. NOTE
With AT vehicles, the temperature of engine coolant is less likely to rise to
the OVERHEAT zone in the
“D ” posi-
tion than in the manual mode position. . If your vehicle has an automatic trans-
mission, avoid using the accelerator pedal
to stay stationary on an uphill slope
instead of using the parking brake or foot
brake. That may cause the transmission
fluid to overheat. ! Parking on a grade
Always block the wheels under both
vehicle and trailer when parking. Apply
the parking brake firmly. You should not
park on a hill or slope. But if parking on a
hill or slope cannot be avoided, you
should take the following steps:
1. Apply the brakes and hold the pedal down.
2. Have someone place wheel blocks
under both the vehicle and trailer wheels.
3. When the wheel blocks are in place,
release the regular brakes slowly until the
blocks absorb the load.
4. Apply the regular brakes and then
apply the parking brake; slowly release
the regular brakes.
5. Shift into 1st or reverse gear (manual
transmission) or “P ” (automatic transmis-
sion) and shut off the engine. Driving tips
8-29
Page 358 of 442

.Do not splash the engine coolant
over painted parts. The alcohol
contained in the engine coolant
may damage the paint surface.
! Changing the coolant
Always add genuine Subaru cooling sys-
tem conditioner whenever the coolant isreplaced.
Change the engine coolant and add
genuine Subaru cooling system condi-
tioner using the following procedures
according to the maintenance schedule
in the “Warranty and Maintenance Book-
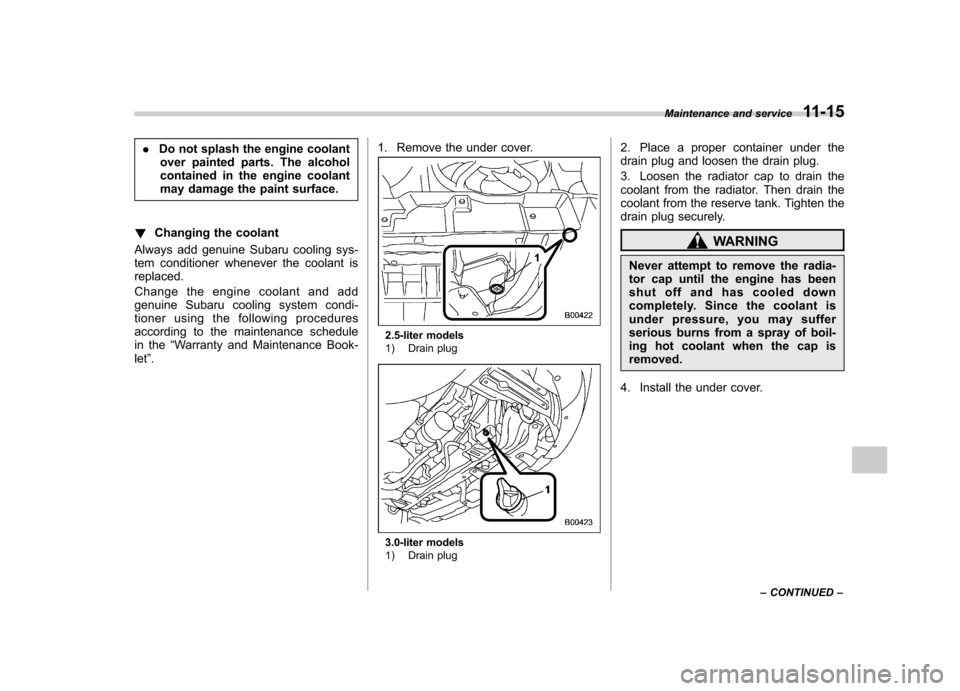
let ”. 1. Remove the under cover.
2.5-liter models
1) Drain plug
3.0-liter models
1) Drain plug 2. Place a proper container under the
drain plug and loosen the drain plug.
3. Loosen the radiator cap to drain the
coolant from the radiator. Then drain the
coolant from the reserve tank. Tighten the
drain plug securely.
WARNING
Never attempt to remove the radia-
tor cap until the engine has been
shut off and has cooled down
completely. Since the coolant is
under pressure, you may suffer
serious burns from a spray of boil-
ing hot coolant when the cap is removed.
4. Install the under cover. Maintenance and service
11-15
– CONTINUED –
Page 359 of 442

11-16Maintenance and service
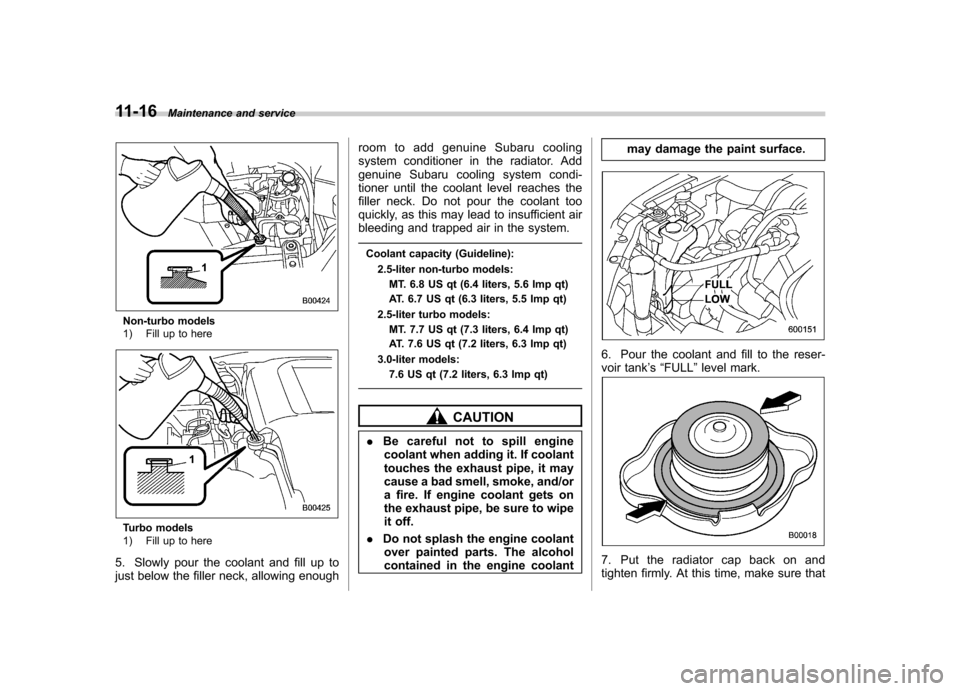
Non-turbo models
1) Fill up to here
Turbo models
1) Fill up to here
5. Slowly pour the coolant and fill up to
just below the filler neck, allowing enough room to add genuine Subaru cooling
system conditioner in the radiator. Add
genuine Subaru cooling system condi-
tioner until the coolant level reaches the
filler neck. Do not pour the coolant too
quickly, as this may lead to insufficient air
bleeding and trapped air in the system.
Coolant capacity (Guideline): 2.5-liter non-turbo models:MT. 6.8 US qt (6.4 liters, 5.6 Imp qt)
AT. 6.7 US qt (6.3 liters, 5.5 Imp qt)
2.5-liter turbo models: MT. 7.7 US qt (7.3 liters, 6.4 Imp qt)
AT. 7.6 US qt (7.2 liters, 6.3 Imp qt)
3.0-liter models: 7.6 US qt (7.2 liters, 6.3 Imp qt)
CAUTION
. Be careful not to spill engine
coolant when adding it. If coolant
touches the exhaust pipe, it may
cause a bad smell, smoke, and/or
a fire. If engine coolant gets on
the exhaust pipe, be sure to wipe
it off.
. Do not splash the engine coolant
over painted parts. The alcohol
contained in the engine coolant may damage the paint surface.
6. Pour the coolant and fill to the reser-
voir tank
’s “FULL ”level mark.
7. Put the radiator cap back on and
tighten firmly. At this time, make sure that