2007 SUBARU IMPREZA WRX turn signal
[x] Cancel search: turn signalPage 171 of 364

!Display illumination dimness cance-
lation (BRIGHT)
The brightness of the radio display dims
when the light switch is in the “
”or
“” position. If this makes the display
difficult to read, press the volume dial for
more than 2 seconds to return the display
to original brightness. Subsequently
pressing the volume dial again for more
than 2 seconds or if you can safely do so,
turning the light switch to the OFF position
and back to the “
”or “”position
makes the radio display dim again. ! FM/AM selection button (FM/AM)
Push the “FM/AM ”button (2) when the
radio is on to select FM1, FM2 or AM
reception. Each time this button is
pressed, the band will change in the
following order:
The display indicates which one is cur-
rently selected. ! Stereo indicator
The stereo indicator “ST ”will come on
when an FM stereo broadcast is received. !
Manual tuning (TUNE)
Turn the tuning dial (5) clockwise to
increase the tuning frequency and turn
the dial counterclockwise to decrease it.
Each click the dial is turned, the frequency
changes 10 kHz in the AM waveband and
0.2 MHz in the FM waveband. ! Seek tuning
When the “
”side of the “SEEK/TRACK/
CAT ”button (3) is depressed, the radio will
begin to automatically seek up for recei-
vable frequencies and will stop at the first
one found. For the “
”side, the radio will
begin to automatically seek down. This
function may not be available, however,
when radio signals are weak. In such a
situation, perform manual tuning to select
the desired station. ! Automatic tuning (SCAN)
Press the “SCAN ”button (4) to change the
radio to the SCAN mode. In this mode, the
radio scans through the radio band until a
station is found. The radio will stop at a
receivable station for 5 seconds while
displaying the frequency by blinking, after
which scanning will continue until the
entire band has been scanned from the
low end to the high end. Press the “SCAN ”
button again to cancel the SCAN mode
and to stop on any displayed frequency.
When the “SCAN ”button is pressed for automatic tuning, stations are scanned in
the direction of low frequencies to high
frequencies only. Automatic tuning may
not function properly if the station recep-
tion is weakened by distance from the
station or proximity to tall buildings andhills. !
Selecting preset stations
Presetting a station with a preset button
(6) allows you to select that station in a
single operation. Up to six AM, FM1 and
FM2 stations each may be preset. ! How to preset stations
1. Press the “FM/AM ”button (2) to select
AM, FM1 or FM2 reception.
2. Press the “SCAN ”button (4) or tune
the radio manually until the desired station
frequency is displayed.
3. Press one of the preset buttons (6) for
at least 2 seconds to store the frequency.
The frequency of the station will flash once
on the display at this time. NOTE . If the connection between the radio
and battery is broken for any reason
such as vehicle maintenance or radio
removal, all stations stored in the
preset buttons are cleared. If this
occurs, it is necessary to reset the Audio
5-13
– CONTINUED –
Page 179 of 364

the audio set, the volume becomes
louder. However, when you change
the audio to the radio mode or to a
CD player, the sound becomes a lot
louder. Remember to turn down the
volume when you change betweenthem. !AUX terminal (if equipped)
The AUX terminal is located behind the lid
under the climate controls. Push gently on
the lid to open it.
! Satellite Radio mode
Press the “SAT ”button (20) to select the
“ Satellite radio mode ”(when the SR-BB is
connected). NOTE
Use of satellite radio (Sirius) requires a
tuner, antenna and a service contract.
For details, please contact your
SUBARU dealer.or
Visit Sirius Satellite Radio at
sirius.com
or call 1-888-539-SIRIUS (7474) for
more information. Sirius, the Sirius
dog logo, channel names and logos
are trademarks of SIRIUS Satellite
Radio Inc. ! Satellite radio reception
Satellite radio signals are best received in
areas with a clear view of the open sky. In
areas where there are tall buildings, trees,
tunnels or other structures that may
obstruct the signal of the satellites, there
may be signal interruptions. Other circum-
stances that may result in signal loss
include driving near a wall, steep cliff or
hill, or driving on the lower level of a multi-
tiered road or inside a parking garage.
To help reduce this condition, satellite
radio providers have installed ground-
based repeaters in heavily populated
areas. However, you may still experience
reception problems in some areas. Audio
5-21
– CONTINUED –
Page 210 of 364

dealer.
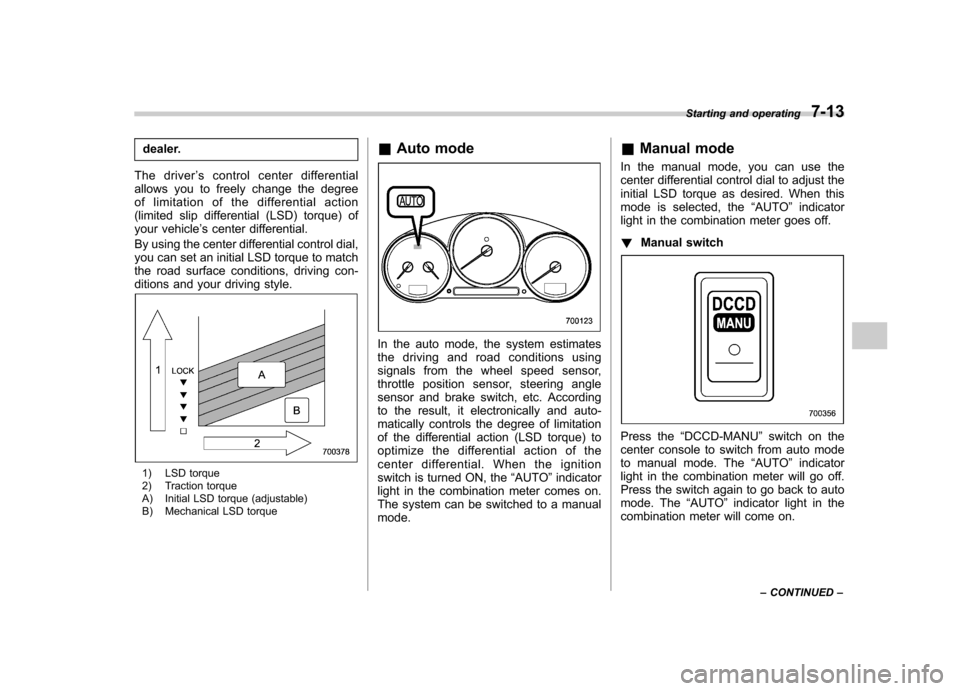
The driver ’s control center differential
allows you to freely change the degree
of limitation of the differential action
(limited slip differential (LSD) torque) of
your vehicle ’s center differential.
By using the center differential control dial,
you can set an initial LSD torque to match
the road surface conditions, driving con-
ditions and your driving style.
1) LSD torque
2) Traction torque
A) Initial LSD torque (adjustable)
B) Mechanical LSD torque &
Auto mode
In the auto mode, the system estimates
the driving and road conditions using
signals from the wheel speed sensor,
throttle position sensor, steering angle
sensor and brake switch, etc. According
to the result, it electronically and auto-
matically controls the degree of limitation
of the differential action (LSD torque) to
optimize the differential action of the
center differential. When the ignition
switch is turned ON, the “AUTO ”indicator
light in the combination meter comes on.
The system can be switched to a manual mode. &
Manual mode
In the manual mode, you can use the
center differential control dial to adjust the
initial LSD torque as desired. When this
mode is selected, the “AUTO ”indicator
light in the combination meter goes off. ! Manual switch
Press the “DCCD-MANU ”switch on the
center console to switch from auto mode
to manual mode. The “AUTO ”indicator
light in the combination meter will go off.
Press the switch again to go back to auto
mode. The “AUTO ”indicator light in the
combination meter will come on. Starting and operating
7-13
– CONTINUED –
Page 245 of 364

WARNING
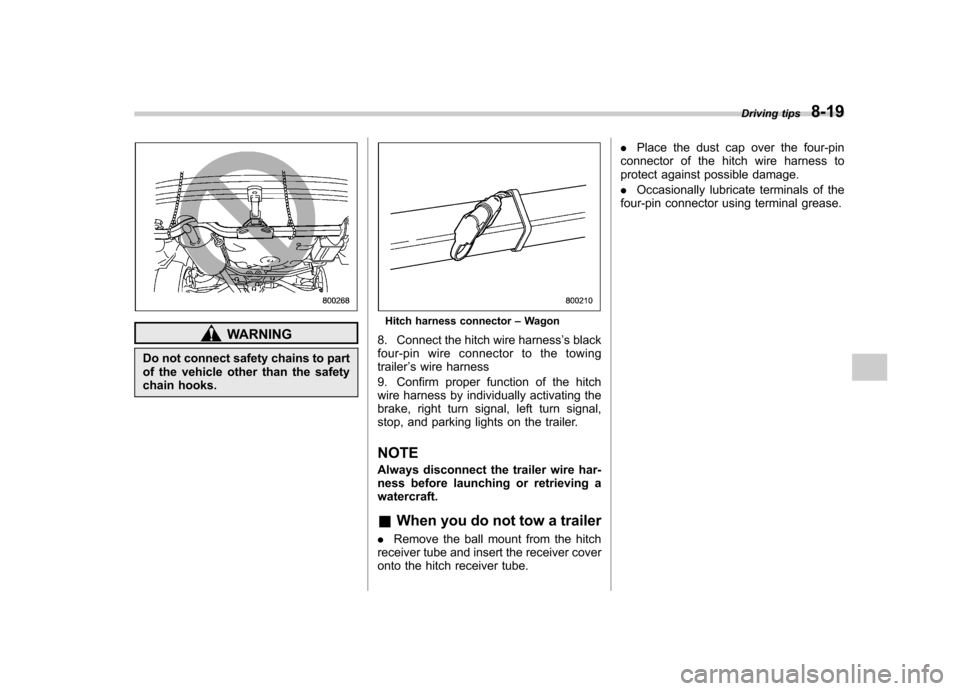
Do not connect safety chains to part
of the vehicle other than the safety
chain hooks.
Hitch harness connector –Wagon
8. Connect the hitch wire harness ’s black
four-pin wire connector to the towing trailer ’s wire harness
9. Confirm proper function of the hitch
wire harness by individually activating the
brake, right turn signal, left turn signal,
stop, and parking lights on the trailer.
NOTE
Always disconnect the trailer wire har-
ness before launching or retrieving awatercraft. & When you do not tow a trailer
. Remove the ball mount from the hitch
receiver tube and insert the receiver cover
onto the hitch receiver tube. .
Place the dust cap over the four-pin
connector of the hitch wire harness to
protect against possible damage. . Occasionally lubricate terminals of the
four-pin connector using terminal grease. Driving tips
8-19
Page 251 of 364

for your hitch and trailer.
WARNING
Always use safety chains between
your vehicle and the trailer. Towing a
trailer without safety chains could
create a traffic safety hazard if the
trailer separates from the hitch due
to coupling damage or hitch balldamage.
! Side mirrors
After hitching a trailer to your vehicle,
check that the standard side mirrors
provide a good rearward field of view
without significant blind spots. If significant
blind spots occur with the vehicle ’s stan-
dard side mirrors, use towing mirrors that conform with Federal, state/province and/
or other applicable regulations. !
Trailer lights
Connection of trailer lights to your vehi- cle ’s electrical system requires modifica-
tions to the vehicle ’s lighting circuit to
increase its capacity and accommodate
wiring changes. To ensure the trailer lights
are connected properly, please consult
your SUBARU dealer. Check for proper
operation of the turn signals, the brake
lights and parking lights each time you
hitch up.
CAUTION
Direct splicing or other improper
connection of trailer lights may
damage your vehicle ’s electrical
system and cause a malfunction of
your vehicle ’s lighting system.
! Tires
Make sure that all the tires on your vehicle
are properly inflated to the pressure
specified on the tire placard located on
the left center pillar of your vehicle.
Trailer tire condition, size, load rating and
proper inflation pressure should be in
accordance with the trailer manufacturer ’s specifications.
In the event your vehicle gets a flat tire
when towing a trailer, ask a commercial
road service to repair the flat tire.
If you carry a regular size spare tire in your
vehicle or trailer as a precaution against
getting a flat tire, be sure that the spare
tire is firmly secured.
WARNING
Never tow a trailer when the tem-
porary spare tire is used. The tem-
porary spare tire is not designed to
sustain the towing load. Use of the
temporary spare tire when towing
can result in failure of the spare tire
and/or less stability of the vehicle.
& Trailer towing tips
CAUTION
. Never exceed 45 mph (72 km/h)
when towing a trailer in hilly
country on hot days.
. When towing a trailer, steering,
stability, stopping distance and
braking performance will be dif-
ferent from normal operation. For Driving tips
8-25
– CONTINUED –
Page 252 of 364

8-26Driving tips
safety’s sake, you should employ
extra caution when towing a
trailer and you should never
speed. You should also keep the
following tips in mind:
! Before starting out on a trip
. Check that the vehicle and vehicle-to-
hitch mounting are in good condition. If
any problems are apparent, do not tow the
trailer. . Check that the vehicle sits horizontally
with the trailer attached. If the vehicle is
tipped sharply up at the front and down at
the rear, check the total trailer weight,
GVW, GAWs and tongue load again, then
confirm that the load and its distribution
are acceptable. . Check that the tire pressures are
correct.. Check that the vehicle and trailer are
connected properly. Confirm that
–the trailer tongue is connected
properly to the hitch ball. – the trailer lights connector is con-
nected properly and trailer ’s brake
lights illuminate when the vehicle ’s
brake pedal is pressed, and that the trailer ’s turn signal lights flash when
the vehicle ’s turn signal lever is oper-
ated. –
the safety chains are connected
properly. – all cargo in the trailer is secured
safely in position.– the side mirrors provide a good
rearward field of view without a sig-
nificant blind spot.
. Sufficient time should be taken to learn
the “feel ”of the vehicle/trailer combination
before starting out on a trip. In an area free
of traffic, practice turning, stopping and
backing up. ! Driving with a trailer
. You should allow for considerably more
stopping distance when towing a trailer.
Avoid sudden braking because it may
result in skidding or jackknifing and loss ofcontrol. . Avoid abrupt starts and sudden accel-
erations. If your vehicle has a manual
transmission, always start out in first gear
and release the clutch at moderate engine revolution. . Avoid uneven steering, sharp turns and
rapid lane changes.. Slow down before turning. Make a
longer than normal turning radius because
the trailer wheels will be closer than the
vehicle wheels to the inside of the turn. In
a tight turn, the trailer could hit yourvehicle. .
Crosswinds will adversely affect the
handling of your vehicle and trailer, caus-
ing sway. Crosswinds can be due to
weather conditions or the passing of large
trucks or buses. If swaying occurs, firmly
grip the steering wheel and slow down
immediately but gradually. . When passing other vehicles, consid-
erable distance is required because of the
added weight and length caused by
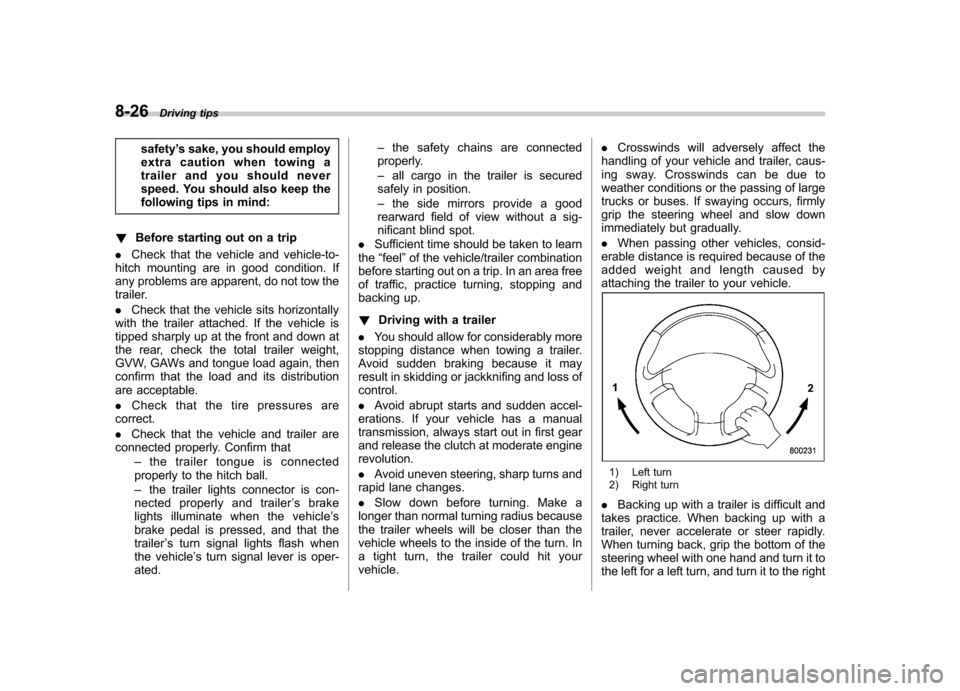
attaching the trailer to your vehicle.
1) Left turn
2) Right turn
. Backing up with a trailer is difficult and
takes practice. When backing up with a
trailer, never accelerate or steer rapidly.
When turning back, grip the bottom of the
steering wheel with one hand and turn it to
the left for a left turn, and turn it to the right
Page 256 of 364

9-2In case of emergency
If you park your vehicle in
case of an emergency
The hazard warning flasher should be
used in day or night to warn other drivers
when you have to park your vehicle under
emergency conditions.
Avoid stopping on the road. It is best to
safely pull off the road if a problem occurs.
The hazard warning flasher can be acti-
vated regardless of the ignition switchposition.
Turn on the hazard warning by pushing
the hazard warning flasher switch. Turn it
off by pushing the switch again. NOTE
When the hazard warning flasher is on,
the turn signals do not work.
Temporary spare tire
The temporary spare tire is smaller and
lighter than a conventional tire and is
designed for emergency use only. Re-
move the temporary spare tire and re-
install the conventional tire as soon as
possible because the spare tire is de-
signed only for temporary use.
Check the inflation pressure of the tem-
porary spare tire periodically to keep the
tire ready for use. The correct pressure is
60 psi (420 kPa, 4.2 kg/cm
2)
.
When using the temporary spare tire, note
the following. . Do not exceed 50 mph (80 km/h).
. Do not put a tire chain on the temporary
spare tire. Because of the smaller tire size,
a tire chain will not fit properly. . Do not use two or more temporary
spare tires at the same time.. Do not drive over obstacles. This tire
has a smaller diameter, so road clearance
is reduced.
Page 278 of 364

Maintenance and serviceWheel balance .................................................. 11-33
Wear indicators ................................................ 11-33
Tire rotation direction mark .............................. 11-33
Tire rotation ..................................................... 11-34
Tire replacement .............................................. 11-34
Wheel replacement ........................................... 11-35
Aluminum wheels ............................................. 11-35
Intercooler water spray (WRX-STI) .................. 11-36
Windshield washer fluid .................................. 11-36
Replacement of wiper blades .......................... 11-38
Windshield wiper blade assembly ..................... 11-38
Windshield wiper blade rubber ......................... 11-38
Rear window wiper blade assembly .................. 11-39
Rear window wiper blade rubber ....................... 11-40
Battery. .............................................................. 11-41 Fuses
................................................................ 11-42
Main fuse .......................................................... 11-44
Installation of accessories .............................. 11-44
Replacing bulbs ............................................... 11-45
Headlights (WRX-STI) ....................................... 11-46
Headlights (Except WRX-STI) ........................... 11-47
Front turn signal light bulbs ............................. 11-49
Parking light .................................................... 11-49
Front fog light .................................................. 11-49
Rear combination lights ................................... 11-49
License plate light ........................................... 11-51
Dome light, map light and cargo area light ....... 11-51
Trunk light ....................................................... 11-52
High mount stop light ...................................... 11-52
Other bulbs ..................................................... 11-53