2007 SUBARU IMPREZA WRX maintenance schedule
[x] Cancel search: maintenance schedulePage 290 of 364

11-14Maintenance and service
according to the maintenance schedule.
1. Remove the under cover.
2. Place a proper container under the
drain plug and loosen the drain plug.
3. Loosen the radiator cap to drain the
coolant from the radiator. Then drain the
coolant from the reserve tank. Tighten the
drain plug securely.
NOTE (Turbo model only)
The cap (without tabs) on top of the
radiator does not need to be removed.
To add coolant, remove the cap (with
tabs) on the coolant tank on top of theengine.
4. Install the under cover.
Non-turbo models
1) Filler neck
2) Fill up to this level
Turbo models
1) Filler neck
2) Fill up to this level
5. Slowly pour the coolant and fill up to
just below the filler neck, allowing enough
room to add genuine Subaru cooling
system conditioner in the radiator. Add
genuine Subaru cooling system condi-
tioner until the coolant level reaches the
filler neck. Do not pour the coolant too
quickly, as this may lead to insufficient air
bleeding and trapped air in the system. Guideline of coolant quantity (including
coolant in reservoir tank):
Non-turbo models:MT: 7.4 US qt (7.0 liters, 6.2 Imp qt)
AT: 7.3 US qt (6.9 liters, 6.1 Imp qt)
Turbo models: MT: 8.1 US qt (7.7 liters, 6.8 Imp qt)
AT: 8.0 US qt (7.6 liters, 6.7 Imp qt)
1) “FULL ”level mark
2) “LOW ”level mark
CAUTION
. Be careful not to spill engine
coolant when adding it. If coolant
touches the exhaust pipe, it may
cause a bad smell, smoke, and/or
Page 291 of 364

a fire. If engine coolant gets on
the exhaust pipe, be sure to wipe
it off.
. Do not splash the engine coolant
over painted parts. The alcohol
contained in the engine coolant
may damage the paint surface.
6. Pour the coolant and fill to the reser-
voir tank ’s “FULL ”level mark.
1) Rubber gaskets
7. Put the radiator cap back on and
tighten firmly. At this time, make sure that
the rubber gasket in the radiator cap is
correctly in place.
8. Start and run the engine for more than
five minutes at 2,000 to 3,000 rpm.
9. Stop the engine and wait until the coolant cools down (122 to 140
8F [50 to
60 8C]). If there is any loss of coolant, add
coolant to the radiator ’s filler neck and to
the reserve tank ’s “FULL ”level.
10. Put the radiator cap and reservoir cap
back on and tighten firmly. Air cleaner element
The air cleaner element functions as a
filter screen. When the element is perfo-
rated or removed, engine wear will be
excessive and engine life shortened.
The air cleaner element is a viscous type.
It is unnecessary to clean or wash theelement.
WARNING
Do not operate the engine with the
air cleaner element removed. The air
cleaner element not only filters
intake air but also stops flames if
the engine backfires. If the air
cleaner element is not installed
when the engine backfires, you
could be burned.
& Replacing the air cleaner element
Replace the air cleaner element according
to the maintenance schedule in the“ Warranty and Maintenance Booklet ”. Un-
der extremely dusty conditions, replace it
more frequently. It is recommended that
you always use genuine SUBARU parts. Maintenance and service
11-15
– CONTINUED –
Page 293 of 364

1) Air cleaner case cover
2) Air cleaner element
3. Open the air cleaner case cover and
remove the air cleaner element.
4. Clean the inside of the air cleaner
cover and case with a damp cloth and
install a new air cleaner element.5. To install the air cleaner case cover,
insert the three projections on the air
cleaner case into the slits on the air
cleaner case cover and then snap the
two clamps on the air cleaner case cover. Spark plugs
It may be difficult to replace the spark
plugs. It is recommended that you have
the spark plugs replaced by your
SUBARU dealer.
The spark plugs should be replaced
according to the maintenance schedule
in the
“Warranty and Maintenance Book-
let ”.
CAUTION
. When disconnecting the spark
plug cables, always grasp the
spark plug cap, not the cables.
. Make sure the cables are re-
placed in the correct order. Maintenance and service
11-17
– CONTINUED –
Page 303 of 364

&Recommended clutch fluid
FMVSS No. 116, fresh DOT 3 or DOT 4
brake fluid
CAUTION
Avoid mixing DOT 3 and DOT 4
brake fluids even if they are of the
same brand. Brake booster
If the brake booster does not operate as
described in the following, have it checked
by your SUBARU dealer.
1. With the engine off, depress the brake
pedal several times, applying the same
pedal force each time. The distance the
pedal travels should not vary.
2. With the brake pedal depressed, start
the engine. The pedal should move
slightly down to the floor.
3. With the brake pedal depressed, stop
the engine and keep the pedal depressed
for 30 seconds. The pedal height should
not change.
4. Start the engine again and run for
approximately one minute then turn it off.
Depress the brake pedal several times to
check the brake booster. The brake
booster operates properly if the pedal
stroke decreases with each depression. Brake pedal
Check the brake pedal free play and
reserve distance according to the main-
tenance schedule in the
“Warranty and
Maintenance Booklet ”.
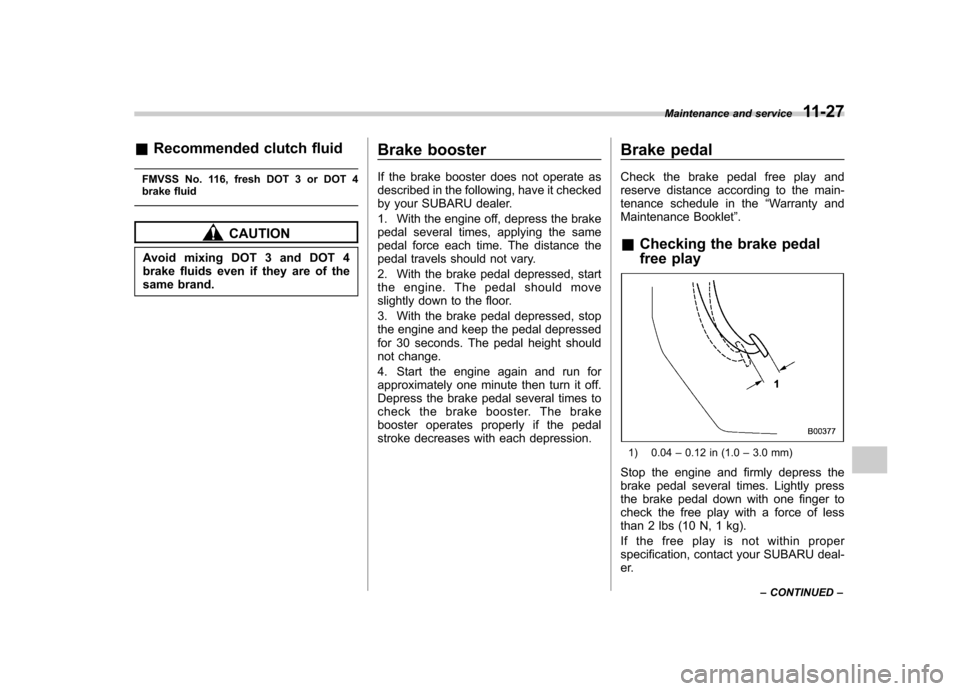
& Checking the brake pedal
free play
1) 0.04 –0.12 in (1.0 –3.0 mm)
Stop the engine and firmly depress the
brake pedal several times. Lightly press
the brake pedal down with one finger to
check the free play with a force of less
than 2 lbs (10 N, 1 kg).
If the free play is not within proper
specification, contact your SUBARU deal-
er. Maintenance and service
11-27
– CONTINUED –
Page 304 of 364

11-28Maintenance and service
&Checking the brake pedal
reserve distance
1) More than 2.56 in (65 mm)
Depress the pedal with a force of approxi-
mately 66 lbs (294 N, 30 kg) and measure
the distance between the upper surface of
the pedal pad and the floor.
When the measurement is smaller than
the specification, or when the pedal does
not operate smoothly, contact with your
SUBARU dealer. Clutch pedal (MT vehicles)
Check the clutch pedal free play and
reserve distance according to the main-
tenance schedule in the
“Warranty and
Maintenance Booklet ”.
& Checking the clutch function
Check the clutch engagement and disen-gagement.
1. With the engine idling, check that there
are no abnormal noises when the clutch
pedal is depressed, and that shifting into
1st or reverse feels smooth.
2. Start the vehicle by releasing the pedal
slowly to check that the engine and
transmission smoothly couple without
any sign of slippage. &
Checking the clutch pedal
free play1) 0.16 –0.51 in (4.0 –13.0 mm)
Lightly press the clutch pedal down with
your finger until you feel resistance, and
check the free play.
If the free play is not within proper
specification, contact your SUBARU deal-
er.
Page 306 of 364

11-30Maintenance and service
Parking brake stroke
Check the parking brake stroke according
to the maintenance schedule in the“Warranty and Maintenance Booklet ”.
When the parking brake is properly
adjusted, braking power is fully applied
by pulling the lever up seven to eight
notches gently but firmly (approximately
44 lbs [196 N, 20 kg]). If the parking brake
lever stroke is not within the specified
range, have the brake system checked
and adjusted at your SUBARU dealer. Tires and wheels &
Types of tires
You should be familiar with type of tires
present on your vehicle.
The factory-fitted 17-inch tires on the
WRX-STI are summer tires. The factory-
fitted tires on other versions are all-seasontires. ! All season tires
All season tires are designed to provide
an adequate measure of traction, handling
and braking performance in year-round
driving including snowy and icy road
conditions. However all season tires do
not offer as much traction performance as
winter (snow) tires in heavy or loose snow
or on icy roads.
All season tires are identified by “ALL
SEASON ”and/or “M+S ”(Mud & Snow) on
the tire sidewall. ! Summer tires
Summer tires are high-speed capability
tires best suited for highway driving under
dry conditions.
Summer tires are inadequate for driving
on slippery roads such as on snow-
covered or icy roads.
If you drive your vehicle on snow-covered
or icy roads, we strongly recommend the use of winter (snow) tires.
When installing winter tires, be sure to
replace all four tires. !
Winter (snow) tires
Winter tires are best suited for driving on
snow-covered and icy roads. However
winter tires do not perform as well as
summer tires and all season tires on roads
other than snow-covered and icy roads. & Tire inspection
Check on a daily basis that the tires are
free from serious damage, nails, and
stones. At the same time, check the tires
for abnormal wear.
Contact your SUBARU dealer immedi-
ately if you find any problem. NOTE . When the wheels and tires strike
curbs or are subjected to harsh treat-
ment as when the vehicle is driven on a
rough surface, they can suffer damage
that cannot be seen with the naked eye.
This type of damage does not become
evident until time has passed. Try not
to drive over curbs, potholes or on
other rough surfaces. If doing so is
unavoidable, keep the vehicle ’s speed
down to a walking pace or less, and
approach the curbs as squarely as
Page 359 of 364

14-6Index
M
Main fuse ................................................................. 11-44
Maintenance
Precautions ........................................................... 11-3
Schedule .............................................................. 11-3
Seatbelt ................................................................ 1-18
Tools .................................................................... 9-16
Manual Climate control system ............................................. 4-3
Transmission oil .................................................... 11-19
Transmission-5 speeds ........................................... 7-11
Transmission-6 speeds ............................................. 7-9
Map light ..................................................................... 6-2
Maximum load limits ................................................... 8-20
Meters and gauges .............................................. 3-6, 3-11
Mirrors ...................................................................... 3-32
Moonroof .................................................................. 2-24
N
New vehicle break-in driving .......................................... 8-2
O
Odometer/Tripmeter ............................................. 3-7, 3-11
Off road driving ............................................................ 8-6
Oil filter ..................................................................... 11-9
Oil level
Engine .................................................................. 11-8
Front differential gear (AT vehicles) ......................... 11-21
Manual transmission .............................................. 11-19
Rear differential .................................................... 11-22
Oil pressure warning light ............................................ 3-16 Outside mirrors
.......................................................... 3-33
Outside temperature indicator ............................... 3-9, 3-13
Overheating engine .................................................... 9-11
P Parking Brake .................................................................... 7-24
Brake stroke ........................................................ 11-30
Light switch ........................................................... 3-25
Tips ...................................................................... 7-25
Parking your vehicle ................................................... 7-24
Periodic inspections ..................................................... 8-4
Power
Door locking switch .................................................. 2-6
Steering ................................................................ 7-20
Steering fluid ........................................................ 11-24
Windows ............................................................... 2-18
Precautions against vehicle modification ................ 1-22, 1-57
Preparing to drive ........................................................ 7-6
Printed antenna ........................................................... 5-2
R Rear Combination lights ................................................ 11-49
Gate ............................................................. 2-23, 9-14
Seats ..................................................................... 1-6
Viscous limited slip differential .................................. 7-20
Rear differential Gear oil ............................................................... 11-22
Oil temperature warning light ................................... 3-17