2007 SUBARU IMPREZA WRX belt
[x] Cancel search: beltPage 236 of 364

8-10Driving tips
CAUTION
Avoid prolonged continuous driving
in snowstorms. Snow will enter the
engine ’s intake system and may
hinder the air flow, which could
result in engine shutdown or evenbreakdown.
! Wiper operation when snowing
Before driving in cold weather, make sure
the wiper blades are not frozen to the
windshield or rear window. If the wiper
blades are frozen to the windshield or rear
window, use the defroster with the airflow
control dial in the “
”position and the
temperature control dial set for maximum
warmth until the wiper blades are com-
pletely thawed out. If your vehicle is
equipped with a wiper deicer, it is helpful
to thaw the windshield wiper blades. To
thaw out the rear wiper blade, use the rear
window defogger.
When driving in snow, if frozen snow starts
to stick on the surface of the windshield
despite wiper operation, use the defroster
with the airflow control dial in “
”and the
temperature control dial set for maximum
warmth. After the windshield gets warmed
enough to melt the frozen snow on it,
wash it away using the windshield washer. Snow stuck on the wiper arm prevents the
wiper from working effectively. If snow is
stuck on the wiper arm, pull off the road to
a safe place, then remove it. If you stop
the vehicle at road side, use the hazard
warning flasher to alert other drivers.
We recommend use of non-freezing type
wiper blades (winter blades) during the
seasons you could have snow and sub-
zero temperatures. Blades of this type
give superior wiping performance in
snowy conditions. Be sure to use blades
that are suitable for your vehicle.
CAUTION
During high-speed driving, non-
freezing type wiper blades may not
perform as well as standard wiper
blades. If this happens, reduce the
vehicle speed.
NOTE
When the season requiring non-freez-
ing type wiper blades is over, replace
them with standard wiper blades. & Corrosion protection
Refer to the “Corrosion protection ”section
(chapter 10). &
Snow tires
! All models except WRX-STI
WARNING
. When replacing original tires with
winter (snow) tires, make sure
you use only the same size,
construction and load range as
the original tires listed on the tire
placard. Using other sizes and
construction may affect speed-
ometer/odometer calibration and
clearance between the body and
tires. It also may be dangerous
and lead to loss of vehicle con-trol.
. You must install four winter tires
that are of the same size, con-
struction, brand, and load range.
Mixing other sizes or construc-
tions may result in severe me-
chanical damage to the drive
train of your vehicle and may
affect ride, handling, braking and
speedometer/odometer calibra-
tion. It also may be dangerous
and lead to loss of vehicle con-trol.
. Do not use a combination of
radial, belted bias or bias tires
Page 237 of 364

since it may cause dangerous
handling characteristics and lead
to an accident.
Your vehicle is equipped with “all season
tires ”as original equipment, which are
designed to provide an adequate measure
of traction, handling and braking perfor-
mance in year-round driving. In winter, it
may be possible to enhance performance
through use of tires designed specifically
for winter driving conditions.
When you choose to install winter tires on
your vehicle, be sure to use the correct tire
size and type. You must install four winter
tires that are of the same size, construc-
tion, brand and load range and you should
never mix radial, belted bias or bias tires
since this may result in dangerous hand-
ling characteristics. When you choose a
tire, make sure that there is enough
clearance between the tire and vehicle
body.
Remember to drive with care at all times
regardless of the type of tires on yourvehicle. ! WRX-STI
WARNING
. When replacing original tires with winter (snow) tires, make sure
you use only the same size,
construction and load range as
the original tires listed on the tire
placard. Using other sizes and
construction may affect speed-
ometer/odometer calibration and
clearance between the body and
tires. It also may be dangerous
and lead to loss of vehicle con-trol.
. You must install four winter tires
that are of the same size, con-
struction, brand, and load range.
Mixing other sizes or construc-
tions may result in severe me-
chanical damage to the drive
train of your vehicle and may
affect ride, handling, braking and
speedometer/odometer calibra-
tion. It also may be dangerous
and lead to loss of vehicle con-trol.
. Do not use a combination of
radial, belted bias or bias tires
since it may cause dangerous
handling characteristics and lead
to an accident.
Your vehicle is equipped with “summer
tires ”as original equipment, which are
inadequate for driving on slippery roads such as on snow-covered or icy roads.
Compared with winter and all-season
tires, summer tires give significantly less
grip on snowy and icy road surfaces.
Therefore, use of winter tires is strongly
recommended when driving with such
road conditions.
When you choose to install winter tires on
your vehicle, be sure to use the correct tire
size and type. You must install four winter
tires that are of the same size, construc-
tion, brand and load range and you should
never mix radial, belted bias or bias tires
since this may result in dangerous hand-
ling characteristics. When you choose a
tire, make sure that there is enough
clearance between the tire and vehicle
body.
Remember to drive with care at all times
regardless of the type of tires on yourvehicle. &
Tire chains
Driving on snowy grades or icy roads may
require the use of tire chains, in which
case put the chains on the front wheels
only. Use only SAE class S type chains
that are of the correct size for your tires so
as not to damage the vehicle body orsuspension.
When driving with tire chains, drive at Driving tips
8-11
– CONTINUED –
Page 263 of 364

eye protectors, and remove metal
objects such as rings, bands or
other metal jewelry.
. Be sure the jumper cables and
clamps on them do not have
loose or missing insulation.
Do not jump start unless cables
in suitable condition are avail-able.
. A running engine can be danger-
ous. Keep your fingers, hands,
clothing, hair and tools away
from the cooling fan, belts and
any other moving engine parts.
Removing rings, watches and
ties is advisable.
. Jump starting is dangerous if it
done incorrectly. If you are un-
sure about the proper procedure
for jump starting, consult a com-
petent mechanic.
When your vehicle does not start due to a
run down (discharged) battery, the vehicle
may be jump started by connecting your
battery to another battery (called the
booster battery) with jumper cables.
& How to jump start
1. Make sure the booster battery is 12
volts and the negative terminal is grounded.
2. If the booster battery is in another
vehicle, do not let the two vehicles touch.
3. Turn off all unnecessary lights and accessories.
4. Connect the jumper cables exactly in
the sequence illustrated.
In case of emergency
9-9
– CONTINUED –
Page 277 of 364

Maintenance schedule....................................... 11-3
Maintenance precautions ................................... 11-3
Before checking or servicing in the engine compartment .................................................... 11-4
When you do checking or servicing in the engine compartment while the engine is running .......... 11-4
Engine hood ....................................................... 11-4
Engine compartment overview .......................... 11-6
Non-turbo models .............................................. 11-6
Turbo models ..................................................... 11-7
Engine oil ............................................................ 11-8
Checking the oil level ......................................... 11-8
Changing the oil and oil filter .............................. 11-9
Recommended grade and viscosity .................. 11-11
Recommended grade and viscosity under severe driving conditions .......................................... 11-12
Synthetic oil ..................................................... 11-12
Cooling system ................................................ 11-12
Cooling fan, hose and connections ................... 11-12
Engine coolant ................................................. 11-13
Air cleaner element .......................................... 11-15
Replacing the air cleaner element ..................... 11-15
Spark plugs ...................................................... 11-17
Recommended spark plugs .............................. 11-18
Drive belts ........................................................ 11-18
Manual transmission oil .................................. 11-19
Checking the oil level ....................................... 11-19
Recommended grade and viscosity .................. 11-20
Automatic transmission fluid .......................... 11-20
Checking the fluid level .................................... 11-20 Recommended fluid
......................................... 11-21
Front differential gear oil (AT vehicles) .......... 11-21
Checking the oil level ...................................... 11-21
Recommended grade and viscosity .................. 11-22
Rear differential gear oil .................................. 11-22
Checking the gear oil level ............................... 11-22
Recommended grade and viscosity .................. 11-23
Power steering fluid ........................................ 11-24
Checking the fluid level .................................... 11-24
Recommended fluid ......................................... 11-25
Brake fluid ........................................................ 11-25
Checking the fluid level .................................... 11-25
Recommended brake fluid ............................... 11-26
Clutch fluid (MT vehicles) ............................... 11-26
Checking the fluid level .................................... 11-26
Recommended clutch fluid ............................... 11-27
Brake booster .................................................. 11-27
Brake pedal ...................................................... 11-27
Checking the brake pedal free play .................. 11-27
Checking the brake pedal reserve distance....... 11-28
Clutch pedal (MT vehicles) .............................. 11-28
Checking the clutch function ............................ 11-28
Checking the clutch pedal free play .................. 11-28
Replacement of brake pad and lining ............ 11-29
Breaking-in of new brake pads and linings ....... 11-29
Parking brake stroke ....................................... 11-30
Tires and wheels .............................................. 11-30
Types of tires ................................................... 11-30
Tire inspection ................................................. 11-30
Tire pressures and wear .................................. 11-31
Maintenance and service
11
Page 280 of 364

11-4Maintenance and service
guard against getting oil or fluids
in your eyes. If something does
get in your eyes, thoroughly
wash them out with clean water.
. Do not tamper with the wiring of
the SRS airbag system or seat-
belt pretensioner system, or at-
tempt to take its connectors
apart, as that may activate the
system or it can render it inop-
erative. The wiring and connec-
tors of these systems are yellow
for easy identification. NEVER
use a circuit tester for thesewiring.
If your SRS airbag or seatbelt
pretensioner needs service, con-
sult your nearest SUBARU deal-
er.
& Before checking or servicing
in the engine compartment
WARNING
. Always stop the engine and set
the parking brake firmly to pre-
vent the vehicle from moving.
. Always let the engine cool down.
Engine parts become very hot
when the engine is running and remain hot for some time after
the engine is stopped.
. Do not spill engine oil, engine
coolant, brake fluid or any other
fluid on hot engine components.
This may cause a fire.
. Always remove the key from the
ignition switch. When the ignition
switch is in the “ON ”position,
thecoolingfanmayoperate
suddenly even when the engine
is stopped.
& When you do checking or
servicing in the engine com-
partment while the engine isrunning
WARNING
A running engine can be dangerous.
Keep your fingers, hands, clothing,
hair and tools away from the cooling
fan, belts and any other moving
engine parts. Removing rings,
watches and ties is advisable. Engine hood
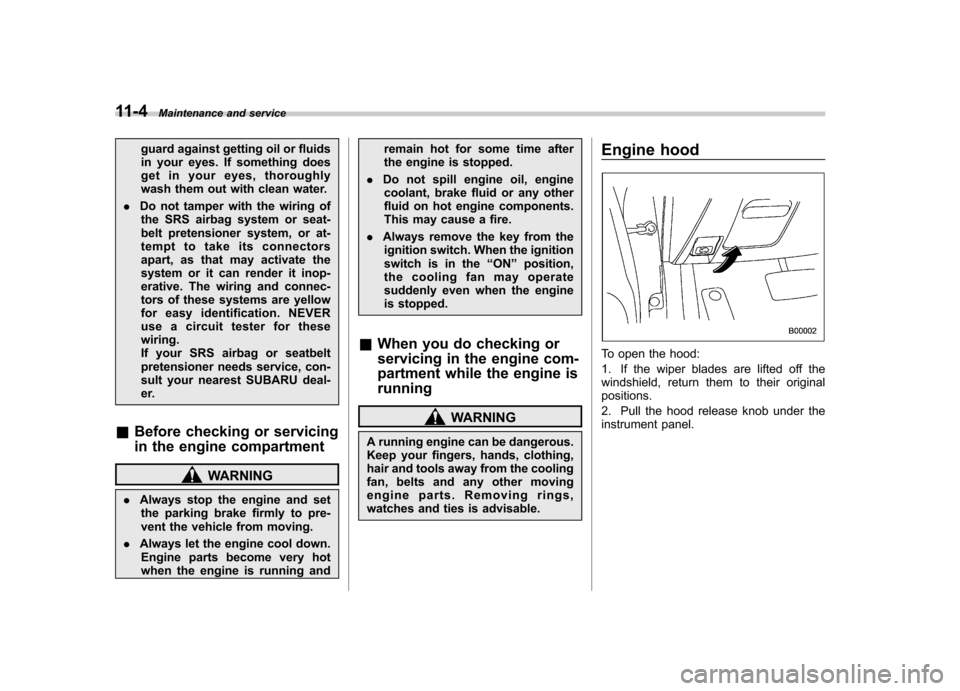
To open the hood:
1. If the wiper blades are lifted off the
windshield, return them to their originalpositions.
2. Pull the hood release knob under the
instrument panel.
Page 294 of 364

11-18Maintenance and service
&Recommended spark plugs
Non-turbo models: FR5AP-11 (NGK)
Turbo models:
ILFR6B (NGK) Drive belts
1) Power steering pump pulley
2) Air conditioner compressor pulley
3) Crank pulley
The alternator, power steering pump, and
air conditioner compressor depend on
drive belts. Satisfactory performance re-
quires that belt tension be correct.
To check belt tension, place a straight-
edge (ruler) across two adjacent pulleys
and apply a force of 22 lbs (98 N, 10 kg)
midway between the pulleys by using a
spring scale. Belt deflection should be the
amount specified. If a belt is loose,
cracked, or worn, contact your SUBARU
dealer. in (mm)
Deflection
New belt Used belt
A 0.28
–0.35
(7.0 –9.0) 0.35
–0.43
(9.0 –11.0)
B 0.30
–0.33
(7.5 –8.5) 0.35
–0.40
(9.0 –10.0)
Page 311 of 364

recommends replacing all four tires at the
same time.
WARNING
. All four tires must be the same in
terms of manufacturer, brand
(tread pattern), construction, de-
gree of wear, speed symbol, load
index and size. Mixing tires of
different types, sizes or degrees
of wear can result in damage tovehicle ’s powertrain. Use of dif-
ferent types or sizes of tires can
also dangerously reduce con-
trollability and braking perfor-
mance and can lead to an acci- dent.
. Use only radial tires. Do not use
radial tires together with belted
bias tires and/or bias-ply tires.
Doing so can dangerously re-
duce controllability, resulting in
an accident.
& Wheel replacement
When replacing wheels due, for example,
to damage, make sure the replacement
wheels match the specifications of the
wheels that are fitted as standard equip-
ment. Replacement wheels are available from SUBARU dealers.WARNING
Use only those wheels that are
specified for your vehicle. Wheels
not meeting specifications could
interfere with brake caliper opera-
tion and may cause the tires to rub
against the wheel well housing dur-
ing turns. The resulting loss of
vehicle control could lead to anaccident.
NOTE
When any of the wheels are removed
and replaced for tire rotation or to
change a flat tire, always check the
tightness of the wheel nuts after driv-
ing approximately 600 miles (1,000 km).
If any nut is loose, tighten it to the
specified torque. Aluminum wheels
Aluminum wheels can be scratched and
damaged easily. Handle them carefully to
maintain their appearance, performance,
and safety. .
When any of the wheels are removed
and replaced for tire rotation or to change
a flat tire, always check the tightness of
the wheel nuts after driving approximately
600 miles (1,000 km). If any nut is loose,
tighten it to the specified torque. . Never apply oil to the threaded parts,
wheel nuts, or tapered surface of the wheel. . Never let the wheel rub against sharp
protrusions or curbs.. Be sure to fit tire chains on uniformly
and completely around the tire, otherwise
the chains may scratch the wheel. . When wheel nuts, balance weights, or
the center cap is replaced, be sure to
replace them with genuine SUBARU parts
designed for aluminum wheels. Maintenance and service
11-35
Page 344 of 364

13-4Consumer information and Reporting safety defects
WARNING
Maximum load rating applies
only to the tire, not to the
vehicle. Putting a load rated tire
on any vehicle does not mean
the vehicle can be loaded up to
the tire ’s rated load.
! Construction type
Applicable construction of this tire.
For example, “TUBELESS STEEL
BELTED RADIAL ”
! Construction
The generic name of each cord
material used in the plies (both side-
wall and tread area) of this tire.
For example, “PLIES: TREAD 2
STEEL + 2 POLYESTER SIDEWALL
2 POLYESTER ”
! Uniform Tire Quality Grading
(UTQG)
For details, refer to “Uniform tire
quality grading standards ”in this
chapter.