2007 SUBARU IMPREZA WRX jump start
[x] Cancel search: jump startPage 127 of 364

3-18Instruments and controls
.The warning light does not come
on when the ignition switch is
turned to the “ON ”position.
. The warning light comes on when
the ignition switch is turned tothe “ON ”position, but it does not
go out even when the vehicle
speed exceeds approximately 8
mph (12 km/h).
. The warning light comes on dur-
ing driving.
If any of these conditions occur,
have the ABS system repaired at
the first available opportunity by
your SUBARU dealer.
With a vehicle equipped with an EBD
system, the ABS warning light comes on
together with the brake system warning
light if the EBD system becomes faulty.
For further details of the EBD system fault
warning, refer to “Brake system warning
light ”.
NOTE
If the warning light behavior is as
described in the following, the ABS
system may be considered normal. . The warning light comes on right
after the engine is started but goes out
immediately, remaining off.. The warning light remains on after the engine has been started, but it goes
out when the vehicle speed reaches
approximately 8 mph (12 km/h)..
The warning light comes on during
driving, but it goes out immediately and
remains off.
When driving with an insufficient battery
voltage such as when the engine is jump
started, the ABS warning light may come
on. This is due to the low battery voltage
and does not indicate a malfunction.
When the battery becomes fully charged,
the light will go out. & Brake system warning light
WARNING
. Driving with the brake system
warning light on is dangerous.
This indicates your brake system
may not be working properly. If
the light remains on, we recom-
mend that you have the brakes
inspected by a SUBARU dealer
immediately.
. If at all in doubt about whether
the brakes are operating prop-
erly, do not drive the vehicle.
Have your vehicle towed to the
nearest SUBARU dealer for re- pair.
This light has the following three functions: ! Parking brake warning
The light comes on with the parking brake
applied while the ignition switch is in the“ ON ”position. It goes out when the
parking brake is fully released. ! Brake fluid level warning
This light comes on when the brake fluid
level has dropped to near the “MIN ”level
of the brake fluid reservoir with the ignition
switch in the “ON ”position and with the
parking brake fully released.
If the brake system warning light should
come on while driving (with the parking
brake fully released and with the ignition
switch positioned in “ON ”), it could be an
indication of leaking of brake fluid or worn
brake pads. If this occurs, immediately
stop the vehicle at the nearest safe place
and check the brake fluid level. If the fluid
level is below the “MIN ”mark in the
reservoir, do not drive the vehicle. Have
the vehicle towed to the nearest SUBARU
dealer for repair. ! Electronic Brake Force Distribution
(EBD) system warning
The brake system warning light also
Page 213 of 364
7-16Starting and operating
WARNING
Do not shift from the “P ” or “N ”
position into the “D ”, “3 ”, “2 ”, “1 ” or
“ R ” position while depressing the
accelerator pedal. This may cause
the vehicle to jump forward or back-ward.
CAUTION
. Shift into the “P ” or “R ” position
only after the vehicle is comple-
tely stopped. Shifting while the
vehicle is moving may cause
damage to the transmission.
. Do not race the engine for more
than 5 seconds in any position
except the “N ” or “P ” position
when the brake is set or when
chocks are used in the wheels.
This may cause the automatic
transmission fluid to overheat.
. Avoid shifting from one of the
forward driving positions into the“ R ” position or vice versa until
the vehicle has completely
stopped. Such shifting may
cause damage to the transmis-sion.
. When parking the vehicle, first securely apply the parking brake
and then place the selector lever
in the
“P ” position. Avoid parking
for a long time with the selector
lever in any other position as
doing so could result in a dead
battery.
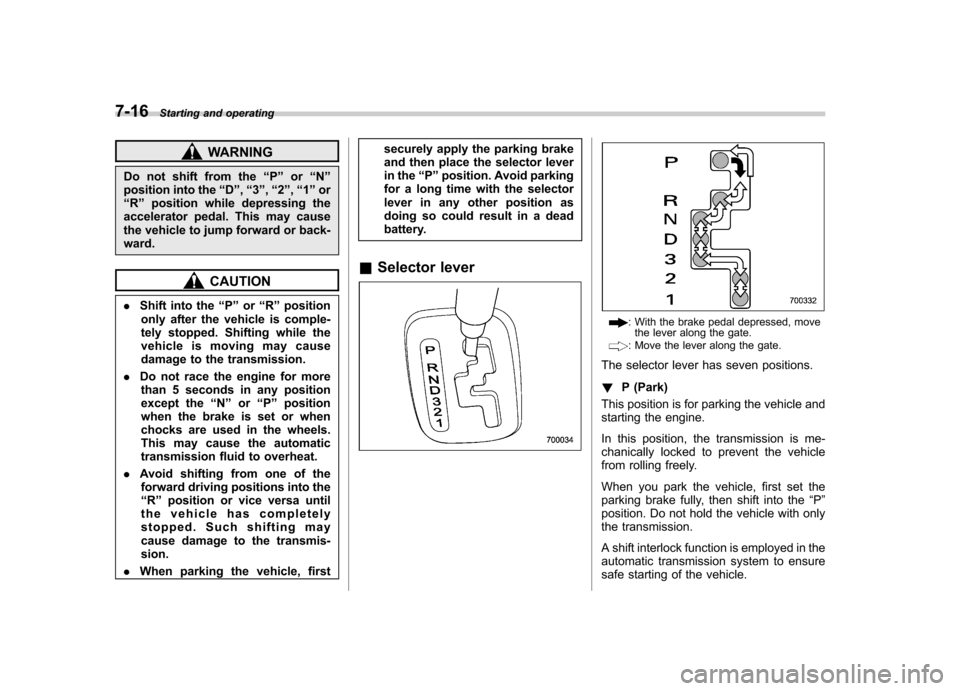
& Selector lever
: With the brake pedal depressed, move
the lever along the gate.
: Move the lever along the gate.
The selector lever has seven positions. ! P (Park)
This position is for parking the vehicle and
starting the engine.
In this position, the transmission is me-
chanically locked to prevent the vehicle
from rolling freely.
When you park the vehicle, first set the
parking brake fully, then shift into the “P ”
position. Do not hold the vehicle with only
the transmission.
A shift interlock function is employed in the
automatic transmission system to ensure
safe starting of the vehicle.
Page 219 of 364
7-22Starting and operating
vehicles.
. When driving on badly surfaced
roads, gravel roads, icy roads, or
over deep newly fallen snow,
stopping distances may be long-
er for a vehicle with the ABS
system than one without. When
driving under these conditions,
therefore, reduce your speed and
leave ample distance from othervehicles.
. When you feel the ABS system
operating, you should maintain
constant brake pedal pressure.
Do not pump the brake pedal
since doing so may defeat the
operation of the ABS system.
& ABS system self-check
Just after the vehicle is started, you may
feel on the brake pedal a vibration similar
to when the ABS operates, and you may
also hear the sound of the ABS working
from the engine compartment. This is
caused by an automatic functional test of
the ABS system being carried out and
does not indicate any abnormal condition. &
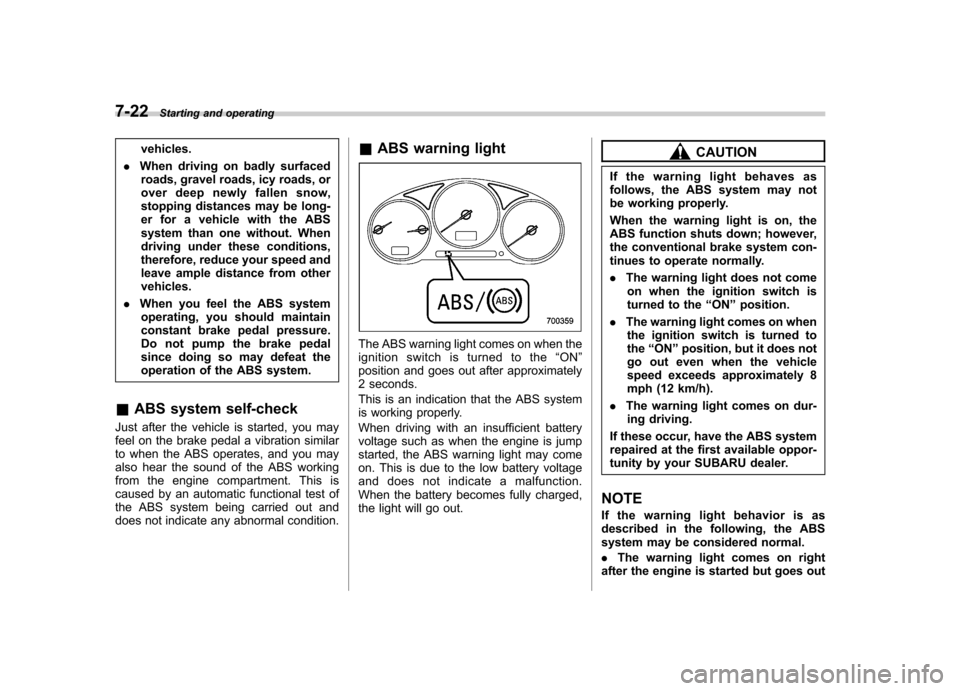
ABS warning light
The ABS warning light comes on when the
ignition switch is turned to the “ON ”
position and goes out after approximately
2 seconds.
This is an indication that the ABS system
is working properly.
When driving with an insufficient battery
voltage such as when the engine is jump
started, the ABS warning light may come
on. This is due to the low battery voltage
and does not indicate a malfunction.
When the battery becomes fully charged,
the light will go out.
CAUTION
If the warning light behaves as
follows, the ABS system may not
be working properly.
When the warning light is on, the
ABS function shuts down; however,
the conventional brake system con-
tinues to operate normally. . The warning light does not come
on when the ignition switch is
turned to the “ON ”position.
. The warning light comes on when
the ignition switch is turned tothe “ON ”position, but it does not
go out even when the vehicle
speed exceeds approximately 8
mph (12 km/h).
. The warning light comes on dur-
ing driving.
If these occur, have the ABS system
repaired at the first available oppor-
tunity by your SUBARU dealer.
NOTE
If the warning light behavior is as
described in the following, the ABS
system may be considered normal. . The warning light comes on right
after the engine is started but goes out
Page 234 of 364
8-8Driving tips
Winter driving
&Operation during cold weather
Carry some emergency equipment, such
as tire chains, a window scraper, a bag of
sand, flares, a small shovel, and jumpercables.
Check the battery and cables. Cold
temperatures reduce battery capacity.
The battery must be in good condition to
provide enough power for cold winterstarts.
Use an engine oil of proper grade and
viscosity for cold weather. Heavy summer
oil will cause harder starting.
Keep the door locks from freezing by squirting them with deicer or glycerin.
Forcing a frozen door open may damage
or separate the rubber weather strips
around the door. If the door is frozen,
use hot water to melt the ice, and after-
wards thoroughly wipe the water away.
Use a windshield washer fluid that con-
tains an antifreeze solution. Do not use
engine antifreeze or other substitutes
because they may damage the paint of
the vehicle.
SUBARU Windshield Washer Fluid con-
tains 58.5% methyl alcohol and 41.5%
surfactant, by volume. Its freezing tem-
perature varies according to how much it
is diluted, as indicated in the followingtable.
Washer Fluid Con- centration Freezing Temperature
30% 10.4 8F( �12 8C)
50% �48F( �20 8C)
100% �
49 8F( �45 8C)
In order to prevent freezing of washer
fluid, check the freezing temperatures in
the table above when adjusting the fluid
concentration to the outside temperature.
If you fill the reservoir tank with a fluid with
a different concentration from the one used previously, purge the old fluid from
the piping between the reservoir tank and
washer nozzles by operating the washer
for a certain period of time. Otherwise, if
the concentration of the fluid remaining in
the piping is too low for the outside
temperature, it may freeze and block thenozzles.
CAUTION
Adjust the washer fluid concentra-
tion appropriately for the outside
temperature. If the concentration is
inappropriate, sprayed washer fluid
may freeze on the windshield and
obstruct your view, and the fluid
may freeze in the reservoir tank.
! Before driving your vehicle
Before entering the vehicle, remove any
snow or ice from your shoes because that
could make the pedals slippery anddangerous.
While warming up the vehicle before
driving, check that the accelerator pedal,
brake pedal, and all other controls operate
smoothly.
Clear away ice and snow that has
accumulated under the fenders to avoid
making steering difficult. During severe
Page 255 of 364
If you park your vehicle in case of anemergency ........................................................ 9-2
Temporary spare tire ........................................... 9-2
Flat tires ............................................................... 9-4
Changing a flat tire .............................................. 9-4
Jump starting ...................................................... 9-8
How to jump start ................................................ 9-9
Engine overheating ............................................ 9-11
If steam is coming from the engine compartment .................................................... 9-11 If no steam is coming from the engine
compartment ................................................... 9-11
Towing ................................................................ 9-11
Towing and tie-down hooks. ............................... 9-12
Using a flat-bed truck. ........................................ 9-13
Towing with all wheels on the ground ................. 9-14
Rear gate –if the rear gate cannot be
unlocked .......................................................... 9-14
Moonroof –if the moonroof cannot be
closed .............................................................. 9-15
Maintenance tools ............................................. 9-16
Jack and jack handle ......................................... 9-16
In case of emergency
9
Page 262 of 364
9-8In case of emergency
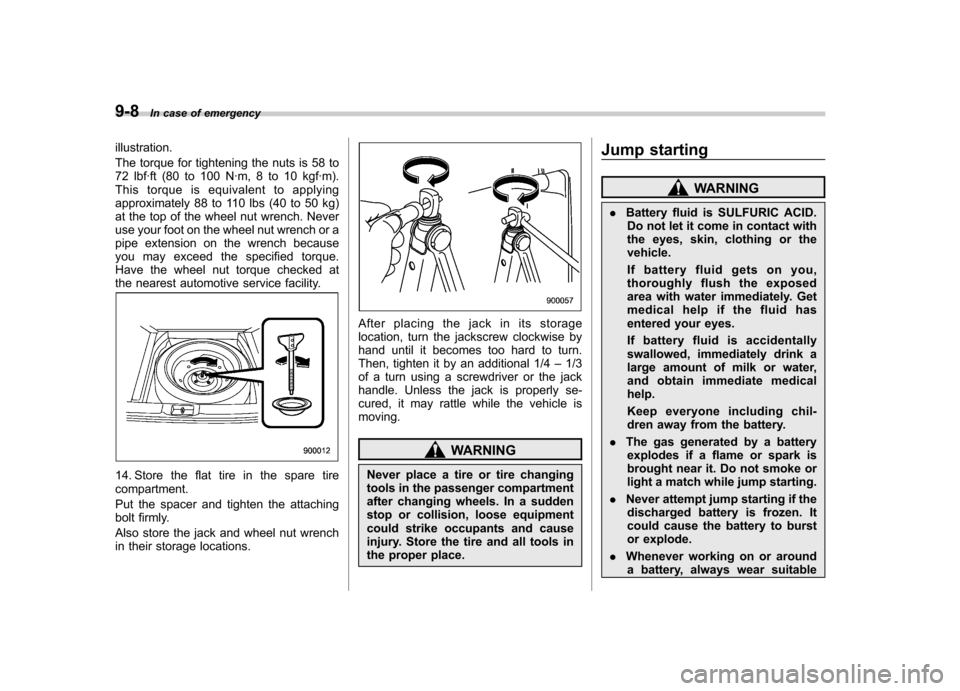
illustration.
The torque for tightening the nuts is 58 to
72 lbf·ft (80 to 100 N·m, 8 to 10 kgf·m).
This torque is equivalent to applying
approximately 88 to 110 lbs (40 to 50 kg)
at the top of the wheel nut wrench. Never
use your foot on the wheel nut wrench or a
pipe extension on the wrench because
you may exceed the specified torque.
Have the wheel nut torque checked at
the nearest automotive service facility.
14. Store the flat tire in the spare tire compartment.
Put the spacer and tighten the attaching
bolt firmly.
Also store the jack and wheel nut wrench
in their storage locations.
After placing the jack in its storage
location, turn the jackscrew clockwise by
hand until it becomes too hard to turn.
Then, tighten it by an additional 1/4 –1/3
of a turn using a screwdriver or the jack
handle. Unless the jack is properly se-
cured, it may rattle while the vehicle ismoving.
WARNING
Never place a tire or tire changing
tools in the passenger compartment
after changing wheels. In a sudden
stop or collision, loose equipment
could strike occupants and cause
injury. Store the tire and all tools in
the proper place. Jump starting
WARNING
. Battery fluid is SULFURIC ACID.
Do not let it come in contact with
the eyes, skin, clothing or thevehicle.
If battery fluid gets on you,
thoroughly flush the exposed
area with water immediately. Get
medical help if the fluid has
entered your eyes.
If battery fluid is accidentally
swallowed, immediately drink a
large amount of milk or water,
and obtain immediate medicalhelp.
Keep everyone including chil-
dren away from the battery.
. The gas generated by a battery
explodes if a flame or spark is
brought near it. Do not smoke or
light a match while jump starting.
. Never attempt jump starting if the
discharged battery is frozen. It
could cause the battery to burst
or explode.
. Whenever working on or around
a battery, always wear suitable
Page 263 of 364

eye protectors, and remove metal
objects such as rings, bands or
other metal jewelry.
. Be sure the jumper cables and
clamps on them do not have
loose or missing insulation.
Do not jump start unless cables
in suitable condition are avail-able.
. A running engine can be danger-
ous. Keep your fingers, hands,
clothing, hair and tools away
from the cooling fan, belts and
any other moving engine parts.
Removing rings, watches and
ties is advisable.
. Jump starting is dangerous if it
done incorrectly. If you are un-
sure about the proper procedure
for jump starting, consult a com-
petent mechanic.
When your vehicle does not start due to a
run down (discharged) battery, the vehicle
may be jump started by connecting your
battery to another battery (called the
booster battery) with jumper cables.
& How to jump start
1. Make sure the booster battery is 12
volts and the negative terminal is grounded.
2. If the booster battery is in another
vehicle, do not let the two vehicles touch.
3. Turn off all unnecessary lights and accessories.
4. Connect the jumper cables exactly in
the sequence illustrated.
In case of emergency
9-9
– CONTINUED –
Page 264 of 364

9-10In case of emergency
1) Booster battery
2) Engine lifting bracket (1) Connect one jumper cable to the
positive (+) terminal on the discharged
battery.
(2) Connect the other end of the
jumper cable to the positive (+) term-
inal of the booster battery.
(3) Connect one end of the other
cable to the negative (
�) terminal of
the booster battery.
(4) Connect the other end of the cable
to the engine lifting bracket.
Make sure that the cables are not near
any moving parts and that the cable
clamps are not in contact with any othermetal.
5. Start the engine of the vehicle with the
booster battery and run it at moderate
speed. Then start the engine of the vehicle
that has the discharged battery.
6. When finished, carefully disconnect
the cables in exactly the reverse order.