2007 SUBARU IMPREZA light
[x] Cancel search: lightPage 155 of 364
other factors. Pressing the button cancels the“AUTO ”mode. SUBARU recommends
using the AUTO position.
NOTE
The air conditioner ’s compressor does
not operate with an outside tempera-
ture of 32 8F(0 8C) or lower.
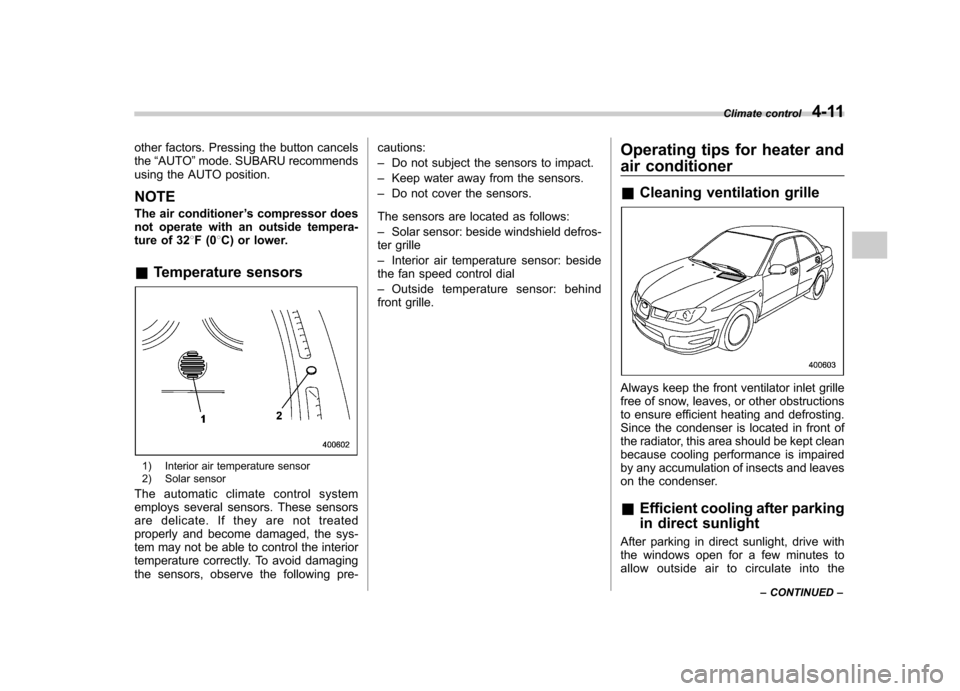
& Temperature sensors
1) Interior air temperature sensor
2) Solar sensor
The automatic climate control system
employs several sensors. These sensors
are delicate. If they are not treated
properly and become damaged, the sys-
tem may not be able to control the interior
temperature correctly. To avoid damaging
the sensors, observe the following pre- cautions: –
Do not subject the sensors to impact.
– Keep water away from the sensors.
– Do not cover the sensors.
The sensors are located as follows:– Solar sensor: beside windshield defros-
ter grille– Interior air temperature sensor: beside
the fan speed control dial– Outside temperature sensor: behind
front grille. Operating tips for heater and
air conditioner &
Cleaning ventilation grille
Always keep the front ventilator inlet grille
free of snow, leaves, or other obstructions
to ensure efficient heating and defrosting.
Since the condenser is located in front of
the radiator, this area should be kept clean
because cooling performance is impaired
by any accumulation of insects and leaves
on the condenser. &Efficient cooling after parking
in direct sunlight
After parking in direct sunlight, drive with
the windows open for a few minutes to
allow outside air to circulate into the Climate control
4-11
– CONTINUED –
Page 157 of 364
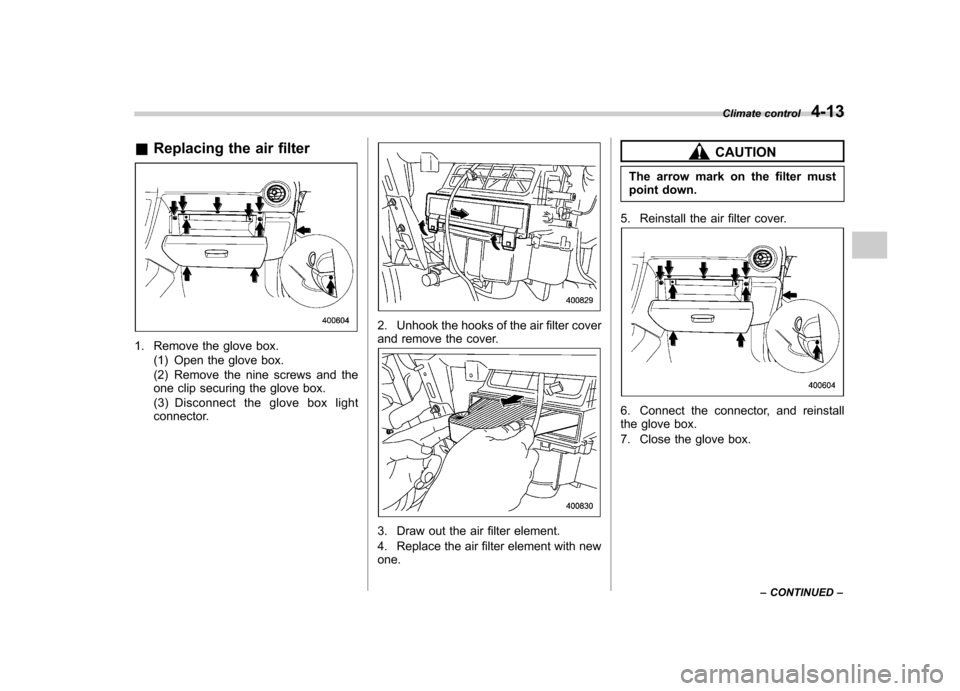
&Replacing the air filter
1. Remove the glove box.
(1) Open the glove box.
(2) Remove the nine screws and the
one clip securing the glove box.
(3) Disconnect the glove box light
connector.
2. Unhook the hooks of the air filter cover
and remove the cover.
3. Draw out the air filter element.
4. Replace the air filter element with new one.
CAUTION
The arrow mark on the filter must
point down.
5. Reinstall the air filter cover.
6. Connect the connector, and reinstall
the glove box.
7. Close the glove box. Climate control
4-13
– CONTINUED –
Page 171 of 364
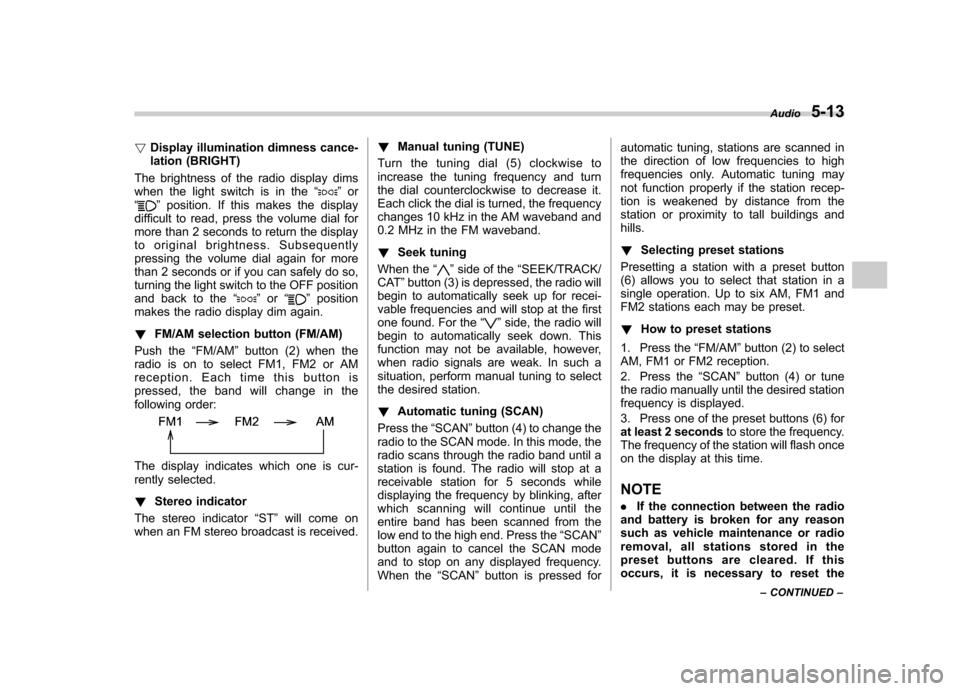
!Display illumination dimness cance-
lation (BRIGHT)
The brightness of the radio display dims
when the light switch is in the “
”or
“” position. If this makes the display
difficult to read, press the volume dial for
more than 2 seconds to return the display
to original brightness. Subsequently
pressing the volume dial again for more
than 2 seconds or if you can safely do so,
turning the light switch to the OFF position
and back to the “
”or “”position
makes the radio display dim again. ! FM/AM selection button (FM/AM)
Push the “FM/AM ”button (2) when the
radio is on to select FM1, FM2 or AM
reception. Each time this button is
pressed, the band will change in the
following order:
The display indicates which one is cur-
rently selected. ! Stereo indicator
The stereo indicator “ST ”will come on
when an FM stereo broadcast is received. !
Manual tuning (TUNE)
Turn the tuning dial (5) clockwise to
increase the tuning frequency and turn
the dial counterclockwise to decrease it.
Each click the dial is turned, the frequency
changes 10 kHz in the AM waveband and
0.2 MHz in the FM waveband. ! Seek tuning
When the “
”side of the “SEEK/TRACK/
CAT ”button (3) is depressed, the radio will
begin to automatically seek up for recei-
vable frequencies and will stop at the first
one found. For the “
”side, the radio will
begin to automatically seek down. This
function may not be available, however,
when radio signals are weak. In such a
situation, perform manual tuning to select
the desired station. ! Automatic tuning (SCAN)
Press the “SCAN ”button (4) to change the
radio to the SCAN mode. In this mode, the
radio scans through the radio band until a
station is found. The radio will stop at a
receivable station for 5 seconds while
displaying the frequency by blinking, after
which scanning will continue until the
entire band has been scanned from the
low end to the high end. Press the “SCAN ”
button again to cancel the SCAN mode
and to stop on any displayed frequency.
When the “SCAN ”button is pressed for automatic tuning, stations are scanned in
the direction of low frequencies to high
frequencies only. Automatic tuning may
not function properly if the station recep-
tion is weakened by distance from the
station or proximity to tall buildings andhills. !
Selecting preset stations
Presetting a station with a preset button
(6) allows you to select that station in a
single operation. Up to six AM, FM1 and
FM2 stations each may be preset. ! How to preset stations
1. Press the “FM/AM ”button (2) to select
AM, FM1 or FM2 reception.
2. Press the “SCAN ”button (4) or tune
the radio manually until the desired station
frequency is displayed.
3. Press one of the preset buttons (6) for
at least 2 seconds to store the frequency.
The frequency of the station will flash once
on the display at this time. NOTE . If the connection between the radio
and battery is broken for any reason
such as vehicle maintenance or radio
removal, all stations stored in the
preset buttons are cleared. If this
occurs, it is necessary to reset the Audio
5-13
– CONTINUED –
Page 182 of 364
5-24Audio
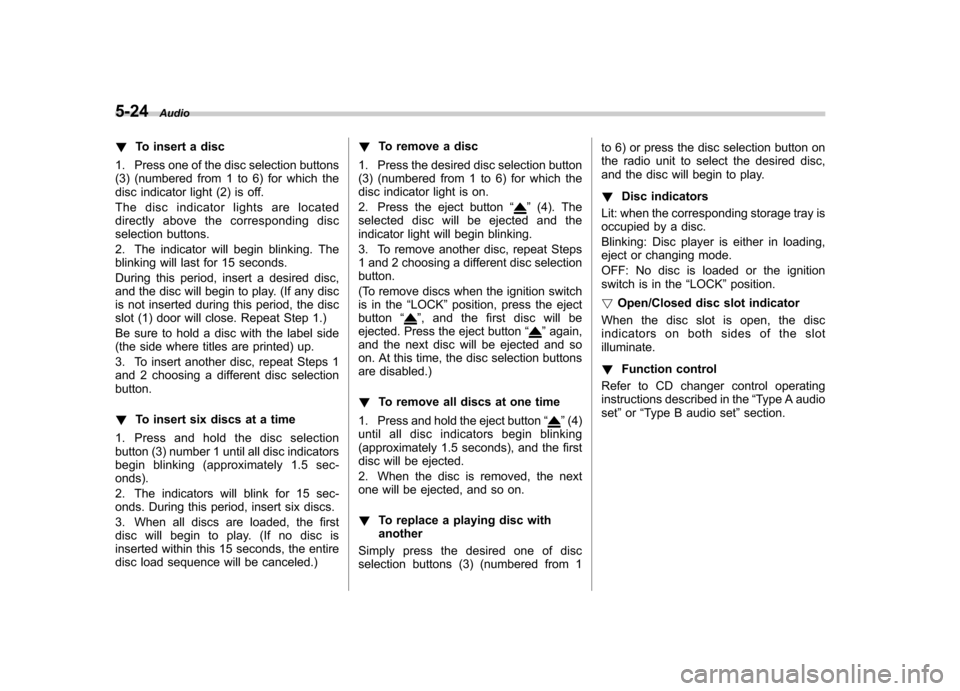
! To insert a disc
1. Press one of the disc selection buttons
(3) (numbered from 1 to 6) for which the
disc indicator light (2) is off.
The disc indicator lights are located
directly above the corresponding disc
selection buttons.
2. The indicator will begin blinking. The
blinking will last for 15 seconds.
During this period, insert a desired disc,
and the disc will begin to play. (If any disc
is not inserted during this period, the disc
slot (1) door will close. Repeat Step 1.)
Be sure to hold a disc with the label side
(the side where titles are printed) up.
3. To insert another disc, repeat Steps 1
and 2 choosing a different disc selectionbutton. ! To insert six discs at a time
1. Press and hold the disc selection
button (3) number 1 until all disc indicators
begin blinking (approximately 1.5 sec-onds).
2. The indicators will blink for 15 sec-
onds. During this period, insert six discs.
3. When all discs are loaded, the first
disc will begin to play. (If no disc is
inserted within this 15 seconds, the entire
disc load sequence will be canceled.) !
To remove a disc
1. Press the desired disc selection button
(3) (numbered from 1 to 6) for which the
disc indicator light is on.
2. Press the eject button “
”(4). The
selected disc will be ejected and the
indicator light will begin blinking.
3. To remove another disc, repeat Steps
1 and 2 choosing a different disc selectionbutton.
(To remove discs when the ignition switch
is in the “LOCK ”position, press the eject
button “
”, and the first disc will be
ejected. Press the eject button “”again,
and the next disc will be ejected and so
on. At this time, the disc selection buttons
are disabled.) ! To remove all discs at one time
1. Press and hold the eject button “
”(4)
until all disc indicators begin blinking
(approximately 1.5 seconds), and the first
disc will be ejected.
2. When the disc is removed, the next
one will be ejected, and so on. ! To replace a playing disc with another
Simply press the desired one of disc
selection buttons (3) (numbered from 1 to 6) or press the disc selection button on
the radio unit to select the desired disc,
and the disc will begin to play. !
Disc indicators
Lit: when the corresponding storage tray is
occupied by a disc.
Blinking: Disc player is either in loading,
eject or changing mode.
OFF: No disc is loaded or the ignition
switch is in the “LOCK ”position.
! Open/Closed disc slot indicator
When the disc slot is open, the disc
indicators on both sides of the slotilluminate. ! Function control
Refer to CD changer control operating
instructions described in the “Type A audio
set ”or “Type B audio set ”section.
Page 183 of 364
Precautions to observe when
handling a compact disc
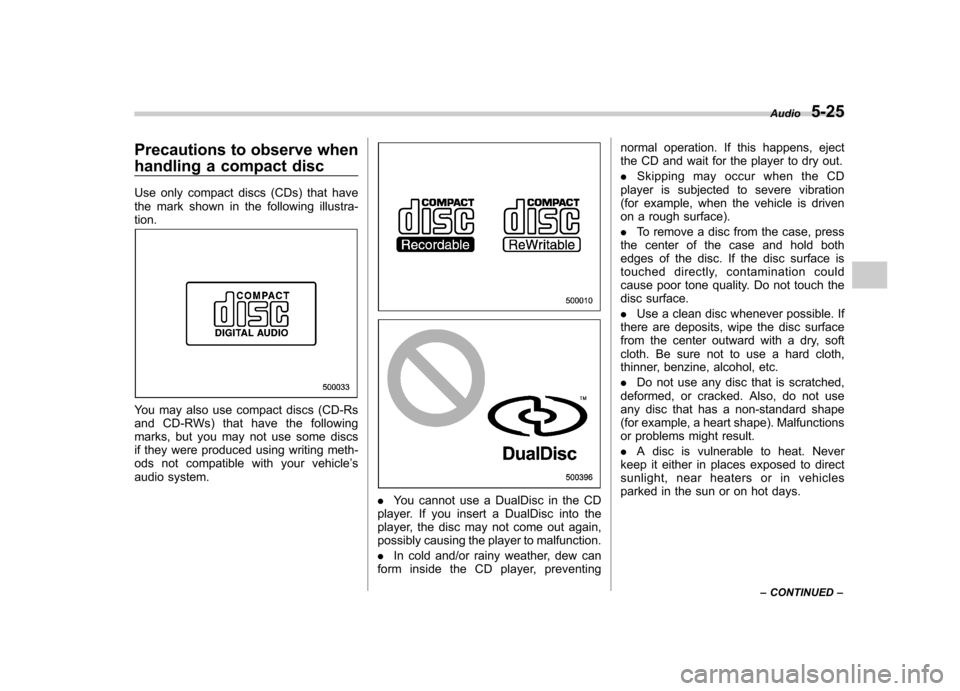
Use only compact discs (CDs) that have
the mark shown in the following illustra-tion.
You may also use compact discs (CD-Rs
and CD-RWs) that have the following
marks, but you may not use some discs
if they were produced using writing meth-
ods not compatible with your vehicle’s
audio system.
. You cannot use a DualDisc in the CD
player. If you insert a DualDisc into the
player, the disc may not come out again,
possibly causing the player to malfunction. . In cold and/or rainy weather, dew can
form inside the CD player, preventing normal operation. If this happens, eject
the CD and wait for the player to dry out. .
Skipping may occur when the CD
player is subjected to severe vibration
(for example, when the vehicle is driven
on a rough surface). . To remove a disc from the case, press
the center of the case and hold both
edges of the disc. If the disc surface is
touched directly, contamination could
cause poor tone quality. Do not touch the
disc surface. . Use a clean disc whenever possible. If
there are deposits, wipe the disc surface
from the center outward with a dry, soft
cloth. Be sure not to use a hard cloth,
thinner, benzine, alcohol, etc. . Do not use any disc that is scratched,
deformed, or cracked. Also, do not use
any disc that has a non-standard shape
(for example, a heart shape). Malfunctions
or problems might result. . A disc is vulnerable to heat. Never
keep it either in places exposed to direct
sunlight, near heaters or in vehicles
parked in the sun or on hot days. Audio
5-25
– CONTINUED –
Page 185 of 364
Interior lights....................................................... 6-2
Dome light .......................................................... 6-2
Cargo area light (if equipped) .............................. 6-2
Map light (if equipped) ........................................ 6-2
Sun visors ........................................................... 6-3
Vanity mirror (if equipped) ................................... 6-3
Storage compartment ......................................... 6-4
Glove box ........................................................... 6-4
Center console .................................................... 6-4
Coin tray ............................................................. 6-4
Pocket (if equipped) ............................................ 6-5
Cup holders ......................................................... 6-5
Front passenger ’s cup holder .............................. 6-5
Rear passenger ’s cup holder (if equipped) ........... 6-6Accessory power outlets
.................................... 6-6
Use with a cigarette lighter (Canada only, if equipped) .................................. 6-7
Ashtray (Canada only, if equipped) .................... 6-8
Floor mat (if equipped) ........................................ 6-9
Coat hooks ........................................................... 6-9
Cargo area cover (Wagon –if equipped) ......... 6-10
Using the cover ................................................. 6-10
To remove the cover .......................................... 6-10
Stowage of the cover ......................................... 6-11
To install the cover housing ............................... 6-11
Cargo tie-down hooks (Wagon –if equipped) .................................... 6-11
Cargo area bars (Wagon) .................................. 6-12
Under-floor storage compartment (Wagon –if equipped) .................................... 6-12
Interior equipment
6
Page 186 of 364
6-2Interior equipment
Interior lights
When leaving your vehicle, make sure the
light goes out to avoid battery discharge. &Dome light
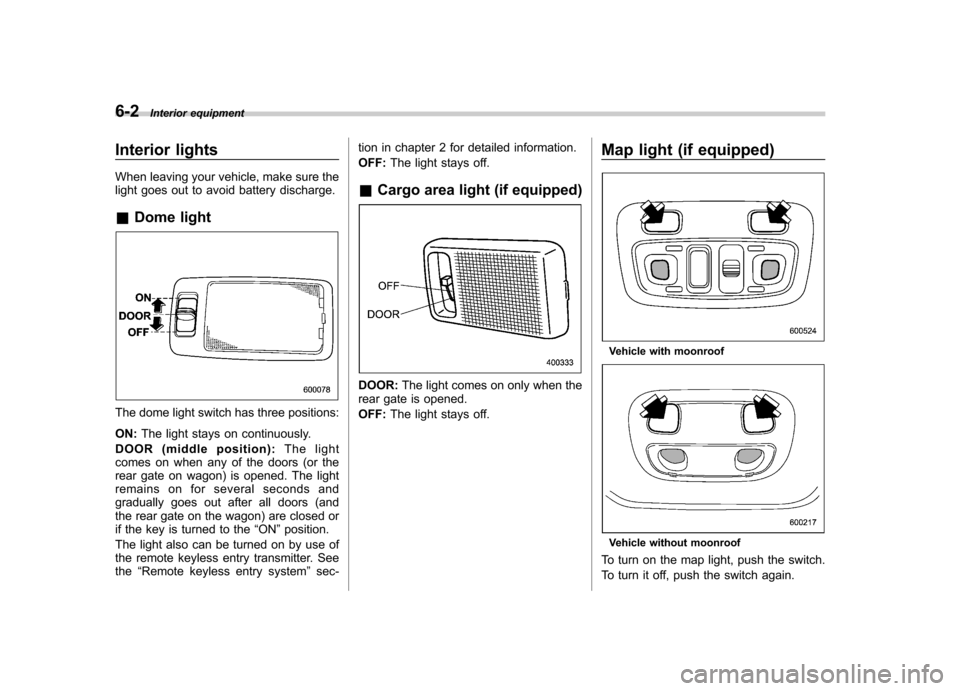
The dome light switch has three positions: ON: The light stays on continuously.
DOOR (middle position): The light
comes on when any of the doors (or the
rear gate on wagon) is opened. The light
remains on for several seconds and
gradually goes out after all doors (and
the rear gate on the wagon) are closed or
if the key is turned to the “ON ”position.
The light also can be turned on by use of
the remote keyless entry transmitter. Seethe “Remote keyless entry system ”sec- tion in chapter 2 for detailed information. OFF:
The light stays off.
& Cargo area light (if equipped)
DOOR: The light comes on only when the
rear gate is opened. OFF: The light stays off. Map light (if equipped)
Vehicle with moonroof
Vehicle without moonroof
To turn on the map light, push the switch.
To turn it off, push the switch again.
Page 187 of 364
When leaving the vehicle, make sure the
light is turned off to avoid battery dis-charge.Sun visors
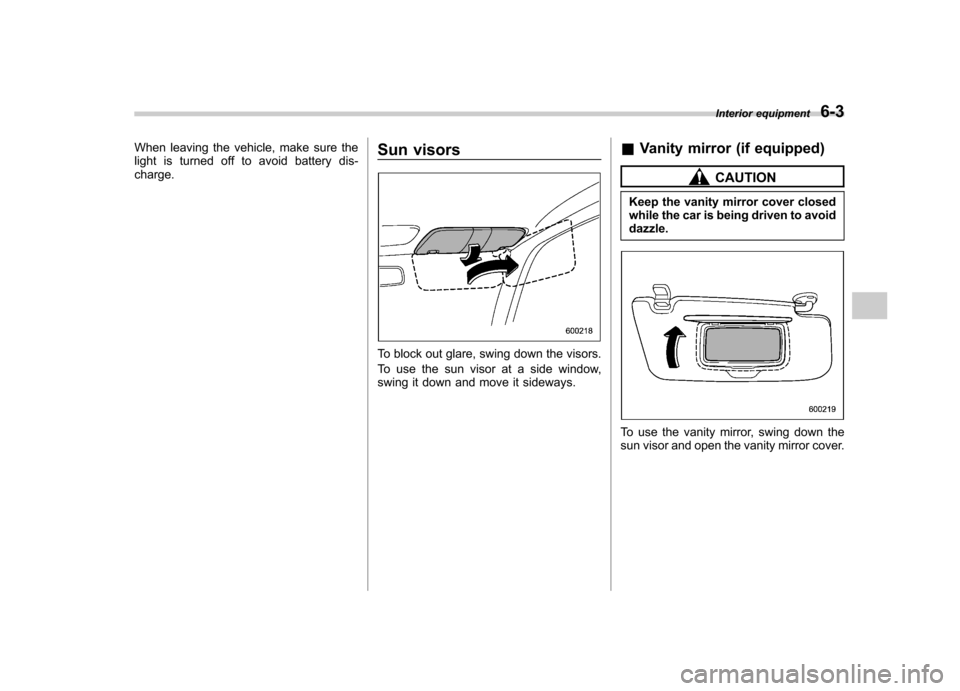
To block out glare, swing down the visors.
To use the sun visor at a side window,
swing it down and move it sideways.&
Vanity mirror (if equipped)
CAUTION
Keep the vanity mirror cover closed
while the car is being driven to avoiddazzle.
To use the vanity mirror, swing down the
sun visor and open the vanity mirror cover. Interior equipment
6-3