2007 SUBARU FORESTER instrument panel
[x] Cancel search: instrument panelPage 128 of 356

3-18 Instruments and controls
�„Headlight flasher
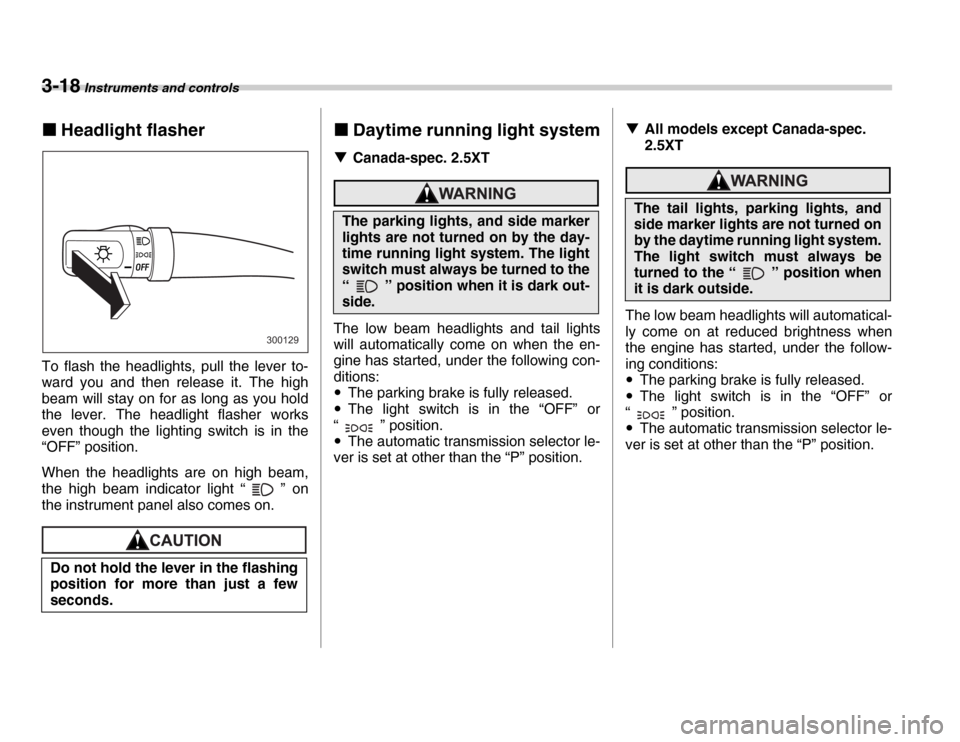
To flash the headlights, pull the lever to-
ward you and then release it. The high
beam will stay on for as long as you hold
the lever. The headlight flasher works
even though the lighting switch is in the
“OFF” position.
When the headlights are on high beam,
the high beam indicator light “ ” on
the instrument panel also comes on.�„ Daytime running light system
�T Canada-spec. 2.5XT
The low beam headlights and tail lights
will automatically come on when the en-
gine has started, under the following con-
ditions: �yThe parking brake is fully released.
�y The light switch is in the “OFF” or
“ ” position.�y The automatic transmission selector le-
ver is set at other than the “P” position. �T
All models except Canada-spec.
2.5XT
The low beam headlights will automatical-
ly come on at reduced brightness when
the engine has started, under the follow-
ing conditions: �yThe parking brake is fully released.
�y The light switch is in the “OFF” or
“ ” position.�y The automatic transmission selector le-
ver is set at other than the “P” position.
Do not hold the lever in the flashing
position for more than just a few
seconds.
300129
The parking lights, and side marker
lights are not turned on by the day-
time running light system. The light
switch must always be turned to the
“ ” position when it is dark out-
side.
The tail lights, parking lights, and
side marker lights are not turned on
by the daytime running light system.
The light switch must always be
turned to the “ ” position when
it is dark outside.
Page 129 of 356

Instruments and controls 3-19
Turn signal lever1) Right turn
2) Left turn
3) Lane change for right
4) Lane change for left
To activate the right turn signal, push the
turn signal lever up. To activate the left
turn signal, push the turn signal lever
down. When the turn is finished, the lever
will return automatically. If the lever does
not return after cornering, return the lever
to the neutral position by hand.
To signal a lane change, push the turn sig-
nal lever up or down slightly and hold it
during the lane change. The turn signal in-
dicator lights will flash in the direction of
the turn or lane change. The lever will re- turn automatically to the neutral position
when you release it.
Illumination brightness con-
trol
When the headlight switch is in the
“ ” or “ ” position, you can ad-
just brightness of the instrument panel illu-
mination for better visibility.
To brighten, turn the control dial upward.
To darken, turn the control dial downward.
1
2 3
4
300601
300131
Page 135 of 356

Instruments and controls 3-25
– CONTINUED –
The rear window defogger operates only
when the ignition switch is in the “ON” po-
sition.
The rear window defogger button is locat-
ed on the climate control panel.
To turn on the defogger, push the button.
To turn it off, push the button again.
The indicator light located on the button
lights up while the rear window defogger is
operating.
The defogger will automatically shut off af-
ter approximately 15 minutes. If the win-
dow clears before that time, push the but-
ton to turn it off. It also turns off when the
ignition switch is turned to the “ACC” or
“LOCK” position. If defrosting or defogging
is desired when you restart your vehicle,
you have to push the button to turn it on
again.
Turn on the rear window defogger if the
wiper is frozen to the glass.
Mirrors
Always check that the inside and outside
mirrors are properly adjusted before you
start driving. �„
Inside mirror
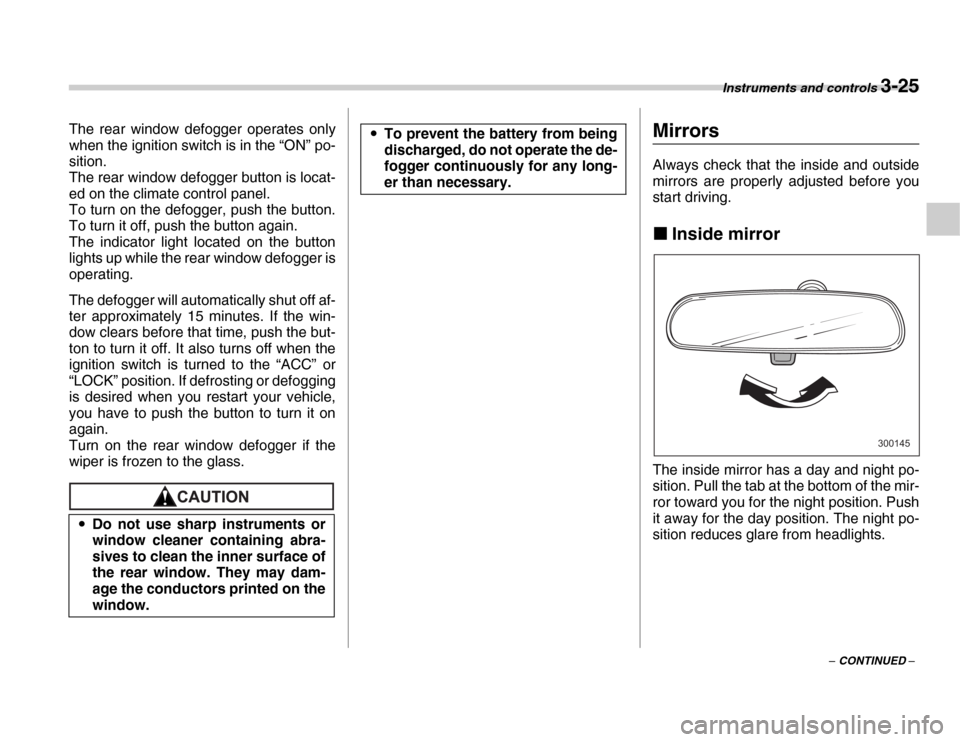
The inside mirror has a day and night po-
sition. Pull the tab at the bottom of the mir-
ror toward you for the night position. Push
it away for the day position. The night po-
sition reduces glare from headlights.
�y
Do not use sharp instruments or
window cleaner containing abra-
sives to clean the inner surface of
the rear window. They may dam-
age the conductors printed on the
window.�yTo prevent the battery from being
discharged, do not operate the de-
fogger continuously for any long-
er than necessary.
300145
Page 144 of 356

4-4 Climate control
�TFan speed control dial
The fan operates only when the ignition
switch is turned to the “ON” position. The
fan speed control dial is used to select four
fan speeds. �T Air flow control dial
This dial has the following five positions:
: Air flows through the instrument panel
outlets.
: Air flows through the instrument panel
outlets and the foot outlets.
: Air flows through the foot outlets and
some through the windshield defroster
outlets.
: Air flows through the windshield de-
froster outlets and foot outlets.
: Air flows through the windshield de-
froster outlets.
NOTE
When the dial is placed in the “ ”
or “ ” position, the air conditioner
compressor operates automatically re-
gardless of the position of the air con-
ditioner button to defog the windshield
quickly. However the indicator on the
air conditioner button will not come on. At the same time, the air inlet selection
is automatically set to “outside air”
mode.
In this state, you cannot select “recir-
culation” mode by manually pressing
the air inlet selection button.
Also, you cannot stop the air condi-
tioner compressor by pressing the air
conditioner button. �T
Air conditioner button
The air conditioner operates only when
the engine is running.
Push the air conditioner button while the
fan is in operation to turn on the air condi-
tioner. The indicator light will come on.
Push it again to turn off the air conditioner. �T
Air inlet selection button
ON position (Recirculation): Interior air
is recirculated inside the vehicle. Push the
air inlet selection button to the ON posi-
tion. The indicator light will come on.
Place the air inlet selection button to the
ON position for fast cooling with the air
conditioner or when driving on a dusty
road.
OFF position (Outside air): Outside air is
drawn into the passenger compartment.
Push the air inlet selection button again to
the OFF position. The indicator light will go off.
Place the air inlet selection button to the
OFF position when the interior has cooled
to a comfortable temperature and the road
is no longer dusty.
400144
400145
Page 146 of 356

4-6 Climate control
�THeating
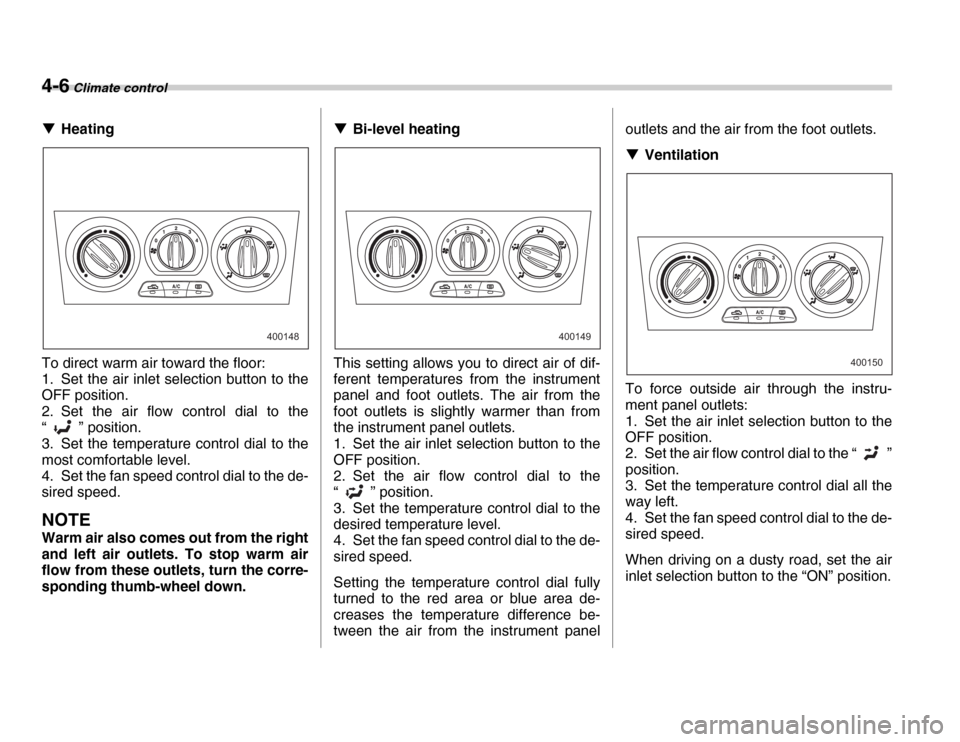
To direct warm air toward the floor:
1. Set the air inlet selection button to the
OFF position.
2. Set the air flow control dial to the
“ ” position.
3. Set the temperature control dial to the
most comfortable level.
4. Set the fan speed control dial to the de-
sired speed.
NOTE
Warm air also comes out from the right
and left air outlets. To stop warm air
flow from these outlets, turn the corre-
sponding thumb-wheel down. �T
Bi-level heating
This setting allows you to direct air of dif-
ferent temperatures from the instrument
panel and foot outlets. The air from the
foot outlets is slightly warmer than from
the instrument panel outlets.
1. Set the air inlet selection button to the
OFF position.
2. Set the air flow control dial to the
“ ” position.
3. Set the temperature control dial to the
desired temperature level.
4. Set the fan speed control dial to the de-
sired speed.
Setting the temperature control dial fully
turned to the red area or blue area de-
creases the temperature difference be-
tween the air from the instrument panel outlets and the air from the foot outlets. �T
Ventilation
To force outside air through the instru-
ment panel outlets:
1. Set the air inlet selection button to the
OFF position.
2. Set the air flow control dial to the “ ”
position.
3. Set the temperature control dial all the
way left.
4. Set the fan speed control dial to the de-
sired speed.
When driving on a dusty road, set the air
inlet selection button to the “ON” position.
400148400149
400150
Page 147 of 356

Climate control 4-7
�„Air conditioner operation
�T Cooling or dehumidifying
1) ON position
For cooling and dehumidification of the
passenger compartment, performing the
following steps will allow air to flow
through the instrument panel outlets:
1. Set the air inlet selection button to the OFF position.
2. Set the air flow control dial to the “ ”
position.
3. Set the air conditioner button to the
“ON” position.
4. Set the temperature control dial to the
blue side.
5. Set the fan speed control dial at the
highest speed. �T
Defrosting or defogging
To direct warm air to the windshield and
front door windows:
1. Set the air flow control dial to the
“ ” position.
2. Set the temperature control dial to the
red side.
3. Set the fan speed control dial at the
highest speed. The air conditioner compressor automati-
cally operates when the air flow control
dial set in the “ ” or “ ” position to
provide better defogging performance.
However, the air conditioner indicator light
does not come on at this time.
Continued operation with the air in-
let selection button in the ON posi-
tion may fog up the windows.
Switch to the OFF position as soon
as the outside dusty condition
clears.
1
400547
400146
Page 149 of 356

Climate control 4-9
– CONTINUED –
�„
Fan speed control dial
The fan operates only with the ignition
switch in the ON position. The fan speed
control dial is used to select the AUTO
(automatic control) mode or to select the
desired fan speed. The dial’s positions
and their functions are as follows:
OFF: The fan does not operate.
AUTO: The fan speed is adjusted auto-
matically in accordance with the air tem-
perature inside and outside the passenger
compartment, the intensity of sunlight,
and other factors. SUBARU recommends
using the AUTO position.
Other positions: The fan speed can be
adjusted in seven steps.
NOTE
With the fan speed control dial in the AUTO position and the air flow control
dial in the “ ”, “ ”, or “ ” po-
sition, the fan does not operate during
engine warm-up until the engine cool-
ant temperature exceeds approx. 122
�qF
(50 �qC).
�„ Temperature control dial
This dial is used to set the desired interior
temperature. With the dial set to your de-
sired temperature, the system automati-
cally adjusts the temperature of air sup-
plied from the outlets such that the desired
temperature is achieved and maintained.
If the dial is turned fully counterclockwise,
the system gives maximum cooling perfor-
mance. If the dial is turned fully clockwise,
the system gives maximum heating per- formance. �„
Air flow control dial
This dial has the following six positions.
The outlets from which air is supplied in
each position are as follows: AUTO: The air flow control is adjusted au-
tomatically in accordance with the air tem-
perature inside and outside the passenger
compartment, the intensity of sunlight,
and other factors. SUBARU recommends
using the AUTO position.
: Instrument panel outlets: Instrument panel outlets and foot out-
lets
: Foot outlets and windshield defroster
outlets (relatively little air from windshield
400154
65 75
85
400549
400156
Page 154 of 356

4-14 Climate control
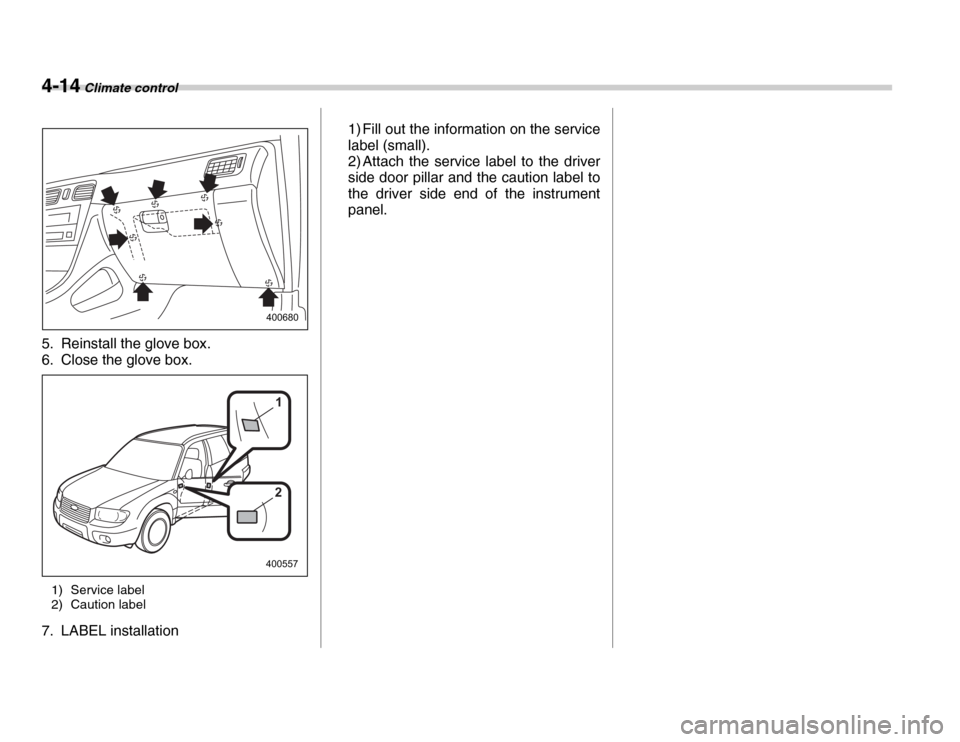
5. Reinstall the glove box.
6. Close the glove box.1) Service label
2) Caution label
7. LABEL installation 1) Fill out the information on the service
label (small).
2) Attach the service label to the driver
side door pillar and the caution label to
the driver side end of the instrument
panel.
400680
1
2
400557