2007 Seat Ibiza 5D change time
[x] Cancel search: change timePage 11 of 70
Remember 8
If the ignition key is replaced and turned, the radio automatically comes on.
(See chapter “PROG settings”).
Starting up for a limited time (one hour)
With the car radio switched off and the key removed from the ignition, press
the principal control once .
In this mode, the apparatus will operate for one hour and will automatically
switch off after this time. if the key is turned in the ignition during this time,
the function (limited time) is deactivated.
To switch the apparatus off within the hour, press the principal control
again.
The apparatus can be started at any time.
With the car radio switched on and the key in the ignition but not switched on,
the radio stays on for 2 hours and then automatically switches off.
Mobile phone or radiophone function
It is possible to connect a mobile phone or a radio phone to the car radio.
While these accessories are in use, the volume of the radio is lowered to the
value set in the menu of the PROG-System. The values of tone, fader and
balance can be adjusted in this operating mode. The changed values are
stored in the memory. See chapter “PROG-System” (car radio muting).
“PHONE” appears on the display.
MutingWhile these accessories are in use the volume is muted. “PHONE” appears on
the display.
PROG settings
Different options for settings
For easier handling, the car radio is equipped with the PROG system. This
allows the user to programme a series of settings which are necessary only
once or very occasionally.
Function confirmation
The car radio is supplied from the factory with the settings adjusted so that
when certain buttons are pressed a short confirmation signal is heard.
The chapter “PROG-System” describes how to remove the warning signal
using the function “BEEP” (Beep off).
Now, instead of a warning signal, when the button is pressed the loud-
speakers remain silent.
AA
AA
Page 16 of 70
Brief instructions13
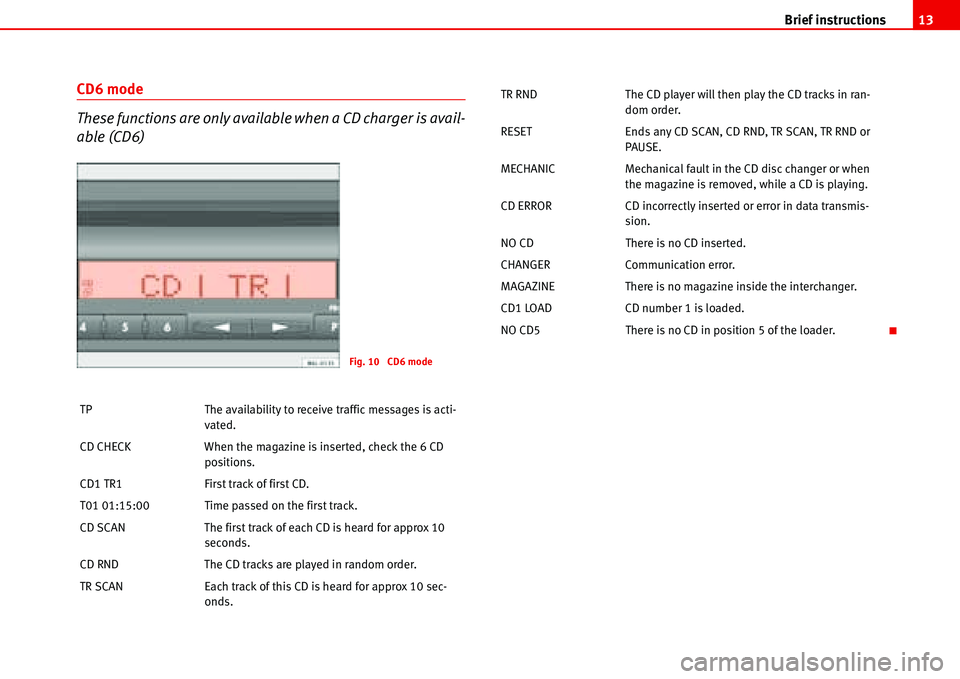
CD6 mode
These functions are only available when a CD charger is avail-
able (CD6)
TP The availability to receive traffic messages is acti-
vated.
CD CHECK When the magazine is inserted, check the 6 CD
positions.
CD1 TR1 First track of first CD.
T01 01:15:00 Time passed on the first track.
CD SCAN The first track of each CD is heard for approx 10
seconds.
CD RND The CD tracks are played in random order.
TR SCAN Each track of this CD is heard for approx 10 sec-
onds.
Fig. 10 CD6 mode
TR RND The CD player will then play the CD tracks in ran-
dom order.
RESET Ends any CD SCAN, CD RND, TR SCAN, TR RND or
PAUSE.
MECHANIC Mechanical fault in the CD disc changer or when
the magazine is removed, while a CD is playing.
CD ERROR CD incorrectly inserted or error in data transmis-
sion.
NO CD There is no CD inserted.
CHANGER Communication error.
MAGAZINE There is no magazine inside the interchanger.
CD1 LOAD CD number 1 is loaded.
NO CD5 There is no CD in position 5 of the loader.
Page 39 of 70
Apple* iPod ® connection 36
Use the large adaptor for the smallest iPod®. Insert the adaptor into the
connector and then place the iPod®.
The larger iPods
® use the smaller adaptors when necessary. These adaptors
can be entered with the widest side upwards in the central connector dock. If
necessary use a lateral spacer to stabilise it.
Check which of the adaptors supplied is best for your iPod
® and position it
safely.
Attach the iPod®
Depending on the vehicle, the iPod® connector may be found
in the central armrest, in the passenger glove compartment
or beneath the passenger seat.
For optimum playback, activate the volume adjustment function and
disactivate the equaliser before connecting the iPod ® adaptor
according to the instructions.
Attach the iPod
®
– First change the input source for the sound system, for example
from CD to FM or to the radio.
– Open the compartment where the iPod
® adaptor is fitted.
– If required, attach an adaptor to the connector �Ÿpage 35.
–Central armrest compartment adaptor: attach the iPod
® with the
screen facing right in relation to the forward direction of the
vehicle.
–Adaptor under the passenger seat: Attach the iPod
® with the
screen facing upwards and the contact to the front.–Adaptor under the passenger seat: Attach the iPod
® with the
screen facing upwards and the contact to the rear.
–The iPod
® will switch on automatically.
– After a few seconds, the sound system will detect it. The tracks
stored can be played through the sound system.
– Close the compartment.
WARNING
It is vital that attention is not diverted from the traffic. Use the iPod ® only
when the situation allows. Any distraction may lead to an accident, with
the risk of injury.
•Never lose visual contact with the road in order to adjust or use the
iPod® and the sound system.
•Use the iPod® only when the state of the road, the weather and traffic
conditions permit.
•Never attach the iPod ® while driving.
Caution
•Attaching the iPod ® to the adaptor will leave marks.
•New iPods® that have not been used for some time have to be charged
according to the manufacturer's instructions, before using it for the first time
with the iPod
® adaptor.
Note
•If the iPod® is not detected in the adaptor by the sound system, “reset the
iPod®”. For more information consult the iPod® instructions.
Page 41 of 70
Apple* iPod ® connection 38
Attach the iPod®
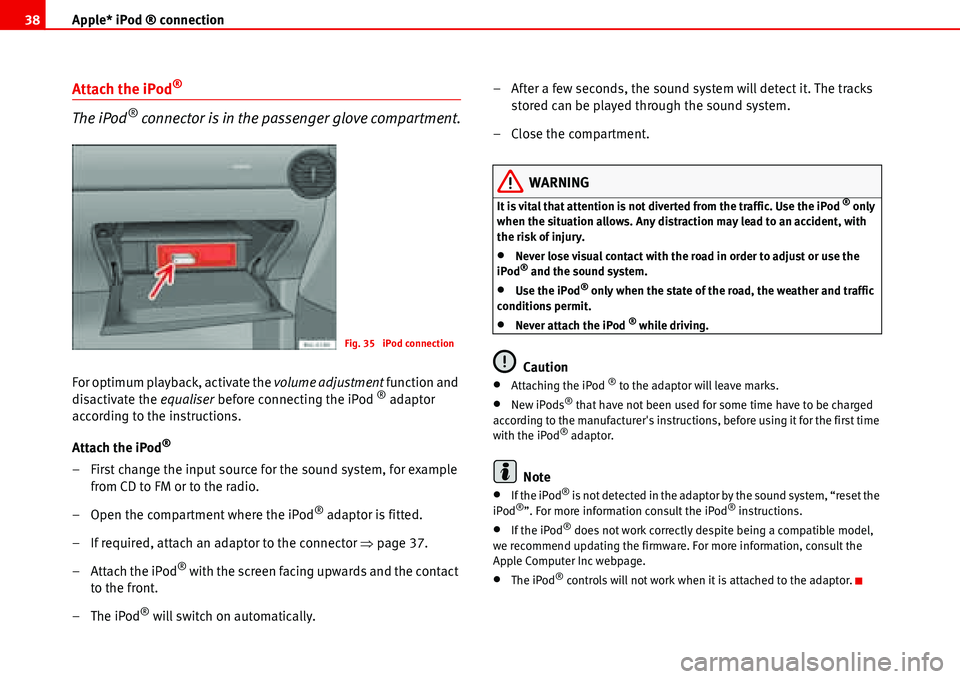
The iPod® connector is in the passenger glove compartment.
For optimum playback, activate the volume adjustment function and
disactivate the equaliser before connecting the iPod ® adaptor
according to the instructions.
Attach the iPod
®
– First change the input source for the sound system, for example
from CD to FM or to the radio.
– Open the compartment where the iPod
® adaptor is fitted.
– If required, attach an adaptor to the connector �Ÿpage 37.
– Attach the iPod
® with the screen facing upwards and the contact
to the front.
–The iPod
® will switch on automatically.– After a few seconds, the sound system will detect it. The tracks
stored can be played through the sound system.
– Close the compartment.
WARNING
It is vital that attention is not diverted from the traffic. Use the iPod ® only
when the situation allows. Any distraction may lead to an accident, with
the risk of injury.
•Never lose visual contact with the road in order to adjust or use the
iPod® and the sound system.
•Use the iPod® only when the state of the road, the weather and traffic
conditions permit.
•Never attach the iPod ® while driving.
Caution
•Attaching the iPod ® to the adaptor will leave marks.
•New iPods® that have not been used for some time have to be charged
according to the manufacturer's instructions, before using it for the first time
with the iPod
® adaptor.
Note
•If the iPod® is not detected in the adaptor by the sound system, “reset the
iPod®”. For more information consult the iPod® instructions.
•If the iPod® does not work correctly despite being a compatible model,
we recommend updating the firmware. For more information, consult the
Apple Computer Inc webpage.
•The iPod® controls will not work when it is attached to the adaptor.
Fig. 35 iPod connection
Page 45 of 70

USB* Connection 42
USB* Connection
Connecting a memory stick / MP3 player
A USB port is in the passenger glove compartment.
Connecting a memory stick in the passenger glove compartment
– Open the passenger glove compartment.
– Lower the top compartment.
– Connect the Memory stick in the USB port, or
– Connect the MP3 player in the USB port using a conventional
USB extension cable.
– Close the lid.Disconnecting the memory stick
– Change the input device, for example from CD to radio FM.
– Then disconnect the memory stick or the extension cable from
the USB port �Ÿ.
Once the device is connected the songs stored can be played using the car
radio fitted.
WARNING
Please keep your attention on driving as a priority!
•Adjust the volume so that external noise can be heard at all times, such
as police, fire and emergency services sirens.
•Never remove the memory stick or MP3 player when driving.
Caution
•The temperature range of the Memory stick and MP3 is limited and is
normally between 0° and 40°C. Therefore, do not leave it in the vehicle for
long.
•Never connect the MP3 player directly into the USB port, as it may be
damaged. Always use an extension cable.
•Never disconnect the device while USB port (CD) is selected as source.
The device may be damaged.
•The USB port is only for connectiing a memory stick or MP3 player. Hard
disks or USB hubs etc. cannot be connected
•The maximum voltage of the the memory stick or MP3 should not exceed
2.5 watts (500mA/5V)
Fig. 36 USB connection
Page 49 of 70

USB* Connection 46
As many as 99 tracks can be shown, although all those contained in the
folder can be played
A title with three figures will not show the hundreds on the screen, only the
last two.
The music can be controlled via the radio keys. Choosing and playing songs,
fast forward and rewind and random playback are described in the radio
manual of your vehicle.
If there are folders in the root directory individual files will not be played, so
all data in the root directory should be in folders.
Storing files in a memory stick or MP3 player
Store files in folders instead of using the root directory of the memory stick or
player. In this way the songs can be stored in order (eg all the songs in a
certain style in the same folder).
The function keys to of the radio can only select the first 5 folders.
If there are more than 6 folders in the memory stick or MP3 player their
content cannot be played.
The folders can be subdivided into subfolders eg different albums by an
artist.
Example of a music folder structure:
Playback of music via USB connection
Connect the memory stick or MP3 player with the USB extension cable to the
USB port.
The screen will show the first 6 folders detected by the USB port, displayed as
CD 1 to CD 6. Folders without music files will not be included.
If there are more than 6 music folders in the device, the exact number of
folders can be shown using the CD options.If the music files are not classified into folders, but stored directly in the root
directory, the radio will read the files and play them in the same order. The
display then shows CD 1.
Music files and folders will be played in alphabetical order, so files begin-
niing woth numbers will be selected first, before those with letters. A file with
the name 1XXXXXXXX will be played before another with the name AAAAAA.
Screen indications
When selecting a music file with the CD keys, it appears iin the radio equip-
ment screen Track 1.
As many as 99 tracks can be shown.
WARNING
Please keep your attention on driving as a priority!
•Adjust the volume so that external noise can be heard at all times, such
as police, fire and emergency services sirens.
•Never remove the memory stick or MP3 player when driving.
Note
•Before turning off the engine, the USB port memorises the position of the
song playing As long as the content is not changed, the system will start
again from this point.
•If many songs are skipped, there may be a delay during playback.
•The detection of the memory stick or MP3 playere requires a few seconds
depending on the type of memory used.
•The title of the song is not shown on the screen.
CD 1CD 6
Page 54 of 70
MP3 mode51
By pressing briefly on the SCAN button it is possible to change between the
following display modes:
1 - FOLDER - TRACK
2 - TRACK - TIME
3 - SCROLL ID3
1 - FOLDER-TRACK
The display shows a scroll of the folder and file and then displays information
on the folder number and file or track number.
2 - TRACK-TIME
The display shows a scroll of the folder name and file and then displays infor-
mation with the track or file number and the time code.
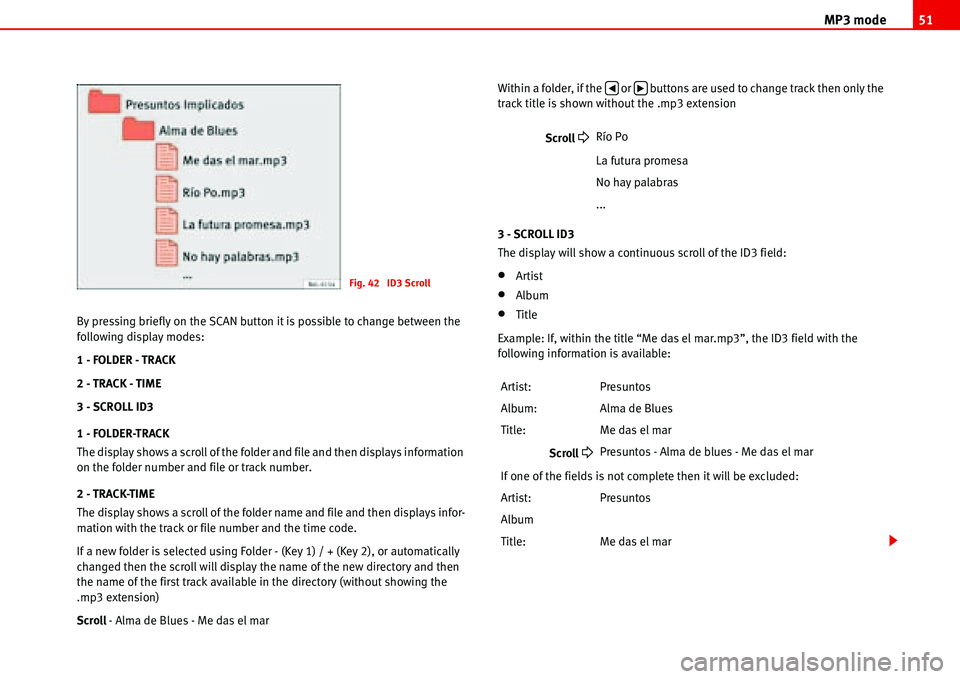
If a new folder is selected using Folder - (Key 1) / + (Key 2), or automatically
changed then the scroll will display the name of the new directory and then
the name of the first track available in the directory (without showing the
.mp3 extension)
Scroll - Alma de Blues - Me das el marWithin a folder, if the or buttons are used to change track then only the
track title is shown without the .mp3 extension
3 - SCROLL ID3
The display will show a continuous scroll of the ID3 field:
•Artist
•Album
•Title
Example: If, within the title “Me das el mar.mp3”, the ID3 field with the
following information is available:
Fig. 42 ID3 Scroll
Scroll �
Río Po
La futura promesa
No hay palabras
...
Artist: Presuntos
Album: Alma de Blues
Title: Me das el mar
Scroll
�
Presuntos - Alma de blues - Me das el mar
If one of the fields is not complete then it will be excluded:
Artist: Presuntos
Album
Title: Me das el mar
�‚�b