2007 SATURN VUE audio
[x] Cancel search: audioPage 213 of 470
The RCA jacks are color coded to match typical
home entertainment system equipment. The yellow
jack (right) is for the video input. The white jack
(middle) is for the left audio input. The red jack (left)
is for the right audio input. The red connector must
always be used in order for the DVD system to
recognize that an external source is plugged in.
With the radio on, the screen automatically
switches to the rear auxiliary input when the
red connector cable is inserted.
Power for auxiliary devices is not supplied by the
radio system.
To use the auxiliary function, connect a camcorder
or a video game unit to the RCA jacks and turn on
the auxiliary device. To view a DVD, insert the DVD
into the CD/DVD loading slot on the radio. The
system automatically switches to DVD and starts to
play. To switch between the auxiliary device and
the DVD, press the DVD/AUX button on the radio
faceplate or the SRCE (source) button on the
remote control. See “DVD Player” and “Remote
Control” later in this section for more information.
Audio Output
Only one audio source can be heard through the
speakers at one time.Press the power button to turn the radio on.
The radio can be heard through all of the
vehicle speakers.
When a DVD is inserted, playback is heard
through the vehicle speakers and headphones.
Front seat passengers can listen to the radio
by pressing the BAND button to select AM, FM or
XM™ (if equipped). The rear seat speakers are
muted for radio listening, and the DVD plays
through the headphones (RSE Mode).
When RCA jacks are connected, the rear speakers
are muted. The rear seat passengers are able
to hear audio from the auxiliary device through the
wireless headphones. The front seat passengers
are able to listen to the radio through the front
speakers, by pressing the BAND button to select
AM, FM, or XM (if equipped), or listen to a CD
that is inserted into the radio.
If a playback device is plugged into the radio’s
auxiliary input jack, the device can be heard
through all of the vehicle speakers. In RSE mode
the playback device is only heard through the
front speakers.
213
ProCarManuals.com
Page 214 of 470
Video Screen
The video screen is located in the overhead
console.
To use the video screen, do the following:
1. Push forward on the release button located on
the DVD display console.
2. Pull the screen down, away from you, and
adjust its position as desired.
When the video screen is not in use, push it up
into its locked position.
If a DVD is playing and the screen is raised to
its locked position, the screen shuts off, but
the DVD continues to play through the previous
audio or video source.
The video screen contains the transmitters for the
wireless headphones and the receivers for the
remote control. If the screen is in the closed
position, the signals are not available for the
operation of the headphones or the remote control.
Notice:Avoid directly touching the video
screen, as damage may occur. See “Cleaning
the Video Screen” later in this section for
more information.
DVD Player
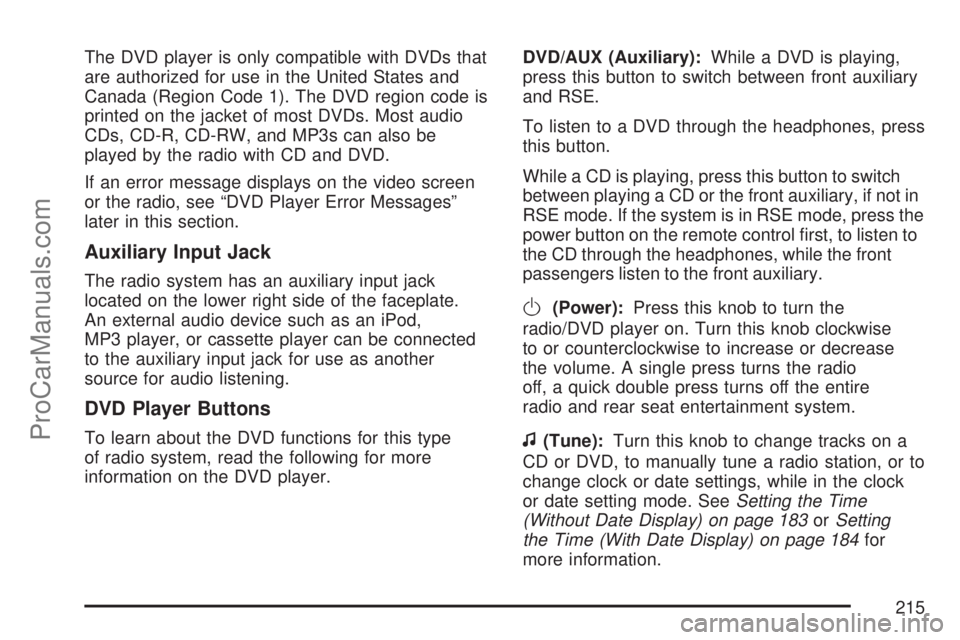
The DVD player is part of the radio and is located
in the center of the instrument panel.
The DVD player is controlled by the buttons on
the radio faceplate, or by the buttons on the
remote control. See “Remote Control” later in this
section for more information.
214
ProCarManuals.com
Page 215 of 470
The DVD player is only compatible with DVDs that
are authorized for use in the United States and
Canada (Region Code 1). The DVD region code is
printed on the jacket of most DVDs. Most audio
CDs, CD-R, CD-RW, and MP3s can also be
played by the radio with CD and DVD.
If an error message displays on the video screen
or the radio, see “DVD Player Error Messages”
later in this section.
Auxiliary Input Jack
The radio system has an auxiliary input jack
located on the lower right side of the faceplate.
An external audio device such as an iPod,
MP3 player, or cassette player can be connected
to the auxiliary input jack for use as another
source for audio listening.
DVD Player Buttons
To learn about the DVD functions for this type
of radio system, read the following for more
information on the DVD player.DVD/AUX (Auxiliary):While a DVD is playing,
press this button to switch between front auxiliary
and RSE.
To listen to a DVD through the headphones, press
this button.
While a CD is playing, press this button to switch
between playing a CD or the front auxiliary, if not in
RSE mode. If the system is in RSE mode, press the
power button on the remote control �rst, to listen to
the CD through the headphones, while the front
passengers listen to the front auxiliary.
O(Power):Press this knob to turn the
radio/DVD player on. Turn this knob clockwise
to or counterclockwise to increase or decrease
the volume. A single press turns the radio
off, a quick double press turns off the entire
radio and rear seat entertainment system.
f(Tune):Turn this knob to change tracks on a
CD or DVD, to manually tune a radio station, or to
change clock or date settings, while in the clock
or date setting mode. SeeSetting the Time
(Without Date Display) on page 183orSetting
the Time (With Date Display) on page 184for
more information.
215
ProCarManuals.com
Page 220 of 470
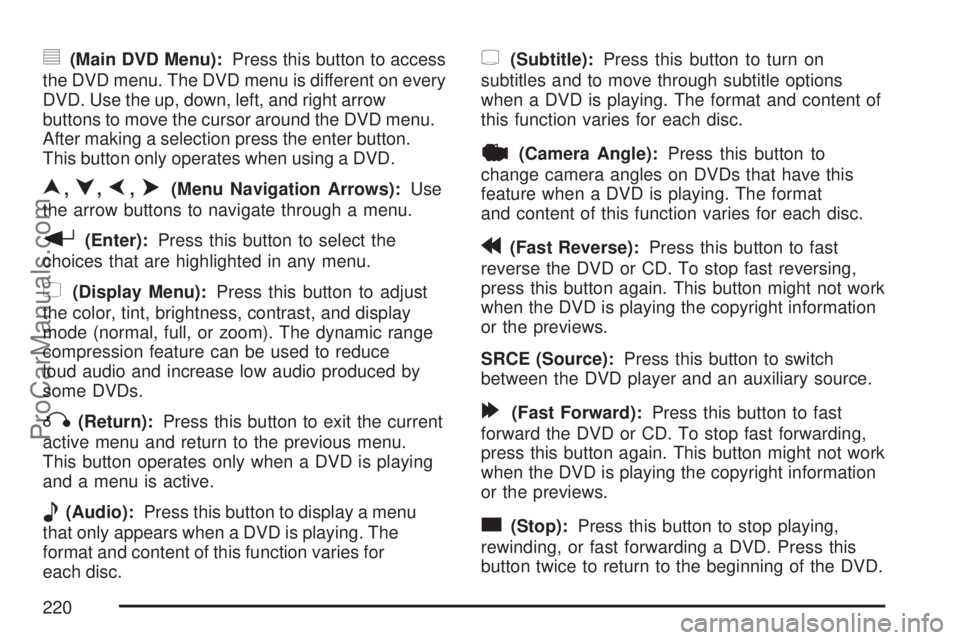
y(Main DVD Menu):Press this button to access
the DVD menu. The DVD menu is different on every
DVD. Use the up, down, left, and right arrow
buttons to move the cursor around the DVD menu.
After making a selection press the enter button.
This button only operates when using a DVD.
n,q,p,o(Menu Navigation Arrows):Use
the arrow buttons to navigate through a menu.
r(Enter):Press this button to select the
choices that are highlighted in any menu.
z(Display Menu):Press this button to adjust
the color, tint, brightness, contrast, and display
mode (normal, full, or zoom). The dynamic range
compression feature can be used to reduce
loud audio and increase low audio produced by
some DVDs.
q(Return):Press this button to exit the current
active menu and return to the previous menu.
This button operates only when a DVD is playing
and a menu is active.
e(Audio):Press this button to display a menu
that only appears when a DVD is playing. The
format and content of this function varies for
each disc.
{(Subtitle):Press this button to turn on
subtitles and to move through subtitle options
when a DVD is playing. The format and content of
this function varies for each disc.
|(Camera Angle):Press this button to
change camera angles on DVDs that have this
feature when a DVD is playing. The format
and content of this function varies for each disc.
r(Fast Reverse):Press this button to fast
reverse the DVD or CD. To stop fast reversing,
press this button again. This button might not work
when the DVD is playing the copyright information
or the previews.
SRCE (Source):Press this button to switch
between the DVD player and an auxiliary source.
[(Fast Forward):Press this button to fast
forward the DVD or CD. To stop fast forwarding,
press this button again. This button might not work
when the DVD is playing the copyright information
or the previews.
c(Stop):Press this button to stop playing,
rewinding, or fast forwarding a DVD. Press this
button twice to return to the beginning of the DVD.
220
ProCarManuals.com
Page 223 of 470
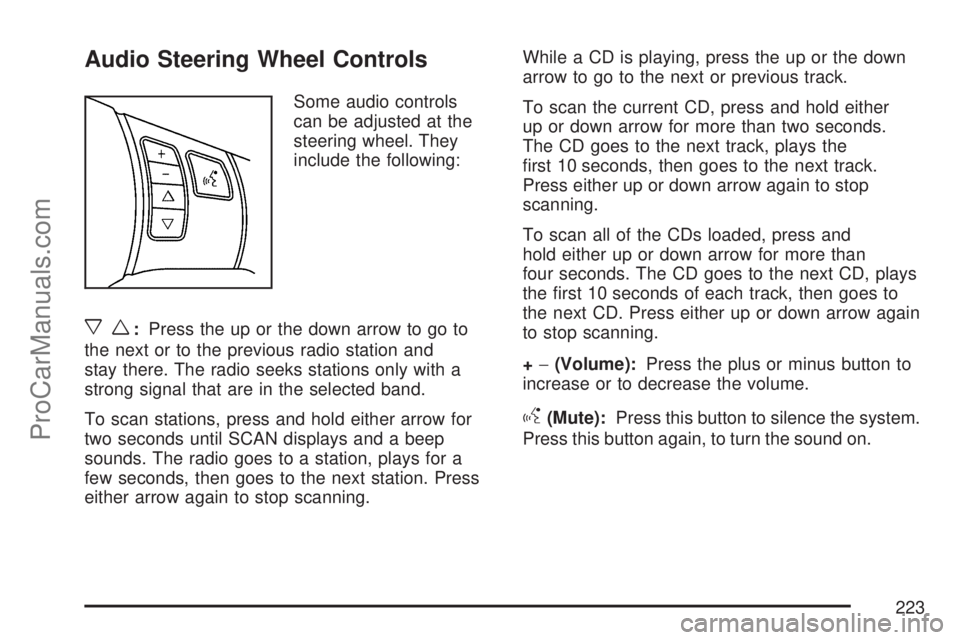
Audio Steering Wheel Controls
Some audio controls
can be adjusted at the
steering wheel. They
include the following:
xw:Press the up or the down arrow to go to
the next or to the previous radio station and
stay there. The radio seeks stations only with a
strong signal that are in the selected band.
To scan stations, press and hold either arrow for
two seconds until SCAN displays and a beep
sounds. The radio goes to a station, plays for a
few seconds, then goes to the next station. Press
either arrow again to stop scanning.While a CD is playing, press the up or the down
arrow to go to the next or previous track.
To scan the current CD, press and hold either
up or down arrow for more than two seconds.
The CD goes to the next track, plays the
�rst 10 seconds, then goes to the next track.
Press either up or down arrow again to stop
scanning.
To scan all of the CDs loaded, press and
hold either up or down arrow for more than
four seconds. The CD goes to the next CD, plays
the �rst 10 seconds of each track, then goes to
the next CD. Press either up or down arrow again
to stop scanning.
+−(Volume):Press the plus or minus button to
increase or to decrease the volume.
g(Mute):Press this button to silence the system.
Press this button again, to turn the sound on.
223
ProCarManuals.com
Page 238 of 470

Traction Control System (TCS)
Your vehicle may have a traction control system
that limits wheel spin. This is especially useful
in slippery road conditions. The system operates
only if it senses that one or both of the front wheels
are spinning or beginning to lose traction. When
this happens, the system reduces engine power to
limit wheel spin.
This light will come on
when your traction
control system is
limiting wheel spin.
SeeLow Traction Light on page 173. You may
feel or hear the system working, but this is normal.
The traction control system automatically comes
on whenever you start your vehicle. To limit
wheel spin, especially in slippery road conditions,
you should always leave the system on.But you can turn the traction control system off if
you ever need to. You should turn the system
off if your vehicle ever gets stuck in sand, mud,
ice or snow and rocking the vehicle is required.
SeeRocking Your Vehicle to Get It Out on
page 277andIf Your Vehicle is Stuck in Sand,
Mud, Ice, or Snow on page 276for more
information.
If your vehicle is
equipped with the
2.2L L4 engine, the
traction control system
can be turned off by
pressing the traction
control button.
It is located on the instrument panel above the
audio system.
If your vehicle is equipped with the 3.5L V6 engine,
the traction control system will be turned off when
the shift lever is in REVERSE (R) or LOW (L).
The traction control system warning light will be
displayed on the instrument panel. SeeTraction
Control System (TCS) Warning Light on page 172
for more information.
238
ProCarManuals.com
Page 457 of 470

A
About Driving Your Vehicle.............................. 3
Accessories and Modi�cations..................... 304
Adding Equipment to Your
Airbag-Equipped Vehicle............................ 89
Additives, Fuel............................................ 307
Add-On Electrical Equipment....................... 409
Air Cleaner/Filter, Engine............................. 324
Air Conditioning........................................... 155
Airbag
Passenger Status Indicator....................... 166
Readiness Light....................................... 165
Airbag System............................................... 71
What Will You See After an
Airbag In�ates?...................................... 80
When Should an Airbag In�ate?................. 77
Where Are the Airbags?............................. 75
Airbag Systems
Adding Equipment to Your
Airbag-Equipped Vehicle......................... 89
How Does an Airbag Restrain?.................. 80
Passenger Sensing System....................... 82
Servicing Your Airbag-Equipped Vehicle..... 88
What Makes an Airbag In�ate?.................. 79
All-Wheel Drive........................................... 353
All-Wheel-Drive (AWD) System.................... 239Antenna, Fixed Mast................................... 225
Antenna, XM™ Satellite Radio Antenna
System.................................................... 225
Anti-Lock Brake System.............................. 235
Anti-Lock Brake, System Warning Light....... 171
Appearance Care
Aluminum Wheels.................................... 404
Care of Safety Belts................................ 402
Chemical Paint Spotting........................... 406
Cleaning Exterior Lamps/Lenses.............. 403
Cleaning the Inside of Your Vehicle.......... 399
Fabric/Carpet........................................... 400
Finish Care.............................................. 403
Finish Damage......................................... 405
Instrument Panel, Vinyl, and Other
Plastic Surfaces.................................... 401
Sheet Metal Damage............................... 405
Tires........................................................ 405
Underbody Maintenance........................... 406
Vehicle Care/Appearance Materials.......... 407
Washing Your Vehicle.............................. 402
Weatherstrips........................................... 402
Windshield and Wiper Blades................... 404
Audio System.............................................. 182
Audio Steering Wheel Controls................. 223
Care of Your CD and DVD Player............ 225
Care of Your CDs and DVDs................... 225
457
ProCarManuals.com
Page 458 of 470

Audio System (cont.)
Fixed Mast Antenna................................. 225
Radio with CD................................186, 192
Setting the Time..............................183, 184
Understanding Radio Reception............... 224
XM™ Satellite Radio Antenna System...... 225
Audio System(s)
Radio with CD and DVD.......................... 202
Automatic Headlamp System....................... 151
Automatic Transaxle
Fluid...............................................327, 328
Operation................................................. 114
B
Battery........................................................ 347
Run-Down Protection............................... 154
Battery Warning Light.................................. 169
Before Leaving on a Long Trip.................... 269
Brake
Emergencies............................................ 237
Parking.................................................... 119
Brakes........................................................ 343
System Warning Light.............................. 170
Braking....................................................... 234
Braking in Emergencies............................... 237
Break-In, New Vehicle................................. 109Bulb Replacement....................................... 358
Center High-Mounted
Stoplamp (CHMSL)............................... 362
Front Turn Signal and Parking Lamps...... 361
Halogen Bulbs......................................... 358
Headlamp Aiming..................................... 355
Headlamps............................................... 358
License Plate Lamps................................ 364
Replacement Bulbs.................................. 364
Taillamps, Turn Signal, Stoplamps and
Back-up Lamps..................................... 363
Buying New Tires........................................ 377
C
Calibration................................................... 125
California Fuel............................................. 307
California Proposition 65 Warning................ 305
Canadian Owners........................................... 3
Capacities and Speci�cations...................... 414
Carbon Monoxide......................123, 272, 290
Care of
Safety Belts............................................. 402
Your CD and DVD Player........................ 225
Your CDs and DVDs................................ 225
Cargo Area................................................. 132
CD, MP3 ..................................................... 202
458
ProCarManuals.com