Page 222 of 532
3. To switch the clock to the small clock, quickly press
TIME again.
4. To toggle back to the large clock, simply press TIME. VIDEO ENTERTAINMENT SYSTEM (SALES CODE
XRV) — IF EQUIPPED
The optional VES™ (Video Entertainment System) con-
sists of a DVD player and LCD (liquid crystal display)
screen, a battery-powered remote control, and two head-
sets. The system is located in the headliner behind the
front row seat. Refer to your VES™ User’s Manual for
detailed operating instructions.
SATELLITE RADIO — IF EQUIPPED
Satellite radio uses direct satellite to receiver broadcast-
ing technology to provide clear digital sound, coast to
coast. The subscription service provider is Sirius™ Satel-
lite Radio. This service offers over 100 channels of music,
sports, news, entertainment, and programming for chil-
dren, directly from its satellites and broadcasting studios.222 UNDERSTANDING YOUR INSTRUMENT PANEL
Page 223 of 532

System Activation
Sirius Satellite Radio service is pre-activated, and you
may begin listening immediately to the one year of
SIRIUS audio service that is included with the factory-
installed satellite radio system in your vehicle. Sirius will
contact you to supply a welcome kit and to confirm
subscription information, including the set up of your
on-line listening account at no additional charge. For
further information, call the toll-free number 888-539-
7474, or visit the Sirius web site at www.sirius.com.
Please have the following information available when
calling:
1. The Electronic Serial Number/Sirius Identification
Number (ESN/SID).
2. Your Vehicle Identification Number. Electronic Serial Number/Sirius Identification
Number (ESN/SID)
The Electronic Serial Number/Sirius Identification Num-
ber is needed to activate your Sirius Satellite Radio
system. To access the ESN/SID, refer to the following
steps:
ESN/SID Access with REF Radios
With the ignition switch in the ACCESSORY position and
the radio OFF, press the CD Eject and Time buttons
simultaneously for 3 seconds. The first four digits of the
twelve-digit ESN/SID number will display. Press the
SEEK UP button to display the next four digits. Continue
to press the SEEK UP button until all twelve ESN/SID
digits display. The SEEK DOWN will page down until
the first four digits display. The radio will exit the
ESN/SID mode when any other button is pushed, the
ignition is turned OFF, or 5 minutes has passed since any
button was pushed. UNDERSTANDING YOUR INSTRUMENT PANEL 223
4
Page 224 of 532

ESN/SID Access with RAQ and RAK Radios
With the ignition switch in the ACCESSORY position and
the radio OFF, press the CD Eject and TIME buttons
simultaneously for 3 seconds. All twelve ESN/SID num-
bers will display. The radio will exit the ESN/SID mode
when any other button is pushed, the ignition is turned
OFF, or 5 minutes has passed since any button was
pushed.
ESN/SID Access with REC Navigation Radios
Please refer to your Navigation User’s Manual.
With the ignition in the ACCESSORY position and the
radio off, press the CD Eject and Set buttons simulta-
neously until the 12 digits of the ESN/SID appear on the
screen. Selecting Satellite Mode in REF, RAQ, and RAK
Radios
Selecting Satellite Mode — REF Radio
Press the MODE button repeatedly until the word � SAT �
appears in the display.
A CD may remain in the radio while in the Satellite radio
mode.
Selecting Satellite Mode — RAQ and RAK Radio
Press the MODE button repeatedly until the word � SAT �
appears in the display.
These radios will also display the current station name
and program type. For more information, such as song
title and artist, press the MSG or INFO button.
A CD or tape may remain in the radio while in the
Satellite radio mode.224 UNDERSTANDING YOUR INSTRUMENT PANEL
Page 225 of 532

Selecting a Channel
Press and release the SEEK or TUNE knob to search for
the next channel. Press the top of the button to search up
and the bottom of the button to search down. Holding the
TUNE button causes the radio to bypass channels until
the button is released.
Press and release the SCAN button (if equipped) to
automatically change channels every 7 seconds. The
radio will pause on each channel for 7 seconds before
moving on to the next channel. The word � SCAN � will
appear in the display between each channel change. Press
the SCAN button a second time to stop the search.
NOTE: Channels that may contain objectionable content
can be blocked. Contact Sirius Customer Care at 888-539-
7474 to discuss options for channel blocking or unblock-
ing. Please have your ESN/SID information available. Storing and Selecting Pre-Set Channels
In addition to the 12 AM and 12 FM pre-set stations, you
may also commit 12 satellite stations to push button
memory. These satellite channel pre-set stations will not
erase any AM or FM pre-set memory stations. Follow the
memory pre-set procedures that apply to your radio.
Using the PTY (Program Type) Button — If
Equipped
Follow the PTY button instructions that apply to your
radio.
PTY Button � SCAN �
When the desired program type is obtained, press the
� SCAN � button within five seconds. The radio will play 7
seconds of the selected channel before moving to the next
channel of the selected program type. Press the � SCAN �
button a second time to stop the search. UNDERSTANDING YOUR INSTRUMENT PANEL 225
4
Page 227 of 532

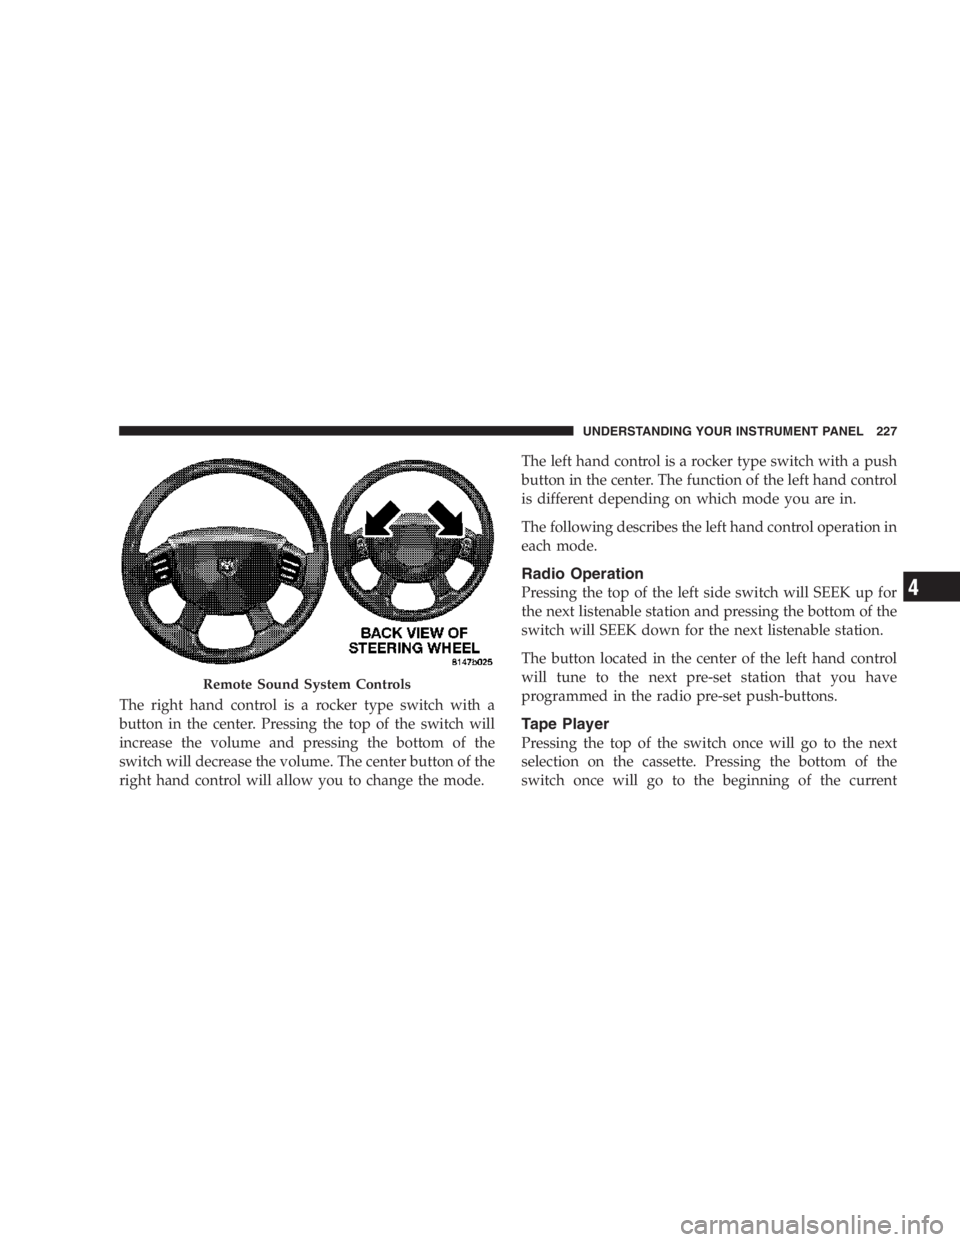
The right hand control is a rocker type switch with a
button in the center. Pressing the top of the switch will
increase the volume and pressing the bottom of the
switch will decrease the volume. The center button of the
right hand control will allow you to change the mode. The left hand control is a rocker type switch with a push
button in the center. The function of the left hand control
is different depending on which mode you are in.
The following describes the left hand control operation in
each mode.
Radio Operation
Pressing the top of the left side switch will SEEK up for
the next listenable station and pressing the bottom of the
switch will SEEK down for the next listenable station.
The button located in the center of the left hand control
will tune to the next pre-set station that you have
programmed in the radio pre-set push-buttons.
Tape Player
Pressing the top of the switch once will go to the next
selection on the cassette. Pressing the bottom of the
switch once will go to the beginning of the currentRemote Sound System Controls UNDERSTANDING YOUR INSTRUMENT PANEL 227
4
Page 228 of 532

selection or to the beginning of the previous selection if it
is within the first 5 seconds of the current selection.
If you press the switch up or down twice it plays the
second selection, three times, it will play the third, etc.
The button in the center of the left hand switch has no
function in this mode.
CD Player
Pressing the top of the switch once will go to the next
track on the CD. Pressing the bottom of the switch once
will go to the beginning of the current track or to the
beginning of the previous track if it is within one second
after the current track begins to play.
If you press the switch up or down twice it plays the
second track, three times, it will play the third, etc.
The button in the center of the left hand switch has no
function in this mode. CASSETTE TAPE AND PLAYER MAINTENANCE
To keep the cassette tapes and player in good condition,
take the following precautions:
1. Do not use cassette tapes longer than C-90; otherwise,
sound quality and tape durability will be greatly dimin-
ished.
2. Keep the cassette tape in its case to protect from
slackness and dust when it is not in use.
3. Keep the cassette tape away from direct sunlight, heat
and magnetic fields such as the radio speakers.
4. Before inserting a tape, make sure that the label is
adhering flatly to the cassette.
5. A loose tape should be corrected before use. To rewind
a loose tape, insert the eraser end of a pencil into the tape
drive gear and twist the pencil in the required directions.228 UNDERSTANDING YOUR INSTRUMENT PANEL
Page 230 of 532
NOTE: If you experience difficulty in playing a particu-
lar disc, it may be damaged, oversized, or have theft
protection encoding. Try a known good disc before
considering disc player service.
RADIO OPERATION AND CELLULAR PHONES
Under certain conditions, the operation of a cellular
phone in your vehicle can cause erratic or noisy perfor-
mance from your radio. This condition may be lessened
or eliminated by relocating the cellular phone antenna.
This condition is not harmful to the radio. If your radio
performance does not satisfactorily “clear” by the repo-
sitioning of the antenna, it is recommended that the radio
volume be turned down or off during cellular phone
operation. CLIMATE CONTROLS
The controls for the heating and ventilation system in this
vehicle consist of a series of rotary knobs. These comfort
controls can be set to obtain desired interior conditions.
Climate Control Location230 UNDERSTANDING YOUR INSTRUMENT PANEL
Page 302 of 532

Brake Noise
During normal operation of the brake system certain
noises may be present from time to time. Occasional
� groan � or � squeal � noises may occur during normal
operation of the brake system which may not be indica-
tive of a problem. These noises may be heard at any time
the brakes are applied but may be more noticeable during
the first few brake applications in the morning. Moisture,
hot or cold temperature, dust, and or other debris may
also contribute to the noise condition. Repeated or con-
tinuous noises during braking may be an indication that
the brake linings are worn and in need of replacement. Four-Wheel Anti-Lock Brake System
WARNING!Anti-Lock Brake Systems contain sophisticated elec-
tronic equipment. It may be susceptible to interfer-
ence caused by improperly installed or high output
radio transmitting equipment. This interference can
cause possible loss of anti-lock braking capability.
Installation of such equipment should be performed
by qualified professionals.302 STARTING AND OPERATING