2007 NISSAN TITAN change wheel
[x] Cancel search: change wheelPage 73 of 368
Other supplemental front air bag precau-
tions
WARNING
cDo not place any objects on the steer-
ing wheel pad or on the instrument
panel. Also, do not place any objects
between any occupant and the steering
wheel or instrument panel. Such ob-
jects may become dangerous projec-
tiles and cause injury if the supplemen-
tal front air bag inflates.
cImmediately after inflation, several
front air bag system components will be
hot. Do not touch them; you may se-
verely burn yourself.
cNo unauthorized changes should be
made to any components or wiring of
the supplemental air bag system. This is
to prevent accidental inflation of the
supplemental air bag or damage to the
supplemental air bag system.
cDo not make unauthorized changes to
your vehicle’s electrical system, sus-
pension system or front end structure.
This could affect proper operation of
the supplemental front air bag system.cTampering with the supplemental front
air bag system may result in serious
personal injury. Tampering includes
changes to the steering wheel and the
instrument panel assembly by placing
material over the steering wheel pad
and above the instrument panel or by
installing additional trim material
around the air bag system.
cModifying or tampering with the front
passenger seat may result in serious
personal injury. For example, do not
change the front seats by placing mate-
rial on the seat cushion or by installing
additional trim material, such as seat
covers, on the seat that are not specifi-
cally designed to assure proper air bag
operation. Additionally, do not stow any
objects under the front passenger seat
or the seat cushion and seatback. Such
objects may interfere with the proper
operation of the occupant classifica-
tion sensor (pressure sensor) .
cNo unauthorized changes should be
made to any components or wiring of
the seat belt system. This may affect the
supplemental front air bag system.
Tampering with the seat belt system
may result in serious personal injury.cWork on and around the supplemental
front air bag system should be done by
a NISSAN dealer. Installation of electri-
cal equipment should also be done by a
NISSAN dealer. The Supplemental Re-
straint System (SRS) wiring should not
be modified or disconnected. Unautho-
rized electrical test equipment and
probing devices should not be used on
the air bag system.
cA cracked windshield should be re-
placed immediately by a qualified re-
pair facility. A cracked windshield could
affect the function of the supplemental
air bag system.
cThe SRS wiring harness connectors are
yellow and orange for easy
identification.
When selling your vehicle, we request that you
inform the buyer about the supplemental front air
bag system and guide the buyer to the appropri-
ate sections in this Owner’s Manual.
Safety—Seats, seat belts and supplemental restraint system1-57
ZREVIEW COPYÐ2007 Titan(tzw)
Owners ManualÐUSA_English(nna)
07/09/06Ðtbrooks
X
Page 159 of 368

4 Display screen, heater, air conditioner
and audio systems
Control panel buttons (if so equipped)...............4-2
How to use the joystick and ENTER button........4-3
How to use the BACK button....................4-3
Setting up the start-up screen...................4-3
How to use the TRIP button.....................4-3
How to use the SETTING button.................4-7
button..................................4-13
Ventilators.......................................4-14
Heater and air conditioner (manual).................4-14
Controls......................................4-15
Heater operation..............................4-16
Air conditioner operation.......................4-17
Air flow charts.................................4-18
Heater and air conditioner (automatic)
(if so equipped)..................................4-22
Automatic operation...........................4-22
Manual operation..............................4-23
Operating tips.................................4-23
Servicing air conditioner...........................4-24
Audio system....................................4-24
Radio........................................4-24
FM radio reception............................4-25AM radio reception............................4-25
Satellite radio reception (if so equipped).........4-25
Audio operation precautions....................4-26
FM/AM radio with compact disc (CD) player
(if so equipped)...............................4-30
FM/AM/SAT radio with compact disc (CD)
changer (Type A, B, C and D)
(if so equipped)...............................4-37
CD care and cleaning..........................4-44
Steering wheel switch for audio control
(if so equipped)...............................4-45
Rear audio controls (if so equipped).............4-46
Antenna......................................4-47
NISSAN mobile entertainment system (MES)
(if so equipped)..................................4-47
Digital video disc (DVD) player controls..........4-48
Remote control................................4-49
Flip-down screen..............................4-49
Playing a digital video disc (DVD)...............4-51
Care and maintenance.........................4-54
How to handle the DVD........................4-54
Car phone or CB radio............................4-57
ZREVIEW COPYÐ2007 Titan(tzw)
Owners ManualÐUSA_English(nna)
07/09/06Ðtbrooks
X
Page 203 of 368

1. Volume control switch
2. MODE select switch
3. POWER on/off switch
4. Tuning switch
STEERING WHEEL SWITCH FOR
AUDIO CONTROL (if so equipped)
The audio system can be operated using the
controls on the steering wheel.
POWER on/off switch
With the ignition key turned to the ACC or ON
position, push the POWER switch to turn the
audio system on or off.
MODE select switch
Push the mode select switch to change the mode
in the following sequence: PRESET A!PRE-
SET B!PRESET C!CD*!DVD** (if so
equipped)!AUX***.
*This mode is only available when a CD is loaded.
**This mode is only available when a DVD is
loaded into the DVD player.
***This mode is only available when a compatible
auxiliary device is plugged into the AUX jack.
Volume control switch
Push the volume control switch up or down to
increase or decrease the volume.
Tuning
Memory change (radio):
While in one of the preset radio station banks (A,
B or C) , push the tuning switch
orfor less than 1.5 seconds to change to the next
preset station in memory.
Seek tuning (radio):
Push the tuning switch
orfor more
than 1.5 seconds to seek the next or previous
radio station.Next/Previous track (CD):
Push the tuning switch
orfor less
than 1.5 seconds to return to the beginning of the
present track or skip to the next track. Push
several times to skip back or skip through tracks.
This system searches for the blank intervals be-
tween selections. If there is a blank interval within
1 program or there is no interval between pro-
grams, the system may not stop in the desired or
expected location.
Change disc (CD) (if so equipped):
Push the tuning switch
orfor more
than 1.5 seconds to change the playing disc up
or down.
LHA0269
Display screen, heater, air conditioner and audio systems4-45
ZREVIEW COPYÐ2007 Titan(tzw)
Owners ManualÐUSA_English(nna)
07/09/06Ðtbrooks
X
Page 238 of 368

2WD or 4WD shift procedure:
4WD Shift
Switch
PositionWheels
DrivenIndicator Light
Use Conditions 4WD Shift Procedure 4WD shift Transfer
4LO posi-
tion
2WDRear
wheels
For driving on dry, paved roads (Economy
drive) or state dynamometer I/M testingMove the 4WD switch.
2WD <—> 4H
4WD shift indicator light will indicate transfer shift position engaged.
IT IS NOT NECESSARY TO MOVE THE AUTOMATIC TRANSMISSION
SELECT LEVER TO THE N POSITION IN THIS OPERATION. PER-
FORM THIS OPERATION WHEN DRIVING STRAIGHT.
4H4 wheels
For driving on rocky, sandy or snow-covered
roads
Neutral
*1
May blinkNeutral disengages the automatic transmis-
sion mechanical parking lock, which will
allow the vehicle to roll. Do not leave the
transfer shift position in Neutral.*21. Stop the vehicle.
2. With the brake pedal depressed, move the automatic transmission
selector lever to the N position.
3. With the brake pedal depressed, depress and turn the 4WD shift
switch to 4LO or 4H.
THE TRANSFER CASE DOES NOT ENGAGE BETWEEN 4H AND
4LO (OR 4LO TO 4H) UNLESS YOU HAVE FIRST STOPPED THE VE-
HICLE, DEPRESSED THE BRAKE PEDAL AND MOVED THE AUTO-
MATIC TRANSMISSION SHIFT LEVER TO NEUTRAL. *3
4LO4 wheelsIlluminatedFor use when maximum power and traction
is required (for example: on steep grades or
rocky, sandy, muddy roads)
*1: Before moving the automatic transmission shift lever from neutral, wait until the 4LO indicator light stays on steady. This indicates that the 4WDshift procedure is completed and the transfer gear is correctly set in the
4LO position. If the vehicle is shifted into gear before the indicator is on steady, the transfer gear may grind, not engage correctly or stay in the neutral position.
- If the 4WD warning light illuminates, perform the following procedure to return the transfer case to correct operating condition.
1. Turn off the engine by turning the ignition switch9OFF9.
2. Start the engine.
- Check that the 4WD warning light turns off. If the 4WD light illuminates, have the system checked by a NISSAN dealer.
3. Apply the parking brake, depress the brake pedal and move the automatic transmission shift selector lever to Neutral position.
4. With the brake pedal depressed, move the 4WD shift switch to desired mode.
- Be sure to wait until the transfer gear change completes before shifting the automatic transmission shift selector lever from Neutral position.
*2: While changing in and out of 4LO, the ignition key must be ON and the vehicle’s engine must be running for a shift to take place and for the indicator lights (4WD shift and 4LO position indicator) to be operable.
Otherwise, the shift will not take place and no indicator lights will be on or flashing.
*3: Make sure the transfer 4LO position indicator light turns on when you shift the 4WD shift switch to 4LO. The
indicator light (if so equipped) will also turn on when 4LO is selected. See “Vehicle dynamic control
system” later in this section.
5-22Starting and driving
ZREVIEW COPYÐ2007 Titan(tzw)
Owners ManualÐUSA_English(nna)
07/09/06Ðtbrooks
X
Page 239 of 368
The transfer case 4WD shift switch is used to
select either 2WD or 4WD depending on the
driving conditions. There are three types of drive
modes available, 2WD, 4H and 4LO.
The 4WD shift switch electronically controls the
transfer case operation. Rotate the switch to
move between each mode, 2WD, 4H and 4LO.
To change into or out of 4LO, the vehicle
MUST be stationary, shift the automatic
transmission selector lever to neutral, and
depress the brake pedal. The switch must
be pushed and turned to select 4LO.
WARNING
cWhen parking, apply the parking brake
before stopping the engine and make
sure that the 4WD shift indicator light is
on and the ATP warning light goes off.
Otherwise, the vehicle could unexpect-
edly move even if the automatic trans-
mission is in the P position.cThe 4LO indicator light must stop blink-
ing and remain illuminated or turn off
before shifting the transmission into
gear. If the transmission selector is
shifted from the “N” position to any
other gear when the 4LO indicator light
is blinking, the vehicle may move
unexpectedly.
CAUTION
cNever shift the 4WD shift switch be-
tween 4LO and 4H while driving.
cThe 4H position provides greater trac-
tion. Avoid excessive speed, as it will
cause increased fuel consumption and
higher oil temperatures, and could
damage drivetrain components.
Speeds over 62.5 MPH (100 km/h) in 4H
is not recommended.
cThe 4LO position provides maximum
power and traction. Avoid raising ve-
hicle speed excessively, as the maxi-
mum speed is approximately 31 MPH
(50 km/h) .
cWhen driving straight, shift the 4WD
shift switch to the 2WD or 4H position.
Do not move the 4WD shift switch when
making a turn or reversing.cDo not shift the 4WD shift switch (be-
tween 2WD and 4H) while driving on
steep downhill grades. Use the engine
brake and low automatic transmission
gears (D1 or D2) for engine braking.
cDo not operate the 4WD shift switch
(between 2WD and 4H) with the rear
wheels spinning.
cDo not drive on dry hard surface roads
in the 4H or 4LO position. Driving on dry
hard surfaces in 4H or 4LO may cause
unnecessary noise and tire wear.
NISSAN recommends driving in the
2WD position under these conditions.
cThe 4WD transfer case may not be
shifted between 4H and 4LO at low am-
bient temperatures and the transfer
4LO position indicator light may blink
even when the 4WD shift switch is
shifted. After driving for a while you can
change the 4WD transfer case between
4H and 4LO.
When driving on rough roads,
cSet the 4WD shift switch to 4H or 4LO.
cDrive carefully according to the road surface
conditions.
Starting and driving5-23
ZREVIEW COPYÐ2007 Titan(tzw)
Owners ManualÐUSA_English(nna)
07/09/06Ðtbrooks
X
Page 241 of 368
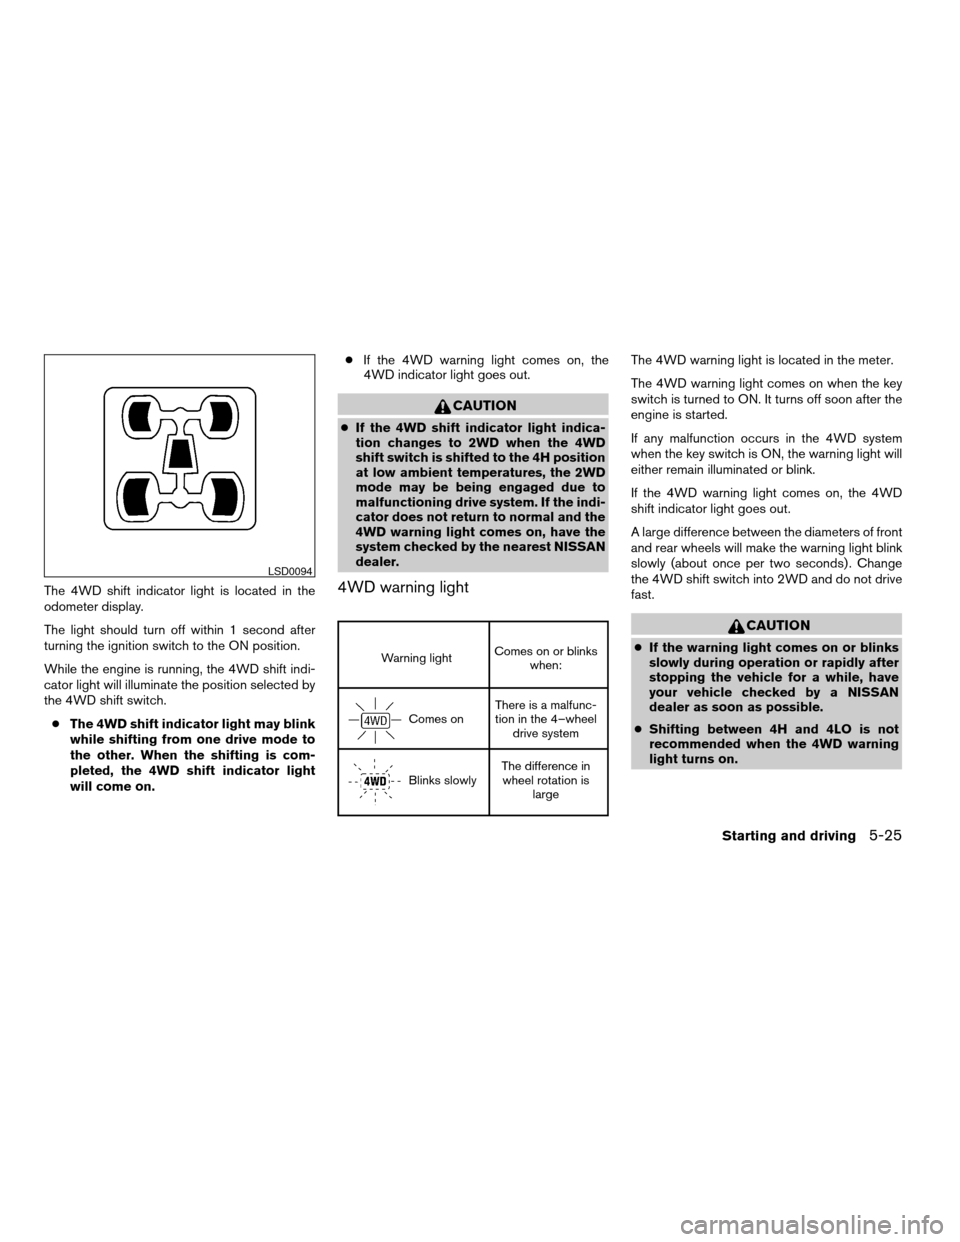
The 4WD shift indicator light is located in the
odometer display.
The light should turn off within 1 second after
turning the ignition switch to the ON position.
While the engine is running, the 4WD shift indi-
cator light will illuminate the position selected by
the 4WD shift switch.
cThe 4WD shift indicator light may blink
while shifting from one drive mode to
the other. When the shifting is com-
pleted, the 4WD shift indicator light
will come on.cIf the 4WD warning light comes on, the
4WD indicator light goes out.
CAUTION
cIf the 4WD shift indicator light indica-
tion changes to 2WD when the 4WD
shift switch is shifted to the 4H position
at low ambient temperatures, the 2WD
mode may be being engaged due to
malfunctioning drive system. If the indi-
cator does not return to normal and the
4WD warning light comes on, have the
system checked by the nearest NISSAN
dealer.
4WD warning light
Warning lightComes on or blinks
when:
Comes onThere is a malfunc-
tion in the 4–wheel
drive system
Blinks slowlyThe difference in
wheel rotation is
large
The 4WD warning light is located in the meter.
The 4WD warning light comes on when the key
switch is turned to ON. It turns off soon after the
engine is started.
If any malfunction occurs in the 4WD system
when the key switch is ON, the warning light will
either remain illuminated or blink.
If the 4WD warning light comes on, the 4WD
shift indicator light goes out.
A large difference between the diameters of front
and rear wheels will make the warning light blink
slowly (about once per two seconds) . Change
the 4WD shift switch into 2WD and do not drive
fast.
CAUTION
cIf the warning light comes on or blinks
slowly during operation or rapidly after
stopping the vehicle for a while, have
your vehicle checked by a NISSAN
dealer as soon as possible.
cShifting between 4H and 4LO is not
recommended when the 4WD warning
light turns on.
LSD0094
Starting and driving5-25
ZREVIEW COPYÐ2007 Titan(tzw)
Owners ManualÐUSA_English(nna)
07/09/06Ðtbrooks
X
Page 255 of 368
WARNING
cMake sure the parking brake is securely
applied and the automatic transmission
is shifted into P (Park) .
cNever change tires when the vehicle is
on a slope, ice or slippery areas. This is
hazardous.
cNever change tires if oncoming traffic is
close to your vehicle. Wait for profes-
sional road assistance.
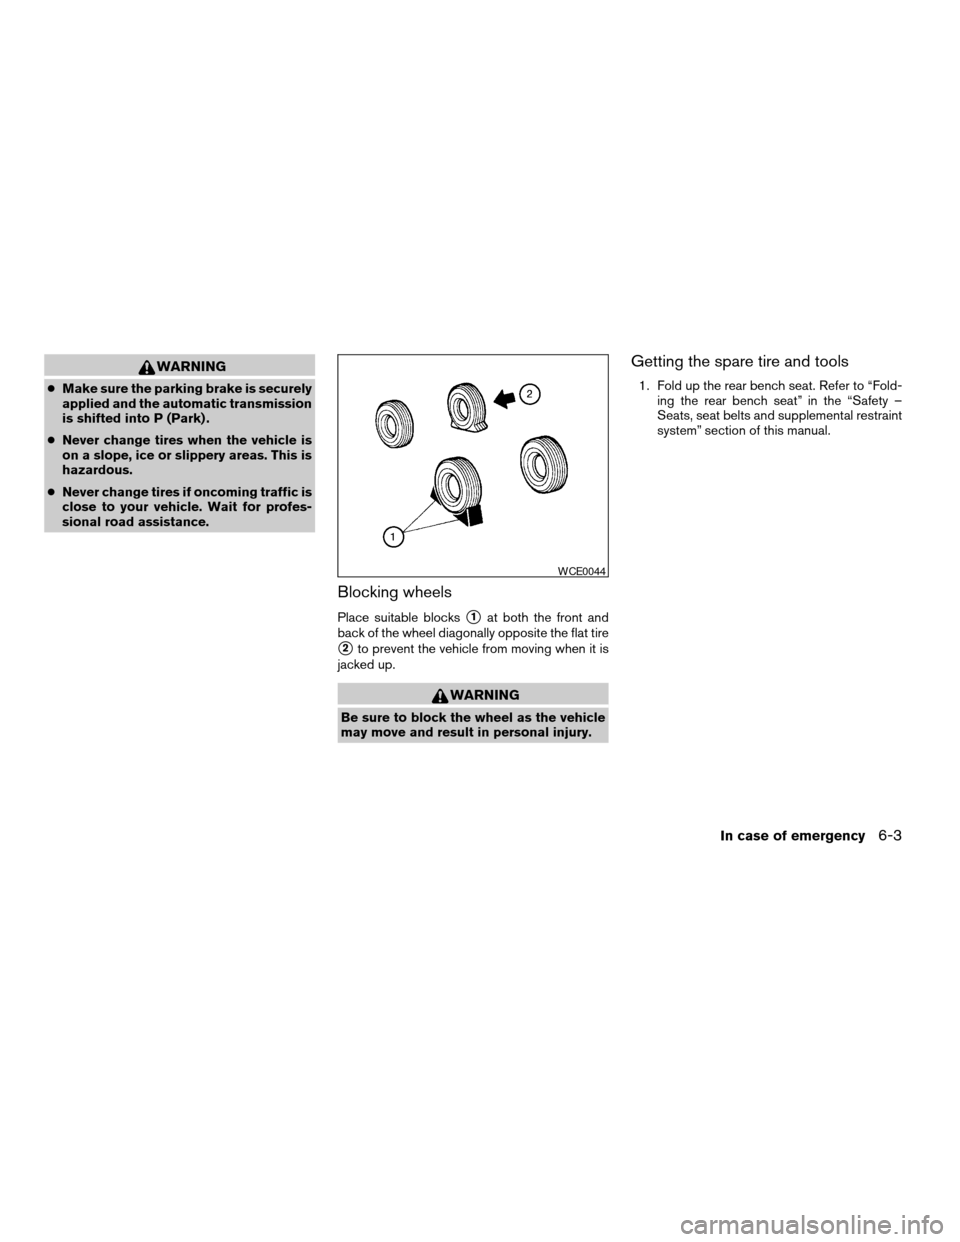
Blocking wheels
Place suitable blockss1at both the front and
back of the wheel diagonally opposite the flat tire
s2to prevent the vehicle from moving when it is
jacked up.
WARNING
Be sure to block the wheel as the vehicle
may move and result in personal injury.
Getting the spare tire and tools
1. Fold up the rear bench seat. Refer to “Fold-
ing the rear bench seat” in the “Safety –
Seats, seat belts and supplemental restraint
system” section of this manual.
WCE0044
In case of emergency6-3
ZREVIEW COPYÐ2007 Titan(tzw)
Owners ManualÐUSA_English(nna)
07/09/06Ðtbrooks
X
Page 257 of 368
CAUTION
Be sure to center the spare tire suspend-
ing plate on the wheel and then lift the
spare tire.
Jacking up vehicle and removing the
damaged tire
WARNING
cNever get under the vehicle while it is
supported only by the jack. If it is nec-
essary to work under the vehicle, sup-
port it with safety stands.
cUse only the jack provided with your
vehicle to lift the vehicle. Do not use the
jack provided with your vehicle on other
vehicles. The jack is designed for lifting
only your vehicle during a tire change.
cUse the correct jack-up points. Never
use any other part of the vehicle for jack
support.
cNever jack up the vehicle more than
necessary.
cNever use blocks on or under the jack.cDo not start or run the engine while
vehicle is on the jack. It may cause the
vehicle to move. This is especially true
for vehicles with limited slip
differentials.
cDo not allow passengers to stay in the
vehicle while it is on the jack.
cNever run the engine with a wheel(s) off
the ground. It may cause the vehicle to
move.
Always refer to the illustration for the correct
placement and jack-up points for your specific
vehicle model and jack type.
Carefully read the caution label attached to
the jack body and the following instruc-
tions.
1. Loosen each wheel nut one or two turns by
turning counterclockwise with the wheel nut
wrench.Do not remove the wheel nuts
until the tire is off the ground.
In case of emergency6-5
ZREVIEW COPYÐ2007 Titan(tzw)
Owners ManualÐUSA_English(nna)
07/09/06Ðtbrooks
X