2007 NISSAN TITAN ECU
[x] Cancel search: ECUPage 56 of 368

5. Remove any additional slack from the child
restraint; press downward and rearward
firmly in the center of the child restraint to
compress the vehicle seat cushion and seat-
back while pulling up on the seat belt.6. Before placing the child in the child restraint,
hold the child restraint near the seat belt
path and use force to push the child restraint
from side to side, and tug it forward to make
sure that it is securely held in place. It should
not move more than 1 in (25 mm) . If it does
move more than 1 in (25 mm) , pull again on
the shoulder belt to further tighten the child
restraint. If you are unable to properly secure
the restraint, move the restraint to another
rear seating position and try again, or try a
different child restraint. Not all child re-
straints fit in all types of vehicles.7. Check that the retractor is in the automatic
locking mode by trying to pull more seat belt
out of the retractor. If you cannot pull any
more seat belt webbing out of the retractor,
the retractor is in the automatic locking
mode
8. Check to make sure that the child restraint is
properly secured prior to each use. If the belt
is not locked, repeat steps 3 through 6.
After the child restraint is removed and the seat
belt fully retracted, the automatic locking mode
child restraint mode) is canceled.
Rear facing – step 5
WRS0683
Rear facing – step 6
WRS0684
1-40Safety—Seats, seat belts and supplemental restraint system
ZREVIEW COPYÐ2007 Titan(tzw)
Owners ManualÐUSA_English(nna)
07/09/06Ðtbrooks
X
Page 58 of 368

cAfter placing the child in the booster
seat and fastening the seat belt, make
sure the shoulder portion of the belt is
away from the child’s face and neck and
the lap portion of the belt does not
cross the abdomen.
cDo not put the shoulder belt behind the
child or under the child’s arm. If you
must install a booster seat in the front
seat, see “Booster seat installation”
later in this section.
cWhen your booster seat is not in use,
keep it secured with a seat belt to pre-
vent it from being thrown around in
case of a sudden stop or accident.
CAUTION
Remember that a booster seat left in a
closed vehicle can become very hot.
Check the seating surface and buckles
before placing your child in the booster
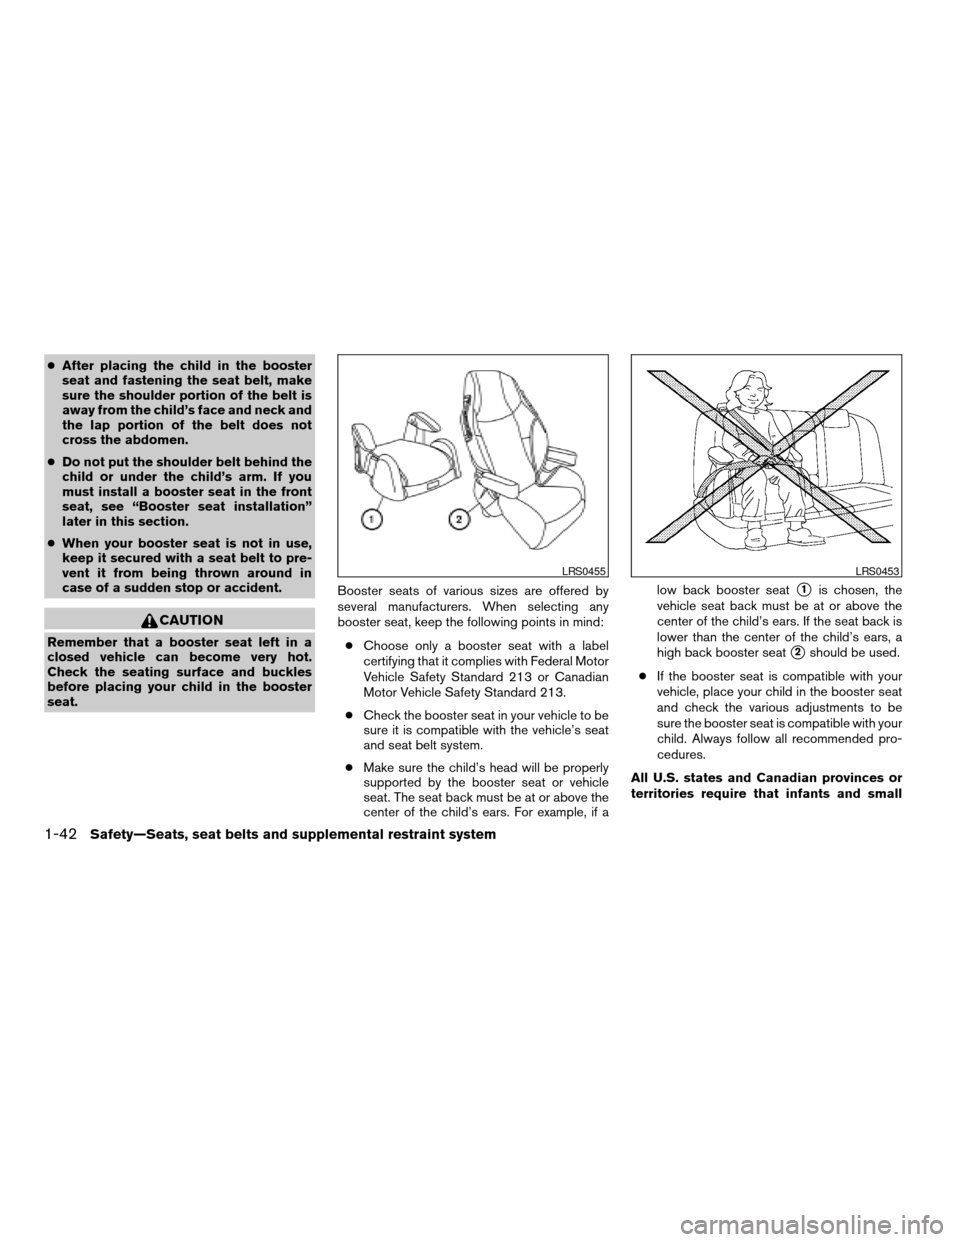
seat.Booster seats of various sizes are offered by
several manufacturers. When selecting any
booster seat, keep the following points in mind:
cChoose only a booster seat with a label
certifying that it complies with Federal Motor
Vehicle Safety Standard 213 or Canadian
Motor Vehicle Safety Standard 213.
cCheck the booster seat in your vehicle to be
sure it is compatible with the vehicle’s seat
and seat belt system.
cMake sure the child’s head will be properly
supported by the booster seat or vehicle
seat. The seat back must be at or above the
center of the child’s ears. For example, if alow back booster seat
s1is chosen, the
vehicle seat back must be at or above the
center of the child’s ears. If the seat back is
lower than the center of the child’s ears, a
high back booster seat
s2should be used.
cIf the booster seat is compatible with your
vehicle, place your child in the booster seat
and check the various adjustments to be
sure the booster seat is compatible with your
child. Always follow all recommended pro-
cedures.
All U.S. states and Canadian provinces or
territories require that infants and small
LRS0455LRS0453
1-42Safety—Seats, seat belts and supplemental restraint system
ZREVIEW COPYÐ2007 Titan(tzw)
Owners ManualÐUSA_English(nna)
07/09/06Ðtbrooks
X
Page 60 of 368

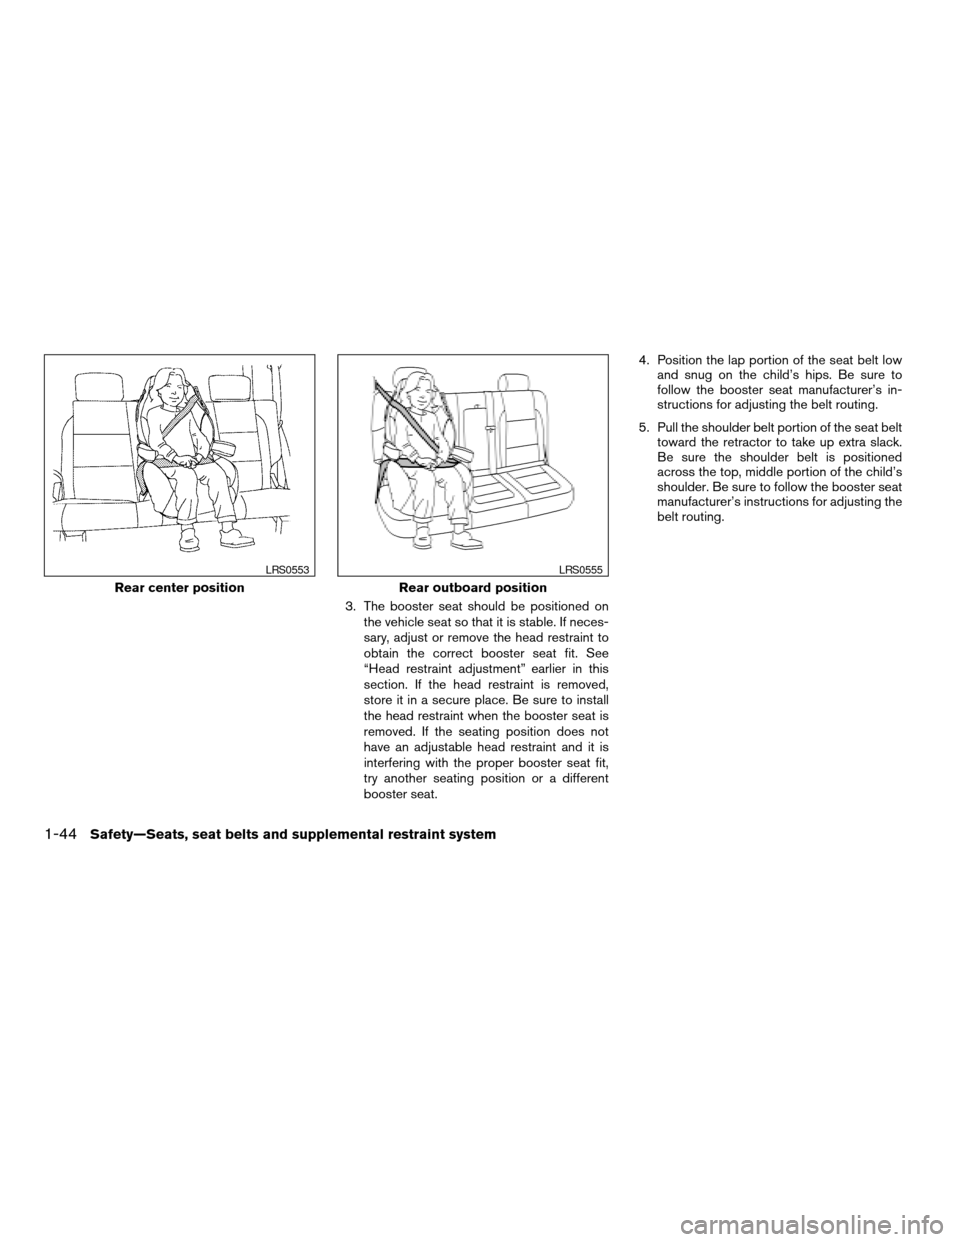
3. The booster seat should be positioned on
the vehicle seat so that it is stable. If neces-
sary, adjust or remove the head restraint to
obtain the correct booster seat fit. See
“Head restraint adjustment” earlier in this
section. If the head restraint is removed,
store it in a secure place. Be sure to install
the head restraint when the booster seat is
removed. If the seating position does not
have an adjustable head restraint and it is
interfering with the proper booster seat fit,
try another seating position or a different
booster seat.4. Position the lap portion of the seat belt low
and snug on the child’s hips. Be sure to
follow the booster seat manufacturer’s in-
structions for adjusting the belt routing.
5. Pull the shoulder belt portion of the seat belt
toward the retractor to take up extra slack.
Be sure the shoulder belt is positioned
across the top, middle portion of the child’s
shoulder. Be sure to follow the booster seat
manufacturer’s instructions for adjusting the
belt routing.
Rear center position
LRS0553
Rear outboard position
LRS0555
1-44Safety—Seats, seat belts and supplemental restraint system
ZREVIEW COPYÐ2007 Titan(tzw)
Owners ManualÐUSA_English(nna)
07/09/06Ðtbrooks
X
Page 72 of 368

Right front passenger seat adult occupants who
are properly seated and using the seat belt as
outlined in this manual should not cause the
passenger air bag to be automatically turned
OFF. For small adults it may be turned OFF;
however, if the occupant takes his/her weight off
the seat cushion (for example, by not sitting up-
right, by sitting on an edge of the seat, or by
otherwise being out of position) , this could cause
the sensor to turn the air bag OFF. In addition, if
the occupant improperly uses the right front seat
belt in the automatic locking mode (child restraint
mode) , this could cause the air bag to be turned
OFF. Always be sure to be seated and wearing
the seat belt properly for the most effective pro-
tection by the seat belt and supplemental air bag.
NISSAN recommends that pre-teens and chil-
dren be properly restrained in a rear seat.
NISSAN also recommends that appropriate child
restraints and booster seats be properly installed
in a rear seat. If this is not possible, the occupant
classification sensor and seat belt sensors are
designed to operate as described above to turn
the front passenger air bag OFF for specified
child restraints as required by the regulations.
Failing to properly secure child restraints and to
use the automatic locking mode (child restraint
mode) may allow the restraint to tip or move in an
accident or sudden stop. This can also result in
the passenger air bag inflating in a crash insteadof being OFF. See “Child restraints” earlier in this
section for proper use and installation.
If the right front passenger seat is not occupied
the passenger air bag is designed not to inflate in
a crash. However, heavy objects placed on the
seat could result in air bag inflation, because of
the object’s weight detected by the occupant
classification sensor. Other conditions could also
result in air bag inflation, such as if a child is
standing on the seat, or if two children are on the
seat, contrary to the instructions in this manual.
Always be sure that you and all vehicle occupants
are seated and restrained properly.
Using the passenger air bag status light, you can
monitor when the front passenger air bag is au-
tomatically turned OFF with the seat occupied.
The light will not illuminate when the right front
passenger seat is unoccupied.
If an adult occupant is in the seat but the passen-
ger air bag status light is illuminated (indicating
that the air bag is OFF) , it could be that the
person is a small adult, or is not sitting on the seat
properly or not using the seat belt properly.
If a child restraint must be used in the front seat,
the passenger air bag status light may or may not
be illuminated, depending on the size of the child
and the type of child restraint being used. If the air
bag status light is not illuminated (indicating that
the air bag might inflate in a crash) , it could bethat the child restraint or seat belt is not being
used properly. Make sure that the child restraint is
installed properly, the seat belt is used properly
and the occupant is positioned properly. If the air
bag status light is not illuminated, reposition the
occupant or child restraint in a rear seat.
If the passenger air bag status light will not illu-
minate even though you believe that the child
restraint, the seat belts and the occupant are
properly positioned, the system may be sensing
an unoccupied seat (in which case the air bag is
OFF) . Your NISSAN dealer can check that the
system is OFF by using a special tool. However,
until you have confirmed with your dealer that
your air bag is working properly, reposition the
occupant or child restraint in a rear seat.
The air bag system and passenger air bag status
light will take a few seconds to register a change
in the passenger seat status. For example, if a
large adult who is sitting in the front passenger
seat exits the vehicle, the passenger air bag
status light will go from OFF to ON for a few
seconds and then to OFF. This is normal system
operation and does not indicate a malfunction.
If a malfunction occurs in the front passenger air
bag system, the supplemental air bag warning
light
, located in the meter and gauges area
in the center of the instrument panel, will blink.
Have the system checked by a NISSAN dealer.
1-56Safety—Seats, seat belts and supplemental restraint system
ZREVIEW COPYÐ2007 Titan(tzw)
Owners ManualÐUSA_English(nna)
07/09/06Ðtbrooks
X
Page 80 of 368

2 Instruments and controls
Instrument panel...................................2-2
Meters and gauges................................2-4
Speedometer and odometer.....................2-4
Tachometer....................................2-5
Engine coolant temperature gauge...............2-6
Fuel gauge....................................2-6
Engine oil pressure gauge.......................2-7
Voltmeter......................................2-8
Automatic transmission fluid temperature
gauge (if so equipped)..........................2-8
Compass and outside temperature display
(if so equipped)...................................2-9
Outside temperature display.....................2-9
Compass display..............................2-10
Warning/indicator lights and audible reminders......2-12
Checking bulbs...............................2-13
Warning lights................................2-13
Indicator lights................................2-17
Audible reminders.............................2-20
Security systems (if so equipped)..................2-20
Vehicle security system.........................2-20
NISSAN vehicle immobilizer system.............2-22
Windshield wiper and washer switch...............2-23Switch operation..............................2-23
Rear window and outside mirror defroster switch
(if so equipped)..................................2-24
Headlight and turn signal switch....................2-25
Headlight control switch........................2-25
Daytime running light system (Canada only)......2-27
Instrument brightness control...................2-28
Turn signal switch.............................2-28
Fog light switch (if so equipped)................2-28
Hazard warning flasher switch.....................2-29
Cargo lamp switch...............................2-29
Horn............................................2-30
Heated seat (if so equipped).......................2-30
Vehicle dynamic control (VDC) off switch
(if so equipped)..................................2-31
Electronic locking rear differential (E-Lock) system
switch (if so equipped)............................2-31
Rear sonar system off switch (if so equipped)........2-32
Tow mode switch.................................2-33
Power outlet.....................................2-33
Cigarette lighter..................................2-35
Storage.........................................2-35
Instrument panel storage trays..................2-35
ZREVIEW COPYÐ2007 Titan(tzw)
Owners ManualÐUSA_English(nna)
07/09/06Ðtbrooks
X
Page 92 of 368

orAnti-lock braking warning lightLow tire pressure warning lightFront passenger air bag status light
Automatic transmission check warning lightLow windshield washer fluid warning lightHigh beam indicator light (Blue)
Automatic transmission park warning light
(model)Seat belt warning light and chimeMalfunction indicator light (MIL)
orBrake warning lightSupplemental air bag warning lightSecurity indicator light (if so equipped)
Charge warning lightAutomatic transmission position indicator lightSlip indicator light for models with ABLS (if so
equipped)
Door open warning lightCruise main switch indicator lightSlip indicator light for models with VDC (if so
equipped)
Engine oil pressure low/engine coolant tem-
perature high warning lightCruise set switch indicator lightTransfer 4LO position indicator light
(model)
4WD warning light (model)Electronic locking rear differential (E-Lock)
system on indicator light (if so equipped)Turn signal/hazard indicator lights
Low fuel warning light4WD shift indicator light (model)Vehicle dynamic control off indicator light (if so
equipped)
WARNING/INDICATOR LIGHTS AND
AUDIBLE REMINDERS
2-12Instruments and controls
ZREVIEW COPYÐ2007 Titan(tzw)
Owners ManualÐUSA_English(nna)
07/09/06Ðtbrooks
X
Page 93 of 368

CHECKING BULBS
With all doors closed, apply the parking brake
and turn the ignition key to the ON position
without starting the engine. The following lights
will come on:
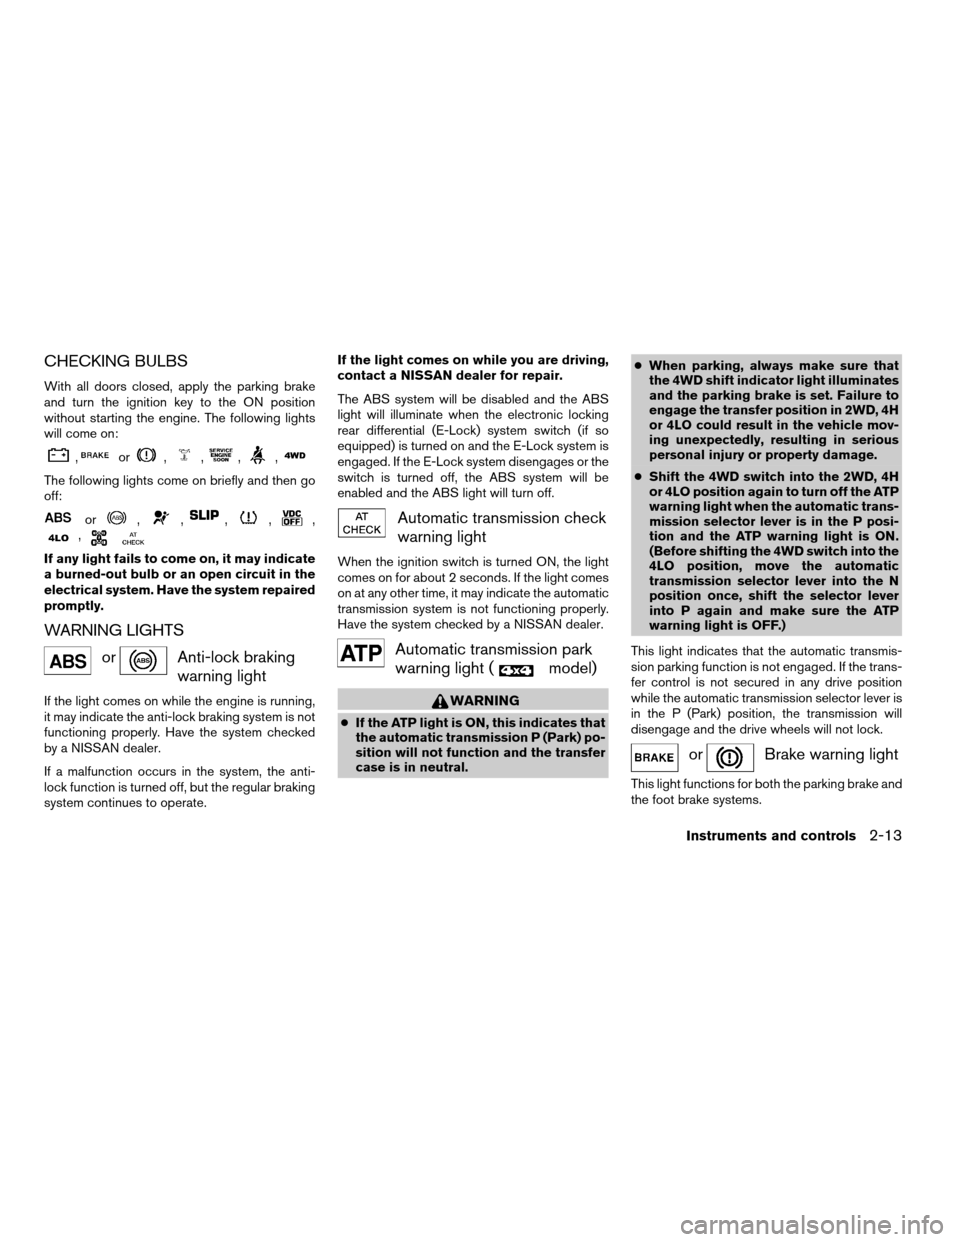
,or,,,,
The following lights come on briefly and then go
off:
or,,,,,,
If any light fails to come on, it may indicate
a burned-out bulb or an open circuit in the
electrical system. Have the system repaired
promptly.
WARNING LIGHTS
orAnti-lock braking
warning light
If the light comes on while the engine is running,
it may indicate the anti-lock braking system is not
functioning properly. Have the system checked
by a NISSAN dealer.
If a malfunction occurs in the system, the anti-
lock function is turned off, but the regular braking
system continues to operate.If the light comes on while you are driving,
contact a NISSAN dealer for repair.
The ABS system will be disabled and the ABS
light will illuminate when the electronic locking
rear differential (E-Lock) system switch (if so
equipped) is turned on and the E-Lock system is
engaged. If the E-Lock system disengages or the
switch is turned off, the ABS system will be
enabled and the ABS light will turn off.
Automatic transmission check
warning light
When the ignition switch is turned ON, the light
comes on for about 2 seconds. If the light comes
on at any other time, it may indicate the automatic
transmission system is not functioning properly.
Have the system checked by a NISSAN dealer.
Automatic transmission park
warning light (
model)
WARNING
cIf the ATP light is ON, this indicates that
the automatic transmission P (Park) po-
sition will not function and the transfer
case is in neutral.cWhen parking, always make sure that
the 4WD shift indicator light illuminates
and the parking brake is set. Failure to
engage the transfer position in 2WD, 4H
or 4LO could result in the vehicle mov-
ing unexpectedly, resulting in serious
personal injury or property damage.
cShift the 4WD switch into the 2WD, 4H
or 4LO position again to turn off the ATP
warning light when the automatic trans-
mission selector lever is in the P posi-
tion and the ATP warning light is ON.
(Before shifting the 4WD switch into the
4LO position, move the automatic
transmission selector lever into the N
position once, shift the selector lever
into P again and make sure the ATP
warning light is OFF.)
This light indicates that the automatic transmis-
sion parking function is not engaged. If the trans-
fer control is not secured in any drive position
while the automatic transmission selector lever is
in the P (Park) position, the transmission will
disengage and the drive wheels will not lock.
orBrake warning light
This light functions for both the parking brake and
the foot brake systems.
Instruments and controls2-13
ZREVIEW COPYÐ2007 Titan(tzw)
Owners ManualÐUSA_English(nna)
07/09/06Ðtbrooks
X
Page 94 of 368

Parking brake indicator
When the ignition key is in the ON position, the
light comes on when the parking brake is applied.
Low brake fluid warning light
When the ignition key is in the ON position, the
light warns of a low brake fluid level. If the light
comes on while the engine is running with the
parking brake not applied, stop the vehicle and
perform the following:
1. Check the brake fluid level. Add brake fluid
as necessary. See “Brake fluid” in the “Main-
tenance and do-it-yourself” section of this
manual.
2. If the brake fluid level is correct, have the
warning system checked by a NISSAN
dealer.
WARNING
cYour brake system may not be working
properly if the warning light is on. Driv-
ing could be dangerous. If you judge it
to be safe, drive carefully to the nearest
service station for repairs. Otherwise,
have your vehicle towed because driv-
ing it could be dangerous.cPressing the brake pedal with the en-
gine stopped and/or a low brake fluid
level may increase your stopping dis-
tance and braking will require greater
pedal effort as well as pedal travel.
cIf the brake fluid level is below the
MINIMUM or MIN mark on the brake
fluid reservoir, do not drive until the
brake system has been checked at a
NISSAN dealer.
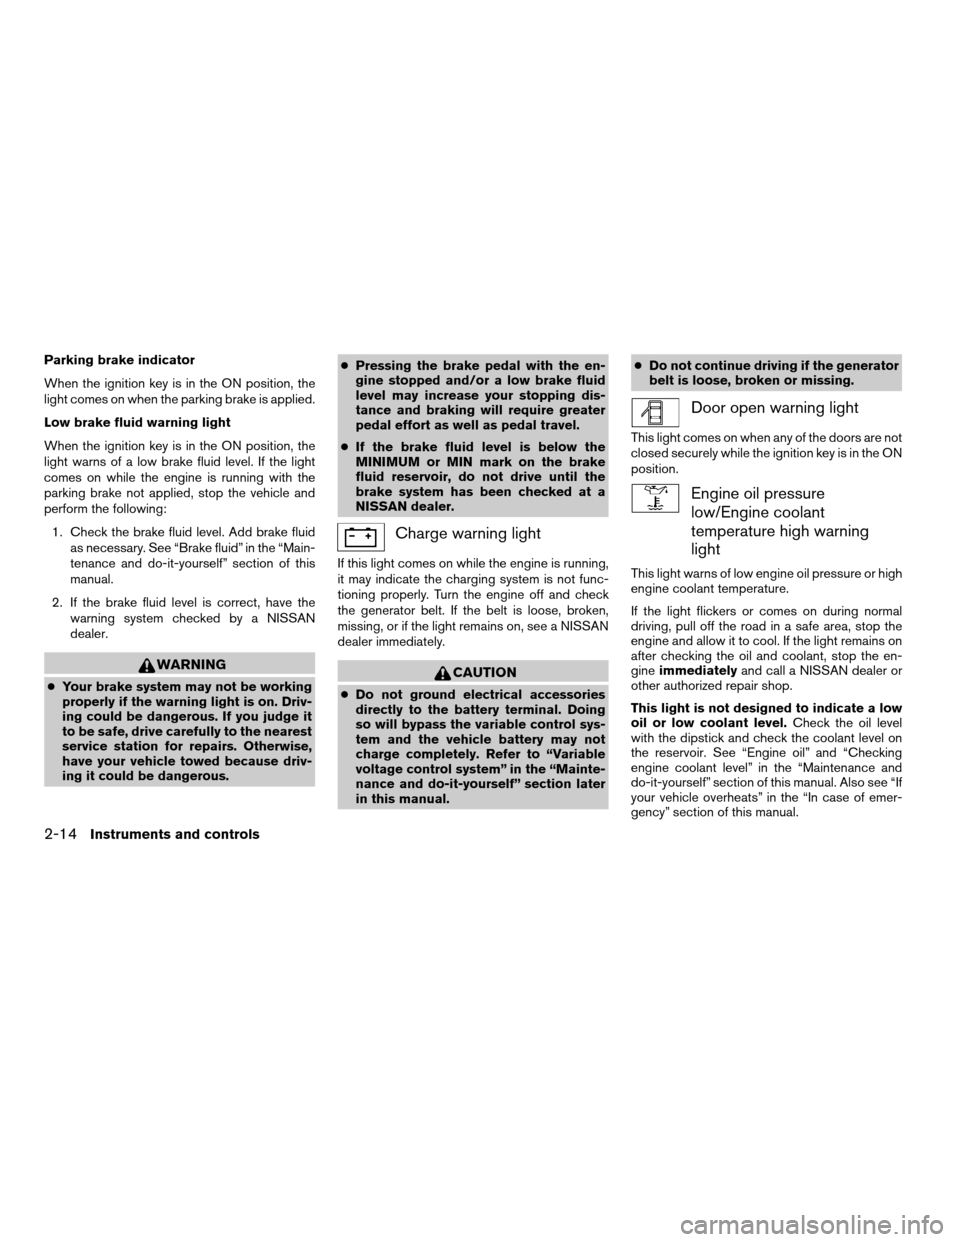
Charge warning light
If this light comes on while the engine is running,
it may indicate the charging system is not func-
tioning properly. Turn the engine off and check
the generator belt. If the belt is loose, broken,
missing, or if the light remains on, see a NISSAN
dealer immediately.
CAUTION
cDo not ground electrical accessories
directly to the battery terminal. Doing
so will bypass the variable control sys-
tem and the vehicle battery may not
charge completely. Refer to “Variable
voltage control system” in the “Mainte-
nance and do-it-yourself” section later
in this manual.cDo not continue driving if the generator
belt is loose, broken or missing.
Door open warning light
This light comes on when any of the doors are not
closed securely while the ignition key is in the ON
position.
Engine oil pressure
low/Engine coolant
temperature high warning
light
This light warns of low engine oil pressure or high
engine coolant temperature.
If the light flickers or comes on during normal
driving, pull off the road in a safe area, stop the
engine and allow it to cool. If the light remains on
after checking the oil and coolant, stop the en-
gineimmediatelyand call a NISSAN dealer or
other authorized repair shop.
This light is not designed to indicate a low
oil or low coolant level.Check the oil level
with the dipstick and check the coolant level on
the reservoir. See “Engine oil” and “Checking
engine coolant level” in the “Maintenance and
do-it-yourself” section of this manual. Also see “If
your vehicle overheats” in the “In case of emer-
gency” section of this manual.
2-14Instruments and controls
ZREVIEW COPYÐ2007 Titan(tzw)
Owners ManualÐUSA_English(nna)
07/09/06Ðtbrooks
X