2007 NISSAN TITAN window
[x] Cancel search: windowPage 81 of 368

Console box (if so equipped)...................2-36
Center armrest storage (if so equipped)..........2-37
Glove box....................................2-38
Sunglasses holder (if so equipped)..............2-38
Map pockets..................................2-39
Seatback pocket (if so equipped)...............2-39
Overhead console (if so equipped)..............2-39
Cup holders..................................2-40
Grocery hooks (if so equipped).................2-43
Lockable bedside storage compartment
(if so equipped)...............................2-43
Windows........................................2-44
Power windows (if so equipped)................2-44
Manual windows..............................2-46
Rear sliding window (if so equipped)............2-46
Rear power window switch (if so equipped)......2-47Sunroof (if so equipped)...........................2-47
Automatic sunroof.............................2-47
Interior light......................................2-49
Console light (if so equipped)...................2-50
Personal lights (if so equipped)....................2-50
Map lights (if so equipped)........................2-50
HomeLinkTuniversal transceiver (if so equipped).....2-51
Programming HomeLinkT.......................2-51
Programming HomeLinkTfor Canadian
customers....................................2-53
Operating the HomeLinkTuniversal
transceiver....................................2-53
Programming trouble-diagnosis.................2-54
Clearing the programmed information............2-54
Reprogramming a single HomeLinkTbutton......2-54
If your vehicle is stolen.........................2-54
ZREVIEW COPYÐ2007 Titan(tzw)
Owners ManualÐUSA_English(nna)
07/09/06Ðtbrooks
X
Page 83 of 368

18. Power outlet/Cigarette lighter
(accessory) (P. 2-33/P. 2-35)
19. Vehicle dynamic control (VDC) off
switch (if so equipped) (P. 2-31)
20. Tow mode switch (P. 2-33)
21. Electronic locking rear differential
(E-Lock) system switch (if so
equipped) (P.2-31)
22. Shift selector lever (console)
(if so equipped) (P. 5-10)
23. Power outlet (P. 2-33)
24. Front passenger air bag status light
(P. 1-55)
25. Hazard warning flasher switch (P. 2-29)
26. 4WD shift switch (if so equipped)
(P. 5-24)
27. Shift selector lever (column)
(if so equipped) (P. 5-10)
28. Tilt steering wheel control (P. 3-12)
29. Cargo lamp switch (P. 2-29)
30. Rear sonar system off switch
(if so equipped) (P. 2-32)
31. Pedal position adjustment switch
(if so equipped) (P. 3-12)
32. Rear power window switch
(if so equipped) (P. 2-47)*: Refer to the separate Navigation System Own-
er’s Manual (if so equipped) .
See the page number indicated in paren-
theses for operating details.
Instruments and controls2-3
ZREVIEW COPYÐ2007 Titan(tzw)
Owners ManualÐUSA_English(nna)
07/09/06Ðtbrooks
X
Page 96 of 368
TPMS and turn off the low tire pressure warning
light. Use a tire pressure gauge to check the tire
pressure.
For additional information, see “Tire pressure
monitoring system (TPMS)” in the “Starting and
driving” section and in the “In case of emergency”
section.
TPMS malfunction:
If the TPMS is not functioning properly, the low
tire pressure warning light will flash for approxi-
mately 1 minute when the ignition switch is
turned ON. The light will remain on after the 1
minute. Have the system checked by a NISSAN
dealer.
For additional information, see “Tire pressure
monitoring system (TPMS)” in the “Starting and
driving” section.
WARNING
cIf the light does not illuminate with the
ignition switch turned ON, have the ve-
hicle checked by a NISSAN dealer as
soon as possible.cIf the light illuminates while driving,
avoid sudden steering maneuvers or
abrupt braking, reduce vehicle speed,
pull off the road to a safe location and
stop the vehicle as soon as possible.
Serious vehicle damage could occur
and may lead to an accident and could
result in serious personal injury. Check
the tire pressure for all four tires. Adjust
the tire pressure to the recommended
COLD tire pressure shown on the Tire
and Loading Information label to turn
the low tire pressure warning light OFF.
If the light still illuminates while driving
after adjusting the tire pressure, a tire
may be flat. If you have a flat tire, re-
place it with a spare tire as soon as
possible.
cWhen a spare tire is mounted or a wheel
is replaced, tire pressure will not be
indicated, the TPMS will not function
and the low tire pressure warning light
will flash. Contact your NISSAN dealer
as soon as possible for tire replacement
and/or system resetting.
cReplacing tires with those not originally
specified by NISSAN could affect the
proper operation of the TPMS.
CAUTION
cThe TPMS is not a substitute for the
regular tire pressure check. Be sure to
check the tire pressure regularly.
cIf the vehicle is being driven at speeds
of less than 16 MPH (25 km/h) , the
TPMS may not operate correctly.
cBe sure to install the specified size of
tires to the 4 wheels correctly.
Low windshield washer fluid
warning light
This light comes on when the windshield washer
fluid is at a low level. Add windshield washer fluid
as necessary. See “Window washer fluid” in the
“Maintenance and do-it-yourself” section of this
manual.
Seat belt warning light and
chime
The light and chime remind you to fasten your
seat belts. The light illuminates whenever the
ignition key is turned to the ON or START position
and remains illuminated until the driver’s seat belt
is fastened. At the same time, the chime sounds
for about 6 seconds unless the driver’s seat belt
is securely fastened.
2-16Instruments and controls
ZREVIEW COPYÐ2007 Titan(tzw)
Owners ManualÐUSA_English(nna)
07/09/06Ðtbrooks
X
Page 101 of 368

exterior vehicle components in all situations. Al-
ways secure your vehicle even if parking for a
brief period. Never leave your keys in the ignition,
and always lock the vehicle when unattended. Be
aware of your surroundings, and park in secure,
well-lit areas whenever possible.
Many devices offering additional protection, such
as component locks, identification markers, and
tracking systems, are available at auto supply
stores and specialty shops. Your NISSAN dealer
may also offer such equipment. Check with your
insurance company to see if you may be eligible
for discounts for various theft protection features.
How to arm the vehicle security
system
1. Close all windows.(The system can be
armed even if the windows are open.)
2. Remove the key from the ignition switch.
3. Close all doors. Lock all doors. The doors
can be locked with the key, power door lock
switch (if the door is opened, locked and
then closed) , or with the keyfob.
Keyfob operation:
cPush the
button on the keyfob.
All doors lock. The hazard lights flash
twice and the horn beeps once to indicate
all doors are locked.cWhen the
button is pushed with
all doors locked, the hazard lights flash
twice and the horn beeps once as a re-
minder that the doors are already locked.
The horn may or may not beep. Refer to
“Silencing the horn beep feature” (vehicles
without navigation system) in the “Pre-
driving checks and adjustments” section or
“Vehicle electronic systems” (vehicles with
navigation system) in the “Display screen,
heater, air conditioner and audio systems”
section.
4. Confirm that the
indicator light comes
on. Thelight stays on for about 30
seconds. The vehicle security system is now
pre-armed. After about 30 seconds the ve-
hicle security system automatically shifts
into the armed phase. The
light begins
to flash once every 3 seconds. If, during the
30-second pre-arm time period, the door is
unlocked by the key or the keyfob, or the
ignition key is turned to ACC or ON, the
system will not arm.
cIf the key is turned slowly when locking
the door, the system may not arm. Fur-
thermore, if the key is turned beyond
the vertical position toward the unlock
position to remove the key, the system
may be disarmed when the key is re-moved. If the indicator light fails to
glow for 30 seconds, unlock the door
once and lock it again.
cEven when the driver and/or passen-
gers are in the vehicle, the system will
arm with all doors closed and locked
with the ignition key in the OFF posi-
tion.
cThe lockable beside storage compart-
ment (if so equipped) is not protected
by the vehicle security system.
Vehicle security system activation
The vehicle security system will give the following
alarm:
cThe headlights blink and the horn sounds
intermittently.
cThe alarm automatically turns off after ap-
proximately 50 seconds. However, the alarm
reactivates if the vehicle is tampered with
again. The alarm can be shut off by unlocking
the driver’s door with the key, or by pressing
the
button on the keyfob.
The alarm is activated by:
copening a door without using the key or
keyfob (even if the door is unlocked by using
the inside lock knob or the power door lock
switch) .
Instruments and controls2-21
ZREVIEW COPYÐ2007 Titan(tzw)
Owners ManualÐUSA_English(nna)
07/09/06Ðtbrooks
X
Page 103 of 368
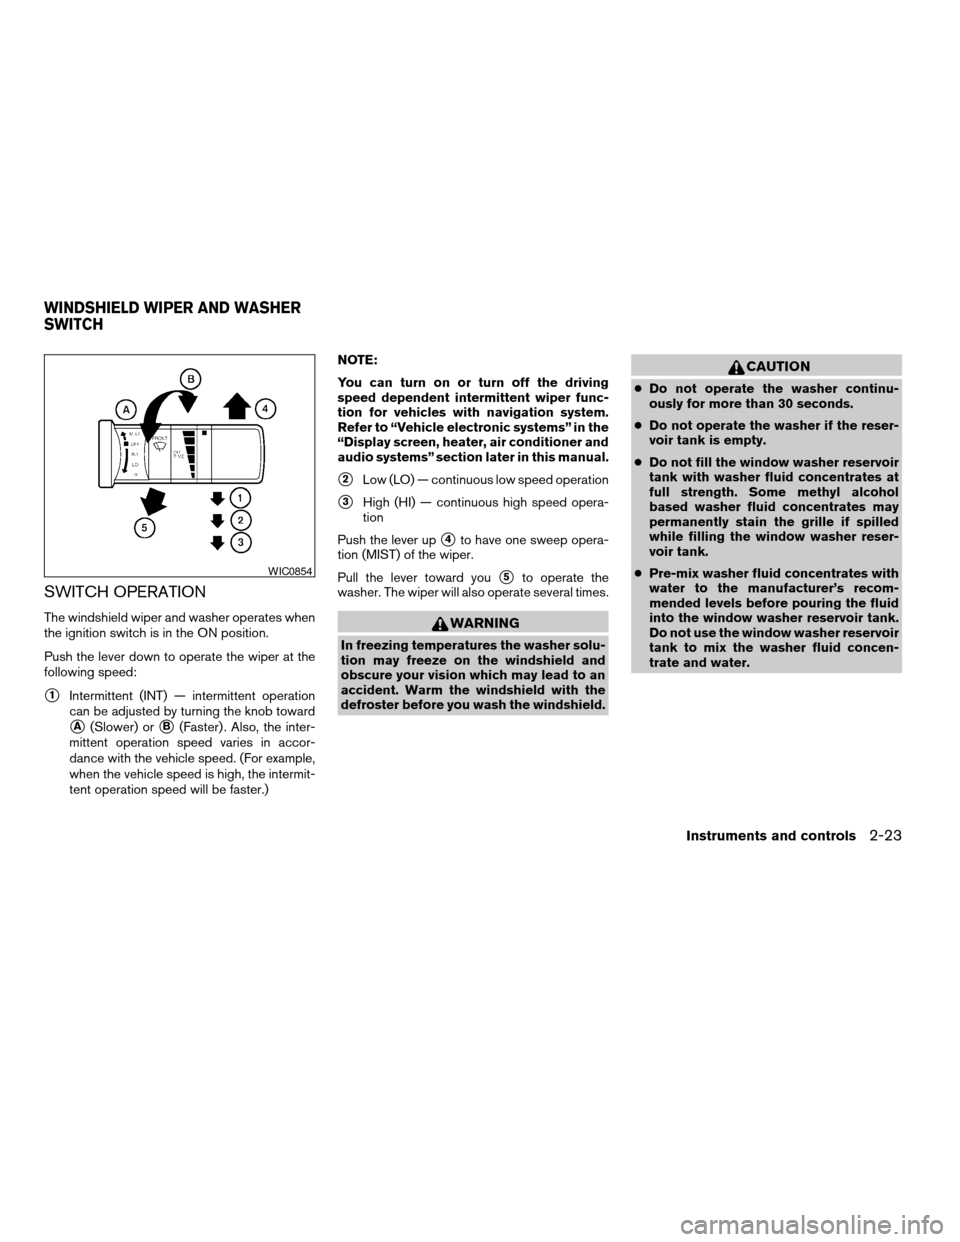
SWITCH OPERATION
The windshield wiper and washer operates when
the ignition switch is in the ON position.
Push the lever down to operate the wiper at the
following speed:
s1Intermittent (INT) — intermittent operation
can be adjusted by turning the knob toward
sA(Slower) orsB(Faster) . Also, the inter-
mittent operation speed varies in accor-
dance with the vehicle speed. (For example,
when the vehicle speed is high, the intermit-
tent operation speed will be faster.)NOTE:
You can turn on or turn off the driving
speed dependent intermittent wiper func-
tion for vehicles with navigation system.
Refer to “Vehicle electronic systems” in the
“Display screen, heater, air conditioner and
audio systems” section later in this manual.
s2Low (LO) — continuous low speed operation
s3High (HI) — continuous high speed opera-
tion
Push the lever up
s4to have one sweep opera-
tion (MIST) of the wiper.
Pull the lever toward you
s5to operate the
washer. The wiper will also operate several times.
WARNING
In freezing temperatures the washer solu-
tion may freeze on the windshield and
obscure your vision which may lead to an
accident. Warm the windshield with the
defroster before you wash the windshield.
CAUTION
cDo not operate the washer continu-
ously for more than 30 seconds.
cDo not operate the washer if the reser-
voir tank is empty.
cDo not fill the window washer reservoir
tank with washer fluid concentrates at
full strength. Some methyl alcohol
based washer fluid concentrates may
permanently stain the grille if spilled
while filling the window washer reser-
voir tank.
cPre-mix washer fluid concentrates with
water to the manufacturer’s recom-
mended levels before pouring the fluid
into the window washer reservoir tank.
Do not use the window washer reservoir
tank to mix the washer fluid concen-
trate and water.
WIC0854
WINDSHIELD WIPER AND WASHER
SWITCH
Instruments and controls2-23
ZREVIEW COPYÐ2007 Titan(tzw)
Owners ManualÐUSA_English(nna)
07/09/06Ðtbrooks
X
Page 104 of 368
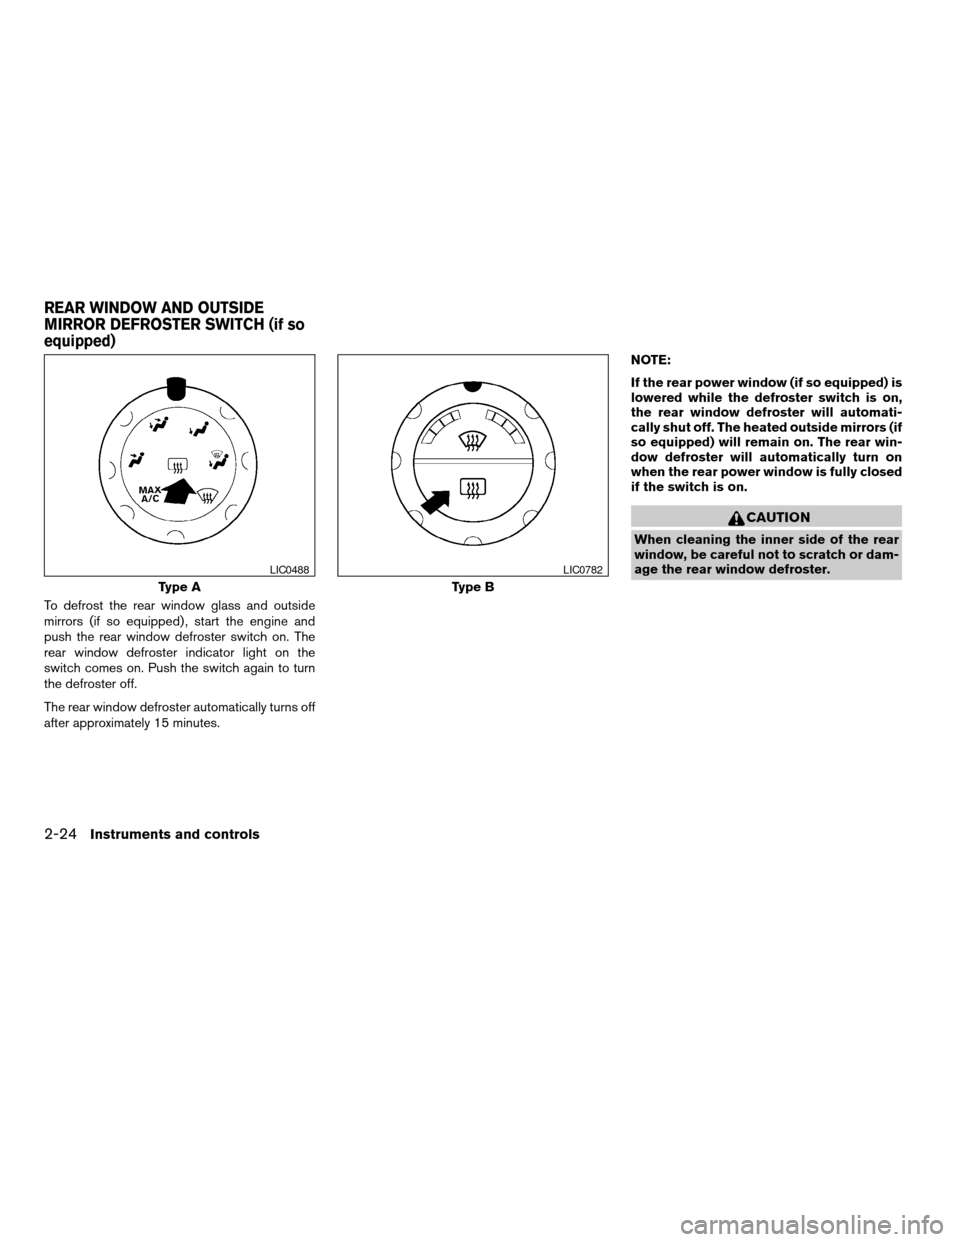
To defrost the rear window glass and outside
mirrors (if so equipped) , start the engine and
push the rear window defroster switch on. The
rear window defroster indicator light on the
switch comes on. Push the switch again to turn
the defroster off.
The rear window defroster automatically turns off
after approximately 15 minutes.NOTE:
If the rear power window (if so equipped) is
lowered while the defroster switch is on,
the rear window defroster will automati-
cally shut off. The heated outside mirrors (if
so equipped) will remain on. The rear win-
dow defroster will automatically turn on
when the rear power window is fully closed
if the switch is on.
CAUTION
When cleaning the inner side of the rear
window, be careful not to scratch or dam-
age the rear window defroster.
Type A
LIC0488
Type B
LIC0782
REAR WINDOW AND OUTSIDE
MIRROR DEFROSTER SWITCH (if so
equipped)
2-24Instruments and controls
ZREVIEW COPYÐ2007 Titan(tzw)
Owners ManualÐUSA_English(nna)
07/09/06Ðtbrooks
X
Page 114 of 368
cUse power outlets with the engine run-
ning to avoid discharging the vehicle
battery.
cAvoid using power outlets when the air
conditioner, headlights or rear window
defroster is on.
cBefore inserting or disconnecting a
plug, be sure the electrical accessory
being used is turned OFF.cPush the plug in as far as it will go. If
good contact is not made, the plug may
overheat or the internal temperature
fuse may open.
cWhen not in use, be sure to close the
cap. Do not allow water to contact the
outlet.
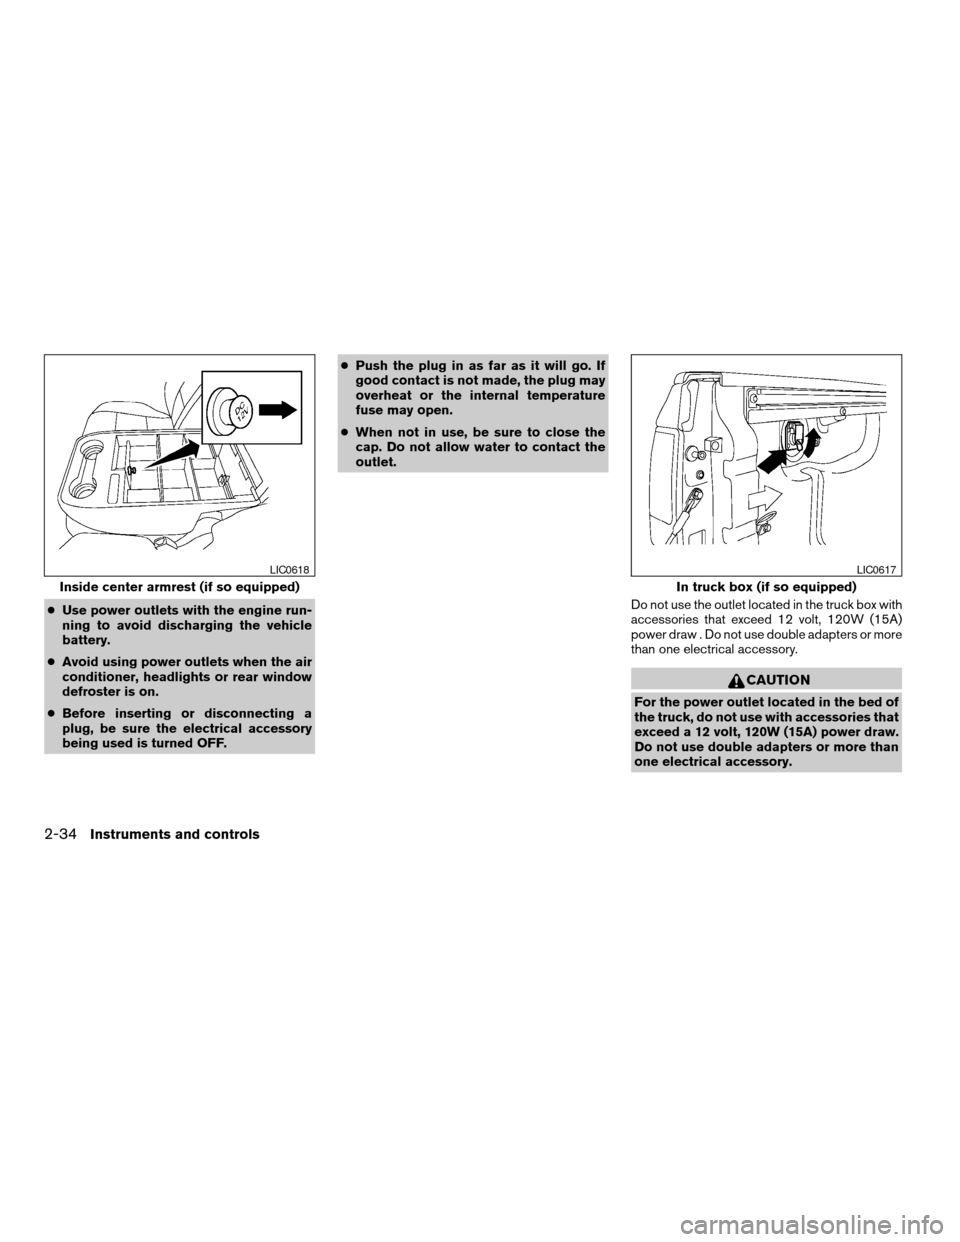
Do not use the outlet located in the truck box with
accessories that exceed 12 volt, 120W (15A)
power draw . Do not use double adapters or more
than one electrical accessory.
CAUTION
For the power outlet located in the bed of
the truck, do not use with accessories that
exceed a 12 volt, 120W (15A) power draw.
Do not use double adapters or more than
one electrical accessory.
Inside center armrest (if so equipped)
LIC0618
In truck box (if so equipped)
LIC0617
2-34Instruments and controls
ZREVIEW COPYÐ2007 Titan(tzw)
Owners ManualÐUSA_English(nna)
07/09/06Ðtbrooks
X
Page 115 of 368
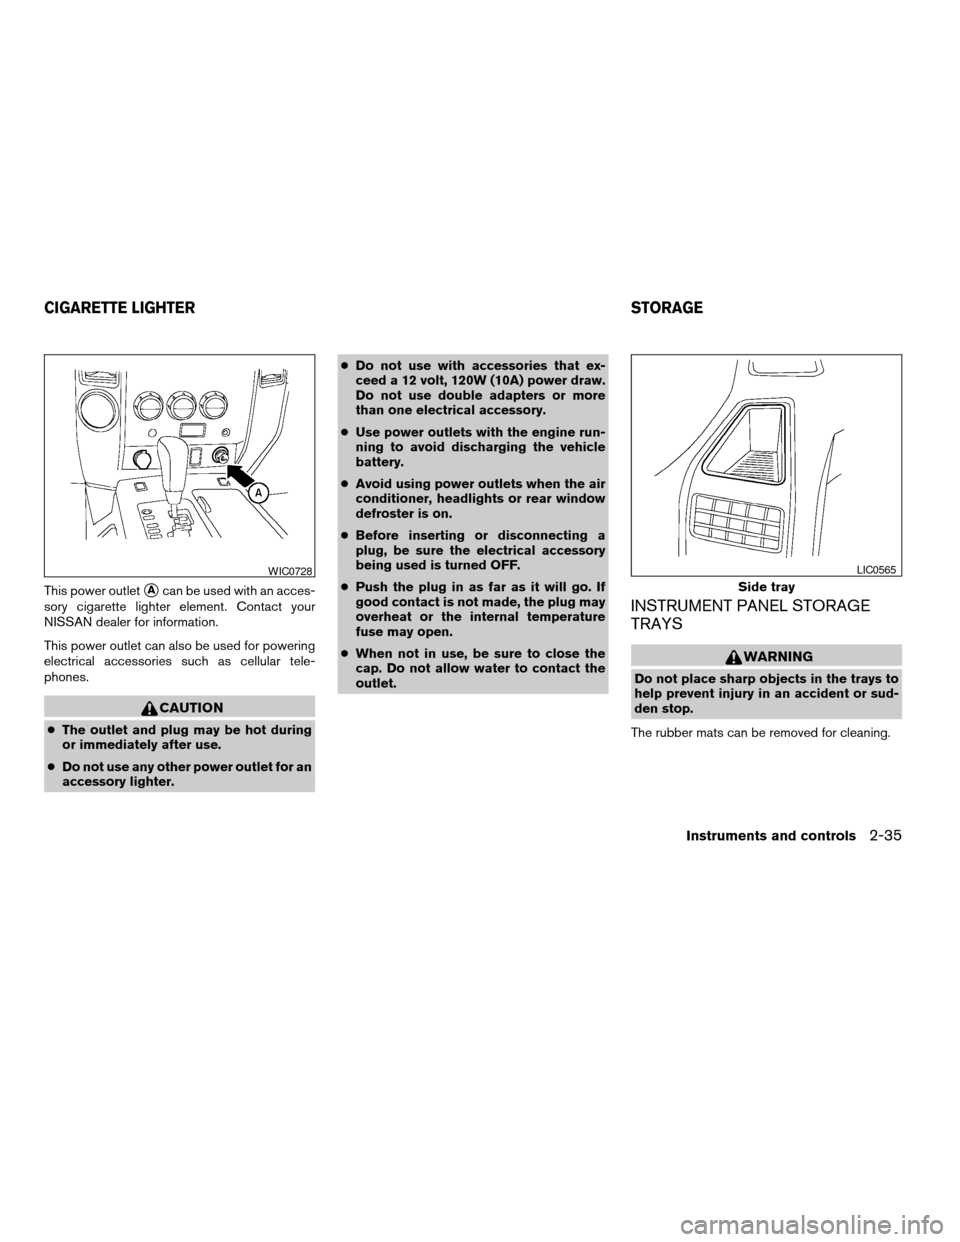
This power outletsAcan be used with an acces-
sory cigarette lighter element. Contact your
NISSAN dealer for information.
This power outlet can also be used for powering
electrical accessories such as cellular tele-
phones.
CAUTION
cThe outlet and plug may be hot during
or immediately after use.
cDo not use any other power outlet for an
accessory lighter.cDo not use with accessories that ex-
ceed a 12 volt, 120W (10A) power draw.
Do not use double adapters or more
than one electrical accessory.
cUse power outlets with the engine run-
ning to avoid discharging the vehicle
battery.
cAvoid using power outlets when the air
conditioner, headlights or rear window
defroster is on.
cBefore inserting or disconnecting a
plug, be sure the electrical accessory
being used is turned OFF.
cPush the plug in as far as it will go. If
good contact is not made, the plug may
overheat or the internal temperature
fuse may open.
cWhen not in use, be sure to close the
cap. Do not allow water to contact the
outlet.
INSTRUMENT PANEL STORAGE
TRAYS
WARNING
Do not place sharp objects in the trays to
help prevent injury in an accident or sud-
den stop.
The rubber mats can be removed for cleaning.
WIC0728
Side tray
LIC0565
CIGARETTE LIGHTER STORAGE
Instruments and controls2-35
ZREVIEW COPYÐ2007 Titan(tzw)
Owners ManualÐUSA_English(nna)
07/09/06Ðtbrooks
X