2007 NISSAN SENTRA roof
[x] Cancel search: roofPage 9 of 320

1. Engine hood (P. 3-22)
2. Windshield wiper and washer switch
(P. 2-18)
3. Windshield (P. 8-19)
4. Sunroof (if so equipped) (P. 2-32)
5. Power windows (P. 2-30)
6. Door locks, keyfob (if so equipped) ,
Intelligent Key system (if so equipped) ,
keys (P. 3-4, 3-6, 3-10, 3-2)
7. Mirrors (P. 3-27)
8. Tire pressure (P. 8-31)
9. Flat tire (P. 6-2)
10. Tire chains (P. 8-38)
11. Headlight and turn signal switch
(P. 2-19)
12. Replacing bulbs (P. 8-27)
13. Fog light switch (P. 2-19)
14. Tie down hook (P. 6-13)
See the page number indicated in paren-
theses for operating details.
LII0089
EXTERIOR FRONT
Illustrated table of contents0-3
ZREVIEW COPYÐ2007 Sentra(sen)
Owners ManualÐUSA_English(nna)
11/28/06Ðarosenma
X
Page 11 of 320

1. Rear seat (P. 1-3)
2. Sunroof (P. 2-32)
3. Interior lights, illuminated entry, sunroof
switch (if so equipped)
(P. 2-34, P. 2-19, P. 2-32)
4. Sun visors (P. 3-26)
5. Inside mirror (P. 3-27)
6. Glove box (P. 2-27)
7. Cupholders (P. 2-26)
8. Parking brake, parking on hills
(P. 5-18, P. 5-22)
9. Front seat (P. 1-2)
10. Front console (P. 2-27)
11. Rear armrest, cupholders
(P. 1-7, P 2-26)
See the page number indicated in paren-
theses for operating details.
LII0091
PASSENGER COMPARTMENT
Illustrated table of contents0-5
ZREVIEW COPYÐ2007 Sentra(sen)
Owners ManualÐUSA_English(nna)
11/28/06Ðarosenma
X
Page 63 of 320

WARNING
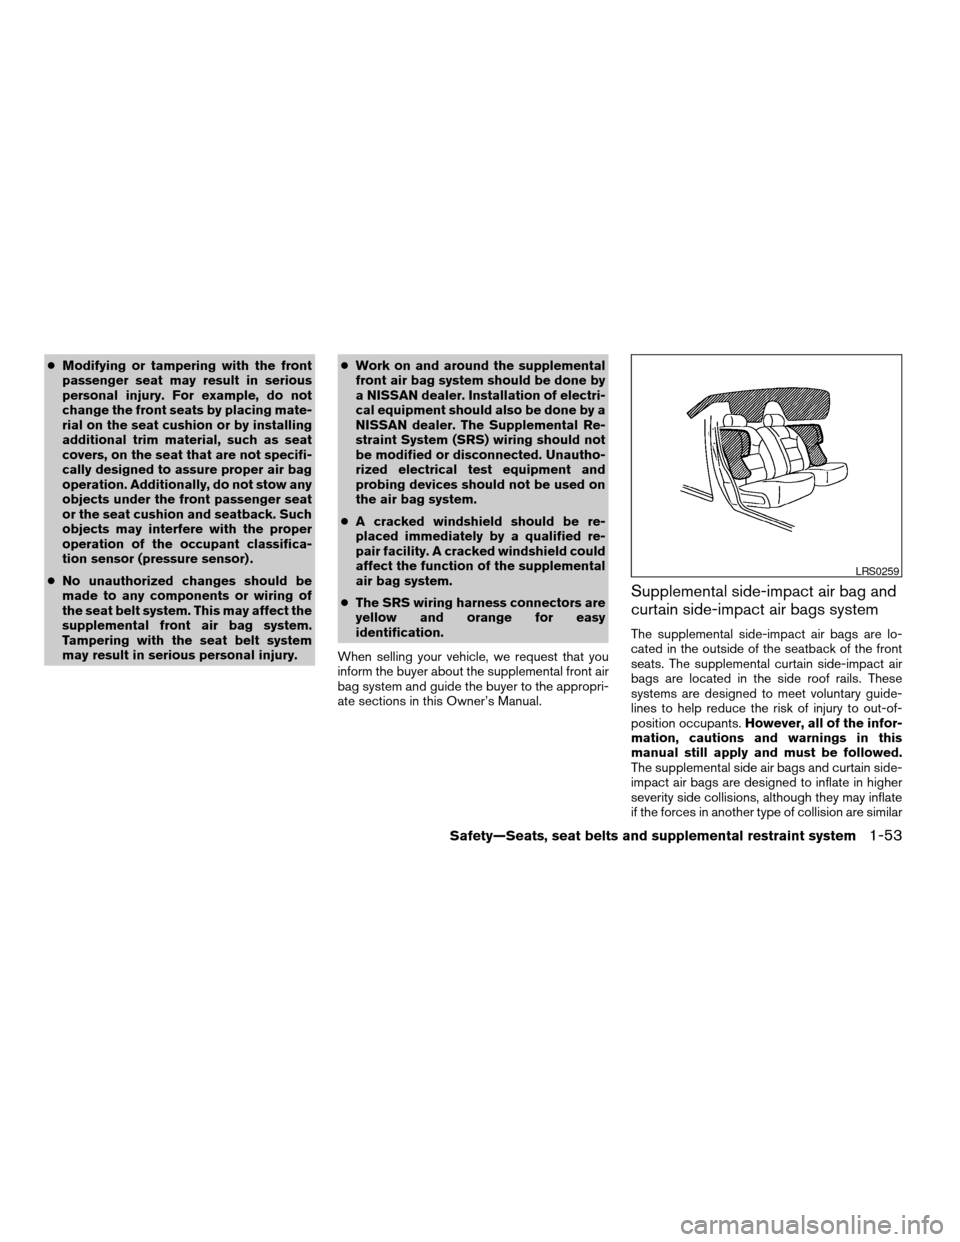
cThe seat belts, the supplemental side
air bags and curtain side-impact air
bags are most effective when you are
sitting well back and upright in the seat
with both feet on the floor. The side air
bag and curtain side-impact air bag in-
flate with great force. Do not allow any-
one to place their hand, leg or face near
the side air bag on the side of the seat-
back of the front seat or near the side
roof rails. Do not allow anyone sitting in
the front seats or rear outboard seats to
extend their hand out of the window or
lean against the door. Some examples
of dangerous riding positions are
shown in the previous illustrations.
WARNING
cWhen sitting in the rear seat, do not
hold onto the seatback of the front seat.
If the side air bag inflates, you may be
seriously injured. Be especially careful
with children, who should always be
properly restrained. Some examples of
dangerous riding positions are shown
in the illustrations.
cDo not use seat covers on the front
seatbacks. They may interfere with
supplemental side air bag inflation.
WRS0032SSS0159
Safety—Seats, seat belts and supplemental restraint system1-47
ZREVIEW COPYÐ2007 Sentra(sen)
Owners ManualÐUSA_English(nna)
11/27/06Ðarosenma
X
Page 69 of 320

cModifying or tampering with the front
passenger seat may result in serious
personal injury. For example, do not
change the front seats by placing mate-
rial on the seat cushion or by installing
additional trim material, such as seat
covers, on the seat that are not specifi-
cally designed to assure proper air bag
operation. Additionally, do not stow any
objects under the front passenger seat
or the seat cushion and seatback. Such
objects may interfere with the proper
operation of the occupant classifica-
tion sensor (pressure sensor) .
cNo unauthorized changes should be
made to any components or wiring of
the seat belt system. This may affect the
supplemental front air bag system.
Tampering with the seat belt system
may result in serious personal injury.cWork on and around the supplemental
front air bag system should be done by
a NISSAN dealer. Installation of electri-
cal equipment should also be done by a
NISSAN dealer. The Supplemental Re-
straint System (SRS) wiring should not
be modified or disconnected. Unautho-
rized electrical test equipment and
probing devices should not be used on
the air bag system.
cA cracked windshield should be re-
placed immediately by a qualified re-
pair facility. A cracked windshield could
affect the function of the supplemental
air bag system.
cThe SRS wiring harness connectors are
yellow and orange for easy
identification.
When selling your vehicle, we request that you
inform the buyer about the supplemental front air
bag system and guide the buyer to the appropri-
ate sections in this Owner’s Manual.
Supplemental side-impact air bag and
curtain side-impact air bags system
The supplemental side-impact air bags are lo-
cated in the outside of the seatback of the front
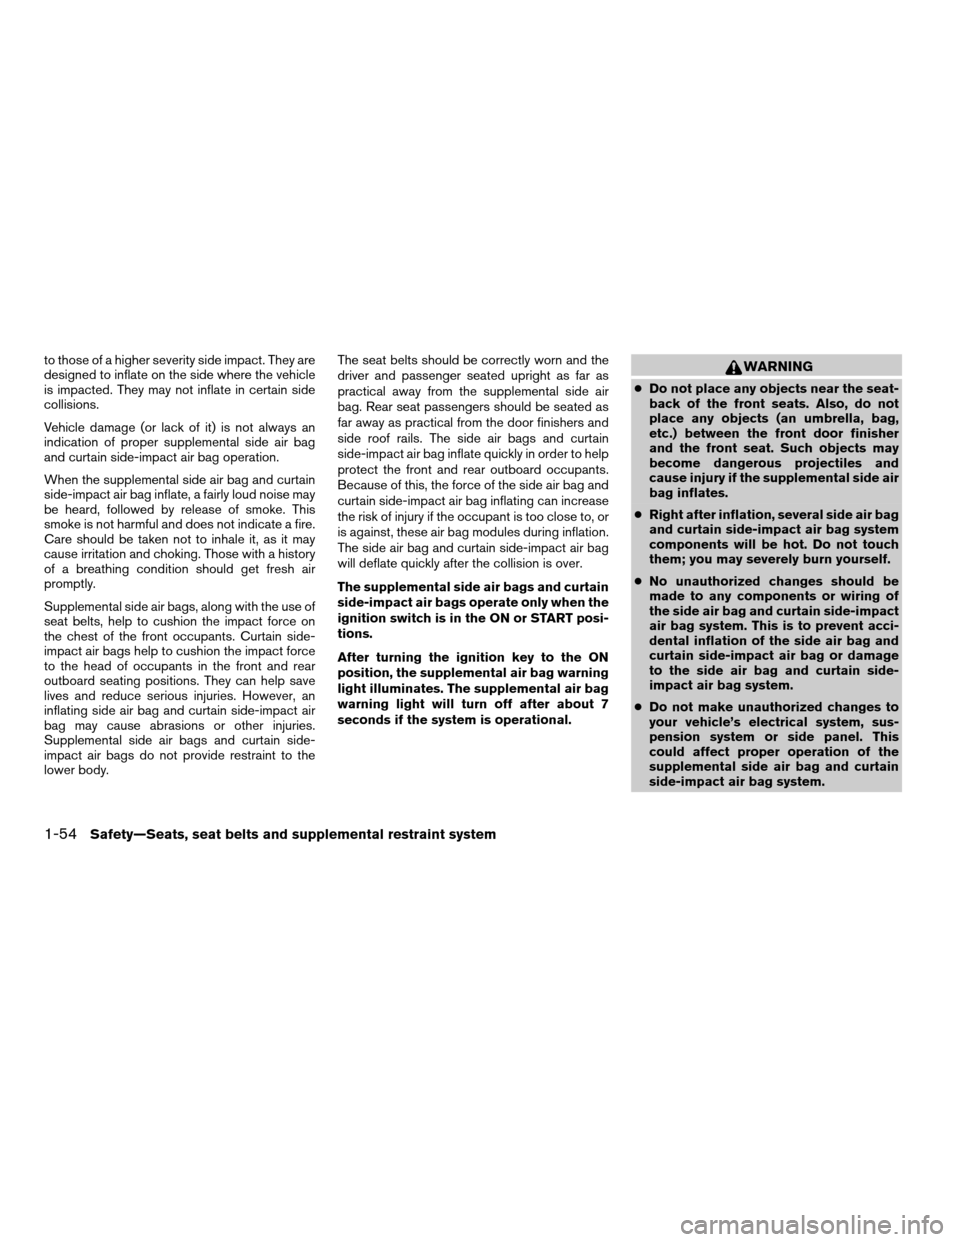
seats. The supplemental curtain side-impact air
bags are located in the side roof rails. These
systems are designed to meet voluntary guide-
lines to help reduce the risk of injury to out-of-
position occupants.However, all of the infor-
mation, cautions and warnings in this
manual still apply and must be followed.
The supplemental side air bags and curtain side-
impact air bags are designed to inflate in higher
severity side collisions, although they may inflate
if the forces in another type of collision are similar
LRS0259
Safety—Seats, seat belts and supplemental restraint system1-53
ZREVIEW COPYÐ2007 Sentra(sen)
Owners ManualÐUSA_English(nna)
11/27/06Ðarosenma
X
Page 70 of 320

to those of a higher severity side impact. They are
designed to inflate on the side where the vehicle
is impacted. They may not inflate in certain side
collisions.
Vehicle damage (or lack of it) is not always an
indication of proper supplemental side air bag
and curtain side-impact air bag operation.
When the supplemental side air bag and curtain
side-impact air bag inflate, a fairly loud noise may
be heard, followed by release of smoke. This
smoke is not harmful and does not indicate a fire.
Care should be taken not to inhale it, as it may
cause irritation and choking. Those with a history
of a breathing condition should get fresh air
promptly.
Supplemental side air bags, along with the use of
seat belts, help to cushion the impact force on
the chest of the front occupants. Curtain side-
impact air bags help to cushion the impact force
to the head of occupants in the front and rear
outboard seating positions. They can help save
lives and reduce serious injuries. However, an
inflating side air bag and curtain side-impact air
bag may cause abrasions or other injuries.
Supplemental side air bags and curtain side-
impact air bags do not provide restraint to the
lower body.The seat belts should be correctly worn and the
driver and passenger seated upright as far as
practical away from the supplemental side air
bag. Rear seat passengers should be seated as
far away as practical from the door finishers and
side roof rails. The side air bags and curtain
side-impact air bag inflate quickly in order to help
protect the front and rear outboard occupants.
Because of this, the force of the side air bag and
curtain side-impact air bag inflating can increase
the risk of injury if the occupant is too close to, or
is against, these air bag modules during inflation.
The side air bag and curtain side-impact air bag
will deflate quickly after the collision is over.
The supplemental side air bags and curtain
side-impact air bags operate only when the
ignition switch is in the ON or START posi-
tions.
After turning the ignition key to the ON
position, the supplemental air bag warning
light illuminates. The supplemental air bag
warning light will turn off after about 7
seconds if the system is operational.WARNING
cDo not place any objects near the seat-
back of the front seats. Also, do not
place any objects (an umbrella, bag,
etc.) between the front door finisher
and the front seat. Such objects may
become dangerous projectiles and
cause injury if the supplemental side air
bag inflates.
cRight after inflation, several side air bag
and curtain side-impact air bag system
components will be hot. Do not touch
them; you may severely burn yourself.
cNo unauthorized changes should be
made to any components or wiring of
the side air bag and curtain side-impact
air bag system. This is to prevent acci-
dental inflation of the side air bag and
curtain side-impact air bag or damage
to the side air bag and curtain side-
impact air bag system.
cDo not make unauthorized changes to
your vehicle’s electrical system, sus-
pension system or side panel. This
could affect proper operation of the
supplemental side air bag and curtain
side-impact air bag system.
1-54Safety—Seats, seat belts and supplemental restraint system
ZREVIEW COPYÐ2007 Sentra(sen)
Owners ManualÐUSA_English(nna)
11/27/06Ðarosenma
X
Page 75 of 320

2 Instruments and controls
Instrument panel...................................2-2
Meters and gauges................................2-3
Speedometer and odometer.....................2-3
Tachometer....................................2-4
G-Force gauge (if so equipped)..................2-5
Fuel gauge....................................2-5
Engine coolant temperature gauge...............2-6
Engine oil pressure gauge (if so equipped)........2-6
Warning/indicator lights and audible reminders.......2-8
Checking bulbs................................2-8
Warning lights.................................2-9
Indicator lights................................2-13
Audible reminders.............................2-14
Security systems (if so equipped)..................2-15
Vehicle security system (if so equipped)..........2-15
NISSAN vehicle immobilizer system.............2-16
Windshield wiper and washer switch...............2-18
Switch operation..............................2-18
Rear window and outside mirror (if so equipped)
defroster switch..................................2-19
Headlight and turn signal switch....................2-19
Headlight control switch........................2-19
Daytime running light system (Canada only)......2-20
Instrument brightness control...................2-21
Turn signal switch.............................2-21Fog light switch (if so equipped)................2-21
Hazard warning flasher switch.....................2-22
Horn............................................2-22
Power outlet.....................................2-23
Storage.........................................2-23
Map pockets..................................2-23
Storage trays.................................2-24
Instrument panel storage (if so equipped)........2-24
Seatback pockets (if so equipped)..............2-25
Sunglasses holder.............................2-25
Cup holders..................................2-26
Glove box....................................2-27
Console box..................................2-27
Compact disc holder (if so equipped)............2-27
Trunk divider (if so equipped)...................2-28
Cargo net (if so equipped)......................2-29
Windows........................................2-30
Power windows (if so equipped)................2-30
Manual windows..............................2-32
Sunroof (if so equipped)...........................2-32
Electric sunroof...............................2-32
Interior light......................................2-34
Map lights (if so equipped)........................2-35
Trunk light.......................................2-36
ZREVIEW COPYÐ2007 Sentra(sen)
Owners ManualÐUSA_English(nna)
11/28/06Ðarosenma
X
Page 106 of 320

1. Turn the ignition switch to the ON position.
2. Open the window more than halfway by
operating the power window switch.
3. Pull up and hold the window switch and hold
it to close the window, and then hold the
switch for more than 3 seconds after the
window is closed completely.
4. Release the power window switch. Operate
the window by automatic function to confirm
the initialization is complete.
5. Perform steps 2 through 4 above for other
windows.
If the power window automatic function does not
operate properly after performing the above pro-
cedure, see a NISSAN dealer for assistance.
MANUAL WINDOWS
The side windows can be opened or closed by
turning the hand crank on each door.
ELECTRIC SUNROOF
This sunroof only operates with the ignition
switch in the ON position.
NOTE:
If the battery is discharged or is discon-
nected, the sunroof may not operate cor-
rectly, and must be reset.
From any sunroof position (full open, partially
open, closed, partially vented and vented) , push
and hold the button in the forward position until
the sunroof vents in the full-up position. This
resets the sunroof motor memory and now the
sunroof will operate correctly.
WIC0263LIC1035
SUNROOF (if so equipped)
2-32Instruments and controls
ZREVIEW COPYÐ2007 Sentra(sen)
Owners ManualÐUSA_English(nna)
11/27/06Ðarosenma
X
Page 107 of 320

Sliding the sunroof
To open the sunroof, push and hold the switch
toward DOWN/OPEN. The sunroof will stop
when the switch is released or when the sunroof
is fully open.
To close the sunroof, push and hold the switch
toward UP/CLOSE. The sunroof will stop when
the switch is released or when the sunroof is fully
closed.
Tilting the sunroof
Close the sunroof by pushing and holding the
switch toward UP/CLOSE. Release the switch,
then push and hold the UP/CLOSE switch to tilt
the sunroof up. The sunroof will stop when the
switch is released or when the sunroof reaches
the maximum tilt position.
To tilt the sunroof down, push and hold the switch
toward DOWN/OPEN. The sunroof will stop
when the switch is released or when the sunroof
is fully closed.
WARNING
cIn an accident you could be thrown from
the vehicle through an open sunroof.
Always use seat belts and child
restraints.cDo not allow anyone to stand up or
extend any portion of their body out of
the sunroof opening while the vehicle is
in motion or while the sunroof is
closing.
CAUTION
cRemove water drops, snow, ice or sand
from the sunroof before opening.
cDo not place heavy objects on the sun-
roof or surrounding area.
Restarting the sunroof switch
The sunroof switch may not operate properly and
need to be restarted if any of the following con-
ditions have occurred:
cthe battery terminal has been disconnected,
cthe sunroof has been manually moved,
cthe sunroof motor has been removed and
reinstalled after the sunroof has been repo-
sitioned or adjusted,
cthe sunroof glass panel has been adjusted
or changed, or
cthe electrical supply interrupted and/or
some malfunction has been detected.Use the following reset procedure to return sun-
roof operation to normal.
1. Press
, until it stops and then release
the switch.
2. Push and hold
. The sunroof panel will
begin to move in about 10 seconds.
3. Continue to hold
while the panel
moves in a jogging motion to the full tilt
position. When the panel reaches the full tilt
position it will back up a little and stop.
4. Release
.
5. Within 5 seconds of completing step 4,
press and continuously hold
. After a
delay of 5 seconds, the panel will move from
the tilt position to the open position and back
to the close position.
6. Release
. Do not disconnect the
power for at least 2 seconds. The sunroof is
now restarted.
Instruments and controls2-33
ZREVIEW COPYÐ2007 Sentra(sen)
Owners ManualÐUSA_English(nna)
11/27/06Ðarosenma
X