2007 NISSAN QUEST steering
[x] Cancel search: steeringPage 87 of 384

17. Shift selector lever (P. 5-10)
18. Ignition switch (P. 5-8)
19. Tilt steering wheel control (P. 3-21)
20. Rear sonar system off switch
(if so equipped) (P. 2-26)
21. Vehicle dynamic control (VDC) off
switch (if so equipped) or Traction con-
trol system (TCS) off switch
(if so equipped) (P. 2-26, P. 2-26)
22. Lights on demand switch (P. 2-43)
*: Refer to the separate Navigation System Own-
er’s Manual (if so equipped) .
See the page number indicated in paren-
theses for operating details.
1. Tachometer
2. Warning/indicator lights
3. Speedometer
4. Engine coolant temperature gauge
5. Fuel gauge
6. Odometer/Twin trip odometer1. Speedometer
2. Odometer/twin trip display
3. Change button
LIC0929
METERS AND GAUGES
Instruments and controls2-3
ZREVIEW COPYÐ2007 Quest(van)
Owners ManualÐUSA_English(nna)
02/27/06Ðdebbie
X
Page 94 of 384

If you select the tire pressure information in the
display, the LOW PRESSURE warning message
will be displayed. The tire pressure for each tire
will also be displayed.
Your vehicle can be driven for a limited time on a
flat tire. See “Michelin PAX Tires” in the “Mainte-
nance and do-it-yourself” section.
For additional information, see “Tire pressure
monitoring system (TPMS)” in the “Starting and
driving” section and in the “In case of emergency”
section.
TPMS malfunction (all models):
If the TPMS is not functioning properly, the low
tire pressure warning light will flash for approxi-
mately 1 minute when the ignition switch is
turned ON. The light will remain on after the 1
minute. Have the system checked by a NISSAN
dealer.
For additional information, see “Tire pressure
monitoring system (TPMS)” in the “Starting and
driving” section and in the “In case of emergency”
section.WARNING
cIf the light does not illuminate with the
ignition switch turned ON, have the ve-
hicle checked by a NISSAN dealer as
soon as possible.
cIf the light illuminates while driving,
avoid sudden steering maneuvers or
abrupt braking, reduce vehicle speed,
pull off the road to a safe location and
stop the vehicle as soon as possible.
Serious vehicle damage could occur
and may lead to an accident and could
result in serious personal injury. Check
the tire pressure for all four tires. Adjust
the tire pressure to the recommended
COLD tire pressure shown on the Tire
and Loading Information label to turn
the low tire pressure warning light OFF.
If the light still illuminates while driving
after adjusting the tire pressure, a tire
may be flat. If you have a flat tire, re-
place it with a spare tire as soon as
possible.cAlthough you can continue driving with
a punctured MichelinTPAXTtire (if so
equipped) , remember that vehicle han-
dling stability is reduced, which could
lead to an accident and personal injury.
Also, driving a long distance at high
speeds may damage the tires.
cDo not drive at speeds above 50 MPH
(80 km/h) and do not drive more than
125 miles (200 km) with a punctured
MichelinTPAXTtire (if so equipped) .
The actual distance the vehicle can be
driven on a flat tire depends on outside
temperature, vehicle load, road condi-
tions and other factors.
cDo not tow a trailer when a MichelinT
PAXTtire (if so equipped) is flat.
cWhen a spare tire is mounted or a wheel
is replaced, tire pressure will not be
indicated, the TPMS will not function
and the low tire pressure warning light
will flash. Contact your NISSAN dealer
as soon as possible for tire replacement
and/or system resetting.
cReplacing tires with those not originally
specified by NISSAN could affect the
proper operation of the TPMS.
2-10Instruments and controls
ZREVIEW COPYÐ2007 Quest(van)
Owners ManualÐUSA_English(nna)
02/27/06Ðdebbie
X
Page 109 of 384

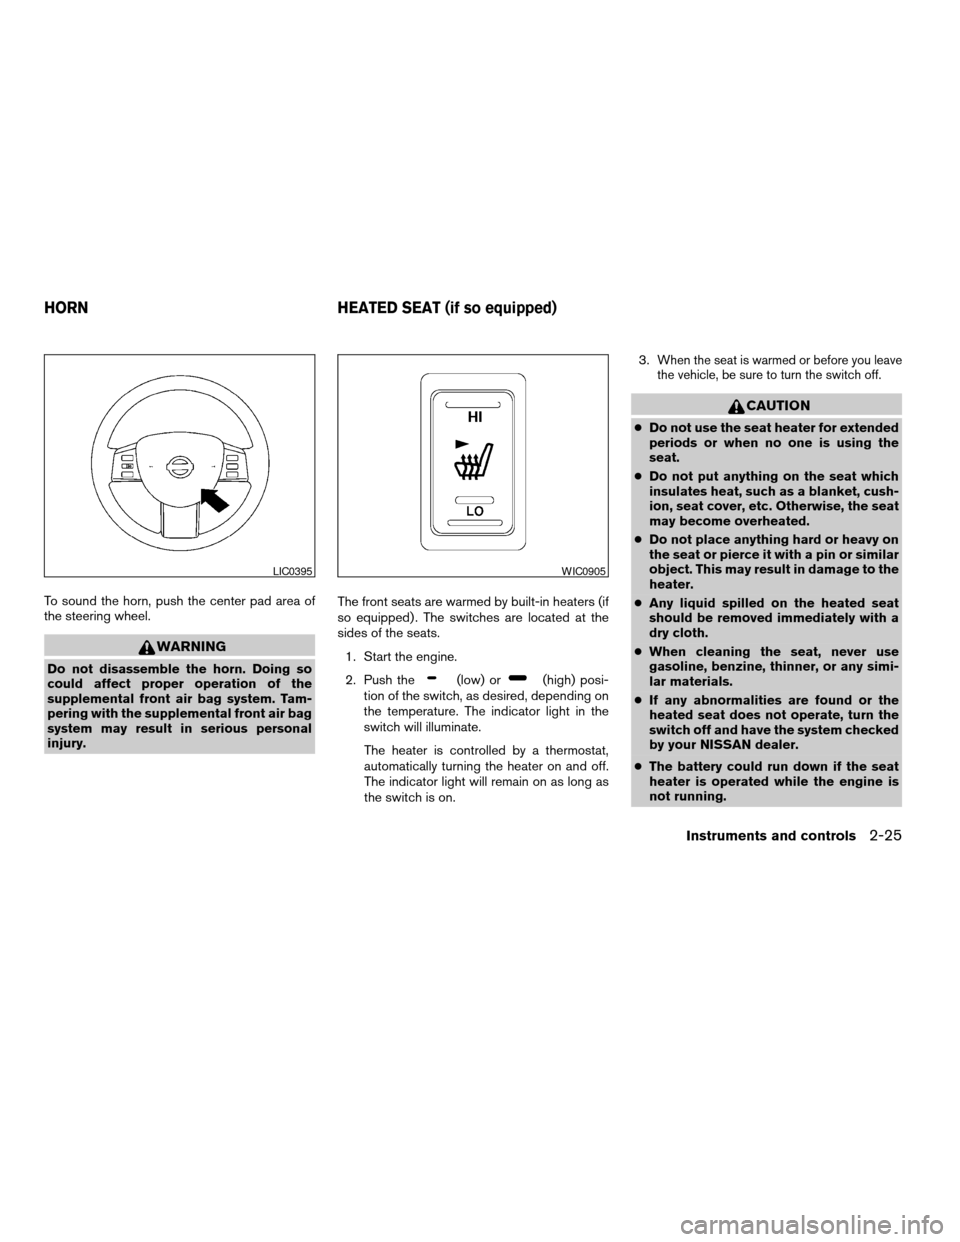
To sound the horn, push the center pad area of
the steering wheel.
WARNING
Do not disassemble the horn. Doing so
could affect proper operation of the
supplemental front air bag system. Tam-
pering with the supplemental front air bag
system may result in serious personal
injury.The front seats are warmed by built-in heaters (if
so equipped) . The switches are located at the
sides of the seats.
1. Start the engine.
2. Push the(low) or(high) posi-
tion of the switch, as desired, depending on
the temperature. The indicator light in the
switch will illuminate.
The heater is controlled by a thermostat,
automatically turning the heater on and off.
The indicator light will remain on as long as
the switch is on.3.
When the seat is warmed or before you leave
the vehicle, be sure to turn the switch off.
CAUTION
cDo not use the seat heater for extended
periods or when no one is using the
seat.
cDo not put anything on the seat which
insulates heat, such as a blanket, cush-
ion, seat cover, etc. Otherwise, the seat
may become overheated.
cDo not place anything hard or heavy on
the seat or pierce it with a pin or similar
object. This may result in damage to the
heater.
cAny liquid spilled on the heated seat
should be removed immediately with a
dry cloth.
cWhen cleaning the seat, never use
gasoline, benzine, thinner, or any simi-
lar materials.
cIf any abnormalities are found or the
heated seat does not operate, turn the
switch off and have the system checked
by your NISSAN dealer.
cThe battery could run down if the seat
heater is operated while the engine is
not running.
LIC0395WIC0905
HORN HEATED SEAT (if so equipped)
Instruments and controls2-25
ZREVIEW COPYÐ2007 Quest(van)
Owners ManualÐUSA_English(nna)
02/27/06Ðdebbie
X
Page 135 of 384

3 Pre-driving checks and adjustments
Keys .............................................3-2
Nissan vehicle immobilizer system keys...........3-2
Doors............................................3-3
Locking with key................................3-3
Locking with inside lock knob....................3-4
Locking with power door lock switch.............3-5
Operating the manual sliding door
(if so equipped)................................3-5
Using the main ON/OFF switch for the
power sliding door (if so equipped)...............3-6
Operating the power sliding door
(if so equipped)................................3-6
Child safety sliding door lock....................3-9
Remote keyless entry system.......................3-9
How to use remote keyless entry system.........3-10
Hood...........................................3-14
Lift gate.........................................3-14
Operating the manual lift gate...................3-15
Using the main ON/OFF switch for the
power lift gate (if so equipped)..................3-15Operating the power lift gate
(if so equipped)...............................3-16
Lift gate release...............................3-18
Fuel-filler door...................................3-19
Opener operation..............................3-19
Fuel-filler cap.................................3-19
Steering wheel...................................3-21
Tilt operation..................................3-21
Pedal position adjustment (if so equipped)..........3-21
Sun visors.......................................3-22
Vanity mirrors.................................3-22
Mirrors..........................................3-23
Rearview mirror (if so equipped).................3-23
Automatic anti-glare rearview mirror
(if so equipped)...............................3-23
Outside mirrors...............................3-24
Automatic drive positioner (if so equipped)..........3-25
Memory storage function.......................3-26
Entry/exit function.............................3-27
System operation..............................3-28
ZREVIEW COPYÐ2007 Quest(van)
Owners ManualÐUSA_English(nna)
02/27/06Ðdebbie
X
Page 155 of 384

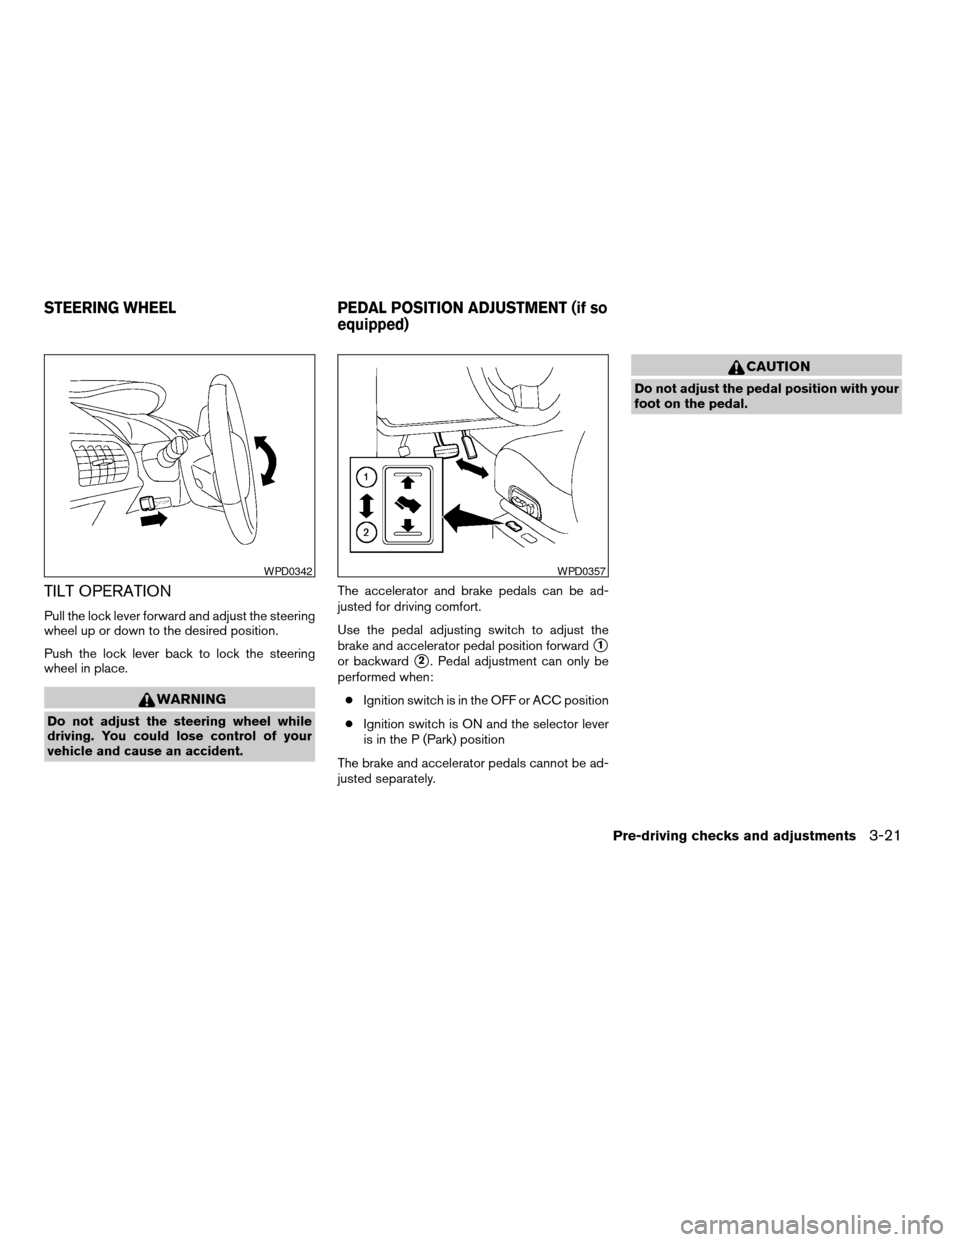
TILT OPERATION
Pull the lock lever forward and adjust the steering
wheel up or down to the desired position.
Push the lock lever back to lock the steering
wheel in place.
WARNING
Do not adjust the steering wheel while
driving. You could lose control of your
vehicle and cause an accident.The accelerator and brake pedals can be ad-
justed for driving comfort.
Use the pedal adjusting switch to adjust the
brake and accelerator pedal position forward
s1
or backwards2. Pedal adjustment can only be
performed when:
cIgnition switch is in the OFF or ACC position
cIgnition switch is ON and the selector lever
is in the P (Park) position
The brake and accelerator pedals cannot be ad-
justed separately.
CAUTION
Do not adjust the pedal position with your
foot on the pedal.
WPD0342WPD0357
STEERING WHEEL PEDAL POSITION ADJUSTMENT (if so
equipped)
Pre-driving checks and adjustments3-21
ZREVIEW COPYÐ2007 Quest(van)
Owners ManualÐUSA_English(nna)
02/27/06Ðdebbie
X
Page 165 of 384

CD care and cleaning..........................4-58
Steering wheel switch for audio control..........4-59
Rear audio controls (if so equipped).............4-60
Antenna......................................4-61
DVD entertainment system (if so equipped)..........4-62
Digital video disc (DVD) player controls..........4-63
Remote control................................4-64
Flip-down screen..............................4-64
Playing a digital video disc (DVD)...............4-65
Care and maintenance.........................4-68How to handle the DVD........................4-69
Car phone or CB radio............................4-72
BluetoothTHands-Free Phone System
(if so equipped)..................................4-72
Using the system..............................4-74
Control buttons...............................4-76
Getting started................................4-76
List of voice commands........................4-78
Speaker adaptation (SA) mode..................4-83
Troubleshooting guide.........................4-84
ZREVIEW COPYÐ2007 Quest(van)
Owners ManualÐUSA_English(nna)
02/27/06Ðdebbie
X
Page 223 of 384

1. Volume control switch
2. Phone operation switch
3. POWER on and MODE select switch
4. Tuning switch
STEERING WHEEL SWITCH FOR
AUDIO CONTROL
The audio system can be operated using the
controls on the steering wheel.
POWER on/off switch
With the ignition key turned to the ACC or ON
position, push the POWER switch to turn the
audio system on or off.If you have the Type B switch, with the ignition key
turned to the ACC or ON position push the
MODE switch to turn the audio system on.
MODE select switch
Push the MODE select switch to change the
mode in the following sequence: PRESET A!
PRESET B!PRESET C!CD!DVD (if so
equipped)!AUX.
While in one of the preset radio station banks (A,
B or C) , use the tuning switch
orto
select one of the preset radio stations (1-6) .
Volume control switch
Push the volume control switch up or down to
increase or decrease the volume.
Tuning
Memory change (radio):
While in one of the preset radio station banks (A,
B or C) , push the tuning switch
orfor less than 1.5 seconds to change to the next
preset station in memory.
Seek tuning (radio):
Push the tuning switch
orfor more
than 1.5 seconds to seek the next or previous
radio station.Next/Previous track (CD):
Push the tuning switch
orfor less
than 1.5 seconds to return to the beginning of the
present track or skip to the next track. Push
several times to skip back or skip through tracks.
This system searches for the blank intervals be-
tween selections. If there is a blank interval within
1 program or there is no interval between pro-
grams, the system may not stop in the desired or
expected location.
Change disc (CD) (if so equipped):
Push the SEEK tuning switch
orfor
more than 1.5 seconds to change the playing
disc up or down.
Type B
WHA0637
Display screen, heater, air conditioner, audio and phone systems4-59
ZREVIEW COPYÐ2007 Quest(van)
Owners ManualÐUSA_English(nna)
02/27/06Ðdebbie
X
Page 238 of 384

– Your cellular phone is locked to prevent it
from being dialed.
When the radio wave condition is not ideal or
ambient sound is too loud, it may be difficult to
hear the other person’s voice during a call.
Do not place the cellular phone in an area sur-
rounded by metal or far away from the in-vehicle
phone module to prevent tone quality degrada-
tion and wireless connection disruption.
While a cellular phone is connected through the
BluetoothTwireless connection, the battery
power of the cellular phone may discharge
quicker than usual.
If the hands-free phone system seems to be
malfunctioning, please refer to “Troubleshooting
guide” later in this section. You can also visit
www.nissan-usa.com/bluetooth for trouble-
shooting help.
Refer to the cellular phone Owner’s Manual re-
garding the telephone charges, cellular phone
antenna and body, etc.
This device complies with Part 15 of the
FCC Rules. Operation is subject to the fol-
lowing two conditions: (1) this device may
not cause harmful interference, and (2) this
device must accept any interference re-
ceived, including interference that may
cause undesired operation.FCC Radiation Exposure Statement:
This equipment complies with FCC radiation ex-
posure limits set forth for an uncontrolled envi-
ronment. This equipment should be installed and
operated with minimum distance 8 inches (20
cm) between the radiator and your body. This
Transmitter must not be co-located or operating
in conjunction with any other antenna or transmit-
ter.
USING THE SYSTEM
The NISSAN Voice Recognition system allows
hands-free operation of the BluetoothTPhone
System.
If the vehicle is in motion, some commands may
not be available so full attention may be given to
vehicle operation.
Initialization
When the ignition switch is turned to the ON
position, NISSAN Voice Recognition is initialized,
which takes a few seconds. When completed,
the amber light on the overhead console illumi-
nates and the system is ready to accept voice
commands. If the
button is pressed before
the initialization completes, the system will an-
nounce “Hands-free phone system not ready”
and will not react to voice commands.
Operating tips
To get the best performance out of the NISSAN
Voice Recognition system, observe the following:
cKeep the interior of the vehicle as quiet as
possible. Close the windows to eliminate
surrounding noises (traffic noises, vibration
sounds, etc.) , which may prevent the system
from recognizing voice commands correctly.
cWait until the tone sounds before speaking a
command. Otherwise, the command will not
be received properly.
cStart speaking a command within 5 seconds
after the tone sounds.
cSpeak in a natural voice without pausing
between words.
Giving voice commands
To operate NISSAN Voice Recognition, press
and release thebutton located on the
steering wheel. The light on the overhead con-
sole flashes to signal you have entered a voice
recognition (VR) session. After the tone sounds,
speak a command.
The command given is picked up by the micro-
phone, and voice feedback is given when the
command is accepted.
4-74Display screen, heater, air conditioner, audio and phone systems
ZREVIEW COPYÐ2007 Quest(van)
Owners ManualÐUSA_English(nna)
02/27/06Ðdebbie
X