2007 NISSAN QUEST ignition
[x] Cancel search: ignitionPage 82 of 384
WARNING
If the supplemental air bag warning light
is on, it could mean that the supplemental
front air bag, supplemental side air bag,
curtain side-impact air bag systems
and/or pre-tensioner seat belt systems
will not operate in an accident. To help
avoid injury to yourself or others, have
your vehicle checked by a NISSAN dealer
as soon as possible.
Repair and replacement procedure
The supplemental front air bags, supplemental
side air bags, curtain side-impact air bags and
pre-tensioner seat belts are designed to inflate
on a one-time-only basis. As a reminder, unless it
is damaged, the supplemental air bag warning
light remains illuminated after inflation has oc-
curred. Repair and replacement of these supple-
mental air bag systems should be done only by a
NISSAN dealer.
When maintenance work is required on the ve-
hicle, the supplemental front air bags, supple-
mental side air bags, curtain side-impact air
bags, pre-tensioner seat belts and related parts
should be pointed out to the person performing
the maintenance. The ignition key should always
be in the LOCK position when working under the
hood or inside the vehicle.
WARNING
cOnce a supplemental front air bag,
supplemental side air bag or curtain
side-impact air bag has inflated, the air
bag module will not function again and
must be replaced. Additionally, if any of
the supplemental front air bags inflate,
the activated pre-tensioner seat belts
must also be replaced. The air bag mod-
ule and pre-tensioner seat belt system
should be replaced by a NISSAN dealer.
The air bag module and pre-tensioner
seat belt system cannot be repaired.
cThe supplemental front air bag, side air
bag and curtain side-impact air bag sys-
tems, and the pre-tensioner seat belt
system should be inspected by a
NISSAN dealer if there is any damage to
the front end or side portion of the
vehicle.
cIf you need to dispose of the supple-
mental air bag, pre-tensioner seat belt
system or scrap the vehicle, contact a
NISSAN dealer. Correct supplemental
air bag and pre-tensioner seat belt sys-
tem disposal procedures are set forth in
the appropriate NISSAN Service
Manual. Incorrect disposal procedures
could cause personal injury.
1-66Safety—Seats, seat belts and supplemental restraint system
ZREVIEW COPYÐ2007 Quest(van)
Owners ManualÐUSA_English(nna)
02/27/06Ðdebbie
X
Page 87 of 384

17. Shift selector lever (P. 5-10)
18. Ignition switch (P. 5-8)
19. Tilt steering wheel control (P. 3-21)
20. Rear sonar system off switch
(if so equipped) (P. 2-26)
21. Vehicle dynamic control (VDC) off
switch (if so equipped) or Traction con-
trol system (TCS) off switch
(if so equipped) (P. 2-26, P. 2-26)
22. Lights on demand switch (P. 2-43)
*: Refer to the separate Navigation System Own-
er’s Manual (if so equipped) .
See the page number indicated in paren-
theses for operating details.
1. Tachometer
2. Warning/indicator lights
3. Speedometer
4. Engine coolant temperature gauge
5. Fuel gauge
6. Odometer/Twin trip odometer1. Speedometer
2. Odometer/twin trip display
3. Change button
LIC0929
METERS AND GAUGES
Instruments and controls2-3
ZREVIEW COPYÐ2007 Quest(van)
Owners ManualÐUSA_English(nna)
02/27/06Ðdebbie
X
Page 88 of 384
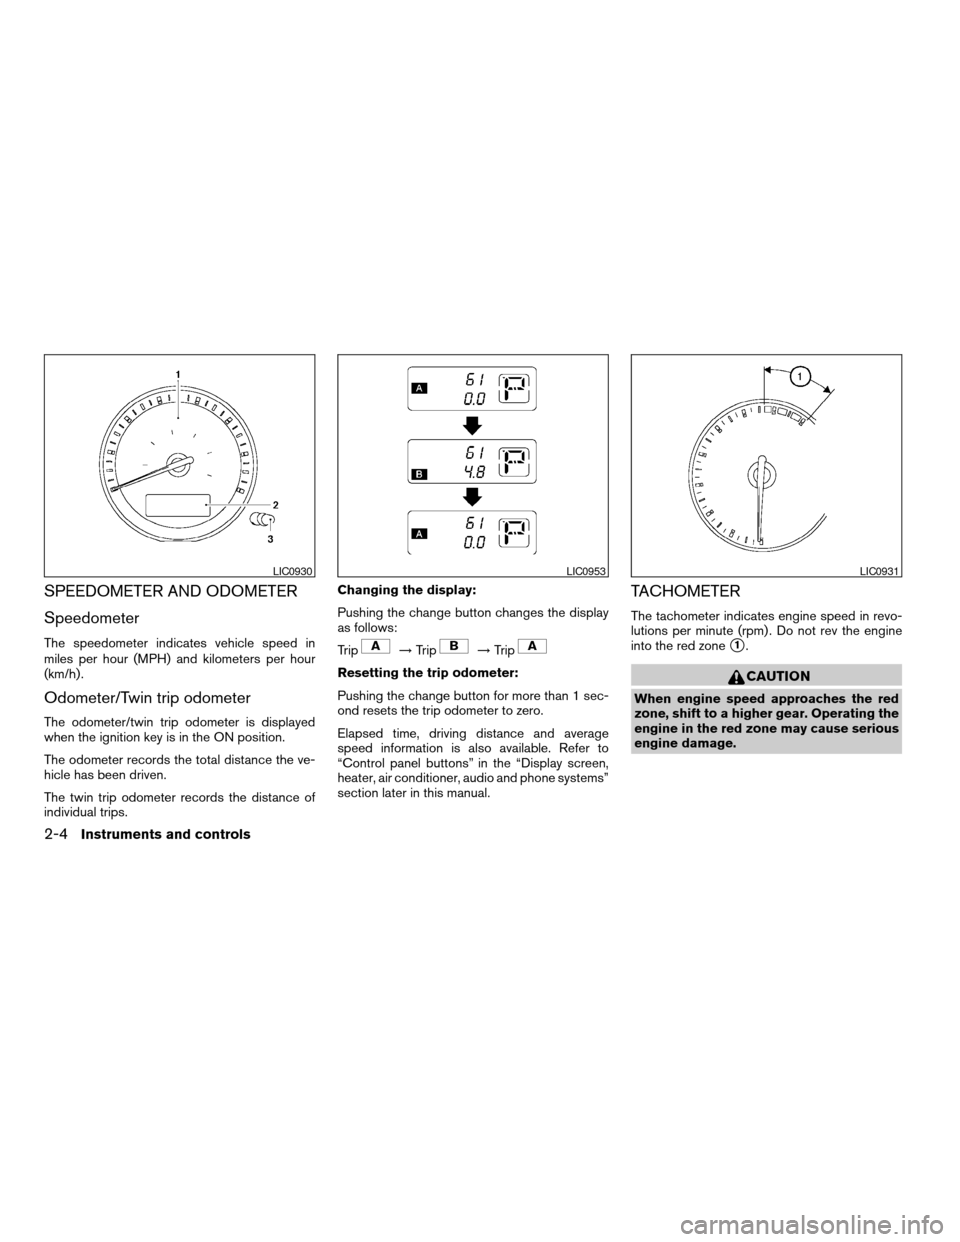
SPEEDOMETER AND ODOMETER
Speedometer
The speedometer indicates vehicle speed in
miles per hour (MPH) and kilometers per hour
(km/h) .
Odometer/Twin trip odometer
The odometer/twin trip odometer is displayed
when the ignition key is in the ON position.
The odometer records the total distance the ve-
hicle has been driven.
The twin trip odometer records the distance of
individual trips.Changing the display:
Pushing the change button changes the display
as follows:
Trip
!Trip!Trip
Resetting the trip odometer:
Pushing the change button for more than 1 sec-
ond resets the trip odometer to zero.
Elapsed time, driving distance and average
speed information is also available. Refer to
“Control panel buttons” in the “Display screen,
heater, air conditioner, audio and phone systems”
section later in this manual.
TACHOMETER
The tachometer indicates engine speed in revo-
lutions per minute (rpm) . Do not rev the engine
into the red zone
s1.
CAUTION
When engine speed approaches the red
zone, shift to a higher gear. Operating the
engine in the red zone may cause serious
engine damage.
LIC0930LIC0953LIC0931
2-4Instruments and controls
ZREVIEW COPYÐ2007 Quest(van)
Owners ManualÐUSA_English(nna)
02/27/06Ðdebbie
X
Page 89 of 384
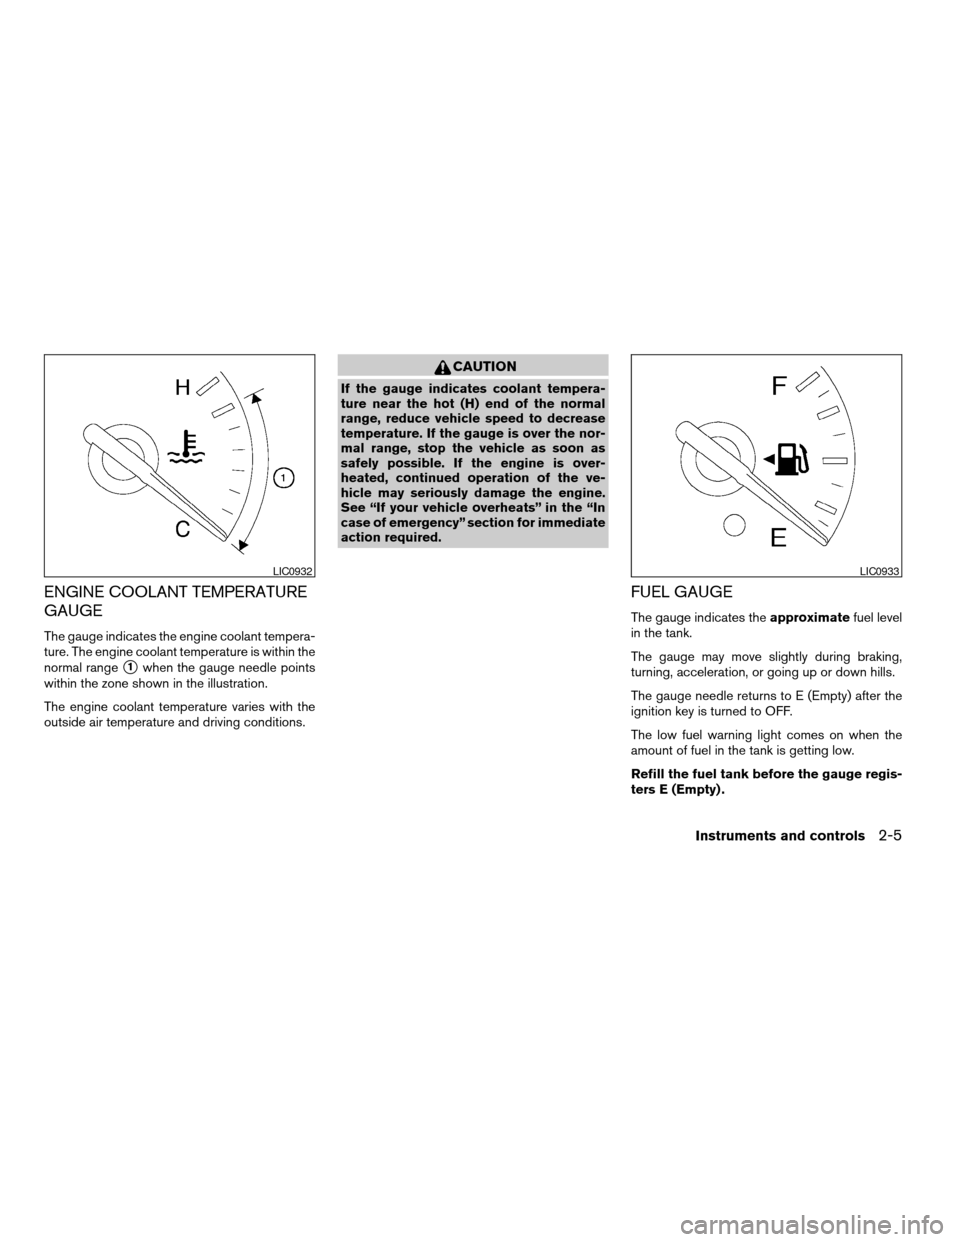
ENGINE COOLANT TEMPERATURE
GAUGE
The gauge indicates the engine coolant tempera-
ture. The engine coolant temperature is within the
normal range
s1when the gauge needle points
within the zone shown in the illustration.
The engine coolant temperature varies with the
outside air temperature and driving conditions.
CAUTION
If the gauge indicates coolant tempera-
ture near the hot (H) end of the normal
range, reduce vehicle speed to decrease
temperature. If the gauge is over the nor-
mal range, stop the vehicle as soon as
safely possible. If the engine is over-
heated, continued operation of the ve-
hicle may seriously damage the engine.
See “If your vehicle overheats” in the “In
case of emergency” section for immediate
action required.
FUEL GAUGE
The gauge indicates theapproximatefuel level
in the tank.
The gauge may move slightly during braking,
turning, acceleration, or going up or down hills.
The gauge needle returns to E (Empty) after the
ignition key is turned to OFF.
The low fuel warning light comes on when the
amount of fuel in the tank is getting low.
Refill the fuel tank before the gauge regis-
ters E (Empty) .
LIC0932LIC0933
Instruments and controls2-5
ZREVIEW COPYÐ2007 Quest(van)
Owners ManualÐUSA_English(nna)
02/27/06Ðdebbie
X
Page 91 of 384

orAnti-lock braking warning lightSeat belt warning light and chimeFront passenger air bag status light
orBrake warning lightSupplemental air bag warning lightSecurity indicator light
Charge warning lightAutomatic transmission position indicator lightSlip indicator light
Door open warning lightCruise main switch indicator lightTraction control system off indicator light (if so
equipped)
Engine oil pressure warning lightCruise set switch indicator lightTurn signal/hazard indicator lights
Low fuel warning lightHigh beam indicator light (Blue)Vehicle dynamic control off indicator light (if so
equipped)
Low tire pressure warning lightMalfunction indicator light (MIL)
Low windshield washer fluid warning lightOverdrive off indicator light
CHECKING BULBS
With all doors closed, apply the parking brake
and turn the ignition key to the ON position
without starting the engine. The following lights
will come on:
,or,,,
The following lights come on briefly and then go
off:
or,,,,,,
If any light fails to come on, it may indicate
a burned-out bulb or an open circuit in the
electrical system. Have the system repaired
promptly.
WARNING/INDICATOR LIGHTS AND
AUDIBLE REMINDERS
Instruments and controls2-7
ZREVIEW COPYÐ2007 Quest(van)
Owners ManualÐUSA_English(nna)
02/27/06Ðdebbie
X
Page 92 of 384
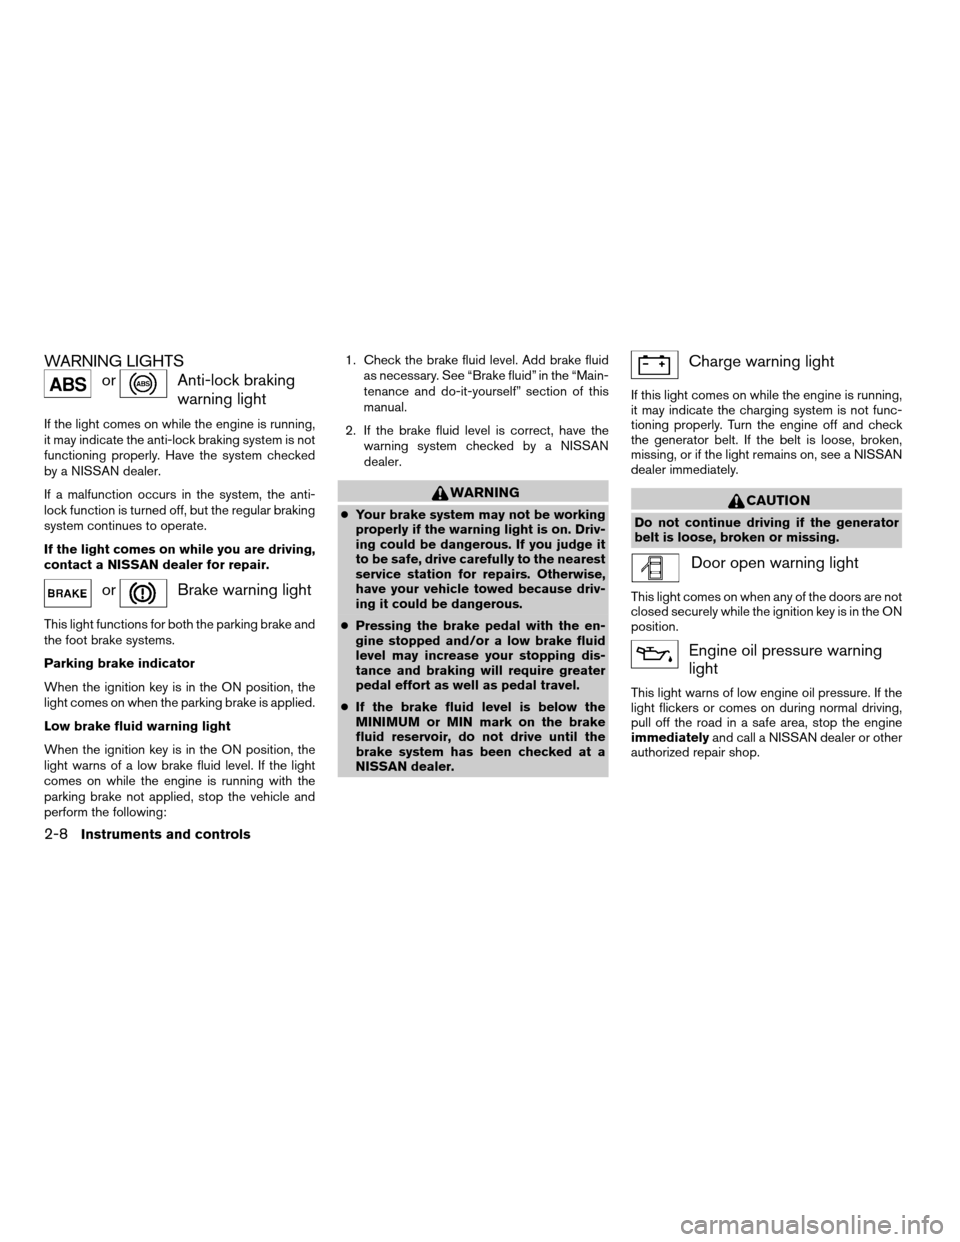
WARNING LIGHTS
orAnti-lock braking
warning light
If the light comes on while the engine is running,
it may indicate the anti-lock braking system is not
functioning properly. Have the system checked
by a NISSAN dealer.
If a malfunction occurs in the system, the anti-
lock function is turned off, but the regular braking
system continues to operate.
If the light comes on while you are driving,
contact a NISSAN dealer for repair.
orBrake warning light
This light functions for both the parking brake and
the foot brake systems.
Parking brake indicator
When the ignition key is in the ON position, the
light comes on when the parking brake is applied.
Low brake fluid warning light
When the ignition key is in the ON position, the
light warns of a low brake fluid level. If the light
comes on while the engine is running with the
parking brake not applied, stop the vehicle and
perform the following:1. Check the brake fluid level. Add brake fluid
as necessary. See “Brake fluid” in the “Main-
tenance and do-it-yourself” section of this
manual.
2. If the brake fluid level is correct, have the
warning system checked by a NISSAN
dealer.
WARNING
cYour brake system may not be working
properly if the warning light is on. Driv-
ing could be dangerous. If you judge it
to be safe, drive carefully to the nearest
service station for repairs. Otherwise,
have your vehicle towed because driv-
ing it could be dangerous.
cPressing the brake pedal with the en-
gine stopped and/or a low brake fluid
level may increase your stopping dis-
tance and braking will require greater
pedal effort as well as pedal travel.
cIf the brake fluid level is below the
MINIMUM or MIN mark on the brake
fluid reservoir, do not drive until the
brake system has been checked at a
NISSAN dealer.
Charge warning light
If this light comes on while the engine is running,
it may indicate the charging system is not func-
tioning properly. Turn the engine off and check
the generator belt. If the belt is loose, broken,
missing, or if the light remains on, see a NISSAN
dealer immediately.
CAUTION
Do not continue driving if the generator
belt is loose, broken or missing.
Door open warning light
This light comes on when any of the doors are not
closed securely while the ignition key is in the ON
position.
Engine oil pressure warning
light
This light warns of low engine oil pressure. If the
light flickers or comes on during normal driving,
pull off the road in a safe area, stop the engine
immediatelyand call a NISSAN dealer or other
authorized repair shop.
2-8Instruments and controls
ZREVIEW COPYÐ2007 Quest(van)
Owners ManualÐUSA_English(nna)
02/27/06Ðdebbie
X
Page 93 of 384
The engine oil pressure warning light is not
designed to indicate a low oil level.Use the
dipstick to check the oil level. See “Engine oil” in
the “Maintenance and do-it-yourself” section of
this manual.
CAUTION
Running the engine with the engine oil
pressure warning light on could cause se-
rious damage to the engine almost imme-
diately. Such damage is not covered by
warranty. Turn off the engine as soon as it
is safe to do so.
Low fuel warning light
This light comes on when the fuel level in the fuel
tank is getting low. The low fuel warning chime
will also sound under certain conditions. See
“Low fuel warning chime” later in this section.
Refuel as soon as it is convenient, preferably
before the fuel gauge reaches E (Empty) .There
will be a small reserve of fuel in the tank
when the fuel gauge needle reaches E
(Empty) .
Low tire pressure warning
light
Your vehicle is equipped with a Tire Pressure
Monitoring System (TPMS) that monitors the tire
pressure of all tires except the spare.
The low tire pressure warning light warns of low
tire pressure or indicates that the TPMS is not
functioning properly.
After the ignition switch is turned ON, this light
illuminates for about 1 second and turns off.
Low tire pressure warning (for models with-
out MichelinTPAXTtires only):
If the vehicle is being driven with low tire pres-
sure, the warning light will illuminate. If you select
the tire pressure information in the display, the
LOW PRESSURE warning message will be dis-
played. The tire pressure for each tire will also be
displayed.
When the low tire pressure warning light illumi-
nates, you should stop and adjust the tire pres-
sure to the recommended COLD tire pressure
shown on the Tire and Loading Information label
to turn the light OFF.
For additional information, see “Tire pressure
monitoring system (TPMS)” in the “Starting and
driving” section and in the “In case of emergency”
section.Low tire pressure warning (for models with
MichelinTPAXTtires only):
If the vehicle is being driven with low tire pressure
the warning light will illuminate. If you select the
tire pressure information in the display, the LOW
PRESSURE warning message will be displayed.
The tire pressure for each tire will also be dis-
played.
When the low tire pressure warning light illumi-
nates, you should stop and adjust the tire pres-
sure to the recommended COLD tire pressure
shown on the Tire and Loading Information label
to turn the light OFF.
Flat tire warning (for models with Mich-
elinTPAXTtires only):
If the vehicle is being driven with one or more flat
tires, the warning light will flash continuously and
a chime will sound for 10 seconds.
The chime will only sound at the first indication of
a flat tire and the warning light will flash continu-
ously. When the flat tire warning is activated,
have the system reset and the tire checked and
replaced if necessary by a NISSAN dealer or
authorized Michelin PAX system dealer. Even if
the tire is inflated to the specified COLD tire
pressure, the warning light will continue to flash
until the system is reset by a NISSAN dealer.
Instruments and controls2-9
ZREVIEW COPYÐ2007 Quest(van)
Owners ManualÐUSA_English(nna)
02/27/06Ðdebbie
X
Page 94 of 384
If you select the tire pressure information in the
display, the LOW PRESSURE warning message
will be displayed. The tire pressure for each tire
will also be displayed.
Your vehicle can be driven for a limited time on a
flat tire. See “Michelin PAX Tires” in the “Mainte-
nance and do-it-yourself” section.
For additional information, see “Tire pressure
monitoring system (TPMS)” in the “Starting and
driving” section and in the “In case of emergency”
section.
TPMS malfunction (all models):
If the TPMS is not functioning properly, the low
tire pressure warning light will flash for approxi-
mately 1 minute when the ignition switch is
turned ON. The light will remain on after the 1
minute. Have the system checked by a NISSAN
dealer.
For additional information, see “Tire pressure
monitoring system (TPMS)” in the “Starting and
driving” section and in the “In case of emergency”
section.WARNING
cIf the light does not illuminate with the
ignition switch turned ON, have the ve-
hicle checked by a NISSAN dealer as
soon as possible.
cIf the light illuminates while driving,
avoid sudden steering maneuvers or
abrupt braking, reduce vehicle speed,
pull off the road to a safe location and
stop the vehicle as soon as possible.
Serious vehicle damage could occur
and may lead to an accident and could
result in serious personal injury. Check
the tire pressure for all four tires. Adjust
the tire pressure to the recommended
COLD tire pressure shown on the Tire
and Loading Information label to turn
the low tire pressure warning light OFF.
If the light still illuminates while driving
after adjusting the tire pressure, a tire
may be flat. If you have a flat tire, re-
place it with a spare tire as soon as
possible.cAlthough you can continue driving with
a punctured MichelinTPAXTtire (if so
equipped) , remember that vehicle han-
dling stability is reduced, which could
lead to an accident and personal injury.
Also, driving a long distance at high
speeds may damage the tires.
cDo not drive at speeds above 50 MPH
(80 km/h) and do not drive more than
125 miles (200 km) with a punctured
MichelinTPAXTtire (if so equipped) .
The actual distance the vehicle can be
driven on a flat tire depends on outside
temperature, vehicle load, road condi-
tions and other factors.
cDo not tow a trailer when a MichelinT
PAXTtire (if so equipped) is flat.
cWhen a spare tire is mounted or a wheel
is replaced, tire pressure will not be
indicated, the TPMS will not function
and the low tire pressure warning light
will flash. Contact your NISSAN dealer
as soon as possible for tire replacement
and/or system resetting.
cReplacing tires with those not originally
specified by NISSAN could affect the
proper operation of the TPMS.
2-10Instruments and controls
ZREVIEW COPYÐ2007 Quest(van)
Owners ManualÐUSA_English(nna)
02/27/06Ðdebbie
X