2007 NISSAN PATHFINDER Reverse switch
[x] Cancel search: Reverse switchPage 107 of 352
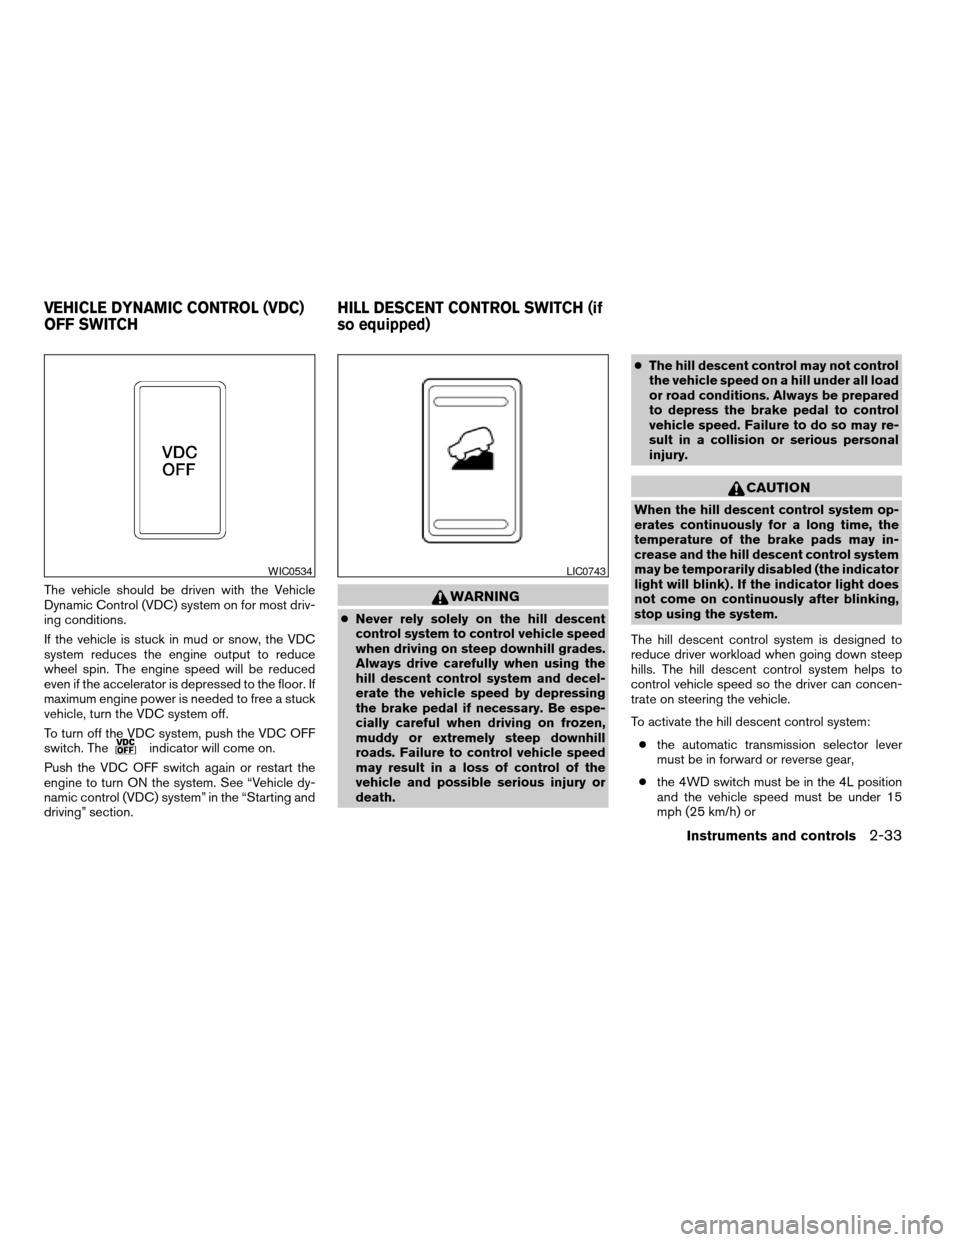
The vehicle should be driven with the Vehicle
Dynamic Control (VDC) system on for most driv-
ing conditions.
If the vehicle is stuck in mud or snow, the VDC
system reduces the engine output to reduce
wheel spin. The engine speed will be reduced
even if the accelerator is depressed to the floor. If
maximum engine power is needed to free a stuck
vehicle, turn the VDC system off.
To turn off the VDC system, push the VDC OFF
switch. The
indicator will come on.
Push the VDC OFF switch again or restart the
engine to turn ON the system. See “Vehicle dy-
namic control (VDC) system” in the “Starting and
driving” section.
WARNING
cNever rely solely on the hill descent
control system to control vehicle speed
when driving on steep downhill grades.
Always drive carefully when using the
hill descent control system and decel-
erate the vehicle speed by depressing
the brake pedal if necessary. Be espe-
cially careful when driving on frozen,
muddy or extremely steep downhill
roads. Failure to control vehicle speed
may result in a loss of control of the
vehicle and possible serious injury or
death.cThe hill descent control may not control
the vehicle speed on a hill under all load
or road conditions. Always be prepared
to depress the brake pedal to control
vehicle speed. Failure to do so may re-
sult in a collision or serious personal
injury.
CAUTION
When the hill descent control system op-
erates continuously for a long time, the
temperature of the brake pads may in-
crease and the hill descent control system
may be temporarily disabled (the indicator
light will blink) . If the indicator light does
not come on continuously after blinking,
stop using the system.
The hill descent control system is designed to
reduce driver workload when going down steep
hills. The hill descent control system helps to
control vehicle speed so the driver can concen-
trate on steering the vehicle.
To activate the hill descent control system:
cthe automatic transmission selector lever
must be in forward or reverse gear,
cthe 4WD switch must be in the 4L position
and the vehicle speed must be under 15
mph (25 km/h) or
WIC0534LIC0743
VEHICLE DYNAMIC CONTROL (VDC)
OFF SWITCHHILL DESCENT CONTROL SWITCH (if
so equipped)
Instruments and controls2-33
ZREVIEW COPYÐ2007 Pathfinder(pat)
Owners ManualÐUSA_English(nna)
01/10/07Ðdebbie
X
Page 123 of 352
Auto-reverse function
The auto-reverse function can be activated when
a window is closed by automatic operation, when
the ignition key is in the ON position or for 45
seconds after the ignition key is turned to the
OFF position.
If the control unit detects something caught in a
window equipped with automatic operation as it
is closing, the window will be immediately low-
ered.
Depending on the environment or driving
conditions, the auto-reverse function may
be activated if an impact or load similar to
something being caught in the window oc-
curs.
WARNING
There are some small distances immedi-
ately before the closed position which
cannot be detected. Make sure that all
passengers have their hands, etc., inside
the vehicle before closing the window.
When power window switch does not
operate
If the power window automatic function (closing
only) does not operate properly, perform the fol-
lowing procedure to initialize the power window
system
1. Turn the ignition switch to the ON position.
2. Open the window more than halfway by
operating the power window switch.
3. Pull up and hold the window switch and hold
it to close the window, and then hold the
switch for more than 3 seconds after the
window is closed completely.
4. Release the power window switch. Operate
the window by automatic function to confirm
the initialization is complete.
5. Perform steps 2 through 4 above for other
windows.
If the power window automatic function does not
operate properly after performing the above pro-
cedure, see a NISSAN dealer for assistance.
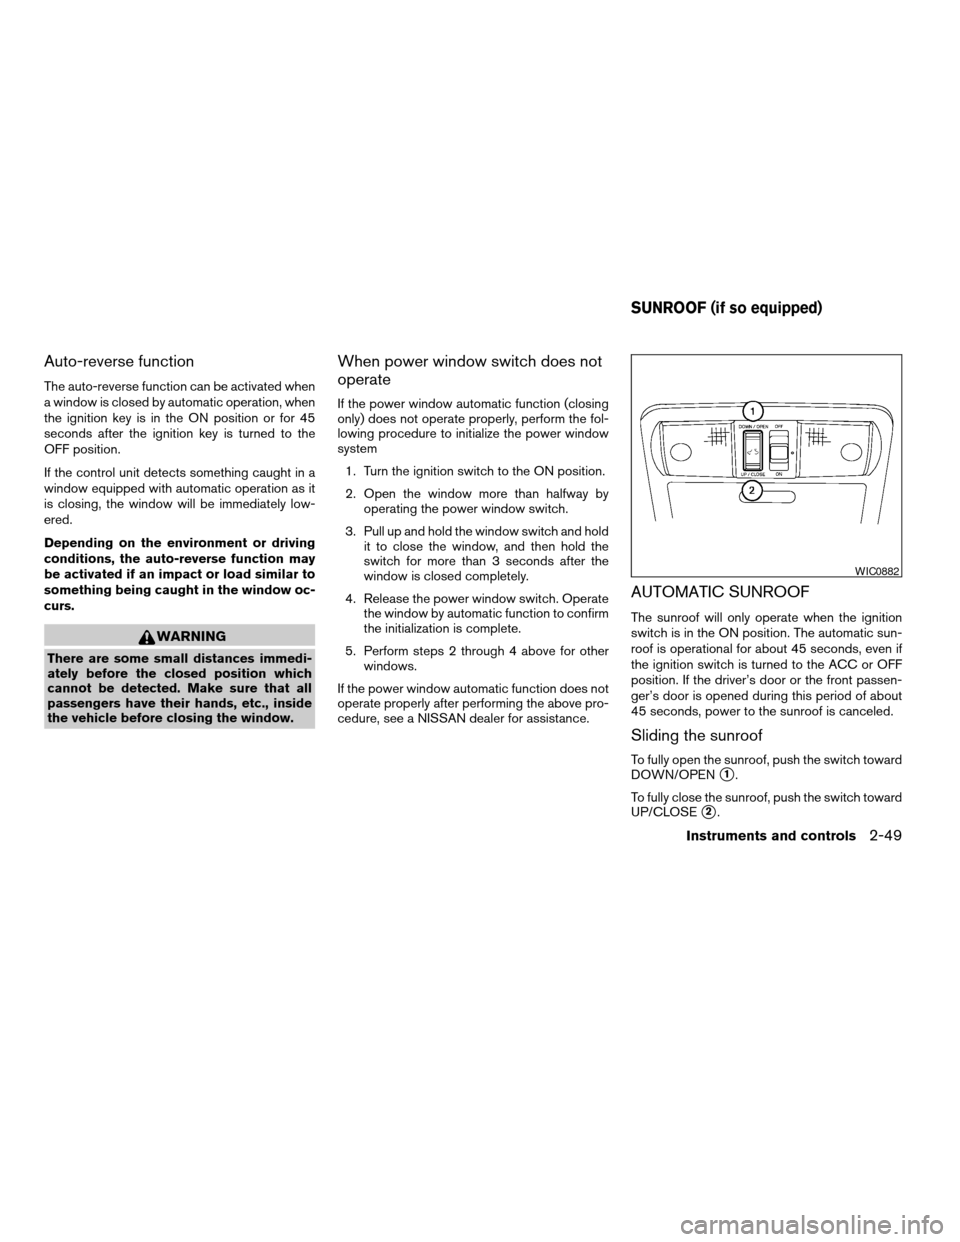
AUTOMATIC SUNROOF
The sunroof will only operate when the ignition
switch is in the ON position. The automatic sun-
roof is operational for about 45 seconds, even if
the ignition switch is turned to the ACC or OFF
position. If the driver’s door or the front passen-
ger’s door is opened during this period of about
45 seconds, power to the sunroof is canceled.
Sliding the sunroof
To fully open the sunroof, push the switch toward
DOWN/OPEN
s1.
To fully close the sunroof, push the switch toward
UP/CLOSE
s2.
WIC0882
SUNROOF (if so equipped)
Instruments and controls2-49
ZREVIEW COPYÐ2007 Pathfinder(pat)
Owners ManualÐUSA_English(nna)
10/16/06Ðcathy
X
Page 124 of 352
To open or close the sunroof part way, push the
switch in any direction while the sunroof is sliding
to stop it in the desired position.
Tilting the sunroof
Close the sunroof by pushing the switch toward
UP/CLOSE
s2. Release the switch, then push
the UP/CLOSE switch again to tilt the sunroof
up.
To tilt the sunroof down, push the switch toward
DOWN/OPEN
s1.
WARNING
cIn an accident you could be thrown from
the vehicle through an open sunroof.
Always use seat belts and child
restraints.
cDo not allow anyone to stand up or
extend any portion of their body out of
the sunroof opening while the vehicle is
in motion or while the sunroof is
closing.
CAUTION
cRemove water drops, snow, ice or sand
from the sunroof before opening.
cDo not place heavy objects on the sun-
roof or surrounding area.
Auto reverse function (when closing or
tilting down the sunroof)
The auto reverse function can be activated when
the sunroof is closed or tilted down by automatic
operation when the ignition key is in the ON
position or for about 45 seconds after the ignition
key is turned to the OFF position.
Depending on the environment or driving
conditions, the auto reverse function may
be activated if an impact or load similar to
something being caught in the sunroof oc-
curs.
WARNING
There are some small distances immedi-
ately before the closed position which
cannot be detected. Make sure that all
passengers have their hands, etc., inside
the vehicle before closing the sunroof.
When closing:
If the control unit detects something caught in the
sunroof as it moves to the front, the sunroof will
immediately open backward.
When tilting down:
If the control unit detects something caught in the
sunroof as it tilts down, the sunroof will immedi-
ately tilt up.If the auto reverse function malfunctions and re-
peats opening or tilting up the sunroof, keep
pushing the tilt down switch within 5 seconds
after it happens; the sunroof will fully close gradu-
ally. Make sure nothing is caught in the sunroof.
WARNING
cIn an accident you could be thrown from
the vehicle through an open sunroof.
Always use seat belts and child
restraints.
cDo not allow anyone to stand up or
extend any portion of their body out of
the sunroof opening while the vehicle is
in motion or while the sunroof is
closing.
CAUTION
cRemove water drops, snow, ice or sand
from the sunroof before opening.
cDo not place heavy objects on the sun-
roof or surrounding area.
Sunshade
Open and close the sunshade by sliding it for-
ward or backward.
If the sunroof does not close
Have your NISSAN dealer check and repair the
sunroof.
2-50Instruments and controls
ZREVIEW COPYÐ2007 Pathfinder(pat)
Owners ManualÐUSA_English(nna)
10/16/06Ðcathy
X
Page 203 of 352
It is possible to operate the DVD player by remote
control.
Headphones are a wireless type and no cables
are necessary. You can use them in almost all the
ranges in the rear seat. (It is not possible to use
the headphones in the front seat.)
POWER on/off button:
With the ignition switch turned to the ACC or ON
position, press the POWER button to turn the
DVD player on or off.
Insert the DVD into the slot with the label side
facing up. The DVD will be guided automatically
into the slot.
If the DVD player is off and a DVD is inserted, the
DVD player will automatically turn on.
CAUTION
Do not force the compact disc into the
slot. This could damage the player.
MODE select button:
Press the MODE button to select Audio/Video
source between DVD and AUX input (input jacks
on the faceplate, Red = right channel audio input,
White = left channel audio input, and Yellow =
Video input) .The display will show the “AUX” in the upper left
corner of the display for 4 seconds once the
Mode is changed to AUX.
To use the input jacks, refer to “Auxiliary input
jacks” in this section.
orPLAY:
When the PLAY/PAUSE button on the player or
the PLAY button on the remote control is
pressed, the player will play.
In play mode, the display will briefly show
on the upper left corner of the display.
FF (Fast Forward) , REW
(Remote control only):
Press FAST FORWARD/FAST REVERSE but-
tons to carry out the fast forward or fast reverse
presentation at 5 times normal play speed.
Press FAST FORWARD/FAST REVERSE but-
tons again or PLAY button to resume the normal
play speed.
NEXT CHAPTER/
PREVIOUS CHAPTER
(Remote control only):
When the
(NEXT CHAPTER) button is
pressed while the DVD is being played, the pro-
gram next to the present one will start to play from
its beginning. Press several times to skip throughprograms. The DVD will advance the number of
times the button is pressed. When the
(PREVIOUS CHAPTER) button is pressed, the
program being played returns to its beginning.
Press several times to skip back through pro-
grams. The DVD will go back the number of times
the button is pressed.
orPAUSE:
When the PLAY/PAUSE button on the player or
the PAUSE button on the remote control is
pressed, the player will pause playing of the
media. In pause mode, the player will show
on the upper left corner of the display until the
player is changed to another mode.
STOP:
Press the STOP button once to stop playing the
media. The display will show
in the upper
left corner of the display for 4 seconds, and the
last disc position will be stored. When the PLAY
button is pressed again, it will resume at the
stored disc track and time position.
If the STOP button is pressed again when the
player is already in Stop mode, it will reinitialize
the pointer to the beginning of the disc. In effect it
will ignore the last stored disc position and upon
receipt of the next play message it will begin at
the Title Menu, or at “the beginning of the disc”.
Display screen, heater, air conditioner and audio systems4-53
ZREVIEW COPYÐ2007 Pathfinder(pat)
Owners ManualÐUSA_English(nna)
10/16/06Ðcathy
X
Page 221 of 352
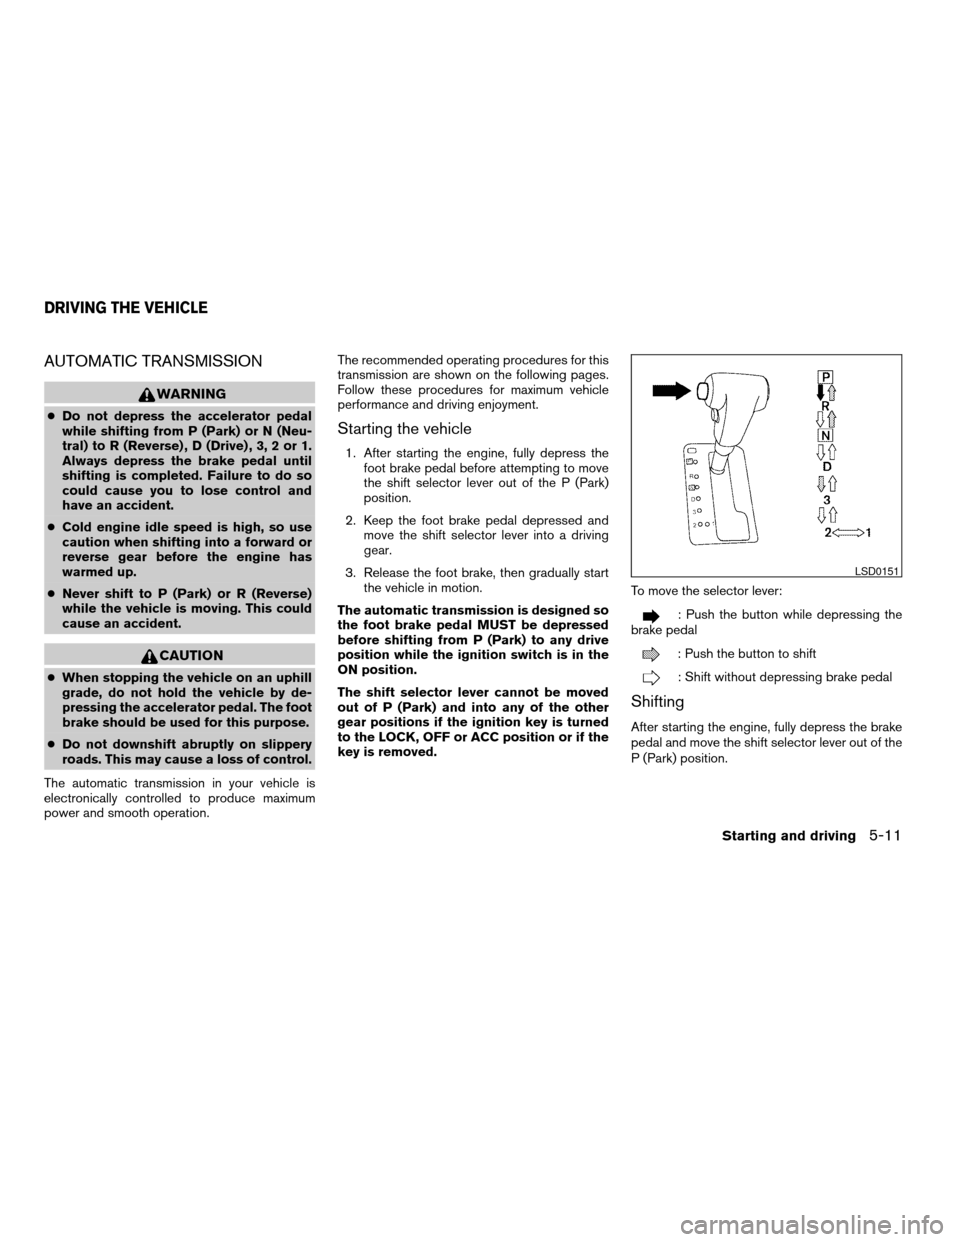
AUTOMATIC TRANSMISSION
WARNING
cDo not depress the accelerator pedal
while shifting from P (Park) or N (Neu-
tral) to R (Reverse) , D (Drive) , 3, 2 or 1.
Always depress the brake pedal until
shifting is completed. Failure to do so
could cause you to lose control and
have an accident.
cCold engine idle speed is high, so use
caution when shifting into a forward or
reverse gear before the engine has
warmed up.
cNever shift to P (Park) or R (Reverse)
while the vehicle is moving. This could
cause an accident.
CAUTION
cWhen stopping the vehicle on an uphill
grade, do not hold the vehicle by de-
pressing the accelerator pedal. The foot
brake should be used for this purpose.
cDo not downshift abruptly on slippery
roads. This may cause a loss of control.
The automatic transmission in your vehicle is
electronically controlled to produce maximum
power and smooth operation.The recommended operating procedures for this
transmission are shown on the following pages.
Follow these procedures for maximum vehicle
performance and driving enjoyment.
Starting the vehicle
1. After starting the engine, fully depress the
foot brake pedal before attempting to move
the shift selector lever out of the P (Park)
position.
2. Keep the foot brake pedal depressed and
move the shift selector lever into a driving
gear.
3. Release the foot brake, then gradually start
the vehicle in motion.
The automatic transmission is designed so
the foot brake pedal MUST be depressed
before shifting from P (Park) to any drive
position while the ignition switch is in the
ON position.
The shift selector lever cannot be moved
out of P (Park) and into any of the other
gear positions if the ignition key is turned
to the LOCK, OFF or ACC position or if the
key is removed.To move the selector lever:
: Push the button while depressing the
brake pedal
: Push the button to shift
: Shift without depressing brake pedal
Shifting
After starting the engine, fully depress the brake
pedal and move the shift selector lever out of the
P (Park) position.
LSD0151
DRIVING THE VEHICLE
Starting and driving5-11
ZREVIEW COPYÐ2007 Pathfinder(pat)
Owners ManualÐUSA_English(nna)
10/16/06Ðdebbie
X
Page 222 of 352
WARNING
Apply the parking brake if the selector
lever is in any position while the engine is
not running. Failure to do so could cause
the vehicle to move unexpectedly or roll
away and result in serious personal injury
or property damage.
If the key is turned to the OFF or ACC position for
any reason while the vehicle is in N (Neutral) , or
any D (Drive) position, the key cannot be turned
to the LOCK position and be removed from the
ignition switch. Move the selector lever to the P
(Park) position, then the key can be turned to
LOCK.
P (Park):
Use this selector position when the vehicle is
parked or when starting the engine. Make sure
the vehicle is completely stopped.The brake
pedal must be depressed to move the se-
lector lever from N (Neutral) or any drive
position to P (Park) .Apply the parking brake.
When parking on a hill, apply the parking brake
first, then shift the selector lever into the P (Park)
position.R (Reverse):CAUTION
Use this position only when the vehicle is
completely stopped.
Use this position to back up. Make sure the
vehicle is completely stopped before selecting
the R (Reverse) position.The brake pedal
must be depressed to move the selector
lever from P (Park) , N (Neutral) or any drive
position to R (Reverse) .
N (Neutral):
Neither forward nor reverse gear is engaged. The
engine can be started in this position. You may
shift to N (Neutral) and restart a stalled engine
while the vehicle is moving.
D (Drive):
Use this position for all normal forward driving.
3 (Third gear):
Use this position for driving up and down long
slopes where engine braking would be advanta-
geous.
Do not downshift into the 3 position at speeds
over the following and do not exceed the follow-
ing speeds in the 3 position.2WD and AUTO:
62 MPH (100 km/h)
4H:
62 MPH (100 km/h)
4LO:
31 MPH (50 km/h)
2 (Second gear):
Use this position for hill climbing or engine brak-
ing on downhill grades.
Do not downshift into the 2 position at speeds
over the following and do not exceed the follow-
ing speeds in the 2 position.
2WD and AUTO:
71 MPH (115 km/h)
4H:
62 MPH (100 km/h)
4LO:
31 MPH (50 km/h)
5-12Starting and driving
ZREVIEW COPYÐ2007 Pathfinder(pat)
Owners ManualÐUSA_English(nna)
10/16/06Ðdebbie
X
Page 228 of 352
WARNING
cFor 4WD equipped vehicles, do not at-
tempt to raise two wheels off the
ground and shift the transmission to
any drive or reverse position with the
engine running. Doing so may result in
drivetrain damage or unexpected ve-
hicle movement which could result in
serious vehicle damage or personal
injury.
cDo not attempt to test a 4WD equipped
vehicle on a 2-wheel dynamometer
(such as the dynamometers used by
some states for emissions testing) , or
similar equipment even if the other two
wheels are raised off the ground. Make
sure you inform test facility personnel
that your vehicle is equipped with 4WD
before it is placed on a dynamometer.
Using the wrong test equipment may
result in drivetrain damage or unex-
pected vehicle movement which could
result in serious vehicle damage or per-
sonal injury.
CAUTION
cDo not drive the vehicle in the 4H or 4LO
position on dry hard surface roads. Driv-
ing on dry, hard surfaces in 4H or 4LO
may cause unnecessary noise, tire wear
and increased fuel consumption.
If the 4WD warning light turns on when
you are driving on dry hard surface
roads:
– in the 4H position, shift the 4WD shift
switch to 2WD.
– in the 4LO position for all mode 4WD
vehicles, stop the vehicle and shift
the transmission selector to the N
position with the brake pedal de-
pressed and shift the 4WD shift
switch to 2WD.
– in the 4LO position for part time 4WD
vehicles, stop the vehicle and shift
the transmission selector to the N
position with the brake pedal de-
pressed and shift the 4WD shift
switch to 2WD.
cIf the warning light is still on after the
above operation, have your vehicle
checked by a NISSAN dealer as soon as
possible.cThe transfer case may be damaged if
you continue driving with the warning
light blinking rapidly.
All mode 4WD system (if so
equipped)
The all mode 4WD system provides 4 positions
(AUTO, 2WD, 4H and 4LO) , so you can select
the desired drive mode according to the driving
conditions.
USING FOUR WHEEL DRIVE
(4WD)
5-18Starting and driving
ZREVIEW COPYÐ2007 Pathfinder(pat)
Owners ManualÐUSA_English(nna)
10/16/06Ðdebbie
X
Page 240 of 352
WARNING
Do not pump the brake pedal. Doing so
may result in increased stopping
distances.
Self-test feature
The ABS includes electronic sensors, electric
pumps, hydraulic solenoids and a computer. The
computer has a built-in diagnostic feature that
tests the system each time you start the engine
and move the vehicle at a low speed in forward or
reverse. When the self-test occurs, you may hear
a “clunk” noise and/or feel a pulsation in the brake
pedal. This is normal and does not indicate a
malfunction. If the computer senses a malfunc-
tion, it switches the ABS off and illuminates the
ABS warning light on the instrument panel. The
brake system then operates normally, but without
anti-lock assistance.
If the ABS warning light illuminates during the
self-test or while driving, have the vehicle
checked by a NISSAN dealer.
Normal operation
The ABS operates at speeds above3-6MPH(5
- 10 km/h) .When the ABS senses that one or more wheels
are close to locking up, the actuator rapidly ap-
plies and releases hydraulic pressure.
This action is similar to pumping the brakes very
quickly. You may feel a pulsation in the brake
pedal and hear a noise from under the hood or
feel a vibration from the actuator when it is oper-
ating. This is normal and indicates that the ABS is
operating properly. However, the pulsation may
indicate that road conditions are hazardous and
extra care is required while driving.When accelerating or driving on slippery sur-
faces, the tires may spin or slide. With the Vehicle
Dynamic Control (VDC) system, sensors detect
these movements and control the braking and
engine output to help improve vehicle stability.
cWhen the vehicle dynamic control (VDC)
system is operating, the SLIP indicator in the
instrument panel blinks.
cIf the 4WD transfer case is shifted into 4LO
the
indicator light will come on and
the VDC system will be turned off. See
“Transfer case shifting procedures” earlier in
this section.
cIf the SLIP indicator blinks, the road condi-
tions are slippery. Be sure to adjust your
speed and driving to these conditions. See
“Slip indicator light”, and “Vehicle dynamic
control (VDC) off indicator light” in the “In-
struments and controls” section.
If the battery is removed or discharged, the trac-
tion control system may be disabled and the
SLIPand
indicator lights will not turn off
after 2 seconds when the ignition switch is turned
to the ON position. Perform the following proce-
dure to reset the system:
cStart the engine and set the steering wheel
in the straight forward position.
VEHICLE DYNAMIC CONTROL (VDC)
SYSTEM (if so equipped)
5-30Starting and driving
ZREVIEW COPYÐ2007 Pathfinder(pat)
Owners ManualÐUSA_English(nna)
10/16/06Ðdebbie
X