2007 NISSAN PATHFINDER ECO mode
[x] Cancel search: ECO modePage 196 of 352

SCAN/RPT:
When the SCAN/RPT play button is pushed
while the compact disc is played, the play pattern
can be changed as follows:
ALL DISC RPT!1 DISC RPT!1 TRACK RPT
!ALL DISC RDM!1 DISC RDM!ALL DISC
RPT
ALL DISC RPT: All discs loaded will be repeated.
1 DISC RPT: The disc that is currently playing will
be repeated.
1 TRACK RPT: The track that is currently playing
will be repeated
ALL DISC RDM: Tracks from all discs will be
played randomly
1 DISC RDM: Tracks from the disc that is cur-
rently playing will be played randomly
DVD button:
When the DVD button is pushed with the system
off and a DVD loaded in the DVD player, the DVD
will start to play. When the DVD button is pushed
with the DVD loaded with another audio source
playing, the other source will automatically be
turned off and the DVD will start to play.
When the radio goes into DVD mode and the
DVD player is off the DVD player will turn on.
When the DVD player is on radio or CD can be
selected. The DVD player will remain on and
broadcast audio through the headphones in therear of the vehicle. The DVD player can be turned
off from the radio by selecting the DVD mode and
pushing the radio power button. The DVD player
will turn off and the radio will go to the last
selected mode.
The DVD player can be operated by remote con-
trol or by the DVD entertainment system located
in the center console.
CD EJECT:
Current/Selected disc:
cPress the
button, then press the slot
number (1 – 6) for the desired disc. The
compact disc will be ejected. If no slot num-
ber (1 – 6) is pressed, the current loaded
disc will be ejected. Also, if the ejected disc
is not removed within 15 seconds, the disc
will reload.
All discs:
cPress and hold the
button for more
than 1.5 seconds. The compact discs will be
ejected one by one. If a disc is not removed
within 15 seconds, or the
button is
pressed again during the eject sequence,
the entire disc eject sequence will be can-
celed.When this button is pressed while the compact
disc is being played, the compact disc will eject
and the last source will be played.
CD IN indicator:
The slot numbers (1 – 6) will illuminate if CDs
have been loaded into the changer in CD mode
only.
4-46Display screen, heater, air conditioner and audio systems
ZREVIEW COPYÐ2007 Pathfinder(pat)
Owners ManualÐUSA_English(nna)
10/16/06Ðcathy
X
Page 198 of 352
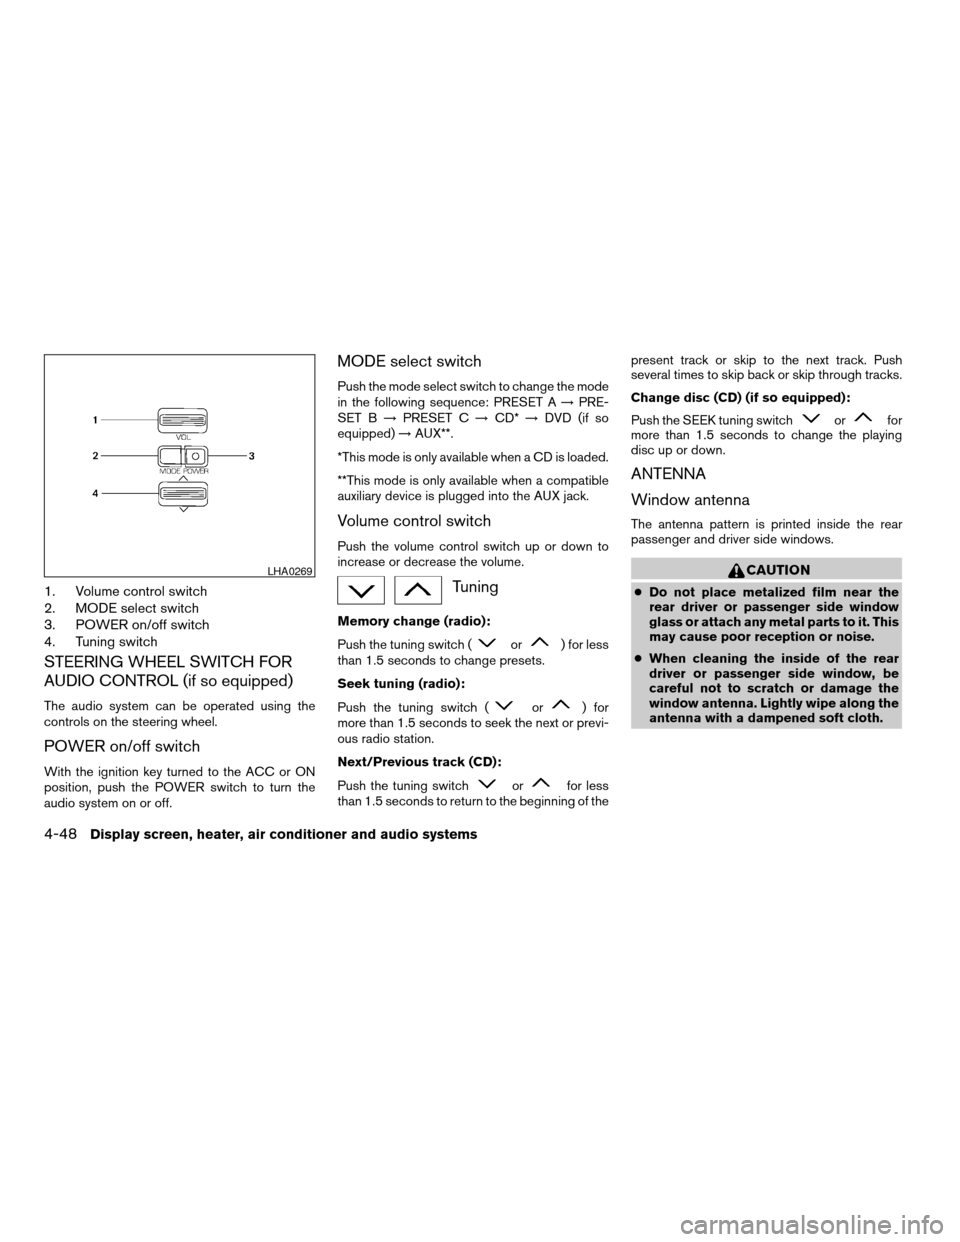
1. Volume control switch
2. MODE select switch
3. POWER on/off switch
4. Tuning switch
STEERING WHEEL SWITCH FOR
AUDIO CONTROL (if so equipped)
The audio system can be operated using the
controls on the steering wheel.
POWER on/off switch
With the ignition key turned to the ACC or ON
position, push the POWER switch to turn the
audio system on or off.
MODE select switch
Push the mode select switch to change the mode
in the following sequence: PRESET A!PRE-
SET B!PRESET C!CD*!DVD (if so
equipped)!AUX**.
*This mode is only available when a CD is loaded.
**This mode is only available when a compatible
auxiliary device is plugged into the AUX jack.
Volume control switch
Push the volume control switch up or down to
increase or decrease the volume.
Tuning
Memory change (radio):
Push the tuning switch (
or) for less
than 1.5 seconds to change presets.
Seek tuning (radio):
Push the tuning switch (
or) for
more than 1.5 seconds to seek the next or previ-
ous radio station.
Next/Previous track (CD):
Push the tuning switch
orfor less
than 1.5 seconds to return to the beginning of thepresent track or skip to the next track. Push
several times to skip back or skip through tracks.
Change disc (CD) (if so equipped):
Push the SEEK tuning switch
orfor
more than 1.5 seconds to change the playing
disc up or down.
ANTENNA
Window antenna
The antenna pattern is printed inside the rear
passenger and driver side windows.
CAUTION
cDo not place metalized film near the
rear driver or passenger side window
glass or attach any metal parts to it. This
may cause poor reception or noise.
cWhen cleaning the inside of the rear
driver or passenger side window, be
careful not to scratch or damage the
window antenna. Lightly wipe along the
antenna with a dampened soft cloth.
LHA0269
4-48Display screen, heater, air conditioner and audio systems
ZREVIEW COPYÐ2007 Pathfinder(pat)
Owners ManualÐUSA_English(nna)
10/16/06Ðcathy
X
Page 203 of 352
It is possible to operate the DVD player by remote
control.
Headphones are a wireless type and no cables
are necessary. You can use them in almost all the
ranges in the rear seat. (It is not possible to use
the headphones in the front seat.)
POWER on/off button:
With the ignition switch turned to the ACC or ON
position, press the POWER button to turn the
DVD player on or off.
Insert the DVD into the slot with the label side
facing up. The DVD will be guided automatically
into the slot.
If the DVD player is off and a DVD is inserted, the
DVD player will automatically turn on.
CAUTION
Do not force the compact disc into the
slot. This could damage the player.
MODE select button:
Press the MODE button to select Audio/Video
source between DVD and AUX input (input jacks
on the faceplate, Red = right channel audio input,
White = left channel audio input, and Yellow =
Video input) .The display will show the “AUX” in the upper left
corner of the display for 4 seconds once the
Mode is changed to AUX.
To use the input jacks, refer to “Auxiliary input
jacks” in this section.
orPLAY:
When the PLAY/PAUSE button on the player or
the PLAY button on the remote control is
pressed, the player will play.
In play mode, the display will briefly show
on the upper left corner of the display.
FF (Fast Forward) , REW
(Remote control only):
Press FAST FORWARD/FAST REVERSE but-
tons to carry out the fast forward or fast reverse
presentation at 5 times normal play speed.
Press FAST FORWARD/FAST REVERSE but-
tons again or PLAY button to resume the normal
play speed.
NEXT CHAPTER/
PREVIOUS CHAPTER
(Remote control only):
When the
(NEXT CHAPTER) button is
pressed while the DVD is being played, the pro-
gram next to the present one will start to play from
its beginning. Press several times to skip throughprograms. The DVD will advance the number of
times the button is pressed. When the
(PREVIOUS CHAPTER) button is pressed, the
program being played returns to its beginning.
Press several times to skip back through pro-
grams. The DVD will go back the number of times
the button is pressed.
orPAUSE:
When the PLAY/PAUSE button on the player or
the PAUSE button on the remote control is
pressed, the player will pause playing of the
media. In pause mode, the player will show
on the upper left corner of the display until the
player is changed to another mode.
STOP:
Press the STOP button once to stop playing the
media. The display will show
in the upper
left corner of the display for 4 seconds, and the
last disc position will be stored. When the PLAY
button is pressed again, it will resume at the
stored disc track and time position.
If the STOP button is pressed again when the
player is already in Stop mode, it will reinitialize
the pointer to the beginning of the disc. In effect it
will ignore the last stored disc position and upon
receipt of the next play message it will begin at
the Title Menu, or at “the beginning of the disc”.
Display screen, heater, air conditioner and audio systems4-53
ZREVIEW COPYÐ2007 Pathfinder(pat)
Owners ManualÐUSA_English(nna)
10/16/06Ðcathy
X
Page 204 of 352

EJECT:
When the EJECT button is pressed with the DVD
loaded, it will be ejected.
The display will show the EJECT symbol
in
the upper left corner of the display for 4 seconds
once the EJECT button is pressed.
If the DVD is not loaded, the display will show
“NO DISC”.
If the DVD comes out and is not removed within
25 seconds, it will be pulled back into the slot to
protect it.
DISPLAY:
If the DISPLAY control is pressed for less than 2
seconds, the display menu will appear on the
screen.
cThe display menu will remain on the screen
for 10 seconds if no subsequent control
activations occur.
cUse NAVIGATION KEYS to navigate within
the display menu, and use ENTER to select
the item.
cHolding the DISPLAY control on the face-
plate for longer than approximately 2 sec-
onds while in the display menu will reset the
display characteristics to their nominal val-
ues. (Faceplate feature only)If the DISPLAY control button on the faceplate is
pressed for more than 2 seconds, the media
track/time information will be displayed along the
bottom of the display. Pressing the DISPLAY
control for more than 2 seconds will remove the
media track/time information from the display.
(Faceplate feature only)
NAVIGATION KEYS:
If media is in PLAY mode, activation of the NAVI-
GATION KEYS (Up, Down, Left, and Right) will
perform the following functions: next
chapter/track, previous chapter/track, fast re-
verse and fast forward, and the display will
show
,,andrespec-
tively in the upper left corner of the display for 4
seconds. (Faceplate feature only)
If media is in PAUSE mode, activation of the
NAVIGATION KEYS (Up, Down and Right) will
perform the following functions: next
chapter/track, previous chapter/track and slow
forward, and the display will show
,and a forward arrow symbol respectively in the
upper left corner of the display for 4 seconds.
(Faceplate feature only)
If media is in activated MENU mode, the NAVI-
GATION KEYS will be used to navigate Up,
Down, Left, and Right within the menu.If display control menu is on, the NAVIGATION
KEYS will be used to navigate Up, Down, Left,
and Right within the menu.
ENTER:
In MENU mode, press the ENTER button to se-
lect MENU items.
In the display menu, press the ENTER button to
select items for modification, as per the on-
screen instructions.
MENU:
If the media is in PLAY mode and the MENU
button is pressed, the DVD menu will appear on
the screen. Use Navigation Keys to navigate
within the menu, and use ENTER to select the
item.
Press the MENU button again to return to PLAY
mode.
TITLE (Remote control only):
Press TITLE button to return the DVD media to
the “title” of the DVD.
Press TITLE button again to return to the previous
stop point and play.
BACK (Remote control only):
Press the BACK button to exit the current active
menu and return to the previous menu.
4-54Display screen, heater, air conditioner and audio systems
ZREVIEW COPYÐ2007 Pathfinder(pat)
Owners ManualÐUSA_English(nna)
10/16/06Ðcathy
X
Page 208 of 352
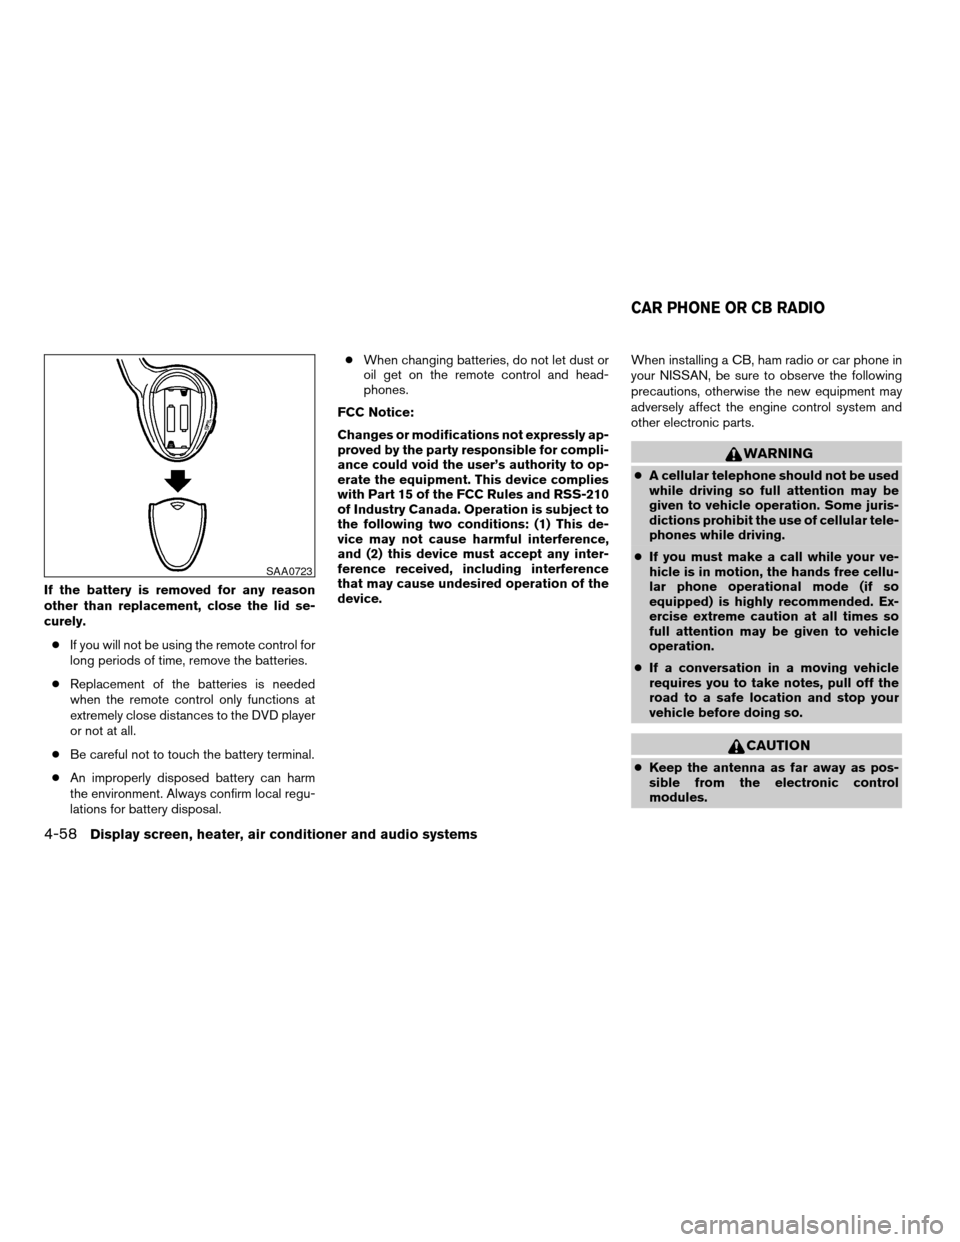
If the battery is removed for any reason
other than replacement, close the lid se-
curely.
cIf you will not be using the remote control for
long periods of time, remove the batteries.
cReplacement of the batteries is needed
when the remote control only functions at
extremely close distances to the DVD player
or not at all.
cBe careful not to touch the battery terminal.
cAn improperly disposed battery can harm
the environment. Always confirm local regu-
lations for battery disposal.cWhen changing batteries, do not let dust or
oil get on the remote control and head-
phones.
FCC Notice:
Changes or modifications not expressly ap-
proved by the party responsible for compli-
ance could void the user’s authority to op-
erate the equipment. This device complies
with Part 15 of the FCC Rules and RSS-210
of Industry Canada. Operation is subject to
the following two conditions: (1) This de-
vice may not cause harmful interference,
and (2) this device must accept any inter-
ference received, including interference
that may cause undesired operation of the
device.When installing a CB, ham radio or car phone in
your NISSAN, be sure to observe the following
precautions, otherwise the new equipment may
adversely affect the engine control system and
other electronic parts.
WARNING
cA cellular telephone should not be used
while driving so full attention may be
given to vehicle operation. Some juris-
dictions prohibit the use of cellular tele-
phones while driving.
cIf you must make a call while your ve-
hicle is in motion, the hands free cellu-
lar phone operational mode (if so
equipped) is highly recommended. Ex-
ercise extreme caution at all times so
full attention may be given to vehicle
operation.
cIf a conversation in a moving vehicle
requires you to take notes, pull off the
road to a safe location and stop your
vehicle before doing so.
CAUTION
cKeep the antenna as far away as pos-
sible from the electronic control
modules.
SAA0723
CAR PHONE OR CB RADIO
4-58Display screen, heater, air conditioner and audio systems
ZREVIEW COPYÐ2007 Pathfinder(pat)
Owners ManualÐUSA_English(nna)
10/16/06Ðcathy
X
Page 220 of 352
cMake sure the area around the vehicle is
clear.
cCheck fluid levels such as engine oil, cool-
ant, brake fluid, and window washer fluid as
frequently as possible, or at least whenever
you refuel.
cCheck that all windows and lights are clean.
cVisually inspect tires for their appearance
and condition. Also check tires for proper
inflation.
cLock all doors.
cPosition seat and adjust head restraints.
cAdjust inside and outside mirrors.
cFasten seat belts and ask all passengers to
do likewise.
cCheck the operation of warning lights when
the key is turned to the ON (3) position. See
“Warning/indicator lights and audible re-
minders” in the “Instruments and controls”
section of this manual.1. Apply the parking brake.
2. Move the shift selector lever to P (Park) or N
(Neutral) . P (Park) is recommended.
The shift selector lever cannot be
moved out of P (Park) and into any of
the other gear positions if the ignition
key is turned to the OFF position or if
the key is removed from the ignition
switch.
The starter is designed not to operate if
the shift selector lever is in any of the
driving positions.
3. Crank the enginewith your foot off the
accelerator pedalby turning the ignition
key to START. Release the key when the
engine starts. If the engine starts, but fails to
run, repeat the above procedure.
cIf the engine is very hard to start in ex-
tremely cold weather or when restarting,
depress the accelerator pedal a little (ap-
proximately 1/3 to the floor) and hold it
and then crank the engine. Release the
key and the accelerator pedal when the
engine starts.
cIf the engine is very hard to start because
it is flooded, depress the accelerator
pedal all the way to the floor and hold it.
Crank the engine for 5-6 seconds. Aftercranking the engine, release the accel-
erator pedal. Crank the enginewith your
foot off the accelerator pedalby turn-
ing the ignition key to START. Release the
key when the engine starts. If the engine
starts, but fails to run, repeat the above
procedure.
CAUTION
Do not operate the starter for more than
15 seconds at a time. If the engine does
not start, turn the key off and wait 10
seconds before cranking again, otherwise
the starter could be damaged.
4. Allow the engine to idle for at least 30 sec-
onds after starting. Do not race the engine
while warming it up. Drive at moderate
speed for a short distance first, especially in
cold weather.
In cold weather, keep the engine running for
a minimum of 2–3 minutes before shutting it
off. Starting and stopping the engine over a
short period of time may make the vehicle
more difficult to start.
BEFORE STARTING THE ENGINE STARTING THE ENGINE
5-10Starting and driving
ZREVIEW COPYÐ2007 Pathfinder(pat)
Owners ManualÐUSA_English(nna)
10/16/06Ðdebbie
X
Page 227 of 352
CAUTION
During the first 1,200 miles (2,000 km) ,
follow these recommendations to obtain
maximum engine performance and en-
sure the future reliability and economy of
your new vehicle. Failure to follow these
recommendations may result in short-
ened engine life and reduced engine
performance.
cAvoid driving for long periods at constant
speed, either fast or slow, and do not run the
engine over 4,000 rpm.
cDo not accelerate at full throttle in any gear.
cAvoid quick starts.
cAvoid hard braking as much as possible.
cDo not tow a trailer for the first 500 miles
(800 km) . Your engine, axle or other parts
could be damaged.cAccelerate slowly and smoothly. Maintain
cruising speeds with a constant accelerator
position.
cDrive at moderate speeds on the highway.
Driving at high speed lowers fuel economy.
cAvoid unnecessary stopping and braking.
Maintain a safe distance behind other ve-
hicles.
cUse a proper gear range which suits road
conditions. On level roads, shift into high
gear as soon as possible.
cAvoid unnecessary engine idling.
cKeep your engine tuned up.
cFollow the recommended periodic mainte-
nance schedule.
cKeep the tires inflated to the correct pres-
sure. Low tire pressure increases tire wear
and lowers fuel economy.
cKeep the front wheels in correct alignment.
Improper alignment increases tire wear and
lowers fuel economy.
cAir conditioner operation lowers fuel
economy. Use the air conditioner only when
necessary.cWhen cruising at highway speeds, it is more
economical to use the air conditioner and
leave the windows closed to reduce drag.
c
Use 4H or 4L position only when
necessary. Four-wheel drive operation low-
ers fuel economy.
BREAK-IN SCHEDULE INCREASING FUEL ECONOMY
Starting and driving5-17
ZREVIEW COPYÐ2007 Pathfinder(pat)
Owners ManualÐUSA_English(nna)
10/16/06Ðdebbie
X
Page 230 of 352
The transfer case 4WD shift switch is used to
select either 2WD or 4WD depending on the
driving conditions. There are four types of drive
modes available, AUTO, 2WD, 4H and 4LO.
The 4WD shift switch electronically controls the
transfer case operation. Rotate the switch to
move between each mode, 2WD, AUTO, 4H and
4LO.
You must depress the switch to select 4LO,
and the vehicle MUST be stationary and the
automatic transmission selector lever in
the N position when changing into or out of
4LO.
WARNING
When parking, apply the parking brake
before stopping the engine and make sure
that the 4WD shift indicator light is on and
the ATP warning light goes off. Otherwise,
the vehicle could unexpectedly move even
if the automatic transmission is in the P
position.
CAUTION
cNever shift the 4WD shift switch be-
tween 4LO and 4H while driving.cThe 4H position provides greater trac-
tion. Avoid excessive speed, as it will
cause increased fuel consumption and
higher oil temperatures, and could
damage drivetrain components.
Speeds over 62.5 MPH (100 km/h) in 4H
is not recommended.
cThe 4LO position provides maximum
traction. Avoid raising vehicle speed ex-
cessively, as the maximum speed is ap-
proximately 31 MPH (50 km/h) .
cWhen driving straight, shift the 4WD
shift switch to the 2WD, AUTO or 4H
position. Do not move the 4WD shift
switch when making a turn or reversing.
cDo not shift the 4WD shift switch (be-
tween 2WD, AUTO and 4H) while driving
on steep downhill grades. Use the en-
gine brake and low automatic transmis-
sion gears (D1 or D2) for engine
braking.
cDo not operate the 4WD shift switch
(between 2WD, AUTO and 4H) with the
rear wheels spinning.cDo not drive on dry hard surface roads
in the 4H or 4LO position. Driving on dry
hard surfaces in 4H or 4LO may cause
unnecessary noise and tire wear.
NISSAN recommends driving in the
2WD or AUTO position under these
conditions.
cThe 4WD transfer case may not be
shifted between 4H and 4LO at low am-
bient temperatures and the transfer
4LO position indicator light may blink
even when the 4WD shift switch is
shifted. After driving for a while you can
change the 4WD transfer case between
4H and 4LO.
When driving on rough roads,
cSet the 4WD shift switch to AUTO, 4H or
4LO.
cDrive carefully according to the road surface
conditions.
When the vehicle is stuck,
cPlace stones or wooden blocks under the
tires to free the vehicle.
cSet the 4WD shift switch to 4H or 4LO.
5-20Starting and driving
ZREVIEW COPYÐ2007 Pathfinder(pat)
Owners ManualÐUSA_English(nna)
10/16/06Ðdebbie
X