2007 NISSAN PATHFINDER Ignition
[x] Cancel search: IgnitionPage 291 of 352

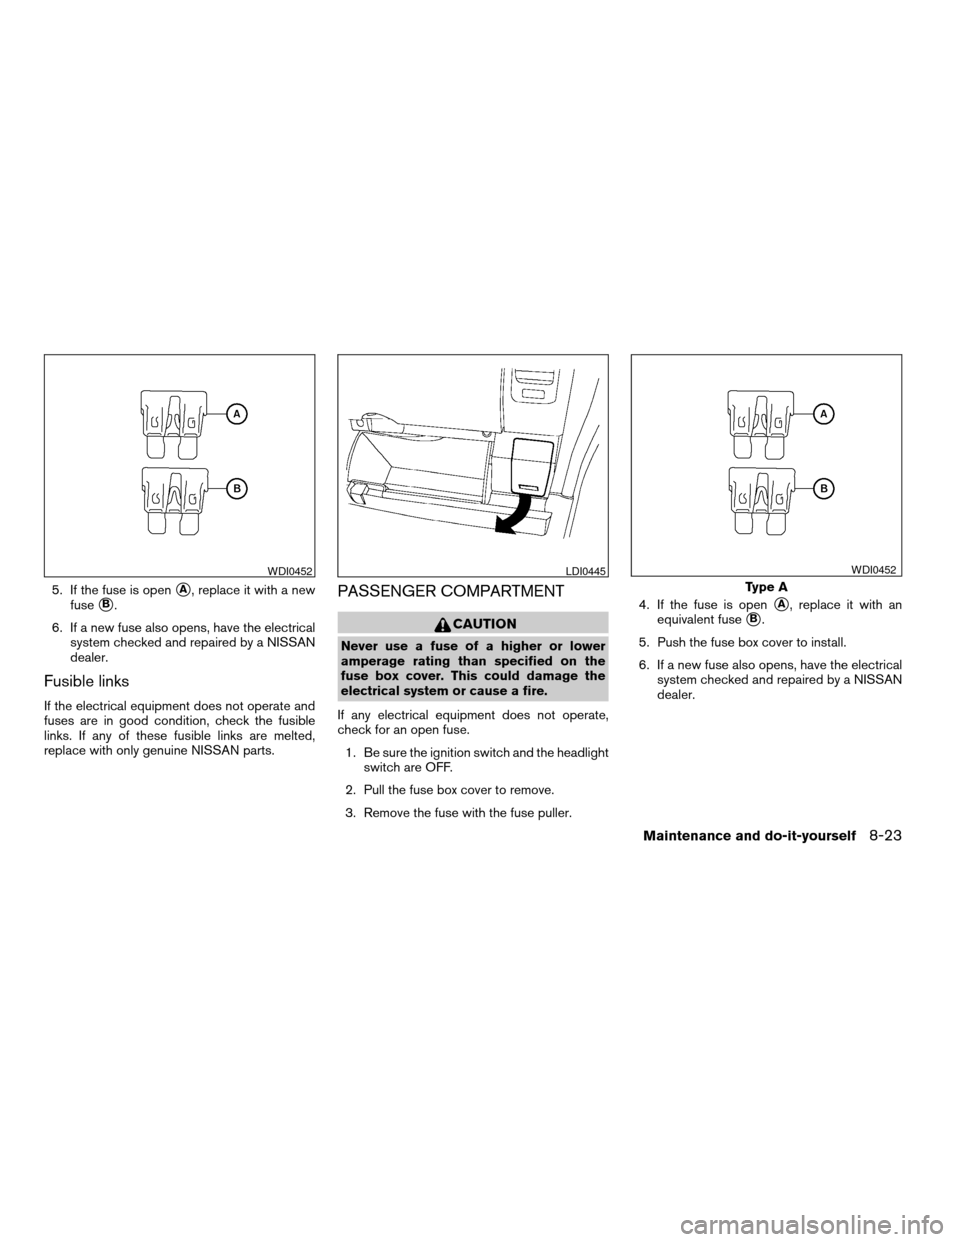
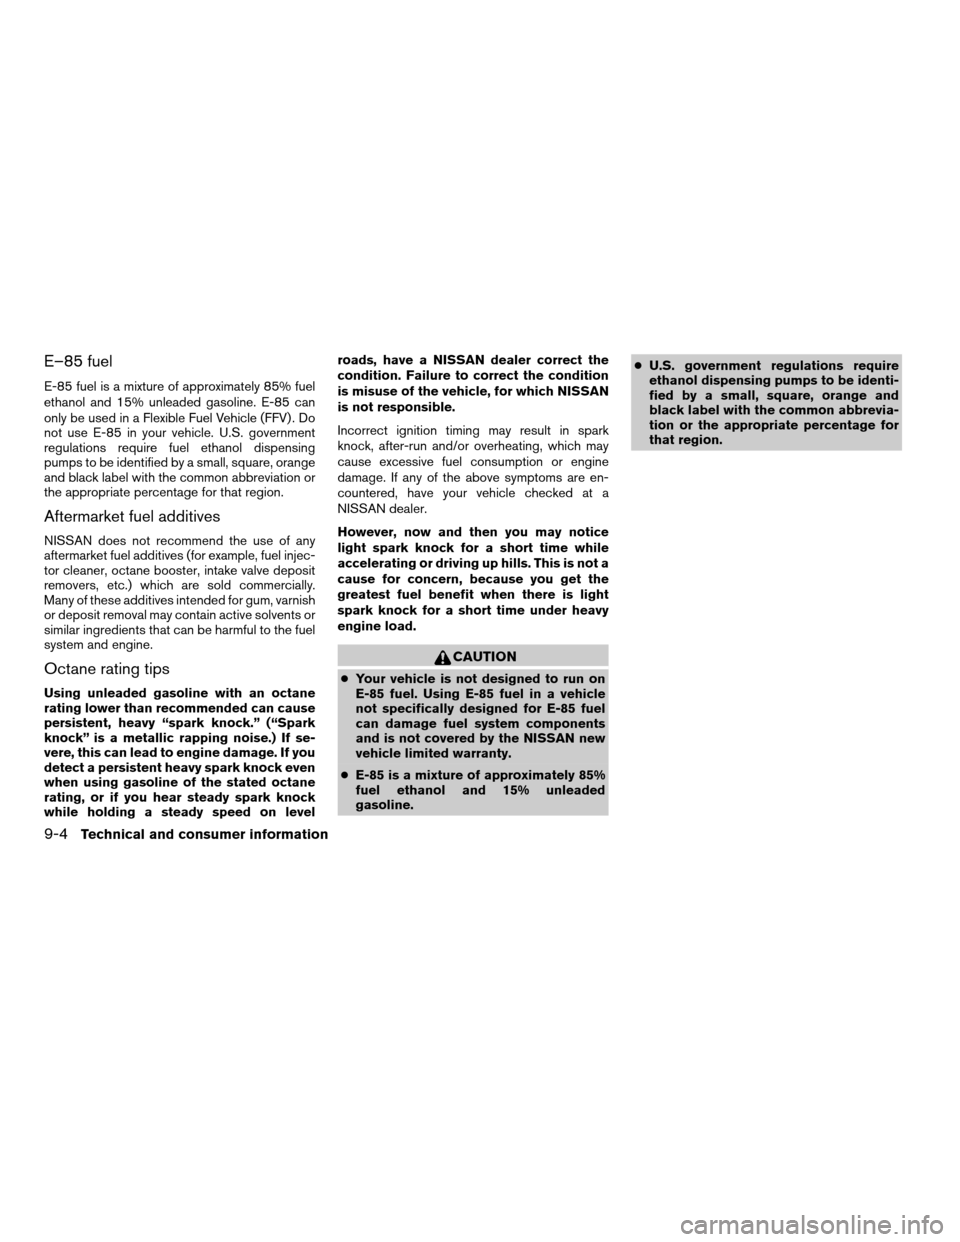
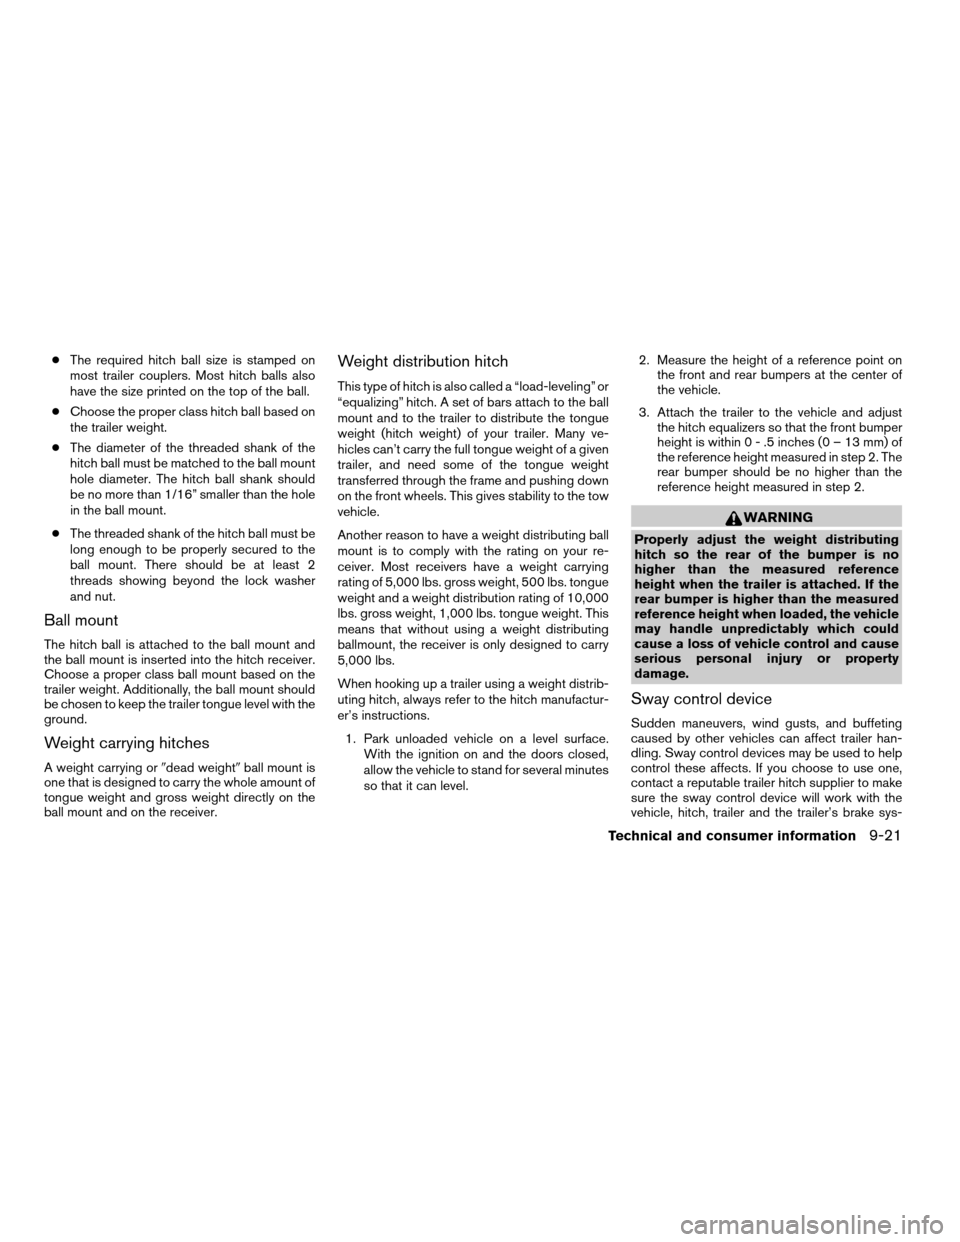
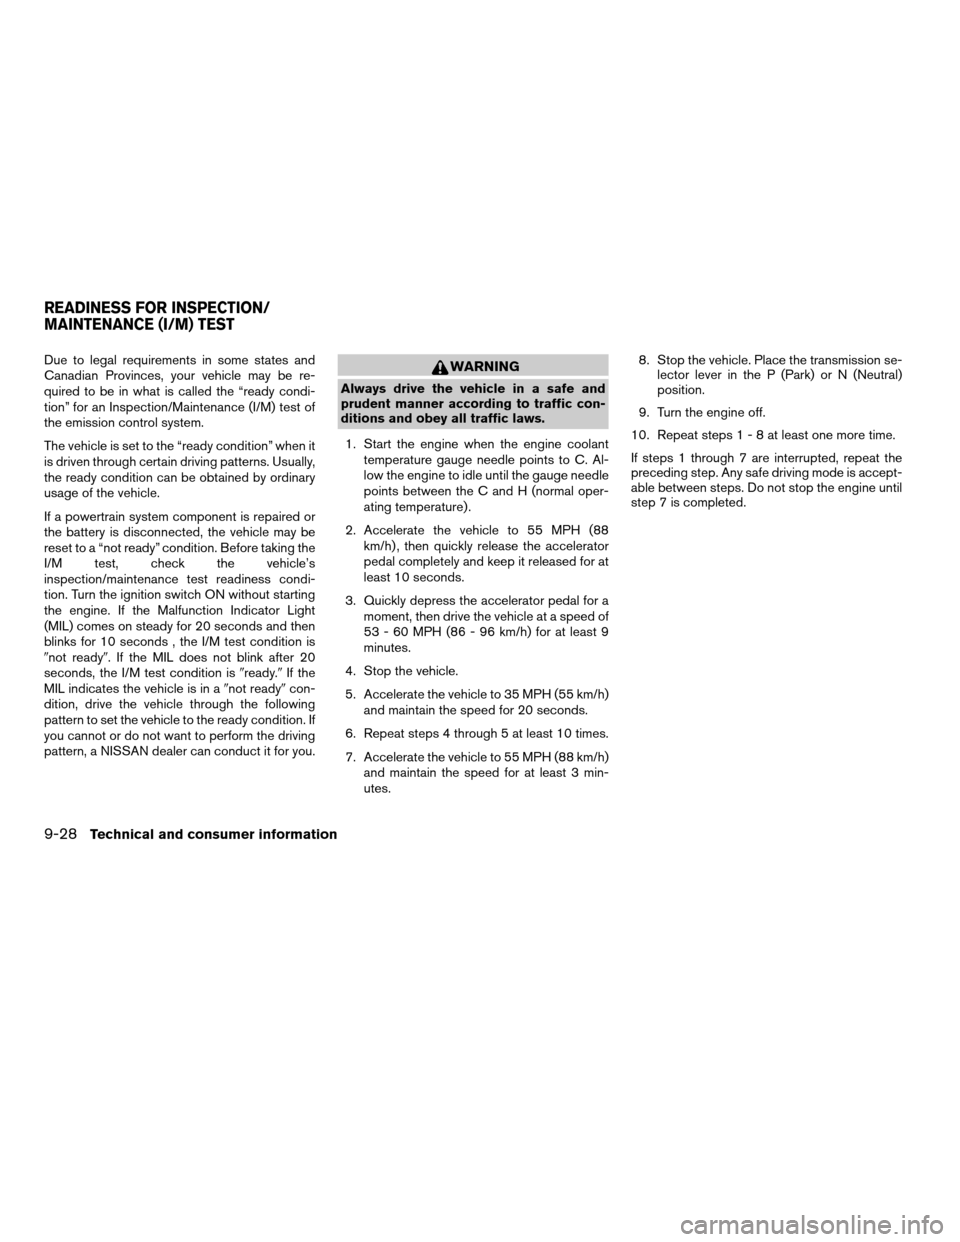
5. If the fuse is opensA, replace it with a new
fuse
sB.
6. If a new fuse also opens, have the electrical
system checked and repaired by a NISSAN
dealer.
Fusible links
If the electrical equipment does not operate and
fuses are in good condition, check the fusible
links. If any of these fusible links are melted,
replace with only genuine NISSAN parts.
PASSENGER COMPARTMENT
CAUTION
Never use a fuse of a higher or lower
amperage rating than specified on the
fuse box cover. This could damage the
electrical system or cause a fire.
If any electrical equipment does not operate,
check for an open fuse.
1. Be sure the ignition switch and the headlight
switch are OFF.
2. Pull the fuse box cover to remove.
3. Remove the fuse with the fuse puller.4. If the fuse is open
sA, replace it with an
equivalent fuse
sB.
5. Push the fuse box cover to install.
6. If a new fuse also opens, have the electrical
system checked and repaired by a NISSAN
dealer.
WDI0452LDI0445
Type A
WDI0452
Maintenance and do-it-yourself8-23
ZREVIEW COPYÐ2007 Pathfinder(pat)
Owners ManualÐUSA_English(nna)
10/26/06Ðcathy
X
Page 312 of 352

E–85 fuel
E-85 fuel is a mixture of approximately 85% fuel
ethanol and 15% unleaded gasoline. E-85 can
only be used in a Flexible Fuel Vehicle (FFV) . Do
not use E-85 in your vehicle. U.S. government
regulations require fuel ethanol dispensing
pumps to be identified by a small, square, orange
and black label with the common abbreviation or
the appropriate percentage for that region.
Aftermarket fuel additives
NISSAN does not recommend the use of any
aftermarket fuel additives (for example, fuel injec-
tor cleaner, octane booster, intake valve deposit
removers, etc.) which are sold commercially.
Many of these additives intended for gum, varnish
or deposit removal may contain active solvents or
similar ingredients that can be harmful to the fuel
system and engine.
Octane rating tips
Using unleaded gasoline with an octane
rating lower than recommended can cause
persistent, heavy “spark knock.” (“Spark
knock” is a metallic rapping noise.) If se-
vere, this can lead to engine damage. If you
detect a persistent heavy spark knock even
when using gasoline of the stated octane
rating, or if you hear steady spark knock
while holding a steady speed on levelroads, have a NISSAN dealer correct the
condition. Failure to correct the condition
is misuse of the vehicle, for which NISSAN
is not responsible.
Incorrect ignition timing may result in spark
knock, after-run and/or overheating, which may
cause excessive fuel consumption or engine
damage. If any of the above symptoms are en-
countered, have your vehicle checked at a
NISSAN dealer.
However, now and then you may notice
light spark knock for a short time while
accelerating or driving up hills. This is not a
cause for concern, because you get the
greatest fuel benefit when there is light
spark knock for a short time under heavy
engine load.
CAUTION
cYour vehicle is not designed to run on
E-85 fuel. Using E-85 fuel in a vehicle
not specifically designed for E-85 fuel
can damage fuel system components
and is not covered by the NISSAN new
vehicle limited warranty.
cE-85 is a mixture of approximately 85%
fuel ethanol and 15% unleaded
gasoline.cU.S. government regulations require
ethanol dispensing pumps to be identi-
fied by a small, square, orange and
black label with the common abbrevia-
tion or the appropriate percentage for
that region.
9-4Technical and consumer information
ZREVIEW COPYÐ2007 Pathfinder(pat)
Owners ManualÐUSA_English(nna)
10/16/06Ðdebbie
X
Page 315 of 352

ENGINE
ModelVQ40DE
TypeGasoline, 4-cycle, DOHC
Cylinder arrangement6-cylinder, V-block, Slanted at 60°
Bore x Strokein (mm) 3.760 x 3.622 (95.5 x 92)
Displacementcu in (cm
3) 241.30 (3,954)
Firing order1–2–3–4–5–6
Idle speed
See the “Emission Control Information label” on the under-
side of the hood. A/T (in “N” position)
Ignition timing (degree B.T.D.C. at idle speed)
CO % at idle
Spark plug
DILFR5A11
Spark plug gap (Nominal)in (mm) 0.043 (1.1)
Camshaft operationTiming chain
The spark ignition system of this vehicle meets all requirements of the Canadian Interference-Causing Equipment Regulations.
SPECIFICATIONS
Technical and consumer information9-7
ZREVIEW COPYÐ2007 Pathfinder(pat)
Owners ManualÐUSA_English(nna)
10/16/06Ðdebbie
X
Page 329 of 352

cThe required hitch ball size is stamped on
most trailer couplers. Most hitch balls also
have the size printed on the top of the ball.
cChoose the proper class hitch ball based on
the trailer weight.
cThe diameter of the threaded shank of the
hitch ball must be matched to the ball mount
hole diameter. The hitch ball shank should
be no more than 1/16” smaller than the hole
in the ball mount.
cThe threaded shank of the hitch ball must be
long enough to be properly secured to the
ball mount. There should be at least 2
threads showing beyond the lock washer
and nut.
Ball mount
The hitch ball is attached to the ball mount and
the ball mount is inserted into the hitch receiver.
Choose a proper class ball mount based on the
trailer weight. Additionally, the ball mount should
be chosen to keep the trailer tongue level with the
ground.
Weight carrying hitches
A weight carrying or9dead weight9ball mount is
one that is designed to carry the whole amount of
tongue weight and gross weight directly on the
ball mount and on the receiver.
Weight distribution hitch
This type of hitch is also called a “load-leveling” or
“equalizing” hitch. A set of bars attach to the ball
mount and to the trailer to distribute the tongue
weight (hitch weight) of your trailer. Many ve-
hicles can’t carry the full tongue weight of a given
trailer, and need some of the tongue weight
transferred through the frame and pushing down
on the front wheels. This gives stability to the tow
vehicle.
Another reason to have a weight distributing ball
mount is to comply with the rating on your re-
ceiver. Most receivers have a weight carrying
rating of 5,000 lbs. gross weight, 500 lbs. tongue
weight and a weight distribution rating of 10,000
lbs. gross weight, 1,000 lbs. tongue weight. This
means that without using a weight distributing
ballmount, the receiver is only designed to carry
5,000 lbs.
When hooking up a trailer using a weight distrib-
uting hitch, always refer to the hitch manufactur-
er’s instructions.
1. Park unloaded vehicle on a level surface.
With the ignition on and the doors closed,
allow the vehicle to stand for several minutes
so that it can level.2. Measure the height of a reference point on
the front and rear bumpers at the center of
the vehicle.
3. Attach the trailer to the vehicle and adjust
the hitch equalizers so that the front bumper
height is within0-.5inches (0 – 13 mm) of
the reference height measured in step 2. The
rear bumper should be no higher than the
reference height measured in step 2.
WARNING
Properly adjust the weight distributing
hitch so the rear of the bumper is no
higher than the measured reference
height when the trailer is attached. If the
rear bumper is higher than the measured
reference height when loaded, the vehicle
may handle unpredictably which could
cause a loss of vehicle control and cause
serious personal injury or property
damage.
Sway control device
Sudden maneuvers, wind gusts, and buffeting
caused by other vehicles can affect trailer han-
dling. Sway control devices may be used to help
control these affects. If you choose to use one,
contact a reputable trailer hitch supplier to make
sure the sway control device will work with the
vehicle, hitch, trailer and the trailer’s brake sys-
Technical and consumer information9-21
ZREVIEW COPYÐ2007 Pathfinder(pat)
Owners ManualÐUSA_English(nna)
10/26/06Ðcathy
X
Page 336 of 352

Due to legal requirements in some states and
Canadian Provinces, your vehicle may be re-
quired to be in what is called the “ready condi-
tion” for an Inspection/Maintenance (I/M) test of
the emission control system.
The vehicle is set to the “ready condition” when it
is driven through certain driving patterns. Usually,
the ready condition can be obtained by ordinary
usage of the vehicle.
If a powertrain system component is repaired or
the battery is disconnected, the vehicle may be
reset to a “not ready” condition. Before taking the
I/M test, check the vehicle’s
inspection/maintenance test readiness condi-
tion. Turn the ignition switch ON without starting
the engine. If the Malfunction Indicator Light
(MIL) comes on steady for 20 seconds and then
blinks for 10 seconds , the I/M test condition is
9not ready9. If the MIL does not blink after 20
seconds, the I/M test condition is9ready.9If the
MIL indicates the vehicle is in a9not ready9con-
dition, drive the vehicle through the following
pattern to set the vehicle to the ready condition. If
you cannot or do not want to perform the driving
pattern, a NISSAN dealer can conduct it for you.WARNING
Always drive the vehicle in a safe and
prudent manner according to traffic con-
ditions and obey all traffic laws.
1. Start the engine when the engine coolant
temperature gauge needle points to C. Al-
low the engine to idle until the gauge needle
points between the C and H (normal oper-
ating temperature) .
2. Accelerate the vehicle to 55 MPH (88
km/h) , then quickly release the accelerator
pedal completely and keep it released for at
least 10 seconds.
3. Quickly depress the accelerator pedal for a
moment, then drive the vehicle at a speed of
53 - 60 MPH (86 - 96 km/h) for at least 9
minutes.
4. Stop the vehicle.
5. Accelerate the vehicle to 35 MPH (55 km/h)
and maintain the speed for 20 seconds.
6. Repeat steps 4 through 5 at least 10 times.
7. Accelerate the vehicle to 55 MPH (88 km/h)
and maintain the speed for at least 3 min-
utes.8. Stop the vehicle. Place the transmission se-
lector lever in the P (Park) or N (Neutral)
position.
9. Turn the engine off.
10. Repeat steps1-8atleast one more time.
If steps 1 through 7 are interrupted, repeat the
preceding step. Any safe driving mode is accept-
able between steps. Do not stop the engine until
step 7 is completed.
READINESS FOR INSPECTION/
MAINTENANCE (I/M) TEST
9-28Technical and consumer information
ZREVIEW COPYÐ2007 Pathfinder(pat)
Owners ManualÐUSA_English(nna)
10/26/06Ðcathy
X
Page 341 of 352

Front air bag system
(See supplemental restraint system).....1-47
Front seats....................1-2
Fuel
Capacities and recommended fuel/
lubricants...................9-2
Fuel economy................5-17
Fuel gauge..................2-7
Fuel octane rating..............9-4
Fuel recommendation............9-3
Fuel-filler door and cap...........3-10
Fuel economy setting..............4-4
Fuses......................8-21
Fusible links...................8-23
G
Garage door opener, HomeLinkTUniversal
Transceiver...................2-53
Gascap.....................3-10
Gauge
Engine coolant temperature gauge.....2-6
Engine oil pressure gauge..........2-8
Fuel gauge..................2-7
Odometer...................2-4
Speedometer.................2-4
Tachometer..................2-6
Trip computer.................2-5
Trip odometer.................2-4
Voltmeter...................2-8
General maintenance..............8-2
Glass hatch...................3-10
Glove box....................2-38H
Hazard warning flasher switch.........2-31
Head restraints..................1-7
Active head restraint.............1-7
Headlight and turn signal switch........2-27
Headlight control switch............2-27
Headlights....................8-25
Headphones (See NISSAN mobile
entertainment system).............4-52
Heated seats..................2-32
Heater
Heater and air conditioner
controls................4-15, 4-22
Heater operation...........4-16, 4-23
Rear seat air conditioner..........4-25
Hill descent control switch...........2-33
Hill descent control system..........5-32
Hill start assist (HSA) system.........5-33
HomeLinkTUniversal Transceiver.......2-53
Hood release...................3-8
Hook
Luggage hook................2-42
Horn.......................2-32
I
Ignition switch..................5-8
Immobilizer system..........2-23, 3-2, 5-9
Important vehicle information label.......9-10
In-cabin microfilter...............8-17
Increasing fuel economy............5-17Indicator lights and audible reminders
(See warning/indicator lights and
audible reminders)...............2-13
Inside automatic anti-glare mirror.......3-14
Inside mirror...................3-14
Instrument brightness control.........2-30
Instrument panel..............0-6, 2-2
Instrument panel dimmer switch........2-30
Interior light...................2-51
ISOFIX child restraints.............1-22
J
Jump starting...................6-8
K
Key ........................3-2
Keyfob battery replacement..........8-24
Keyless entry system
(See remote keyless entry system).......3-5
L
Labels
Air conditioner specification label.....9-11
C.M.V.S.S. certification label........9-10
Emission control information label.....9-10
Engine serial number............9-10
F.M.V.S.S. certification label........9-10
Vehicle identification number (VIN) plate . .9-9
Warning labels (for SRS)..........1-55
Language setting................4-11
10-3
ZREVIEW COPYÐ2007 Pathfinder(pat)
Owners ManualÐUSA_English(nna)
01/10/07Ðdebbie
X
Page 344 of 352

Startup screen..................4-3
Steering
Power steering fluid.............8-11
Power steering system...........5-28
Tilting steering wheel............3-12
Steering wheel audio control switch......4-48
Stop light....................8-27
Storage.....................2-35
Storage bin................2-36, 2-42
Storage tray...................2-35
Sun visors....................3-13
Sunglasses case................2-38
Sunglasses holder...............2-38
Sunroof.....................2-49
Supplemental air bag warning labels.....1-55
Supplemental air bag warning light . . .1-55, 2-18
Supplemental front impact air bag system . .1-47
Supplemental restraint system
Information and warning labels.......1-55
Precautions on supplemental restraint
system....................1-39
Supplemental restraint system
(Supplemental air bag system).........1-39
Switch
Autolight switch...............2-28
Automatic power window switch.....2-48
Fog light switch...............2-30
Hazard warning flasher switch.......2-31
Headlight and turn signal switch......2-27
Headlight control switch..........2-27
Hill descent control switch.........2-33
Ignition switch................5-8
Overdrive switch..............5-14
Power door lock switch...........3-4
Rear window and outside mirror
defroster switch...............2-26Rear window wiper and washer
switches...................2-25
Turn signal switch..............2-30
Vehicle dynamic control (VDC)
off switch..................2-33
Windshield wiper and washer switch . . .2-24
T
Tachometer....................2-6
Temperature gauge
Engine coolant temperature gauge.....2-6
Theft (NISSAN vehicle immobilizer system) ,
engine start..............2-23, 3-2, 5-9
Three-way catalyst................5-2
Tilting steering wheel..............3-12
Tire
Flat tire....................6-2
Spare tire...................6-4
Tire chains..................8-37
Tire placard.................9-11
Tire pressure................8-30
Tire rotation.................8-38
Tires of 4-wheel drive............8-40
Types of tires................8-36
Uniform tire quality grading.........9-26
Wheels and tires..............8-30
Wheel/tire size................9-8
Tire pressure
Low tire pressure warning light......2-16
Tire pressure display...............4-6
Tire Pressure Monitoring System (TPMS) . . .5-3
Tire rotation maintenance reminder.......4-6
Top tether strap child restraint.........1-24Towing
2-wheel drive models............6-13
4-wheel drive models............6-14
Flat towing..................9-25
Tow truck towing..............6-12
Towing load/specification.........9-20
Trailer towing................9-17
Transceiver
HomeLinkTUniversal Transceiver.....2-53
Transmission
Driving with automatic transmission. . . .5-11
Selector lever lock release.........5-13
Travel (See registering your vehicle in
another country).................9-9
Trip button....................4-3
Trip computer...................2-5
Trip odometer...................2-4
Turn signal switch................2-30
U
Uniform tire quality grading...........9-26
V
Vanity mirror...................3-13
Vehicle dimensions and weights........9-8
Vehicle dynamic control (VDC) off switch. . .2-33
Vehicle dynamic control (VDC) system. . . .5-30
Vehicle electronic system............4-9
Vehicle identification...............9-9
Vehicle identification number (VIN)
(Chassis number).................9-9
Vehicle identification number (VIN) plate. . . .9-9
10-6
ZREVIEW COPYÐ2007 Pathfinder(pat)
Owners ManualÐUSA_English(nna)
01/10/07Ðdebbie
X