2007 NISSAN PATHFINDER ac controls
[x] Cancel search: ac controlsPage 173 of 352

cThe temperature of the passenger compart-
ment will be maintained automatically. Air
flow distribution, fan speed and A/C on/off
are also controlled automatically.
cA visible mist may be seen coming from the
ventilators in hot, humid conditions as the air
is cooled rapidly. This does not indicate a
malfunction.
Dehumidified defrosting or defogging
1. Push the defroster control buttonto
turn the system on. The display will show the
defrost icon.
2. Turn the temperature dial to the left or right
to set the desired temperature.
cTo quickly remove ice from the outside of the
windows, turn the manual fan control dial to
the maximum position
.
cAs soon as possible after the windshield is
clean, push the AUTO button to return to the
auto mode.
cWhen the DEF control
is activated,
the air conditioner will automatically be
turned on at outside temperatures above
36°F (2°C) . If in defrost mode for more than
one minute, the air conditioning system will
continue to operate until the fan control is
turned OFF or the vehicle is shut off, even ifthe air flow MODE control button is used to
select a position other than the
posi-
tion. This dehumidifies the air which helps
defog the windshield. The air recirculation
mode automatically turns off, allowing out-
side air to be drawn into the passenger
compartment to further improve the defog-
ging performance.
MANUAL OPERATION
Fan speed control dial
Turn the fan speed control dialleft or right
to manually control the fan speed or turn the
system on or off.
Push the AUTO button to return to automatic
control of the fan speed.
Air recirculation
Themode automatically turns off, allowing
outside air to be drawn into the passenger com-
partment to prevent fogging.
Push the air recirculation button
to recir-
culate interior air inside the vehicle. Push the
AUTO button to return to automatic mode.
The air recirculation button will not be activated
when the air conditioner is in DEF, floor, or
floor/defrost mode.
Air flow control
Pushing the MODE button manually controls air
flow and selects the air outlet:
— Air flows from center and side
ventilators.
— Air flows from center and side
ventilators and foot outlets.
— Air flows mainly from foot outlets.
— Air flows from defroster and foot
outlets.
— Air flows from defroster outlets.
To turn system off
Turn and hold the fan speed control dial all the
waytotheleft(0)until the system turns off.
Display screen, heater, air conditioner and audio systems4-23
ZREVIEW COPYÐ2007 Pathfinder(pat)
Owners ManualÐUSA_English(nna)
10/16/06Ðcathy
X
Page 174 of 352

1. Rear fan speed control dial.
2. Rear temperature control dial.
REAR CONTROL DIAL
You can adjust the climate control system for rear
seat passengers using the dials on the main
control panel. Front passengers can control the
rear functions by placing the controls on any
setting other than the “R”.
OPERATING TIPS
cWhen the engine coolant temperature and
outside air temperature are low, the air flow
from the foot outlets may not operate for a
maximum of 150 seconds. However, this is
not a malfunction. After the coolant tempera-
ture warms up, air flow from the foot outlets
will operate normally.
The sunload sensor
s1, located on the top center
of the instrument panel, helps the system main-
tain a constant temperature. Do not put anything
on or around this sensor.
WHA0509LIC0835
4-24Display screen, heater, air conditioner and audio systems
ZREVIEW COPYÐ2007 Pathfinder(pat)
Owners ManualÐUSA_English(nna)
10/16/06Ðcathy
X
Page 175 of 352
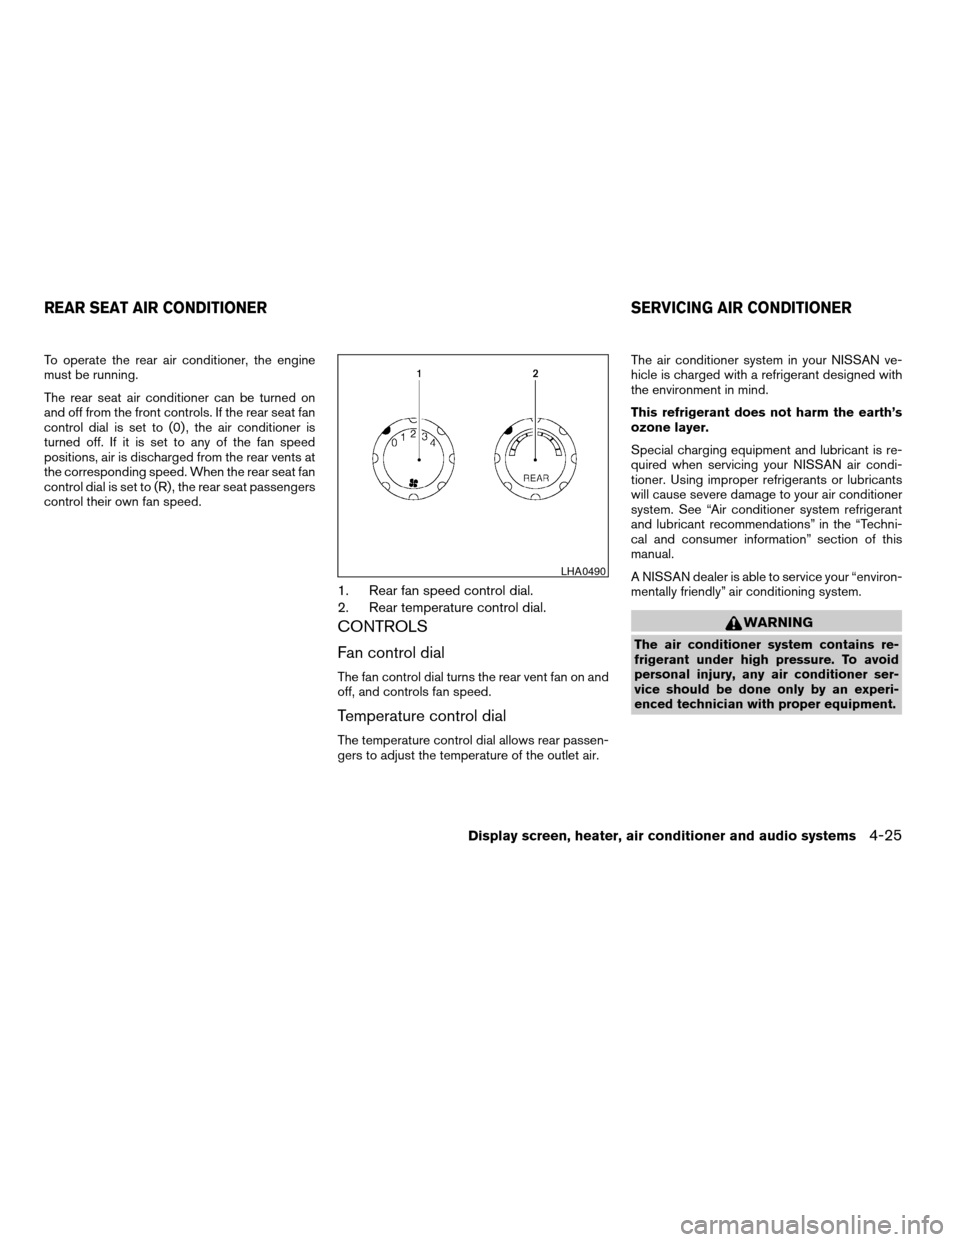
To operate the rear air conditioner, the engine
must be running.
The rear seat air conditioner can be turned on
and off from the front controls. If the rear seat fan
control dial is set to (0) , the air conditioner is
turned off. If it is set to any of the fan speed
positions, air is discharged from the rear vents at
the corresponding speed. When the rear seat fan
control dial is set to (R) , the rear seat passengers
control their own fan speed.
1. Rear fan speed control dial.
2. Rear temperature control dial.
CONTROLS
Fan control dial
The fan control dial turns the rear vent fan on and
off, and controls fan speed.
Temperature control dial
The temperature control dial allows rear passen-
gers to adjust the temperature of the outlet air.The air conditioner system in your NISSAN ve-
hicle is charged with a refrigerant designed with
the environment in mind.
This refrigerant does not harm the earth’s
ozone layer.
Special charging equipment and lubricant is re-
quired when servicing your NISSAN air condi-
tioner. Using improper refrigerants or lubricants
will cause severe damage to your air conditioner
system. See “Air conditioner system refrigerant
and lubricant recommendations” in the “Techni-
cal and consumer information” section of this
manual.
A NISSAN dealer is able to service your “environ-
mentally friendly” air conditioning system.
WARNING
The air conditioner system contains re-
frigerant under high pressure. To avoid
personal injury, any air conditioner ser-
vice should be done only by an experi-
enced technician with proper equipment.
LHA0490
REAR SEAT AIR CONDITIONER SERVICING AIR CONDITIONER
Display screen, heater, air conditioner and audio systems4-25
ZREVIEW COPYÐ2007 Pathfinder(pat)
Owners ManualÐUSA_English(nna)
10/16/06Ðcathy
X
Page 198 of 352
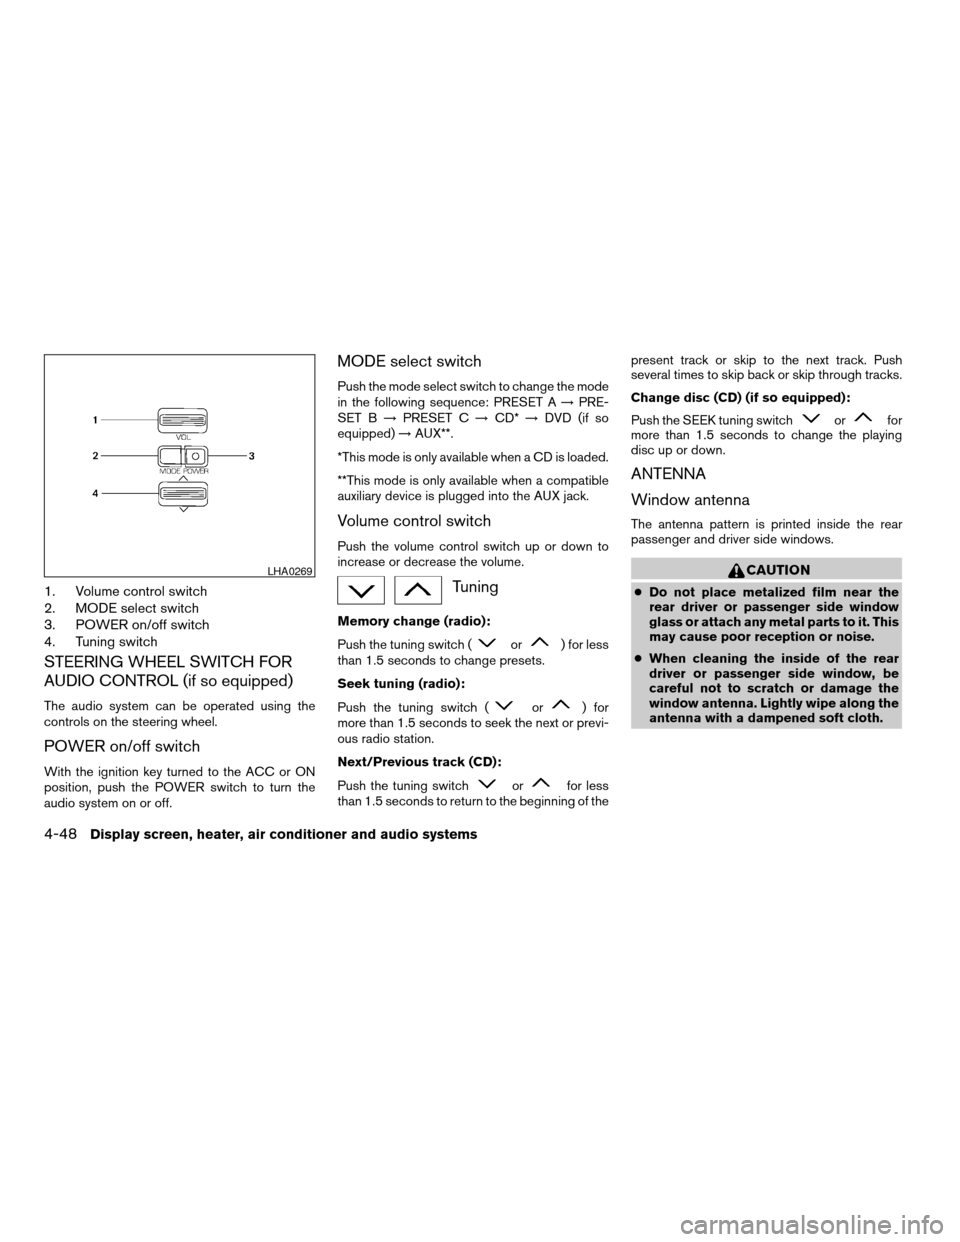
1. Volume control switch
2. MODE select switch
3. POWER on/off switch
4. Tuning switch
STEERING WHEEL SWITCH FOR
AUDIO CONTROL (if so equipped)
The audio system can be operated using the
controls on the steering wheel.
POWER on/off switch
With the ignition key turned to the ACC or ON
position, push the POWER switch to turn the
audio system on or off.
MODE select switch
Push the mode select switch to change the mode
in the following sequence: PRESET A!PRE-
SET B!PRESET C!CD*!DVD (if so
equipped)!AUX**.
*This mode is only available when a CD is loaded.
**This mode is only available when a compatible
auxiliary device is plugged into the AUX jack.
Volume control switch
Push the volume control switch up or down to
increase or decrease the volume.
Tuning
Memory change (radio):
Push the tuning switch (
or) for less
than 1.5 seconds to change presets.
Seek tuning (radio):
Push the tuning switch (
or) for
more than 1.5 seconds to seek the next or previ-
ous radio station.
Next/Previous track (CD):
Push the tuning switch
orfor less
than 1.5 seconds to return to the beginning of thepresent track or skip to the next track. Push
several times to skip back or skip through tracks.
Change disc (CD) (if so equipped):
Push the SEEK tuning switch
orfor
more than 1.5 seconds to change the playing
disc up or down.
ANTENNA
Window antenna
The antenna pattern is printed inside the rear
passenger and driver side windows.
CAUTION
cDo not place metalized film near the
rear driver or passenger side window
glass or attach any metal parts to it. This
may cause poor reception or noise.
cWhen cleaning the inside of the rear
driver or passenger side window, be
careful not to scratch or damage the
window antenna. Lightly wipe along the
antenna with a dampened soft cloth.
LHA0269
4-48Display screen, heater, air conditioner and audio systems
ZREVIEW COPYÐ2007 Pathfinder(pat)
Owners ManualÐUSA_English(nna)
10/16/06Ðcathy
X
Page 200 of 352

1. EJECT button
2. DVD slot
3. ENTER button
4. POWER on/off button
5. MODE button
6. Input jacks
7. STOP button
8. PLAY/PAUSE button
9. MENU button
10. DISPLAY button
11. NAVIGATION keysDIGITAL VIDEO DISC (DVD) PLAYER
CONTROLS
Refer to “Playing a digital video disc (DVD)” later
in this section for the function of each button.
1. POWER button
2. STOP button
3. NEXT TRACK/CHAPTER and PREVI-
OUS TRACK/CHAPTER button
4. TITLE button
5. ENTER button
LHA0316
LHA0317
4-50Display screen, heater, air conditioner and audio systems
ZREVIEW COPYÐ2007 Pathfinder(pat)
Owners ManualÐUSA_English(nna)
10/16/06Ðcathy
X
Page 202 of 352
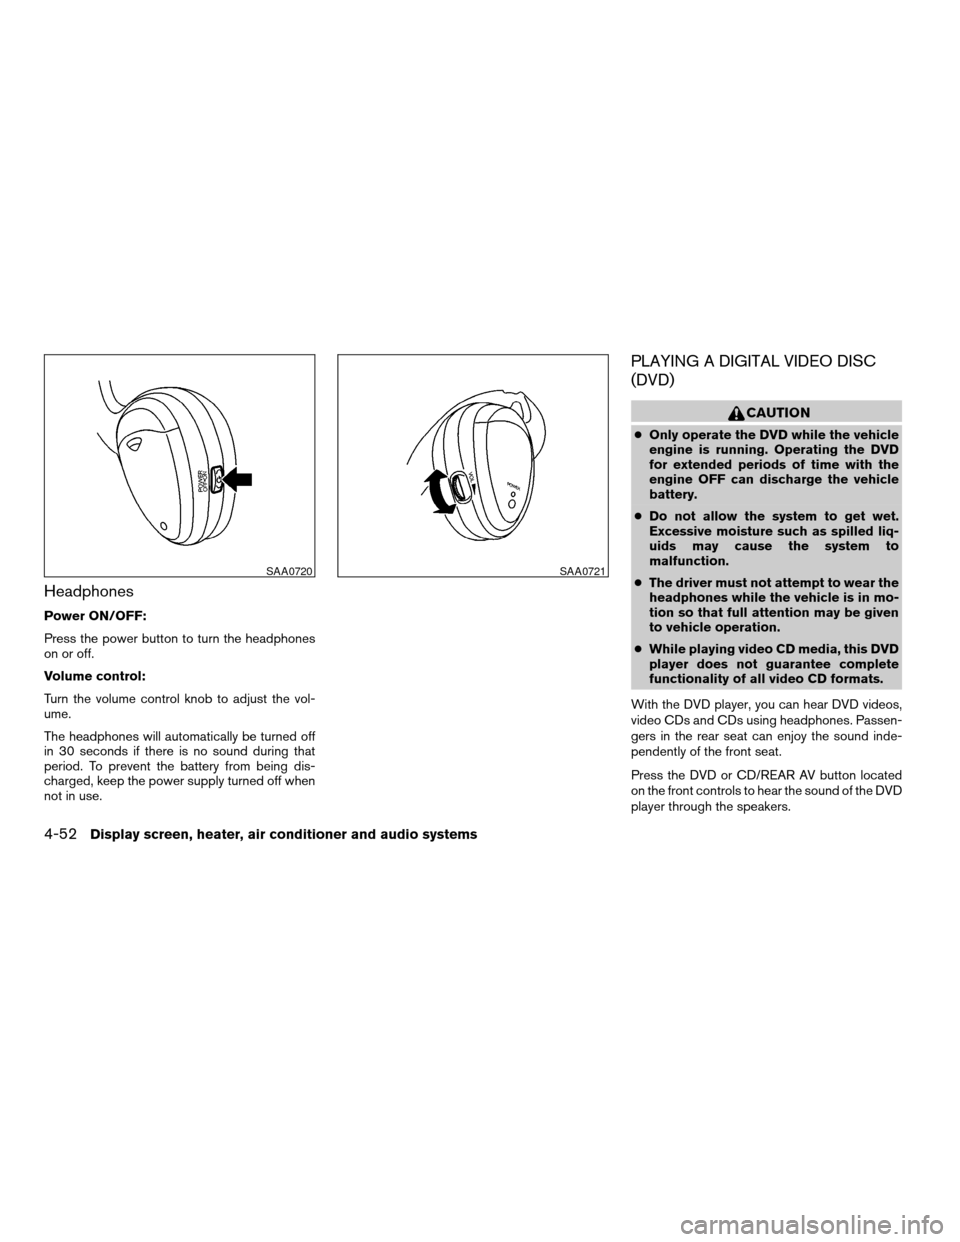
Headphones
Power ON/OFF:
Press the power button to turn the headphones
on or off.
Volume control:
Turn the volume control knob to adjust the vol-
ume.
The headphones will automatically be turned off
in 30 seconds if there is no sound during that
period. To prevent the battery from being dis-
charged, keep the power supply turned off when
not in use.
PLAYING A DIGITAL VIDEO DISC
(DVD)
CAUTION
cOnly operate the DVD while the vehicle
engine is running. Operating the DVD
for extended periods of time with the
engine OFF can discharge the vehicle
battery.
cDo not allow the system to get wet.
Excessive moisture such as spilled liq-
uids may cause the system to
malfunction.
cThe driver must not attempt to wear the
headphones while the vehicle is in mo-
tion so that full attention may be given
to vehicle operation.
cWhile playing video CD media, this DVD
player does not guarantee complete
functionality of all video CD formats.
With the DVD player, you can hear DVD videos,
video CDs and CDs using headphones. Passen-
gers in the rear seat can enjoy the sound inde-
pendently of the front seat.
Press the DVD or CD/REAR AV button located
on the front controls to hear the sound of the DVD
player through the speakers.
SAA0720SAA0721
4-52Display screen, heater, air conditioner and audio systems
ZREVIEW COPYÐ2007 Pathfinder(pat)
Owners ManualÐUSA_English(nna)
10/16/06Ðcathy
X
Page 214 of 352
cThe low tire pressure warning light does not
automatically turn off when the tire pressure
is adjusted. After the tire is inflated to the
recommended pressure, the vehicle must be
driven at speeds above 16 MPH (25 km/h)
to activate the TPMS and turn off the low tire
pressure warning light. Use a tire pressure
gauge to check the tire pressure.
cTire pressure rises and falls depending on
the heat caused by the vehicle’s operation
and the outside temperature. Low outside
temperature can lower the temperature of
the air inside the tire which can cause a
lower tire inflation pressure. This may cause
the low tire pressure warning light to illumi-
nate. If the warning light illuminates in low
ambient temperature, check the tire pres-
sure for all four tires.
cYou can also check the pressure of all tires
(except the spare tire) on the display screen.
The order of the tire pressure figures dis-
played on the screen does not correspond
with the actual order of the tire position. See
“Tire pressure information” in the “Display
screen, heater, air conditioner and audio
systems” section.
For additional information, see “Low tire pressure
warning light” in the “Instruments and controls”
section, “Tire pressure monitoring system
(TPMS)” in the “In case of emergency” section.WARNING
cIf the low tire pressure warning light
illuminates while driving, avoid sudden
steering maneuvers or abrupt braking,
reduce vehicle speed, pull off the road
to a safe location and stop the vehicle
as soon as possible. Serious vehicle
damage could occur and may lead to an
accident and could result in serious
personal injury. Check the tire pressure
for all four tires. Adjust the tire pressure
to the recommended COLD tire pres-
sure shown on the Tire and Loading
Information label to turn the low tire
pressure warning light OFF. If you have
a flat tire, replace it with a spare tire as
soon as possible. (See “Flat tire” in the
“In case of emergency” section for
changing a flat tire.)
cWhen a spare tire is mounted or a wheel
is replaced, tire pressure will not be
indicated, the TPMS will not function
and the low tire pressure warning light
will flash for approximately 1 minute.
The light will remain on after 1 minute.
Contact your NISSAN dealer as soon as
possible for tire replacement and/or
system resetting.cReplacing tires with those not originally
specified by NISSAN could affect the
proper operation of the TPMS.
cDo not inject any tire liquid or aerosol
tire sealant into the tires, as this may
cause a malfunction of the tire pressure
sensors.
CAUTION
Do not place metalized film or any metal
parts (antenna, etc.) on the windows. This
may cause poor reception of the signals
from the tire pressure sensors, and the
TPMS will not function properly.
Some devices and transmitters may temporarily
interfere with the operation of the TPMS and
cause the low tire pressure warning light to illu-
minate.
Some examples are:
– Facilities or electric devices using similar radio
frequencies are near the vehicle.
– If a transmitter set to similar frequencies is
being used in or near the vehicle.
– If a computer (or similar equipment) or a
DC/AC converter is being used in or near the
vehicle.
5-4Starting and driving
ZREVIEW COPYÐ2007 Pathfinder(pat)
Owners ManualÐUSA_English(nna)
10/26/06Ðcathy
X
Page 220 of 352
cMake sure the area around the vehicle is
clear.
cCheck fluid levels such as engine oil, cool-
ant, brake fluid, and window washer fluid as
frequently as possible, or at least whenever
you refuel.
cCheck that all windows and lights are clean.
cVisually inspect tires for their appearance
and condition. Also check tires for proper
inflation.
cLock all doors.
cPosition seat and adjust head restraints.
cAdjust inside and outside mirrors.
cFasten seat belts and ask all passengers to
do likewise.
cCheck the operation of warning lights when
the key is turned to the ON (3) position. See
“Warning/indicator lights and audible re-
minders” in the “Instruments and controls”
section of this manual.1. Apply the parking brake.
2. Move the shift selector lever to P (Park) or N
(Neutral) . P (Park) is recommended.
The shift selector lever cannot be
moved out of P (Park) and into any of
the other gear positions if the ignition
key is turned to the OFF position or if
the key is removed from the ignition
switch.
The starter is designed not to operate if
the shift selector lever is in any of the
driving positions.
3. Crank the enginewith your foot off the
accelerator pedalby turning the ignition
key to START. Release the key when the
engine starts. If the engine starts, but fails to
run, repeat the above procedure.
cIf the engine is very hard to start in ex-
tremely cold weather or when restarting,
depress the accelerator pedal a little (ap-
proximately 1/3 to the floor) and hold it
and then crank the engine. Release the
key and the accelerator pedal when the
engine starts.
cIf the engine is very hard to start because
it is flooded, depress the accelerator
pedal all the way to the floor and hold it.
Crank the engine for 5-6 seconds. Aftercranking the engine, release the accel-
erator pedal. Crank the enginewith your
foot off the accelerator pedalby turn-
ing the ignition key to START. Release the
key when the engine starts. If the engine
starts, but fails to run, repeat the above
procedure.
CAUTION
Do not operate the starter for more than
15 seconds at a time. If the engine does
not start, turn the key off and wait 10
seconds before cranking again, otherwise
the starter could be damaged.
4. Allow the engine to idle for at least 30 sec-
onds after starting. Do not race the engine
while warming it up. Drive at moderate
speed for a short distance first, especially in
cold weather.
In cold weather, keep the engine running for
a minimum of 2–3 minutes before shutting it
off. Starting and stopping the engine over a
short period of time may make the vehicle
more difficult to start.
BEFORE STARTING THE ENGINE STARTING THE ENGINE
5-10Starting and driving
ZREVIEW COPYÐ2007 Pathfinder(pat)
Owners ManualÐUSA_English(nna)
10/16/06Ðdebbie
X