2007 NISSAN PATHFINDER Clock time
[x] Cancel search: Clock timePage 99 of 352
NOTE:
You can turn on or turn off the driving
speed dependent intermittent wiper func-
tion for vehicles with navigation system.
Refer to “Vehicle electronic systems” in the
“Display screen, heater, air conditioner and
audio systems” section later in this manual.
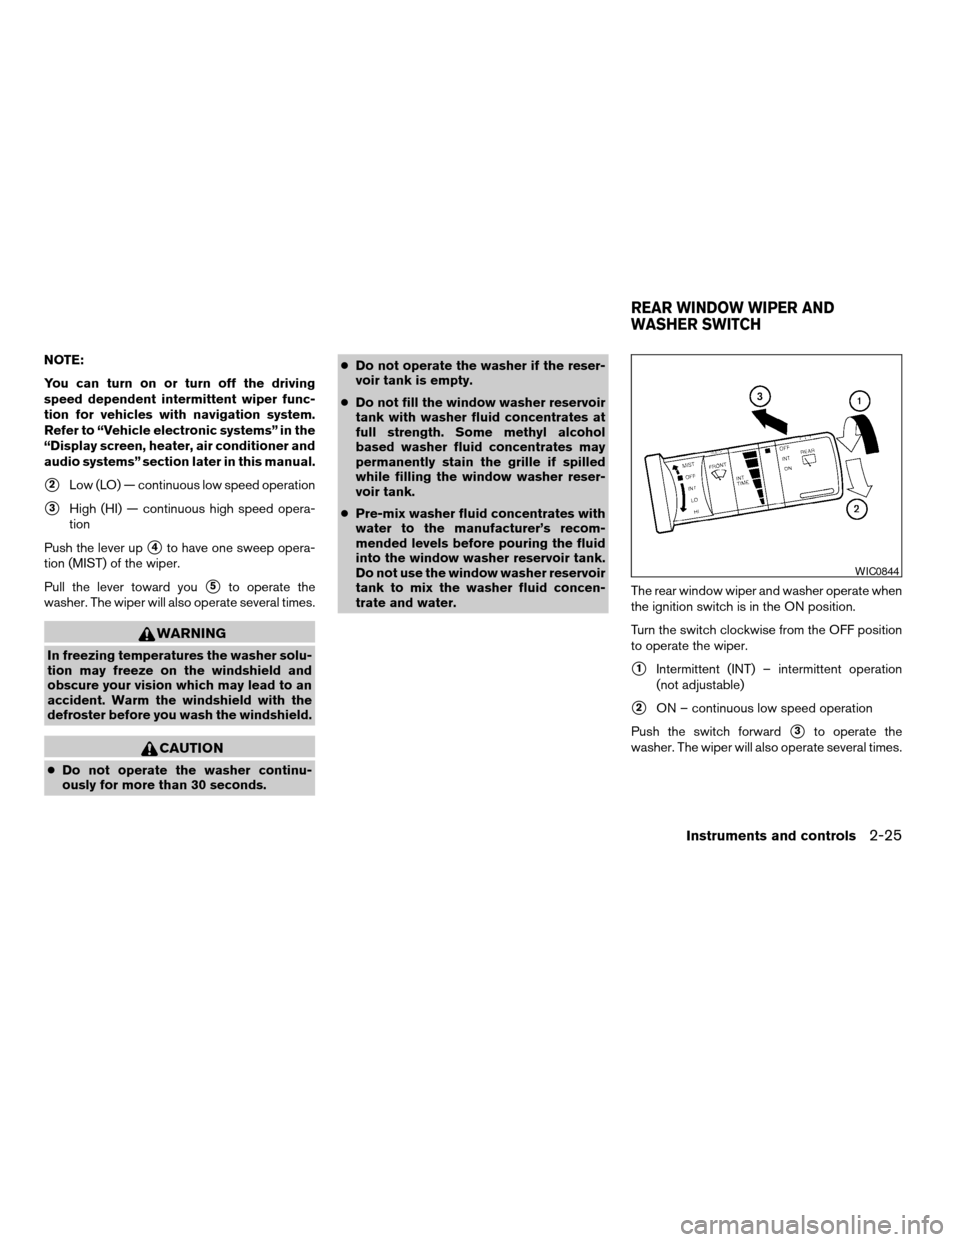
s2Low (LO) — continuous low speed operation
s3High (HI) — continuous high speed opera-
tion
Push the lever up
s4to have one sweep opera-
tion (MIST) of the wiper.
Pull the lever toward you
s5to operate the
washer. The wiper will also operate several times.
WARNING
In freezing temperatures the washer solu-
tion may freeze on the windshield and
obscure your vision which may lead to an
accident. Warm the windshield with the
defroster before you wash the windshield.
CAUTION
cDo not operate the washer continu-
ously for more than 30 seconds.cDo not operate the washer if the reser-
voir tank is empty.
cDo not fill the window washer reservoir
tank with washer fluid concentrates at
full strength. Some methyl alcohol
based washer fluid concentrates may
permanently stain the grille if spilled
while filling the window washer reser-
voir tank.
cPre-mix washer fluid concentrates with
water to the manufacturer’s recom-
mended levels before pouring the fluid
into the window washer reservoir tank.
Do not use the window washer reservoir
tank to mix the washer fluid concen-
trate and water.The rear window wiper and washer operate when
the ignition switch is in the ON position.
Turn the switch clockwise from the OFF position
to operate the wiper.
s1Intermittent (INT) – intermittent operation
(not adjustable)
s2ON – continuous low speed operation
Push the switch forward
s3to operate the
washer. The wiper will also operate several times.
WIC0844
REAR WINDOW WIPER AND
WASHER SWITCH
Instruments and controls2-25
ZREVIEW COPYÐ2007 Pathfinder(pat)
Owners ManualÐUSA_English(nna)
10/16/06Ðcathy
X
Page 162 of 352

Clock
Adjusting the time:
Select the “Hours” or “Minutes” key and move the
joystick to the right or left to adjust the time.
The time will change step by step.
The new settings are automatically saved when
you exit the setting screen by pressing the BACK
button or any other mode button.Setting daylight savings time:
Use the “Daylight Saving Time” key to adjust the
clock to daylight savings time.
ON: The displayed time advances by 1 hour.
OFF: The current time is displayed.Adjusting the time to the GPS:
Select the “Auto Adjust” key.
The time will be reset to the GPS time.
LHA0562LHA0566LHA0567
4-12Display screen, heater, air conditioner and audio systems
ZREVIEW COPYÐ2007 Pathfinder(pat)
Owners ManualÐUSA_English(nna)
10/16/06Ðcathy
X
Page 163 of 352

Selecting the time zone:
1. Select the “Select Time Zone” key.
The TIME ZONE screen will appear.2. Select one of the following zones, depend-
ing on the current location.
cPacific zone
cMountain zone
cCentral zone
cEastern zone
cAtlantic zone
cNewfoundland zone
After selection, the CLOCK SETTINGS screen
will appear.The GPS time (manual time) corresponding to
the selected zone will be displayed. Pacific zone
has been set as the initial (default) setting.
Beep setting
With this option ON, a beep will sound if any
audio button is pressed.
Navigation settings
Refer to the separate Navigation System Own-
er’s Manual for information regarding these set-
tings.
Guidance voice settings
Refer to the separate Navigation System Own-
er’s Manual for information regarding these set-
tings.
BUTTON
To change the display brightness, press
thebutton. Pressing the button again will
change the display to “DAY” or “NIGHT” display.
Then, adjust the brightness by moving the joy-
stick right or left.
If no operation is done within 10 seconds, or if the
BACK button is pressed, the display will return to
the previous display.
LHA0568LHA0563
Display screen, heater, air conditioner and audio systems4-13
ZREVIEW COPYÐ2007 Pathfinder(pat)
Owners ManualÐUSA_English(nna)
10/16/06Ðcathy
X
Page 192 of 352

11. DVD button
12. AUX button
13. AUDIO and TUNE/TRACK control knob
(BASS, MID, TREBLE, FADE and BAL-
ANCE)
14. LOAD button
15. CD insert slot
16.
CD eject button
*No satellite radio reception is available
when the RADIO button is pressed to
access satellite radio stations unless
optional satellite receiver and antenna
are installed and an XMTor SIRIUS™
satellite radio service subscription is
active. Satellite radio can only be in-
stalled in vehicles that were factory pre-
wired for satellite radio. Satellite radio is
not available in Alaska, Hawaii and
Guam.
FM/AM/SAT RADIO WITH
COMPACT DISC CHANGER (if so
equipped)
No satellite radio reception is available and “NO
SAT” is displayed when the RADIO button is
pressed to access satellite radio stations unless
optional satellite receiver and antenna are in-stalled and an XMTor SIRIUS™ satellite radio
service subscription is active. Satellite radio can
only be installed in vehicles that were factory
pre-wired for satellite radio. Satellite radio is not
available in Alaska, Hawaii and Guam.
Audio main operation
POWER/VOLUME control:
Turn the ignition key to ACC or ON, and then
press the PWR/VOL control knob while the sys-
tem is off to call up the mode (radio or CD) which
was playing immediately before the system was
turned off.
To turn the system off, press the PWR/VOL con-
trol knob.
Turn the PWR/VOL control knob to adjust the
volume.
This vehicle may be equipped with Speed Sen-
sitive Volume (SSV) for audio. The audio volume
changes as the driving speed changes.
AUDIO knob (BASS, MIDRANGE, TREBLE,
FADE, BALANCE and SSV if so equipped):
Press the AUDIO knob to change the mode as
follows:
BASS!MID!TREBLE!FADE!BALANCE
!SSV (if so equipped)To adjust Bass, Mid (Midrange) , Treble, Fade and
Balance, press the AUDIO knob until the desired
mode appears in the display. Turn the Tuning
knob to adjust Bass and Treble to the desired
level. You can also use the Tuning knob to adjust
Fader and Balance modes. Fader adjusts the
sound level between the front and rear speakers
and Balance adjusts the sound between the right
and left speakers.
To change the SSV mode to OFF, LOW, MID or
HIGH, turn the Tuning knob to the right or left.
Once you have adjusted the sound quality to the
desired level, press the AUDIO knob repeatedly
until the radio or CD display reappears. Other-
wise, the radio or CD display will automatically
reappear after about 10 seconds.
Clock set
For setting the clock, see “Adjusting the time”
earlier in this section.
DISP (display) button:
This DISP (display) button will show text about
MP3, SAT or CD information in the audio display.
CD display mode
To change the text displayed while playing a CD
with text, press the DISP button. The DISP button
will allow you to scroll through CD text as follows:
Disc titleÃ!Track title.
4-42Display screen, heater, air conditioner and audio systems
ZREVIEW COPYÐ2007 Pathfinder(pat)
Owners ManualÐUSA_English(nna)
10/16/06Ðcathy
X
Page 220 of 352
cMake sure the area around the vehicle is
clear.
cCheck fluid levels such as engine oil, cool-
ant, brake fluid, and window washer fluid as
frequently as possible, or at least whenever
you refuel.
cCheck that all windows and lights are clean.
cVisually inspect tires for their appearance
and condition. Also check tires for proper
inflation.
cLock all doors.
cPosition seat and adjust head restraints.
cAdjust inside and outside mirrors.
cFasten seat belts and ask all passengers to
do likewise.
cCheck the operation of warning lights when
the key is turned to the ON (3) position. See
“Warning/indicator lights and audible re-
minders” in the “Instruments and controls”
section of this manual.1. Apply the parking brake.
2. Move the shift selector lever to P (Park) or N
(Neutral) . P (Park) is recommended.
The shift selector lever cannot be
moved out of P (Park) and into any of
the other gear positions if the ignition
key is turned to the OFF position or if
the key is removed from the ignition
switch.
The starter is designed not to operate if
the shift selector lever is in any of the
driving positions.
3. Crank the enginewith your foot off the
accelerator pedalby turning the ignition
key to START. Release the key when the
engine starts. If the engine starts, but fails to
run, repeat the above procedure.
cIf the engine is very hard to start in ex-
tremely cold weather or when restarting,
depress the accelerator pedal a little (ap-
proximately 1/3 to the floor) and hold it
and then crank the engine. Release the
key and the accelerator pedal when the
engine starts.
cIf the engine is very hard to start because
it is flooded, depress the accelerator
pedal all the way to the floor and hold it.
Crank the engine for 5-6 seconds. Aftercranking the engine, release the accel-
erator pedal. Crank the enginewith your
foot off the accelerator pedalby turn-
ing the ignition key to START. Release the
key when the engine starts. If the engine
starts, but fails to run, repeat the above
procedure.
CAUTION
Do not operate the starter for more than
15 seconds at a time. If the engine does
not start, turn the key off and wait 10
seconds before cranking again, otherwise
the starter could be damaged.
4. Allow the engine to idle for at least 30 sec-
onds after starting. Do not race the engine
while warming it up. Drive at moderate
speed for a short distance first, especially in
cold weather.
In cold weather, keep the engine running for
a minimum of 2–3 minutes before shutting it
off. Starting and stopping the engine over a
short period of time may make the vehicle
more difficult to start.
BEFORE STARTING THE ENGINE STARTING THE ENGINE
5-10Starting and driving
ZREVIEW COPYÐ2007 Pathfinder(pat)
Owners ManualÐUSA_English(nna)
10/16/06Ðdebbie
X
Page 277 of 352
CAUTION
Oil level should be checked regularly. Op-
erating the engine with an insufficient
amount of oil can damage the engine, and
such damage is not covered by warranty.
CHANGING ENGINE OIL
1. Park the vehicle on a level surface and apply
the parking brake.
2. Start the engine and let it idle until it reaches
operating temperature, then turn it off.
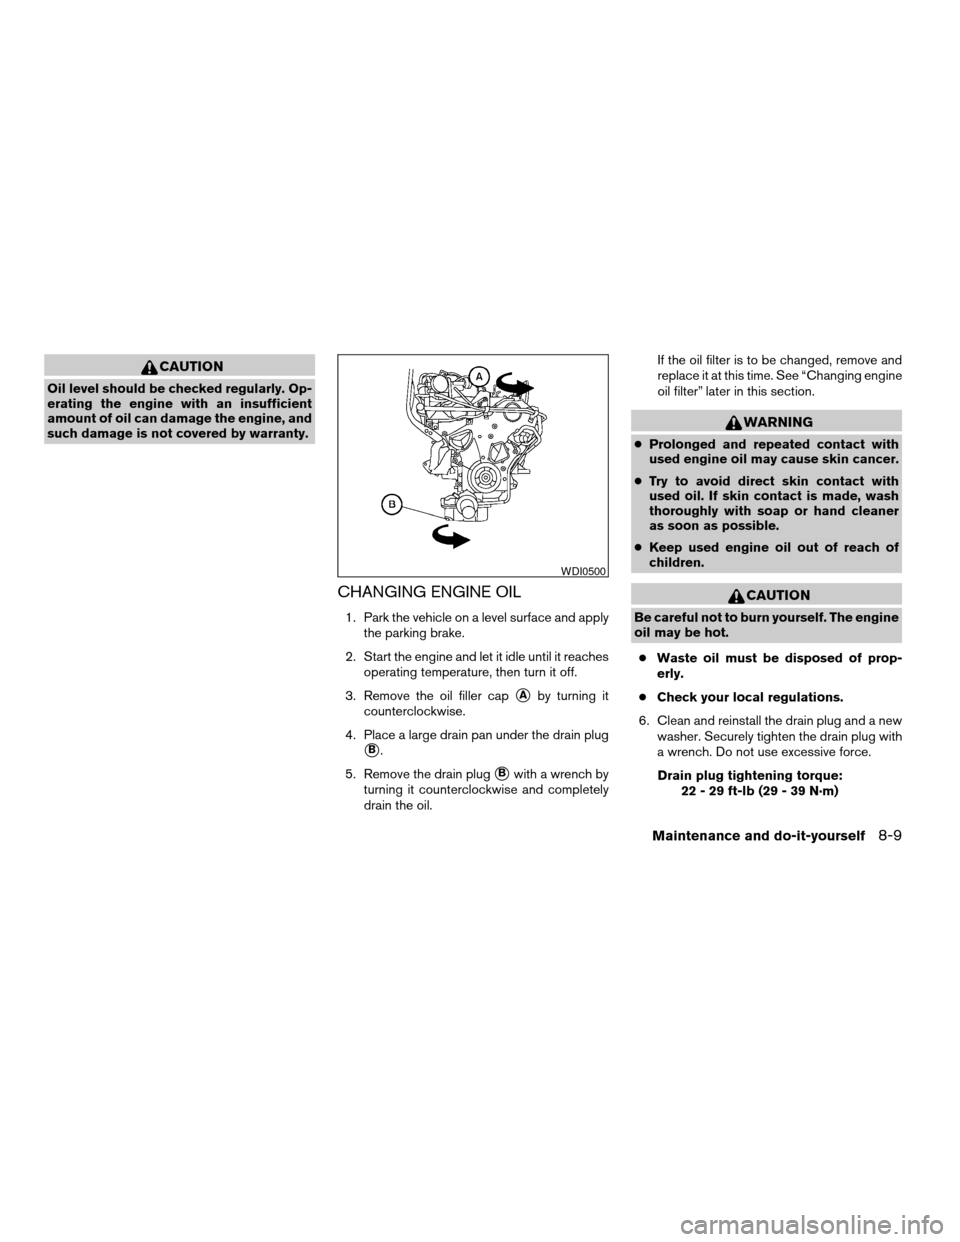
3. Remove the oil filler cap
sAby turning it
counterclockwise.
4. Place a large drain pan under the drain plug
sB.
5. Remove the drain plug
sBwith a wrench by
turning it counterclockwise and completely
drain the oil.If the oil filter is to be changed, remove and
replace it at this time. See “Changing engine
oil filter” later in this section.
WARNING
cProlonged and repeated contact with
used engine oil may cause skin cancer.
cTry to avoid direct skin contact with
used oil. If skin contact is made, wash
thoroughly with soap or hand cleaner
as soon as possible.
cKeep used engine oil out of reach of
children.
CAUTION
Be careful not to burn yourself. The engine
oil may be hot.
cWaste oil must be disposed of prop-
erly.
cCheck your local regulations.
6. Clean and reinstall the drain plug and a new
washer. Securely tighten the drain plug with
a wrench. Do not use excessive force.
Drain plug tightening torque:
22 - 29 ft-lb (29 - 39 N·m)
WDI0500
Maintenance and do-it-yourself8-9
ZREVIEW COPYÐ2007 Pathfinder(pat)
Owners ManualÐUSA_English(nna)
10/16/06Ðdebbie
X
Page 278 of 352
7. Refill engine with recommended oil through
the oil filler opening, then install the oil filler
cap securely.
See “Capacities and recommended
fuel/lubricants” in the “Technical and con-
sumer information” section of this manual for
drain and refill capacity.
The drain and refill capacity depends on the
oil temperature and drain time. Use these
specifications for reference only. Always use
the dipstick to determine when the proper
amount of oil is in the engine.
8. Start the engine. Check for leakage around
the drain plug and oil filter. Correct as re-
quired.
9. Turn the engine off and wait more than 10
minutes. Check the oil level with the dipstick.
Add engine oil if necessary.
CHANGING ENGINE OIL FILTER
1. Park the vehicle on a level surface and apply
the parking brake.
2. Turn the engine off.
3. Place a large drain pan under the oil filter.
4. Unscrew the plate covering the oil filter ex-
posing the filter.
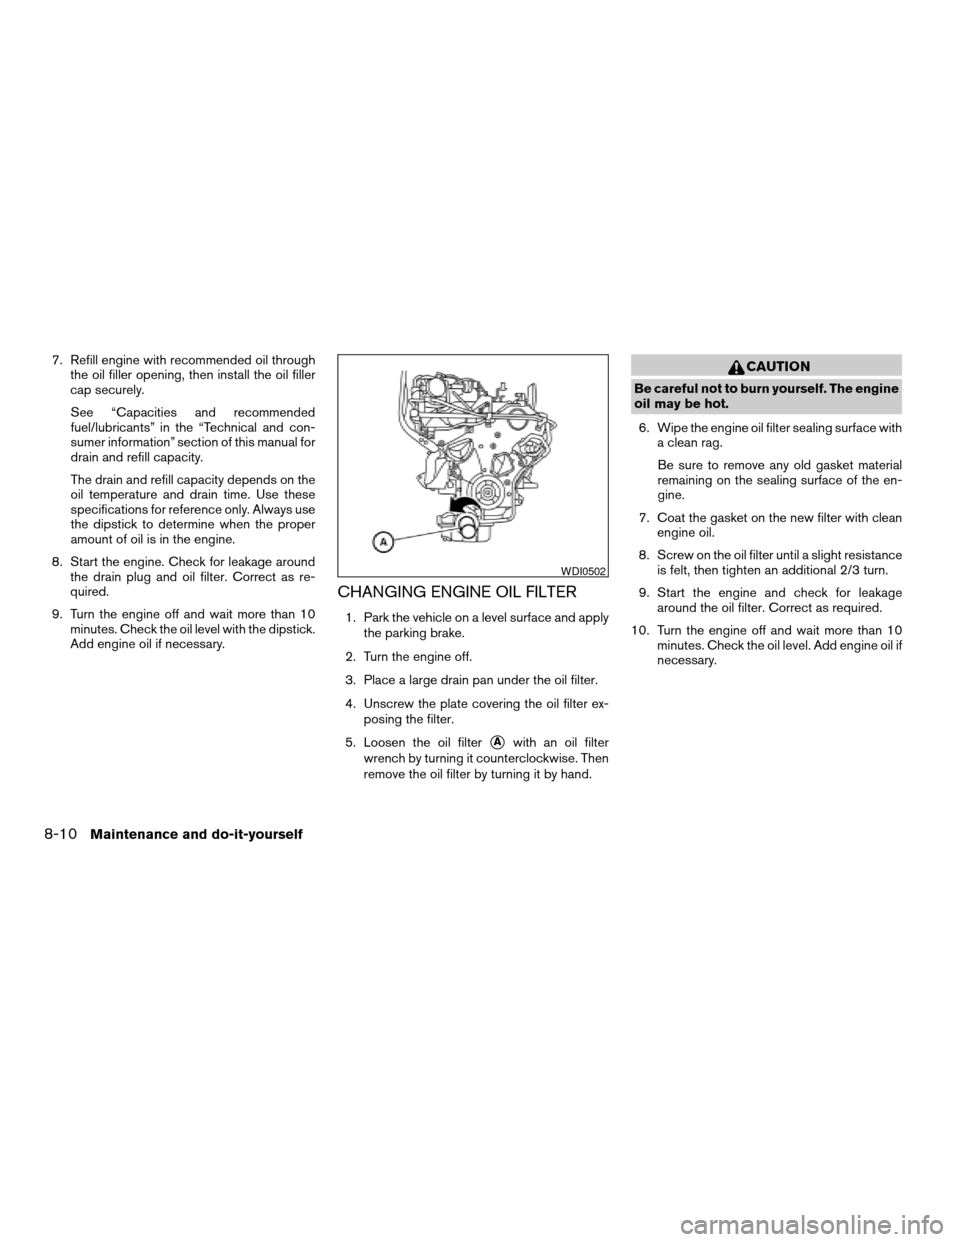
5. Loosen the oil filter
sAwith an oil filter
wrench by turning it counterclockwise. Then
remove the oil filter by turning it by hand.
CAUTION
Be careful not to burn yourself. The engine
oil may be hot.
6. Wipe the engine oil filter sealing surface with
a clean rag.
Be sure to remove any old gasket material
remaining on the sealing surface of the en-
gine.
7. Coat the gasket on the new filter with clean
engine oil.
8. Screw on the oil filter until a slight resistance
is felt, then tighten an additional 2/3 turn.
9. Start the engine and check for leakage
around the oil filter. Correct as required.
10. Turn the engine off and wait more than 10
minutes. Check the oil level. Add engine oil if
necessary.
WDI0502
8-10Maintenance and do-it-yourself
ZREVIEW COPYÐ2007 Pathfinder(pat)
Owners ManualÐUSA_English(nna)
10/16/06Ðdebbie
X
Page 331 of 352
Trailer lights
CAUTION
When splicing into the vehicle electrical
system, a commercially available power-
type module/converter must be used to
provide power for all trailer lighting. This
unit uses the vehicle battery as a direct
power source for all trailer lights while
using the vehicle tail light, stoplight and
turn signal circuits as a signal source. The
module/converter must draw no more
that 15 milliamps from the stop and tail
lamp circuits. Using a module/converter
that exceeds these power requirements
may damage the vehicle’s electrical sys-
tem. See a reputable trailer dealer to ob-
tain the proper equipment and to have it
installed.
Trailer lights should comply with federal and/or
local regulations. For assistance in hooking up
trailer lights, contact a NISSAN dealer or repu-
table trailer dealer. Vehicles equipped with the
trailer tow package are equipped with a 4-pin
trailer harness connector. If your trailer is
equipped with a 7-pin connector, an adapter will
be needed to connect the trailer lights to the
vehicle. Adapters are available at NISSAN deal-
ers as well as auto parts stores and hitch retail-
ers.
Trailer brakes
If your trailer is equipped with a braking system,
make sure it conforms to federal and/or local
regulations and that it is properly installed.
WARNING
Never connect a trailer brake system di-
rectly to the vehicle brake system.
Pre-towing tips
cBe certain your vehicle maintains a level
position when a loaded and/or unloaded
trailer is hitched. Do not drive the vehicle if it
has an abnormal nose-up or nose-down
condition; check for improper tongue load,
overload, worn suspension or other possible
causes of either condition.
cAlways secure items in the trailer to prevent
load shift while driving.
cKeep the cargo load as low as possible in
the trailer to keep the trailer center of gravity
low.
cLoad the trailer so approximately 60% of the
trailer load is in the front half and 40% is in
the back half. Also make sure the load is
balanced side to side.cCheck your hitch, trailer tire pressure, ve-
hicle tire pressure, trailer light operation, and
trailer wheel lug nuts every time you attach a
trailer to the vehicle.
cBe certain your rearview mirrors conform to
all federal, state or local regulations. If not,
install any mirrors required for towing before
driving the vehicle.
cDetermine the overall height of the vehicle
and trailer so the required clearance is
known.
Trailer towing tips
In order to gain skill and an understanding of the
vehicle’s behavior, you should practice turning,
stopping and backing up in an area which is free
from traffic. Steering stability and braking perfor-
mance will be somewhat different than under
normal driving conditions.
cAlways secure items in the trailer to prevent
load shift while driving.
cLock the trailer hitch coupler with a pin or
lock to prevent the coupler from inadvert-
ently becoming unlatched.
cAvoid abrupt starts, acceleration or stops.
cAvoid sharp turns or lane changes.
Technical and consumer information9-23
ZREVIEW COPYÐ2007 Pathfinder(pat)
Owners ManualÐUSA_English(nna)
10/26/06Ðcathy
X