2007 NISSAN NOTE engine overheat
[x] Cancel search: engine overheatPage 152 of 235

hill gradient. Overheated brakes may reduce brak-
ing performance and could result in loss of vehicle
control.
CAUTION
While driving on a slippery surface, be careful
when braking, accelerating or downshifting.
Abrupt braking actions or sudden acceleration
could cause the wheels to skid and result in an
accident.
Be aware that brakes will fade if repeated heavy
brake applications are made.
Driving uphill
When starting on a steep gradient, it is sometimes
difficult to operate the brake (AT models) or both the
brake and clutch (MT models). Use the handbrake
to hold the vehicle. Do not slip the clutch (MT mod-
els). When ready to start, slowly release the hand-
brake while depressing the accelerator pedal and
releasing the clutch (MT models) or depressing the
accelerator pedal (AT models).
Driving downhill
The engine braking action is effective for controlling
the vehicle while descending hills.
The gear lever (MT models) should be placed in a
gear position low enough to obtain sufficient engine
braking.
For AT models, the 2 (Second) or 1 (First) gear
should be selected.
ANTI-LOCK BRAKING SYSTEM (ABS)
WARNING
•The Anti-lock Braking System (ABS) is a so-
phisticated device, but it cannot prevent acci-
dents resulting from careless or dangerous
driving techniques. It can help maintain ve-
hicle control during braking on slippery sur-
faces. Remember that stopping distances
may also be longer on rough, gravel or snow
covered roads, or if you are using snow
chains. Always maintain a safe distance from
the vehicle in front of you. Ultimately, the
driver is responsible for safety.
•Tyre type and condition may also affect brak-
ing effectiveness.
– When replacing tyres, install the specified
size of tyres on all four wheels.
– When installing a spare tyre, make sure it
is the proper size and type as specified on
the tyre placard. See “Vehicle
identification” in the “9. Technical
information” section for the tyre placard
location.
– For detailed information, see “Wheels and
tyres” in the “8. Maintenance and
do-it-yourself” section.
The Anti-lock Braking System (ABS) controls the
brakes so that the wheels do not lock during hard
braking or when braking on slippery surfaces. The
system detects the rotation speed at each wheeland varies the brake fluid pressure to prevent each
wheel from locking and sliding. By preventing each
wheel from locking, the system helps the driver to
maintain steering control and helps to minimise
swerving and spinning on slippery surfaces.
Using the system
Depress the brake pedal and hold it down. Depress
the brake pedal with firm steady pressure, but do
not pump the brakes. The ABS will operate to pre-
vent the wheels from locking up. Steer the vehicle to
avoid obstacles.
WARNING
Do not pump the brake pedal. Doing so may in-
crease the stopping distance.
Self-test feature
The ABS includes electronic sensors, electric
pumps, hydraulic solenoids and a computer. The
computer has a built-in diagnostic feature that tests
the system each time you start the engine and move
the vehicle at a low speed in forward or reverse.
When the self-test occurs, you may hear a “clunk”
noise and/or feel a pulsation in the brake pedal. This
is normal and does not indicate a malfunction. If the
computer senses a malfunction, it switches the ABS
off and illuminates the ABS warning light on the
instrument panel. The brake system then operates
normally, but without anti-lock assistance.
If the ABS warning light illuminates during the self-
test or while driving, have the vehicle checked by a
NISSAN dealer or qualified workshop.
5-28Starting and driving
Page 157 of 235
6In case of emergencyIn case of emergency
Spare tyre................................................................ 6-2
Temporary-use spare tyre ................................... 6-2
Flat tyre ................................................................... 6-3
Stopping the vehicle ........................................... 6-3
Changing flat tyre (Models with spare wheel,
where fitted) ....................................................... 6-3
Repairing flat tyre (Models with emergency
tyre puncture repair kit, where fitted) ................... 6-7Jump-starting ........................................................... 6-9
Push-starting ........................................................... 6-11
Engine overheat ....................................................... 6-11
Tow truck towing ..................................................... 6-12
Towing precautions ............................................ 6-12
Recommended towing ........................................ 6-13
Towing eye ......................................................... 6-13
Freeing the vehicle from sand, snow or mud ....... 6-14
Page 167 of 235
CAUTION
•Three-way catalyst equipped models should
not be started by pushing the vehicle as the
three-way catalyst may be damaged.
•Automatic transmission (AT) models cannot
be started by pushing the vehicle. This may
cause transmission damage.
•Never try to start the vehicle by towing it; when
the engine starts, the forward surge could
cause the vehicle to collide with the tow ve-
hicle.
WARNING
•Never continue driving if the engine of your
vehicle overheats. Doing so could cause a ve-
hicle fire.
•Never open the bonnet if steam is coming
out.
•Never remove the radiator cap (where fitted)
or engine coolant reservoir cap when the en-
gine is hot. If the radiator cap (where fitted) or
engine coolant reservoir cap is removed while
the engine is hot, pressurised hot water will
spurt out and possibly cause burning, scald-
ing or serious injury.
•If steam or coolant is coming out of the en-
gine, stand clear of the vehicle to prevent get-
ting injured.
•The engine cooling fan will start whenever the
coolant temperature exceeds preset degrees.
•Be careful not to allow your hands, hair, jewel-
lery or clothing to come into contact with, or
get caught in, the cooling fan or drive belts.
If the engine of your vehicle is overheating (indi-
cated by the engine coolant temperature warning
light (red)) or if you feel a lack of engine power,
detect an unusual noise, etc., proceed as follows:
1. Move and park the vehicle safely off the road and
away from traffic.
2. Turn on the hazard warning flasher lights.
3. Apply the handbrake.4. Shift the gear lever (M/T models) into the N (Neu-
tral) position [AT models, move the selector lever
to the P (Park) position].
DO NOT STOP THE ENGINE.
5. Open all windows.
6. Switch off the air conditioner system (where fit-
ted).
7. Set the heater or air conditioner temperature
control to maximum “HOT” and fan speed con-
trol to maximum speed.
8. Exit the vehicle.
9. Visually inspect and listen for steam or coolant
escaping from the radiator before opening the
bonnet. Wait until no steam or coolant can be
seen before proceeding.
10. Open the bonnet. For details, see “Bonnet
release” in the “3. Pre-driving checks and
adjustments” section.
11. Visually check if the cooling fan is running.
12. Visually check the radiator and radiator hoses
for leakage.
WARNING
If coolant is leaking, the cooling fan belt is
missing or loose or the cooling fan is not run-
ning, stop the engine.
PUSH-STARTING ENGINE OVERHEAT
In case of emergency6-11
Page 182 of 235
WARNING
•Never remove the engine coolant reservoir
cap or the radiator cap (where fitted) when
the engine is hot. Serious burns could be
caused by high pressure fluid escaping either
from the radiator or the engine coolant reser-
voir. Wait until the engine and radiator have
cooled down.
•Engine coolant is poisonous and should be
stored carefully in marked containers out of
the reach of children.
The engine cooling system is filled at the factory
with a high-quality, year-round and extended life en-
gine coolant. The high quality engine coolant con-
tains the specific solutions effective for the anti-cor-
rosion and the anti-freeze function. Therefore, addi-
tional cooling system additives are not necessary.
CAUTION
•When adding or replacing engine coolant, be
sure to use Genuine NISSAN anti-freeze L250
coolant or equivalent premixed type (mixture
ratio 50% for all ambient temperatures).
•The use of other types of engine coolant may
damage the engine cooling system.
•If the radiator or engine coolant reservoir tank
is equipped with a pressure cap, use a Genu-
ine NISSAN cap or its equivalent when re-
placement is required.
CHECKING ENGINE COOLANT
LEVEL
Check the coolant level in the reservoir when the
engine is cold. If the coolant level is below MINj2,
add coolant up to the MAXj1 level. If the reservoir
is empty, check the coolant level in the radiator
(where fitted)when the engine is cold.If there is
insufficient coolant in the radiator, fill the radiatorwith coolant up to the filler opening (where fitted)
and also add it to the coolant reservoir up to the
MAX level.
CAUTION
If the cooling system frequently requires coolant,
have it checked by a NISSAN dealer or qualified
workshop.
CHANGING ENGINE COOLANT
CAUTION
•Major cooling system repairs should be per-
formed by a NISSAN dealer or qualified work-
shop. The service procedures can be found in
the appropriate NISSAN Service Manual.
•When checking or replacement is required,
NISSAN recommends contacting a NISSAN
dealer or qualified workshop for servicing.
•Improper servicing or engine coolant change
can result in reduced heater performance and
engine overheating.
NDI742Z
Type A
NDI741Z
Type B
NDI719Z
CR14DE or HR16DE
ENGINE COOLING SYSTEM
8-6Maintenance and do-it-yourself
Page 183 of 235
WARNING
•To avoid the danger of being scalded, never
change the coolant when the engine is hot.
•Avoid direct skin contact with used coolant. If
skin contact is made, wash thoroughly with
soap or hand cleaner and plenty of water as
soon as possible.
•Keep coolant out of reach of children and
pets.
NISSAN GREEN PROGRAM
Engine coolant must be disposed of properly.
Check your local regulations.
CR14DE or HR16DE engine
1. Set the heater or air conditioner temperature
control to the maximum “HOT” position.
2. Open the bonnet. For details, see “Bonnet
release” in the “3. Pre-driving checks and
adjustments” section.
3. Open the radiator cap
j1 (where fitted) or en-
gine coolant reservoir cap to help to drain the
coolant.
4. Slacken off the radiator lower hose clip
j2and
remove the lower hosej3 to drain the coolant.
5. Flush the cooling system by running clean water
through the radiator filler opening (where fitted)
or engine coolant reservoir.
6. Install the radiator lower hose on the radiator
securely.7. Fill the radiator through the filler opening (where
applicable) slowly with coolant and fill the cool-
ant reservoir up to the MAX level. See “Capaci-
ties and recommended fuel/lubricants” in the
“9. Technical information” section for cooling
system capacity.
8. Install the radiator cap (where fitted) and the en-
gine coolant reservoir cap.
9. Start the engine, and warm it up until the radiator
fan operates. Then rev the engine two or three
times under no load. Observe the coolant tem-
perature warning light for signs of overheating.
10. Stop the engine. After it has completely cooled
down, refill the radiator up to the filler opening
(where fitted). If the coolant level lowered, fill
the engine coolant reservoir up to the MAX level.
11. Check radiator lower hose for any signs of leak-
age.
12. Close the bonnet.
K9K engine
1. Set the heater or air conditioner temperature
control to the maximum “HOT” position.
2. Open the bonnet. For details, see “Bonnet
release” in the “3. Pre-driving checks and
adjustments” section.
3. Disconnect the radiator lower hose
j1 and open
the drain plugj2 on the engine block.
4. Open the engine coolant reservoir cap to help to
drain the coolant.
5. Flush the cooling system by running fresh water
through the radiator.
6. Install the radiator lower hose to the radiator and
securely tighten the engine block drain plug.
7. Fill the reservoir up to the MAX level with cool-
ant. See “Capacities and recommended
fuel/lubricants” in the “9. Technical information”
section for cooling system capacity.
8. Install the engine coolant reservoir cap.
9. Start the engine and run the engine at about
2,000 rpm for 1 minute.
10. Stop the engine and check coolant level, allow
to cool and refill up to the MAX level.
11. Warm up the engine at about 2,000 rpm until it
reaches the normal operational temperature
(fan cycles).
Check heater core (below instrument panel) for
gurgling, refill if necessary.
NDI671Z
K9K engine
Maintenance and do-it-yourself8-7
Page 223 of 235
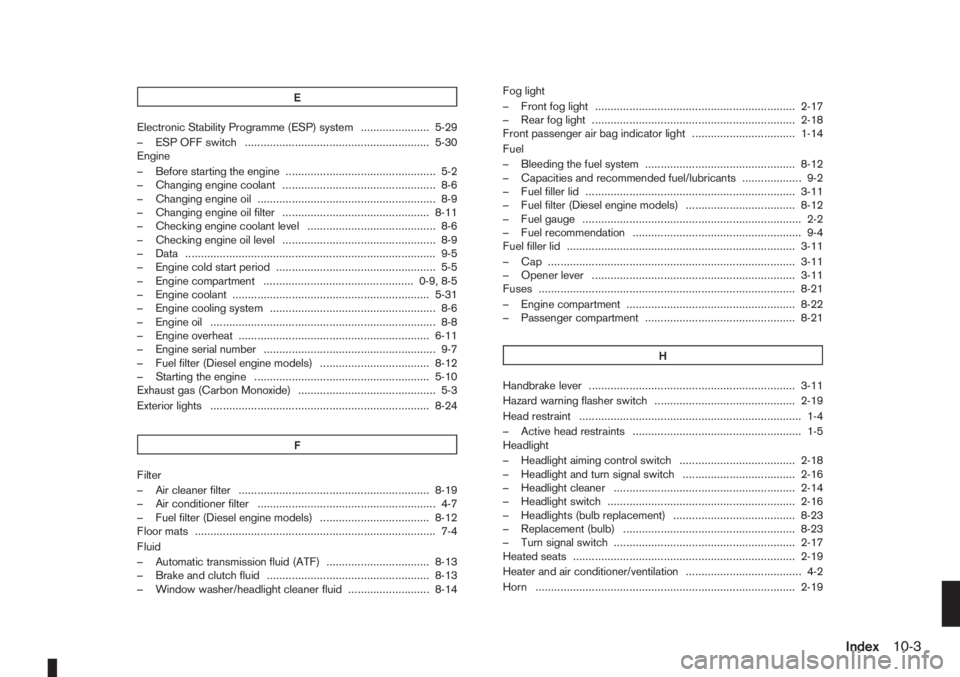
E
Electronic Stability Programme (ESP) system ...................... 5-29
– ESP OFF switch ........................................................... 5-30
Engine
– Before starting the engine ................................................ 5-2
– Changing engine coolant ................................................. 8-6
– Changing engine oil ......................................................... 8-9
– Changing engine oil filter ............................................... 8-11
– Checking engine coolant level ......................................... 8-6
– Checking engine oil level ................................................. 8-9
– Data ................................................................................ 9-5
– Engine cold start period ................................................... 5-5
– Engine compartment ................................................ 0-9, 8-5
– Engine coolant ............................................................... 5-31
– Engine cooling system ..................................................... 8-6
– Engine oil ........................................................................ 8-8
– Engine overheat ............................................................. 6-11
– Engine serial number ....................................................... 9-7
– Fuel filter (Diesel engine models) ................................... 8-12
– Starting the engine ........................................................ 5-10
Exhaust gas (Carbon Monoxide) ............................................ 5-3
Exterior lights ...................................................................... 8-24
F
Filter
– Air cleaner filter ............................................................. 8-19
– Air conditioner filter ......................................................... 4-7
– Fuel filter (Diesel engine models) ................................... 8-12
Floor mats ............................................................................. 7-4
Fluid
– Automatic transmission fluid (ATF) ................................. 8-13
– Brake and clutch fluid .................................................... 8-13
– Window washer/headlight cleaner fluid .......................... 8-14Fog light
– Front fog light ................................................................ 2-17
– Rear fog light ................................................................. 2-18
Front passenger air bag indicator light ................................. 1-14
Fuel
– Bleeding the fuel system ................................................ 8-12
– Capacities and recommended fuel/lubricants ................... 9-2
– Fuel filler lid ................................................................... 3-11
– Fuel filter (Diesel engine models) ................................... 8-12
– Fuel gauge ...................................................................... 2-2
– Fuel recommendation ...................................................... 9-4
Fuel filler lid ......................................................................... 3-11
– Cap ............................................................................... 3-11
– Opener lever ................................................................. 3-11
Fuses .................................................................................. 8-21
– Engine compartment ...................................................... 8-22
– Passenger compartment ................................................ 8-21
H
Handbrake lever .................................................................. 3-11
Hazard warning flasher switch ............................................. 2-19
Head restraint ....................................................................... 1-4
– Active head restraints ...................................................... 1-5
Headlight
– Headlight aiming control switch ..................................... 2-18
– Headlight and turn signal switch .................................... 2-16
– Headlight cleaner .......................................................... 2-14
– Headlight switch ............................................................ 2-16
– Headlights (bulb replacement) ....................................... 8-23
– Replacement (bulb) ....................................................... 8-23
– Turn signal switch .......................................................... 2-17
Heated seats ....................................................................... 2-19
Heater and air conditioner/ventilation ..................................... 4-2
Horn ................................................................................... 2-19
Index10-3
Page 225 of 235

– Power door lock switch ................................................... 3-7
– Steering lock ............................................................ 5-7, 5-8
– Super Lock system .......................................................... 3-6
M
Maintenance
– General maintenance ....................................................... 8-2
– Maintenance precautions ................................................. 8-4
– Maintenance requirements ............................................... 8-2
– Seat belt maintenance ..................................................... 1-9
Manual transmission
– Driving with manual transmission ................................... 5-11
Meters and gauges ............................................................... 2-2
– Digital clock ..................................................................... 2-5
– Fuel gauge ...................................................................... 2-2
– Odometer ........................................................................ 2-3
– Oil change schedule set-up ............................................. 2-4
– Outside temperature display ............................................ 2-4
– Speedometer .................................................................. 2-2
– Tachometer ..................................................................... 2-2
– Trip computer .................................................................. 2-3
– Twin trip odometer .......................................................... 2-3
Mirror .................................................................................. 3-12
– Inside rear-view mirror ................................................... 3-12
– Outside rear-view mirrors .............................................. 3-12
– Vanity mirror .................................................................. 3-13
Mobile phone integration ..................................................... 4-34
N
NISSAN Anti-Theft System (NATS) ................................ 5-7, 5-9
– NATS immobilizer radio approval number ......................... 9-8
– NATS security indicator light ............................................ 3-9O
Odometer ............................................................................. 2-3
– Twin trip .......................................................................... 2-3
Oil
– Changing engine oil ......................................................... 8-9
– Changing engine oil filter ............................................... 8-11
– Checking engine oil level ................................................. 8-9
– Engine oil ........................................................................ 8-8
– Oil change schedule set-up ............................................. 2-4
– Recommended lubricants ................................................ 9-2
– Recommended SAE viscosity number .............................. 9-4
Outside temperature display .................................................. 2-4
Overheat
– Engine overheat ............................................................. 6-11
P
Parking ............................................................................... 5-22
– Ultrasonic parking sensor .............................................. 5-22
Phone
– Bluetooth® .................................................................... 4-34
– Mobile phone integration ............................................... 4-34
Power
– Power steering system .................................................. 5-27
– Power window — Driver’s side (Reinitialisation
procedure) .................................................................... 8-16
Power outlet ........................................................................ 2-20
Power windows ................................................................... 2-25
– Automatic operation ....................................................... 2-26
– Driver’s side main switch ............................................... 2-26
– Passenger’s side switch ................................................ 2-26
Pre-tensioner seat belt system ............................................... 1-9
Precaution
– Seat belt usage ............................................................... 1-6
Index10-5
Page 231 of 235
Have your car serviced regularly
Regular service allows you to run your vehicle in
optimal condition and with the best fuel efficiency.
Have your vehicle serviced by your NISSAN dealer
or a qualified workshop to ensure that it is main-
tained to its original standard.
•In case of emergency ... 6-2
(Flat tyre, engine will not start, overheating, tow-
ing)
•How to start the engine ... 5-2
•How to read the meters and gauges ... 2-2
•Maintenance and do-it-yourself ... 8-2
•Technical information ... 9-2
QUICK REFERENCE