Page 37 of 345
will not be secured properly.
�Child restraint anchor points are de-
signed to withstand only those loads
imposed by correctly fitted child re-
straints. Under no circumstance are
they to be used for adult seat belts or
harnesses.
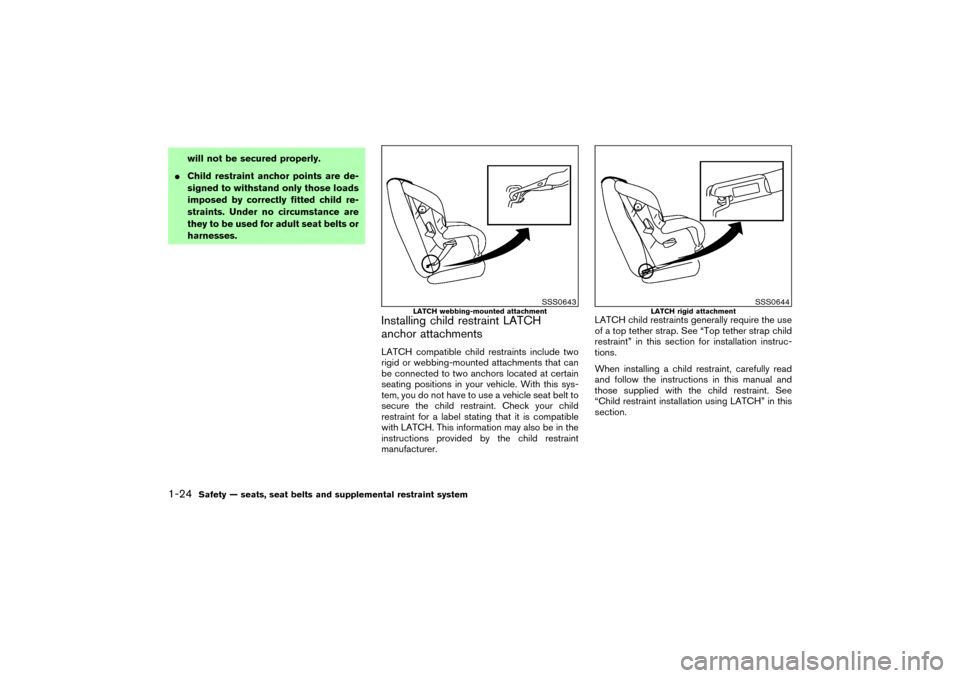
Installing child restraint LATCH
anchor attachmentsLATCH compatible child restraints include two
rigid or webbing-mounted attachments that can
be connected to two anchors located at certain
seating positions in your vehicle. With this sys-
tem, you do not have to use a vehicle seat belt to
secure the child restraint. Check your child
restraint for a label stating that it is compatible
with LATCH. This information may also be in the
instructions provided by the child restraint
manufacturer.LATCH child restraints generally require the use
of a top tether strap. See “Top tether strap child
restraint” in this section for installation instruc-
tions.
When installing a child restraint, carefully read
and follow the instructions in this manual and
those supplied with the child restraint. See
“Child restraint installation using LATCH” in this
section.
SSS0643
LATCH webbing-mounted attachment
SSS0644
LATCH rigid attachment
1-24
Safety — seats, seat belts and supplemental restraint system
�
06.7.5/Z50-D/V5.0
�
Page 38 of 345
TOP TETHER STRAP CHILD
RESTRAINTIf the manufacturer of your child restraint re-
quires the use of a top tether strap, it must be
secured to an anchor point.
WARNING
�Child restraint anchor points are de-
signed to withstand only those loads
imposed by correctly fitted child re-
straints. Under no circumstances arethey to be used for adult seat belts or
harnesses.
�The child restraint top tether strap
may be damaged by contact with the
tonneau cover or items in the cargo
area. Remove the tonneau cover from
the vehicle or secure it in the cargo
area. Also secure any items in the
cargo area. Your child could be seri-
ously injured or killed in a collision if
the top tether strap is damaged.
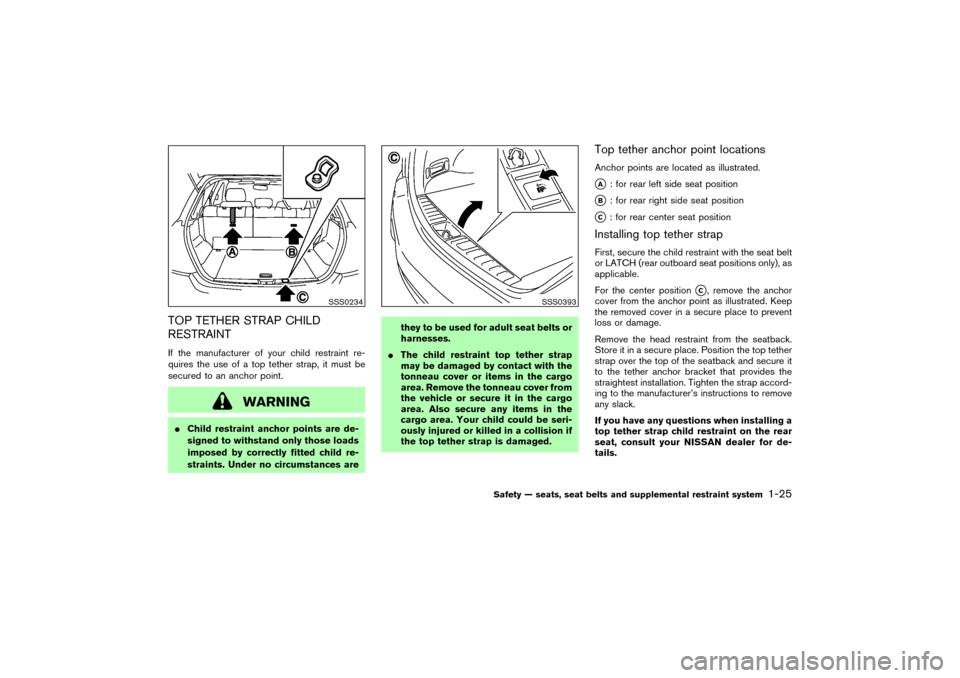
Top tether anchor point locationsAnchor points are located as illustrated.�A
: for rear left side seat position
�B
: for rear right side seat position
�C
: for rear center seat position
Installing top tether strapFirst, secure the child restraint with the seat belt
or LATCH (rear outboard seat positions only), as
applicable.
For the center position
�C, remove the anchor
cover from the anchor point as illustrated. Keep
the removed cover in a secure place to prevent
loss or damage.
Remove the head restraint from the seatback.
Store it in a secure place. Position the top tether
strap over the top of the seatback and secure it
to the tether anchor bracket that provides the
straightest installation. Tighten the strap accord-
ing to the manufacturer’s instructions to remove
any slack.
If you have any questions when installing a
top tether strap child restraint on the rear
seat, consult your NISSAN dealer for de-
tails.
SSS0234
SSS0393
Safety — seats, seat belts and supplemental restraint system
1-25
�
06.7.5/Z50-D/V5.0
�
Page 39 of 345
CHILD RESTRAINT INSTALLATION
USING LATCH
WARNING
�Attach LATCH compatible child re-
straints only at the locations shown.
For the LATCH lower anchor loca-
tions, see “Lower Anchors and Teth-
ers for CHildren System (LATCH)” in
this section. If a child restraint is not
secured properly, your child could be
seriously injured or killed in an acci-
dent.
�The LATCH anchors are designed to
withstand only those loads imposed
by correctly fitted child restraints. Un-
der no circumstance are they to be
used for adult seat belts or har-
nesses.
�Inspect the lower anchors by insert-
ing your fingers into the lower anchor
area and feeling to make sure there
are no obstructions over the LATCH
anchors, such as seat belt webbingor seat cushion material. The child
restraint will not be secured properly
if the LATCH anchors are obstructed.
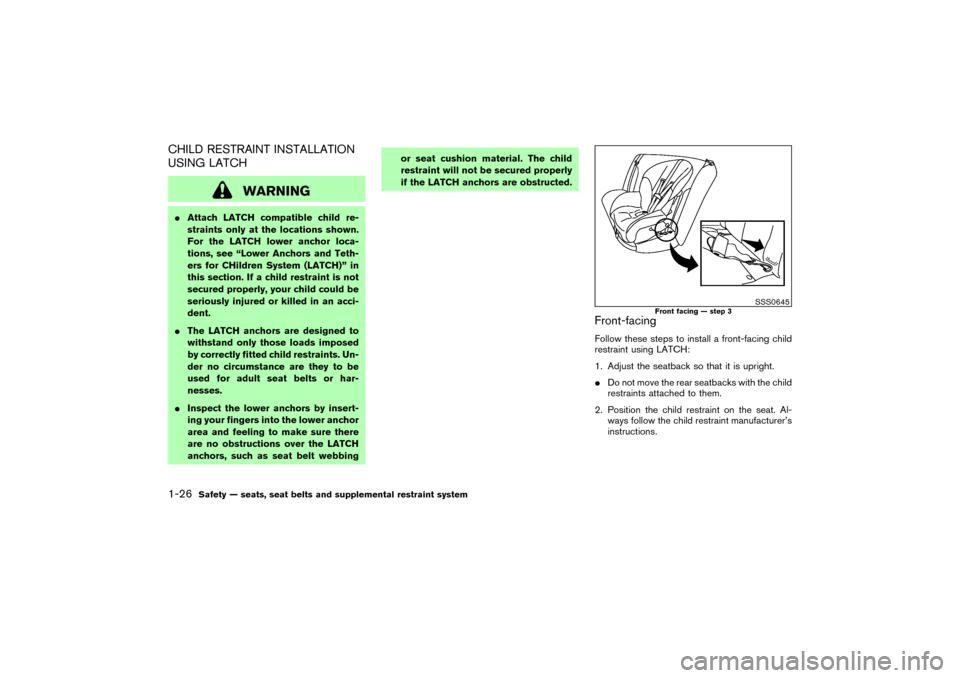
Front-facingFollow these steps to install a front-facing child
restraint using LATCH:
1. Adjust the seatback so that it is upright.
�Do not move the rear seatbacks with the child
restraints attached to them.
2. Position the child restraint on the seat. Al-
ways follow the child restraint manufacturer’s
instructions.
SSS0645
Front facing — step 3
1-26
Safety — seats, seat belts and supplemental restraint system
�
06.7.5/Z50-D/V5.0
�
Page 40 of 345

3. Secure the child restraint anchor attach-
ments to the LATCH lower anchors.
4. The back of the child restraint should be
secured against the vehicle seatback. If nec-
essary, adjust or remove the head restraint to
obtain the correct child restraint fit. See
“Head restraint adjustment” in this section.
When the head restraint is removed, store it
in a secure place. Be sure to install the head
restraint when the child restraint is removed.5. For child restraints that are equipped with
webbing mounted attachments, remove any
additional slack from the anchor attachments.
Press downward and rearward firmly in the
center of the child restraint with your knee to
compress the vehicle seat cushion and seat-
back while tightening the webbing of the
anchor attachments.
6. If the child restraint is equipped with a top
tether strap, route the top tether strap and
secure the tether strap to the tether anchor
point. See “Top tether strap child restraint” in
this section.7. Before placing the child in the child restraint,
hold child restraint near the LATCH attach-
ment and use force to push the child restraint
from side to side, and tug it forward to make
sure that it is securely held in place. It should
not move more than 1 in (25 mm). If it does
move more than 1 in (25 mm), pull again on
the anchor attachments to further tighten the
child restraint. If you are unable to properly
secure the restraint, move the restraint to
another seating position and try again, or try a
different child restraint. Not all child restraints
fit in all types of vehicles.
8. Check to make sure the child restraint is
properly secured prior to each use. If the
SSS0646
Front facing — step 3
SSS0647
Front facing — step 5
SSS0638
Front facing — step 7
Safety — seats, seat belts and supplemental restraint system
1-27
�
06.7.5/Z50-D/V5.0
�
Page 41 of 345
child restraint is loose, repeat steps 4
through 7.
Rear-facingFollow these steps to install a rear-facing child
restraint using LATCH:
1. Adjust the seatback so that it is upright.
�Do not move the rear seatbacks with the child
restraints attached to them.
2. Position the child restraint on the seat. Al-
ways follow the child restraint manufacturer’s
instructions.3. Secure the child restraint anchor attach-
ments to the LATCH lower anchors.
SSS0648
Rear facing — step 3
SSS0649
Rear facing — step 3
1-28
Safety — seats, seat belts and supplemental restraint system
�
06.7.5/Z50-D/V5.0
�
Page 42 of 345

4. For child restraints that are equipped with
webbing mounted attachments, remove any
additional slack from the anchor attachments.
Press downward and rearward firmly in the
center of the child restraint with your hand to
compress the vehicle seat cushion and seat-
back while tightening the webbing of the
anchor attachments.5. Before placing the child in the child restraint,
hold the child restraint near the LATCH at-
tachment and use force to push the child
restraint from side to side, and tug it forward
to make sure that it is securely held in place.
It should not move more than 1 in (25 mm). If
it does move more than 1 in (25 mm), pull
again on the anchor attachments to further
tighten the child restraint. If you are unable to
properly secure the restraint, move the re-
straint to another seating position and try
again, or try a different child restraint. Not all
child restraints fit in all types of vehicles.
6. Check to make sure the child restraint is
properly secured prior to each use. If thechild restraint is loose, repeat steps 4
through 5.
SSS0639
Rear facing — step 4
SSS0650
Rear facing — step 5
Safety — seats, seat belts and supplemental restraint system
1-29
�
06.7.5/Z50-D/V5.0
�
Page 43 of 345
CHILD RESTRAINT INSTALLATION
USING THE SEAT BELTS
WARNING
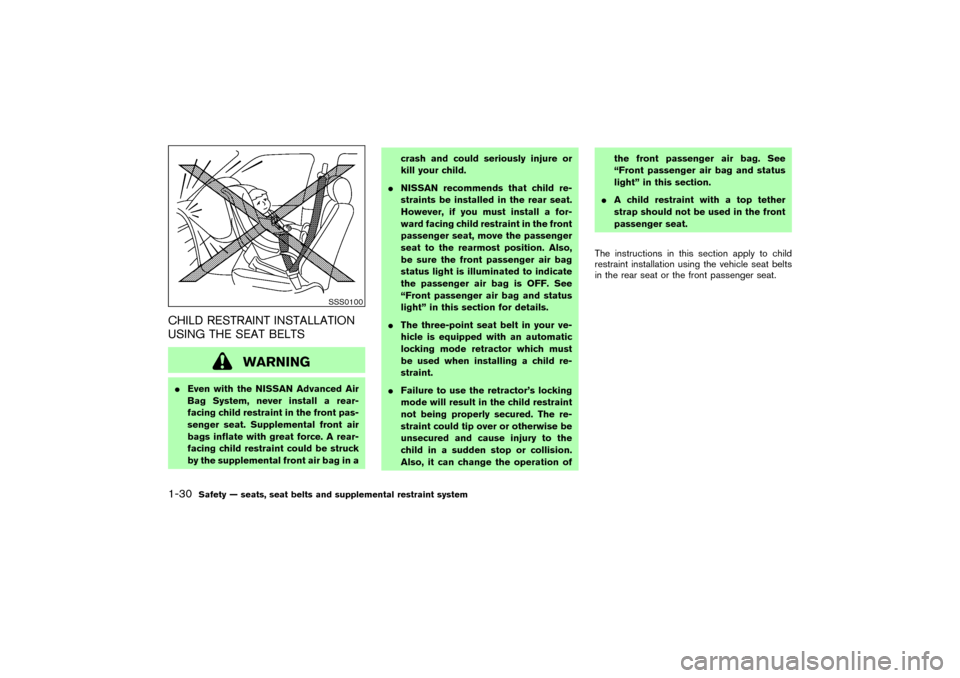
�Even with the NISSAN Advanced Air
Bag System, never install a rear-
facing child restraint in the front pas-
senger seat. Supplemental front air
bags inflate with great force. A rear-
facing child restraint could be struck
by the supplemental front air bag in acrash and could seriously injure or
kill your child.
�NISSAN recommends that child re-
straints be installed in the rear seat.
However, if you must install a for-
ward facing child restraint in the front
passenger seat, move the passenger
seat to the rearmost position. Also,
be sure the front passenger air bag
status light is illuminated to indicate
the passenger air bag is OFF. See
“Front passenger air bag and status
light” in this section for details.
�The three-point seat belt in your ve-
hicle is equipped with an automatic
locking mode retractor which must
be used when installing a child re-
straint.
�Failure to use the retractor’s locking
mode will result in the child restraint
not being properly secured. The re-
straint could tip over or otherwise be
unsecured and cause injury to the
child in a sudden stop or collision.
Also, it can change the operation ofthe front passenger air bag. See
“Front passenger air bag and status
light” in this section.
�A child restraint with a top tether
strap should not be used in the front
passenger seat.
The instructions in this section apply to child
restraint installation using the vehicle seat belts
in the rear seat or the front passenger seat.
SSS0100
1-30
Safety — seats, seat belts and supplemental restraint system
�
06.7.5/Z50-D/V5.0
�
Page 44 of 345

Front-facingFollow these steps to install a front-facing child
restraint using the vehicle seat belt in the rear
seat or in the front passenger seat:
1. Adjust the seatback so that it is upright.
�Do not move the seats with the child re-
straints attached to them.
2. If you must install a child restraint in the
front seat, it should be placed in a front-
facing direction only. Move the seat to
the rearmost position. Child restraints
for infants must be used in the rear-
facing direction and therefore must notbe used in the front seat.
3. Position the child restraint on the seat. Al-
ways follow the child restraint manufacturer’s
instructions.
The back of the child restraint should be
secured against the vehicle seatback. If nec-
essary, adjust or remove the head restraint to
obtain the correct child restraint fit. See
“Head restraint adjustment” in this section.
If the head restraint is removed, store it in a
secure place. Be sure to install the head
restraint when the child restraint is removed.
4. Route the seat belt tongue through the child
restraint and insert it into the buckle until you
hear and feel the latch engage. Be sure to
follow the child restraint manufacturer’s in-
structions for belt routing.
SSS0640
Front facing (front passenger seat) — step 2
SSS0360B
Front facing — step 4
Safety — seats, seat belts and supplemental restraint system
1-31
�
06.7.5/Z50-D/V5.0
�