Page 45 of 345

5. Pull the shoulder belt until the belt is fully
extended. At this time, the seat belt retractor
is in the automatic locking mode (child re-
straint mode). It reverts to emergency locking
mode when the seat belt is fully retracted.6. Allow the seat belt to retract. Pull up on the
shoulder belt to remove any slack in the belt.7. Remove any additional slack from the seat
belt; press downward and rearward firmly in
the center of the child restraint with your knee
to compress the vehicle seat cushion and
seatback while pulling up on the seat belt.
8. If the child restraint is equipped with a top
tether strap, route the top tether strap and
secure the tether strap to the tether anchor
point (rear seat installation only). See “Top
tether strap child restraint” in this section. Do
not install child restraints equipped with a top
tether strap to seating positions that do not
have a top tether anchor.
SSS0651
Front facing — step 5
SSS0652
Front facing — step 6
SSS0653
Front facing — step 7
1-32
Safety — seats, seat belts and supplemental restraint system
�
06.7.5/Z50-D/V5.0
�
Page 46 of 345

9. Before placing the child in the child restraint,
hold the child restraint near the seat belt path
and use force to push the child restraint from
side to side, and tug it forward to make sure
that it is securely held in place. It should not
move more than 1 in (25 mm). If it does move
more than 1 in (25 mm), pull again on the
shoulder belt to further tighten the child
restraint. If you are unable to properly secure
the restraint, move the restraint to another
seating position and try again, or try a differ-
ent child restraint. Not all child restraints fit in
all types of vehicles.
10. Check that the retractor is in the automatic
locking mode by trying to pull more seat beltout of the retractor. If you cannot pull any
more belt webbing out of the retractor, the
retractor is in the automatic locking mode.
11. Check to make sure the child restraint is
properly secured prior to each use. If the
seat belt is not locked, repeat steps 4
through 9.
12. If the child restraint is installed in the front
passenger seat, turn the ignition switch to
the ON position. The front passenger air
bag status light
should illuminate. If
this light is not illuminated, see “Front pas-
senger air bag and status light” in this
section.Move the child restraint to an-
other seating position.Have the system
checked by a NISSAN dealer.
After the child restraint is removed and the seat
belt is fully retracted, the automatic locking
mode (child restraint mode) is canceled.
SSS0641
Front facing — step 9
SSS0481
Front facing — step 12
Safety — seats, seat belts and supplemental restraint system
1-33
�
06.7.5/Z50-D/V5.0
�
Page 48 of 345

5. Allow the seat belt to retract. Pull up on the
shoulder belt to remove any slack in the belt.6. Remove any additional slack from the child
restraint; press downward and rearward
firmly in the center of the child restraint with
your hand to compress the vehicle seat cush-
ion and seatback while pulling up on the seat
belt.7. Before placing the child in the child restraint,
hold the child restraint near the seat belt path
and use force to push the child restraint from
side to side, and tug it forward to make sure
that it is securely held in place. It should not
move more than 1 in (25 mm). If it does move
more than 1 in (25 mm), pull again on the
shoulder belt to further tighten the child
restraint. If you are unable to properly secure
the restraint, move the restraint to another
rear seating position and try again, or try a
different child restraint. Not all child restraints
fit in all types of vehicles.
8. Check that the retractor is in the automatic
locking mode (Child restraint mode) by trying
SSS0656
Rear facing — step 5
SSS0657
Rear facing — step 6
SSS0658
Rear facing — step 7
Safety — seats, seat belts and supplemental restraint system
1-35
�
06.7.5/Z50-D/V5.0
�
Page 49 of 345

to pull more seat belt out of the retractor. If
you cannot pull any more seat belt webbing
out of the retractor, the retractor is in the
automatic locking mode (Child restraint
mode).
9. Check to make sure that the child restraint is
properly secured prior to each use. If the belt
is not locked, repeat steps 4 through 7.
After the child restraint is removed and the seat
belt fully retracted, the automatic locking mode
(child restraint mode) is canceled.
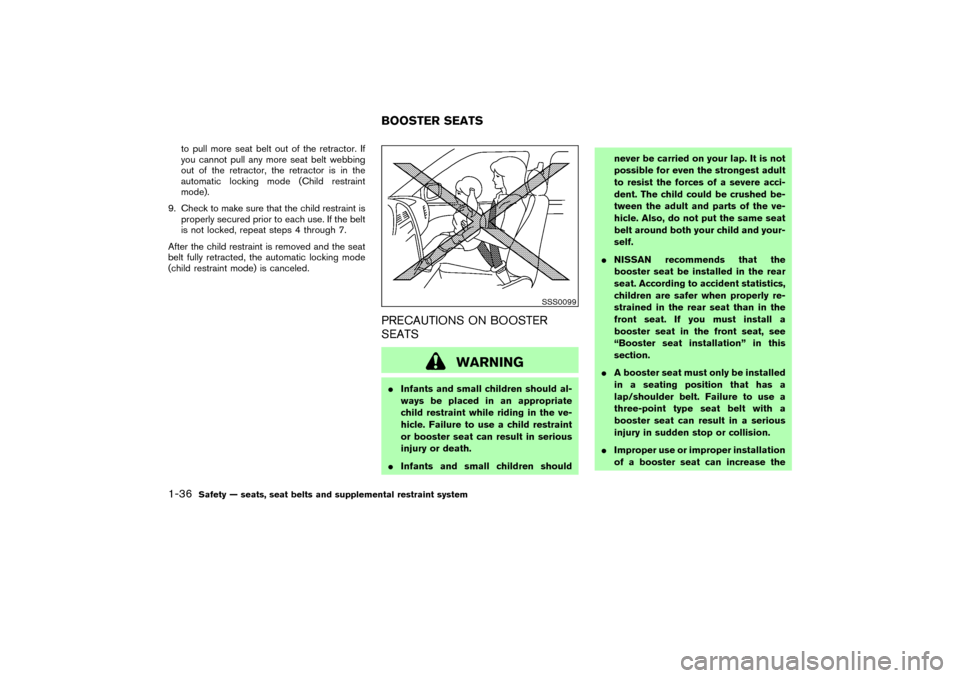
PRECAUTIONS ON BOOSTER
SEATS
WARNING
�Infants and small children should al-
ways be placed in an appropriate
child restraint while riding in the ve-
hicle. Failure to use a child restraint
or booster seat can result in serious
injury or death.
�Infants and small children shouldnever be carried on your lap. It is not
possible for even the strongest adult
to resist the forces of a severe acci-
dent. The child could be crushed be-
tween the adult and parts of the ve-
hicle. Also, do not put the same seat
belt around both your child and your-
self.
�NISSAN recommends that the
booster seat be installed in the rear
seat. According to accident statistics,
children are safer when properly re-
strained in the rear seat than in the
front seat. If you must install a
booster seat in the front seat, see
“Booster seat installation” in this
section.
�A booster seat must only be installed
in a seating position that has a
lap/shoulder belt. Failure to use a
three-point type seat belt with a
booster seat can result in a serious
injury in sudden stop or collision.
�Improper use or improper installation
of a booster seat can increase the
SSS0099
BOOSTER SEATS
1-36
Safety — seats, seat belts and supplemental restraint system
�
06.7.5/Z50-D/V5.0
�
Page 52 of 345

BOOSTER SEAT INSTALLATION
WARNING
NISSAN recommends that booster
seats be installed in the rear seat. How-
ever, if you must install a booster seat in
the front passenger seat, move the pas-
senger’s seat to the rearmost position.
CAUTION
Do not use the lap/shoulder belt auto-
matic locking mode when using a
booster seat with the seat belts.
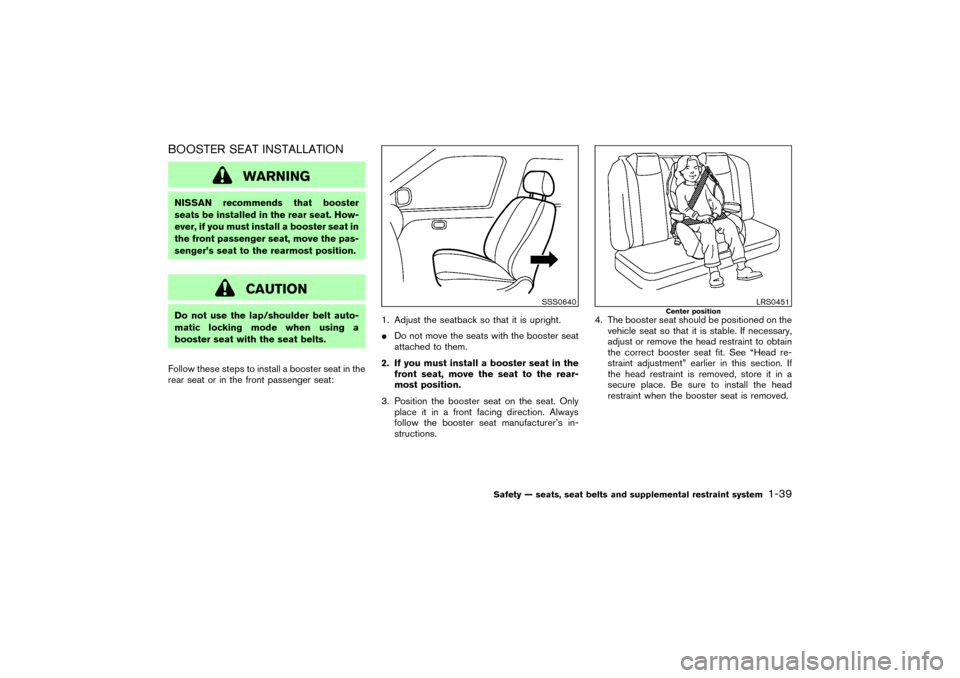
Follow these steps to install a booster seat in the
rear seat or in the front passenger seat:1. Adjust the seatback so that it is upright.
�Do not move the seats with the booster seat
attached to them.
2. If you must install a booster seat in the
front seat, move the seat to the rear-
most position.
3. Position the booster seat on the seat. Only
place it in a front facing direction. Always
follow the booster seat manufacturer’s in-
structions.4. The booster seat should be positioned on the
vehicle seat so that it is stable. If necessary,
adjust or remove the head restraint to obtain
the correct booster seat fit. See “Head re-
straint adjustment” earlier in this section. If
the head restraint is removed, store it in a
secure place. Be sure to install the head
restraint when the booster seat is removed.
SSS0640
LRS0451
Center position
Safety — seats, seat belts and supplemental restraint system
1-39
�
06.7.5/Z50-D/V5.0
�
Page 263 of 345

(where it would be difficult to remove).
�Wipe off excess tire dressing using a dry
towel. Make sure the tire dressing is com-
pletely removed from the tire tread/grooves.
�Allow the tire dressing to dry as recom-
mended by tire dressing manufacturer.Occasionally remove loose dust from the interior
trim, plastic parts and seats using a vacuum
cleaner or soft bristled brush. Wipe the vinyl and
leather surfaces with a clean, soft cloth damp-
ened in mild soap solution, then wipe clean with
a dry soft cloth.
Regular care and cleaning is required in order to
maintain the appearance of the leather.
Before using any fabric protector, read the
manufacturer’s recommendations. Some fabric
protectors contain chemicals that may stain or
bleach the seat material.
Use a cloth dampened only with water, to clean
the meter and gauge lens.
CAUTION
�Never use benzine, thinner, or any
similar material.
�Small dirt particles can be abrasive
and damaging to leather surfaces
and should be removed promptly. Do
not use saddle soap, car waxes, pol-
ishes, oils, cleaning fluids, solvents,
detergents or ammonia-based clean-
ers as they may damage the naturalleather finish.
�Never use fabric protectors unless
recommended by the manufacturer.
�Do not use glass or plastic cleaner on
meter or gauge lens covers. It may
damage the lens cover.
FLOOR MATSThe use of Genuine NISSAN floor mats can
extend the life of your vehicle carpet and make it
easier to clean the interior.No matter what
mats are used, be sure they are fitted for
your vehicle and are properly positioned in
the footwell to prevent interference with
pedal operation.Mats should be maintained
with regular cleaning and replaced if they be-
come excessively worn.
CLEANING INTERIOR
7-4
Appearance and care
�
06.7.5/Z50-D/V5.0
�