2007 NISSAN MAXIMA reset
[x] Cancel search: resetPage 186 of 336

1. SEEK/TRACK button
2. TUNE/FOLDER·CAT button
3. SCAN/RPT button
4. DISP button
5. PRESET A·B·C button
6. CD button7. FM button
8. AM button
9. SAT* button
10. AUX button
11. LOAD button
12. CD insert slot13.
CD eject button
14. POWER/VOLUME control knob
15. Station and CD select (1 - 6) buttons
16. TUNE/TRACK and AUDIO control knob
(BASS, MID, TREBLE, FADE, BAL-
ANCE and SSV (if so equipped))
*No satellite radio reception is available
and “NO SAT” is displayed when the
SAT button is pressed unless optional
satellite receiver and antenna are
installed, and an XMTor SIRIUS™ satel-
lite radio service subscription is active.
Satellite radio not available in Alaska,
Hawaii and Guam.
FM/AM/SAT RADIO WITH
COMPACT DISC (CD) CHANGER
For all operation precautions, see9Audio opera-
tion precautions9earlier in this section.
No satellite radio reception is available and “NO
SAT” is displayed when the SAT button is
pressed unless optional satellite receiver and
antenna are installed, and an XMTor SIRIUS™
satellite radio service subscription is active. Sat-
ellite radio not available in Alaska, Hawaii and
Guam.
LHA0680
4-36Display screen, heater, air conditioner, audio and phone systems
ZREVIEW COPYÐ2007 Maxima(max)
Owners ManualÐUSA_English(nna)
01/26/07Ðarosenma
X
Page 189 of 336

SCAN/RPT tuning button:
Press the SCAN/RPT button for more than 1.5
seconds to stop at each broadcasting station
(AM, FM or SAT, if so equipped) for 5 seconds.
Pressing the button again during this 5 second
period will stop scan tuning and the radio will
remain tuned to that station. If the SCAN/RPT
button is not pressed within 5 seconds, scan
tuning moves to the next station.
PRESET A·B·C (Station memory opera-
tions):
18 stations can be set for the FM, AM and SAT
(satellite, if so equipped) radio to the A, B and C
preset button in any combination of FM, AM or
SAT stations.
1. Choose preset bank A, B or C using the
PRESET A·B·C select button.
2. Select the desired FM, AM or SAT station
band.
3. Tune to the desired station using manual,
SEEK or SCAN tuning. Press and hold any
of the desired station memory buttons (1 –
6) until a beep sound is heard.
4. The channel indicator will then come on and
the sound will resume. Programming is now
complete.5. Other buttons can be set in the same man-
ner.
If the battery cable is disconnected, or if the fuse
opens, the radio memory will be canceled. In that
case, reset the desired stations.
Radio data system (RDS):
RDS stands for Radio Data System, and is a data
information service transmitted by some radio
stations on the FM band (not AM band) . Cur-
rently, most RDS stations are in large cities, but
many stations are now considering broadcasting
RDS data.
RDS can display:
cStation call sign, such as “WHFR 98.3”.
cStation name, such as “The Groove”.
cMusic or programming type such as “Clas-
sical”, “Country”, or “Rock”.
cArtist and song information.
If the station broadcasts RDS information, the
RDS icon is displayed.
Compact disc (CD) changer operation
Turn the ignition key to the ACC or ON position
and insert the compact disc into the slot with the
label side facing up. The compact disc will beguided automatically into the slot and start play-
ing. To insert the disc, first press the LOAD
button.
If the radio is already operating, it will automati-
cally turn off and the compact disc will play.
If the system has been turned off while the com-
pact disc was playing, pressing the
POWER/VOLUME control knob will start the
compact disc.
LOAD button:
To insert a CD in the CD changer, press the
LOAD button for less than 1.5 seconds. Select
the loading slot by pressing the CD insert select
button (1 – 6) , then insert the CD.
To insert 6 CDs to the CD changer, press the
LOAD button for more than 1.5 seconds.
The slot numbers (1 – 6) will illuminate on the
display when CDs are loaded into the changer.
CD button:
When the CD button is pressed with the system
off and the compact disc loaded, the system will
turn on and the compact disc will start to play.
When the CD button is pressed with the com-
pact disc loaded with the radio playing, the radio
will automatically be turned off and the compact
disc will start to play.
Display screen, heater, air conditioner, audio and phone systems4-39
ZREVIEW COPYÐ2007 Maxima(max)
Owners ManualÐUSA_English(nna)
01/26/07Ðarosenma
X
Page 192 of 336
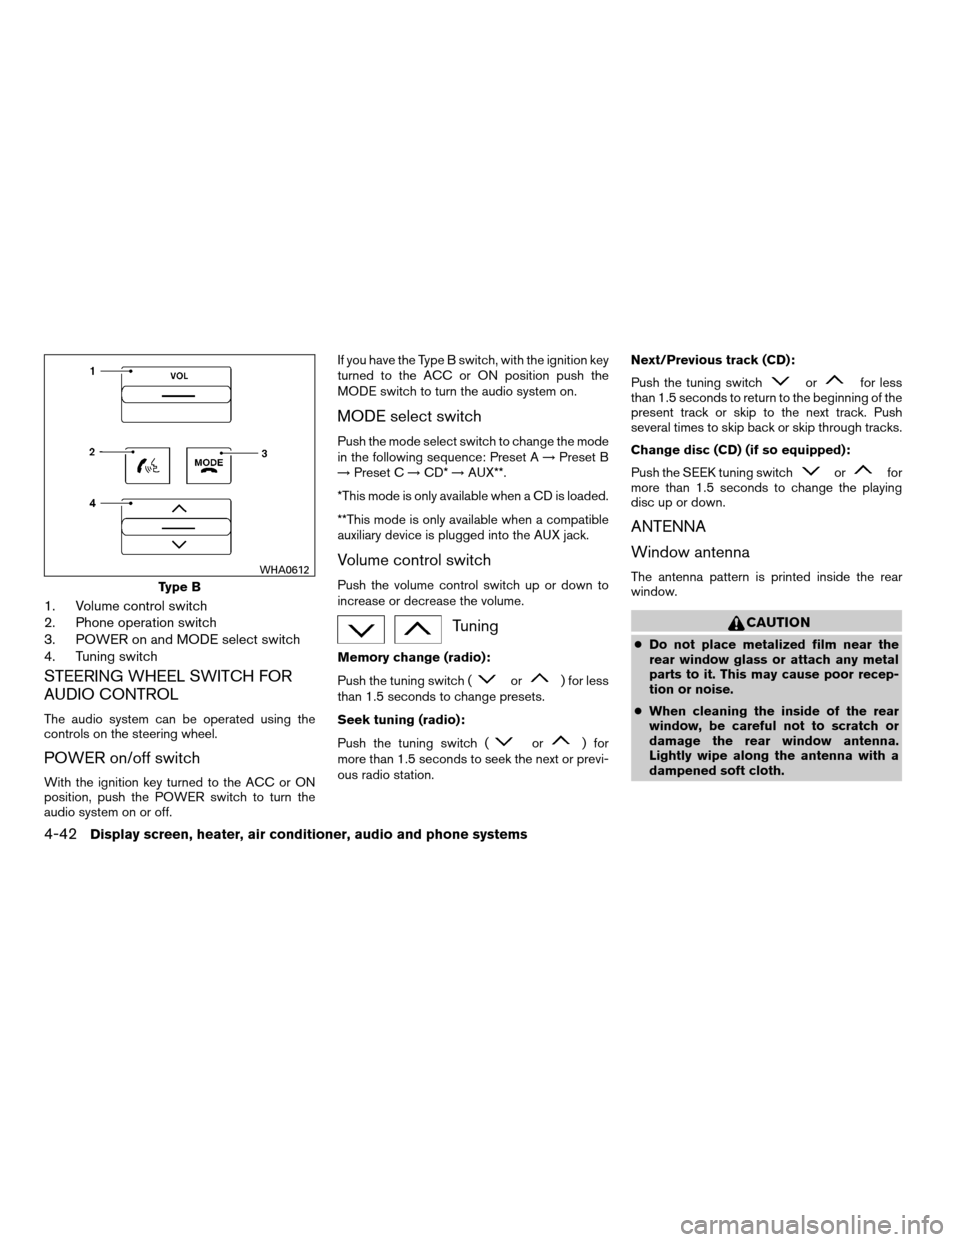
1. Volume control switch
2. Phone operation switch
3. POWER on and MODE select switch
4. Tuning switch
STEERING WHEEL SWITCH FOR
AUDIO CONTROL
The audio system can be operated using the
controls on the steering wheel.
POWER on/off switch
With the ignition key turned to the ACC or ON
position, push the POWER switch to turn the
audio system on or off.If you have the Type B switch, with the ignition key
turned to the ACC or ON position push the
MODE switch to turn the audio system on.
MODE select switch
Push the mode select switch to change the mode
in the following sequence: Preset A!Preset B
!Preset C!CD*!AUX**.
*This mode is only available when a CD is loaded.
**This mode is only available when a compatible
auxiliary device is plugged into the AUX jack.
Volume control switch
Push the volume control switch up or down to
increase or decrease the volume.
Tuning
Memory change (radio):
Push the tuning switch (
or) for less
than 1.5 seconds to change presets.
Seek tuning (radio):
Push the tuning switch (
or) for
more than 1.5 seconds to seek the next or previ-
ous radio station.Next/Previous track (CD):
Push the tuning switch
orfor less
than 1.5 seconds to return to the beginning of the
present track or skip to the next track. Push
several times to skip back or skip through tracks.
Change disc (CD) (if so equipped):
Push the SEEK tuning switch
orfor
more than 1.5 seconds to change the playing
disc up or down.
ANTENNA
Window antenna
The antenna pattern is printed inside the rear
window.
CAUTION
cDo not place metalized film near the
rear window glass or attach any metal
parts to it. This may cause poor recep-
tion or noise.
cWhen cleaning the inside of the rear
window, be careful not to scratch or
damage the rear window antenna.
Lightly wipe along the antenna with a
dampened soft cloth.
Type B
WHA0612
4-42Display screen, heater, air conditioner, audio and phone systems
ZREVIEW COPYÐ2007 Maxima(max)
Owners ManualÐUSA_English(nna)
01/26/07Ðarosenma
X
Page 200 of 336

When prompted by the system, say the name of
the phone book entry you wish to call. The system
acknowledges the name.
If there are multiple locations associated with the
name, the system asks you to choose the loca-
tion.
Once you have confirmed the name and location,
the system begins the call.
Number (speak digits)
sB
When prompted by the system, say the number
you wish to call. Refer to “How to say numbers”
and “Making a call by entering a phone number”
earlier in this section for more details.
“Redial”
sC
Use the Redial command to call the last number
that was dialed within the vehicle.
NOTE:
The system will not redial the last number
dialed by the handset keypad.
The system acknowledges the command, re-
peats the number and begins dialing.
If a redial number does not exist, the system
announces, “There is no number to redial” and
ends the VR session.“Call back”
sD
Use the Call Back command to dial the number of
the last incoming call within the vehicle.
The system acknowledges the command, re-
peats the number and begins dialing.
If a call back number does not exist, the system
announces, “There is no number to call back” and
ends the VR session.
During a call
During a call there are several command options
available. Press the
button on the steering
wheel to mute the receiving voice and enter com-
mands.
c“Help” — The system announces the avail-
able commands.
c“Go back/Correction” — The system an-
nounces “Go back,” ends the VR session
and returns to the call.
c“Cancel/Quit” — The system announces
“Cancel,” ends the VR session and returns
to the call.
c“Send/Enter/Call/Dial” — Use the Send
command to enter numbers during a call. For
example, if you were directed to dial an ex-
tension by an automated system:
Say: “Send one two three four.”The system acknowledges the command
and sends the tones associated with the
numbers. The system then ends the VR ses-
sion and returns to the call.
c“Transfer call” — Use the Transfer Call com-
mand to transfer the call from the BluetoothT
Hands-Free Phone System to the cellular
phone when privacy is desired.
The system announces, “Transfer call. Call
transferred to privacy mode.” The system
then ends the VR session.
You can also issue the Transfer Call com-
mand again to return to a hands-free call
through the vehicle.
c“Mute” — Use the Mute command to mute
your voice so the other party cannot hear it.
Use the mute command again to unmute
your voice.
NOTE:
If a call is ended or the cellular phone
network connection is lost while the Mute
feature is on, the Mute feature will be reset
to “off” for the next call so the other party
can hear your voice.
4-50Display screen, heater, air conditioner, audio and phone systems
ZREVIEW COPYÐ2007 Maxima(max)
Owners ManualÐUSA_English(nna)
01/26/07Ðarosenma
X
Page 210 of 336
km/h) . Also, this system may not detect a
sudden drop in tire pressure (for example a
flat tire while driving) .
cThe low tire pressure warning light does not
automatically turn off when the tire pressure
is adjusted. After the tire is inflated to the
recommended pressure, the vehicle must be
driven at speeds above 16 MPH (25 km/h)
to activate the TPMS and turn off the low tire
pressure warning light. Use a tire pressure
gauge to check the tire pressure.
cTire pressure rises and falls depending on
the heat caused by the vehicle’s operation
and the outside temperature. Low outside
temperature can lower the temperature of
the air inside the tire which can cause a
lower tire inflation pressure. This may cause
the low tire pressure warning light to illumi-
nate. If the warning light illuminates in low
ambient temperature, check the tire pres-
sure for all four tires.
cYou can also check the pressure of all tires
(except the spare tire) on the display screen
(if so equipped) . The order of the tire pres-
sure figures displayed on the screen does
not correspond with the actual order of the
tire position. See “Tire pressure information”
in the “Display screen, heater, air conditioner
and audio and phone systems” section.For additional information, see “Low tire pressure
warning light” in the “Instruments and controls”
section and “Tire pressure monitoring system
(TPMS)” in the “In case of emergency” section.
WARNING
cIf the low tire pressure warning light
illuminates while driving, avoid sudden
steering maneuvers or abrupt braking,
reduce vehicle speed, pull off the road
to a safe location and stop the vehicle
as soon as possible. Serious vehicle
damage could occur and may lead to an
accident and could result in serious
personal injury. Check the tire pressure
for all four tires. Adjust the tire pressure
to the recommended COLD tire pres-
sure shown on the Tire and Loading
Information label to turn the low tire
pressure warning light OFF. If you have
a flat tire, replace it with a spare tire as
soon as possible. (See “Flat tire” in the
“In case of emergency” section for
changing a flat tire.)cWhen a spare tire is mounted or a wheel
is replaced, tire pressure will not be
indicated, the TPMS will not function
and the low tire pressure warning light
will flash for approximately 1 minute.
The light will remain on after 1 minute.
Contact your NISSAN dealer as soon as
possible for tire replacement and/or
system resetting.
cReplacing tires with those not originally
specified by NISSAN could affect the
proper operation of the TPMS.
cDo not inject any tire liquid or aerosol
tire sealant into the tires, as this may
cause a malfunction of the tire pressure
sensors.
CAUTION
Do not place metalized film or any metal
parts (antenna, etc.) on the windows. This
may cause poor reception of the signals
from the tire pressure sensors, and the
TPMS will not function properly.
Some devices and transmitters may temporarily
interfere with the operation of the TPMS and
cause the low tire pressure warning light to illu-
minate.
5-4Starting and driving
ZREVIEW COPYÐ2007 Maxima(max)
Owners ManualÐUSA_English(nna)
01/26/07Ðarosenma
X
Page 220 of 336
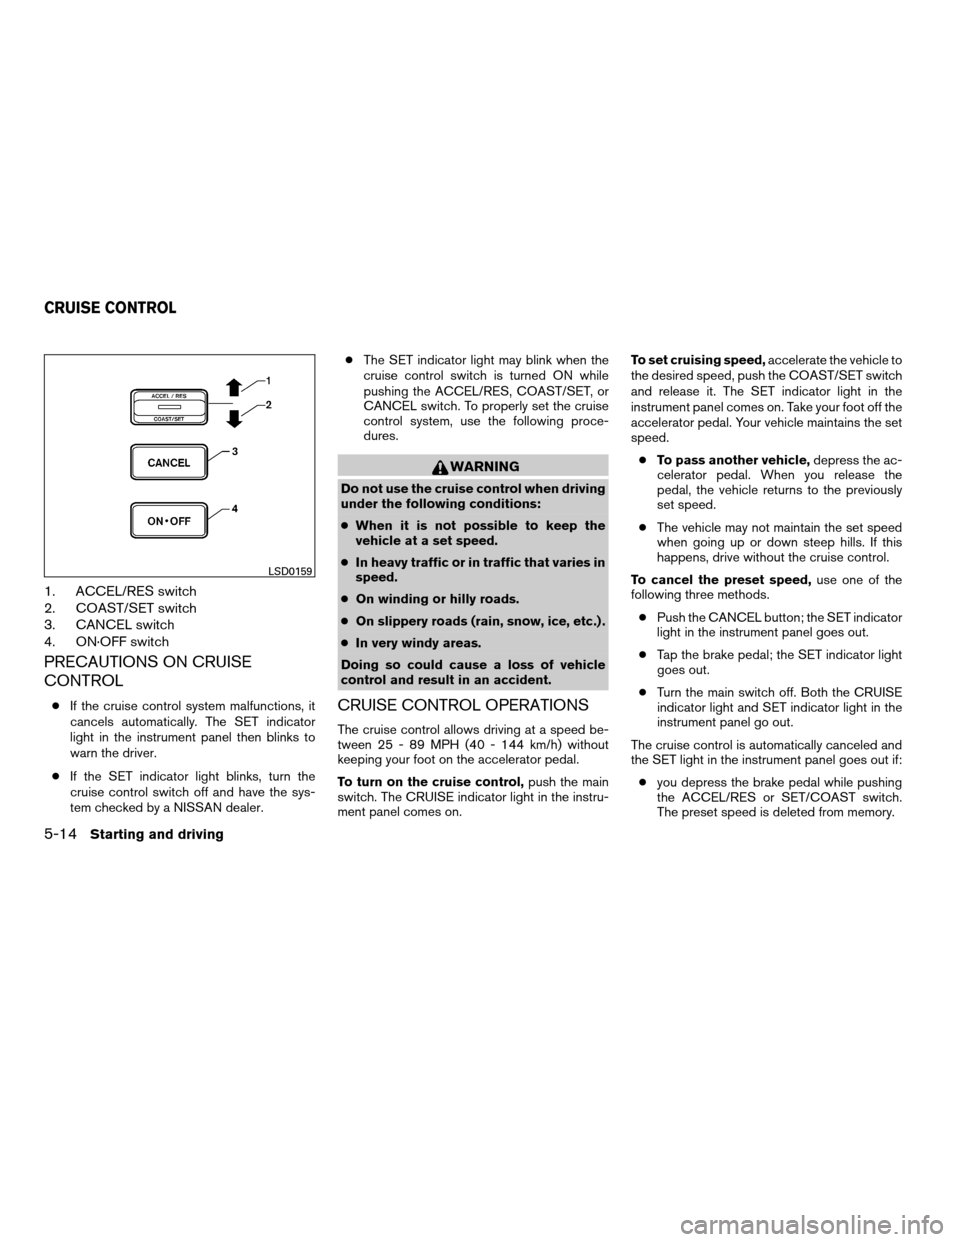
1. ACCEL/RES switch
2. COAST/SET switch
3. CANCEL switch
4. ON·OFF switch
PRECAUTIONS ON CRUISE
CONTROL
cIf the cruise control system malfunctions, it
cancels automatically. The SET indicator
light in the instrument panel then blinks to
warn the driver.
cIf the SET indicator light blinks, turn the
cruise control switch off and have the sys-
tem checked by a NISSAN dealer.cThe SET indicator light may blink when the
cruise control switch is turned ON while
pushing the ACCEL/RES, COAST/SET, or
CANCEL switch. To properly set the cruise
control system, use the following proce-
dures.
WARNING
Do not use the cruise control when driving
under the following conditions:
cWhen it is not possible to keep the
vehicle at a set speed.
cIn heavy traffic or in traffic that varies in
speed.
cOn winding or hilly roads.
cOn slippery roads (rain, snow, ice, etc.) .
cIn very windy areas.
Doing so could cause a loss of vehicle
control and result in an accident.
CRUISE CONTROL OPERATIONS
The cruise control allows driving at a speed be-
tween 25 - 89 MPH (40 - 144 km/h) without
keeping your foot on the accelerator pedal.
To turn on the cruise control,push the main
switch. The CRUISE indicator light in the instru-
ment panel comes on.To set cruising speed,accelerate the vehicle to
the desired speed, push the COAST/SET switch
and release it. The SET indicator light in the
instrument panel comes on. Take your foot off the
accelerator pedal. Your vehicle maintains the set
speed.
cTo pass another vehicle,depress the ac-
celerator pedal. When you release the
pedal, the vehicle returns to the previously
set speed.
cThe vehicle may not maintain the set speed
when going up or down steep hills. If this
happens, drive without the cruise control.
To cancel the preset speed,use one of the
following three methods.
cPush the CANCEL button; the SET indicator
light in the instrument panel goes out.
cTap the brake pedal; the SET indicator light
goes out.
cTurn the main switch off. Both the CRUISE
indicator light and SET indicator light in the
instrument panel go out.
The cruise control is automatically canceled and
the SET light in the instrument panel goes out if:
cyou depress the brake pedal while pushing
the ACCEL/RES or SET/COAST switch.
The preset speed is deleted from memory.
LSD0159
CRUISE CONTROL
5-14Starting and driving
ZREVIEW COPYÐ2007 Maxima(max)
Owners ManualÐUSA_English(nna)
01/26/07Ðarosenma
X
Page 221 of 336
cthe vehicle slows down more than 8 MPH
(13 km/h) below the set speed.
cyou move the shift selector lever to N (Neu-
tral) .
To reset at a faster cruising speed,use one
of the following three methods.
cDepress the accelerator pedal. When the
vehicle attains the desired speed, push and
release the COAST/SET switch.
cPush and hold the ACCEL/RES switch.
When the vehicle attains the speed you de-
sire, release the switch.
cPush and release the ACCEL/RES switch.
Each time you do this, the set speed in-
creases by about 1 MPH (1.6 km/h) .
To reset at a slower cruising speed,use one
of the following three methods.
cLightly tap the brake pedal. When the ve-
hicle attains the desired speed, push the
COAST/SET switch and release it.
cPush and hold the COAST/SET switch. Re-
lease the switch when the vehicle slows to
the desired speed.
cPush and release the COAST/SET switch.
Each time you do this, the set speed de-
creases by about 1 MPH (1.6 km/h) .To resume the preset speed,push and re-
lease the ACCEL/RES switch. The vehicle re-
turns to the last set cruising speed when the
vehicle speed is over 25 MPH (40 km/h) .CAUTION
During the first 1,200 miles (2,000 km) ,
follow these recommendations to obtain
maximum engine performance and en-
sure the future reliability and economy of
your new vehicle. Failure to follow these
recommendations may result in short-
ened engine life and reduced engine
performance.
cAvoid driving for long periods at constant
speed, either fast or slow, and do not run the
engine over 4,000 rpm.
cDo not accelerate at full throttle in any gear.
cAvoid quick starts.
cAvoid hard braking as much as possible.
cDo not tow a trailer for the first 500 miles
(800 km) . Your engine, axle or other parts
could be damaged.
BREAK-IN SCHEDULE
Starting and driving5-15
ZREVIEW COPYÐ2007 Maxima(max)
Owners ManualÐUSA_English(nna)
01/26/07Ðarosenma
X
Page 234 of 336
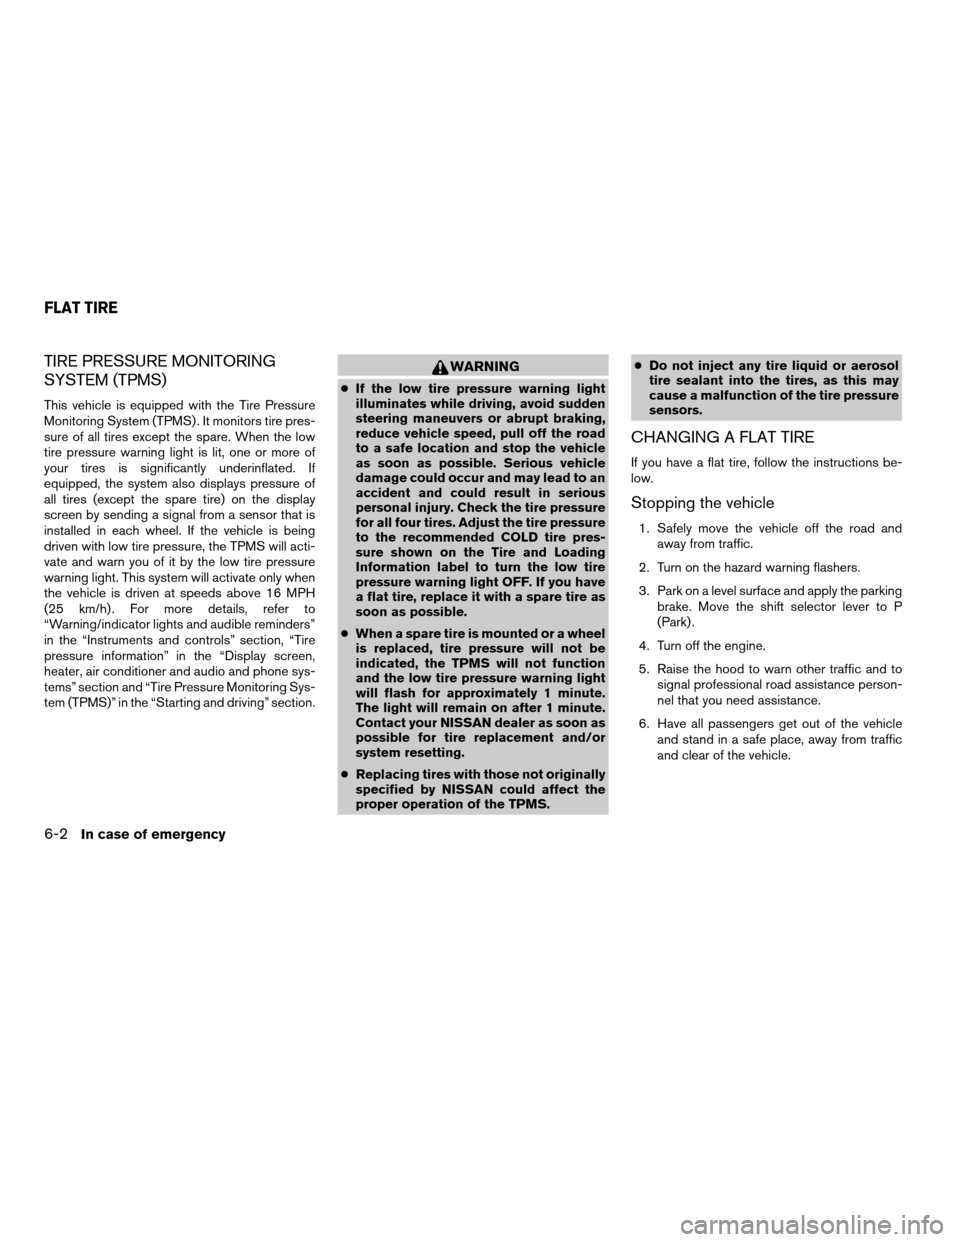
TIRE PRESSURE MONITORING
SYSTEM (TPMS)
This vehicle is equipped with the Tire Pressure
Monitoring System (TPMS) . It monitors tire pres-
sure of all tires except the spare. When the low
tire pressure warning light is lit, one or more of
your tires is significantly underinflated. If
equipped, the system also displays pressure of
all tires (except the spare tire) on the display
screen by sending a signal from a sensor that is
installed in each wheel. If the vehicle is being
driven with low tire pressure, the TPMS will acti-
vate and warn you of it by the low tire pressure
warning light. This system will activate only when
the vehicle is driven at speeds above 16 MPH
(25 km/h) . For more details, refer to
“Warning/indicator lights and audible reminders”
in the “Instruments and controls” section, “Tire
pressure information” in the “Display screen,
heater, air conditioner and audio and phone sys-
tems” section and “Tire Pressure Monitoring Sys-
tem (TPMS)” in the “Starting and driving” section.
WARNING
cIf the low tire pressure warning light
illuminates while driving, avoid sudden
steering maneuvers or abrupt braking,
reduce vehicle speed, pull off the road
to a safe location and stop the vehicle
as soon as possible. Serious vehicle
damage could occur and may lead to an
accident and could result in serious
personal injury. Check the tire pressure
for all four tires. Adjust the tire pressure
to the recommended COLD tire pres-
sure shown on the Tire and Loading
Information label to turn the low tire
pressure warning light OFF. If you have
a flat tire, replace it with a spare tire as
soon as possible.
cWhen a spare tire is mounted or a wheel
is replaced, tire pressure will not be
indicated, the TPMS will not function
and the low tire pressure warning light
will flash for approximately 1 minute.
The light will remain on after 1 minute.
Contact your NISSAN dealer as soon as
possible for tire replacement and/or
system resetting.
cReplacing tires with those not originally
specified by NISSAN could affect the
proper operation of the TPMS.cDo not inject any tire liquid or aerosol
tire sealant into the tires, as this may
cause a malfunction of the tire pressure
sensors.
CHANGING A FLAT TIRE
If you have a flat tire, follow the instructions be-
low.
Stopping the vehicle
1. Safely move the vehicle off the road and
away from traffic.
2. Turn on the hazard warning flashers.
3. Park on a level surface and apply the parking
brake. Move the shift selector lever to P
(Park) .
4. Turn off the engine.
5. Raise the hood to warn other traffic and to
signal professional road assistance person-
nel that you need assistance.
6. Have all passengers get out of the vehicle
and stand in a safe place, away from traffic
and clear of the vehicle.
FLAT TIRE
6-2In case of emergency
ZREVIEW COPYÐ2007 Maxima(max)
Owners ManualÐUSA_English(nna)
01/26/07Ðarosenma
X